ArcGIS QuickCapture is a field data collection app that allows you to capture data simply and quickly. It was designed to support field teams that need to collect data rapidly: from a moving vehicle, helicopter, bicycle, or ATV. But its simple, form-based interface makes it an good choice for any data collection activity.
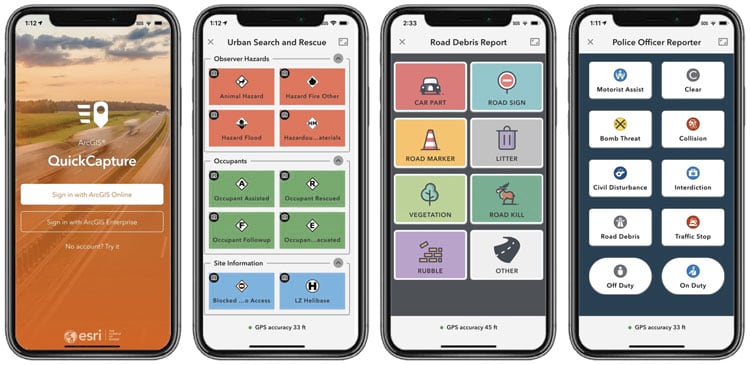
You can capture points, lines, and polygons along with attributes of assets or incidents as you travel. The project author crafts the collection form using QuickCapture designer, and determines the arrangement of buttons, how they appear, and the information they collect. The app allows you to capture both photos and sensor information from a device.
The essential steps to use QuickCapture are:
- Think about what you want to capture.
- Create a feature layer to store what is captured.
- Configure the feature layer for the desired attributes.
- Create a new QuickCapture project.
- Use QuickCapture designer to change the look and feel.
- Open the project in the QuickCapture app.
- View the results.
For this example, a simple QuickCapture form will be created to enable students to capture (photograph and locate) things they see around a school campus. The things to capture are:
- Big trees
- Small trees
- Shrubs
- Rocks
- Signs
- Lights
- Art
- People
- Cars
- Animals
To capture the desired QuickCapture data, a feature layer is used. You can create the feature layer using ArcGIS Pro or ArcGIS Online. Both workflows are detailed below. Use the links to jump to the feature layer workflow you want to use.
- Create QuickCapture feature layer using ArcGIS Online
- Create QuickCapture feature layer using ArcGIS Pro
Once the feature layer has been created, follow the rest of the QuickCapture project, designer, and app workflows.
Create the feature layer using ArcGIS Online
Feature layers can be created from a template, from an existing layer, from a URL pointing to an existing service, or from scratch. For this example, the feature layer will be created from scratch.
To create the feature, layer follow these steps.
Step 1 — If you have not done so already, sign in to your ArcGIS account. You must have sufficient privileges to create hosted feature layers.
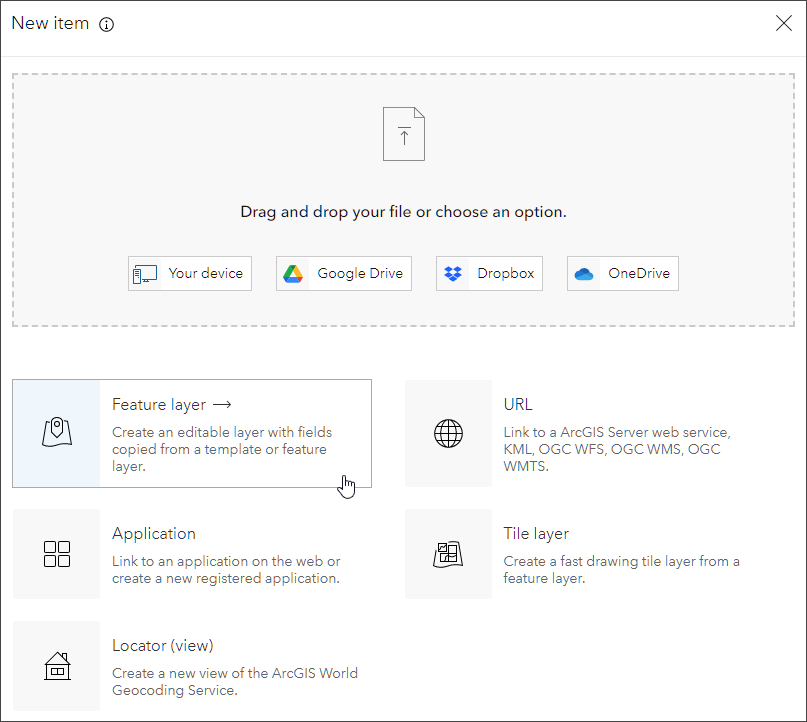
Step 2 — In the Content tab, click New item.

Step 3 — Choose Feature layer to open the Create a feature layer window.
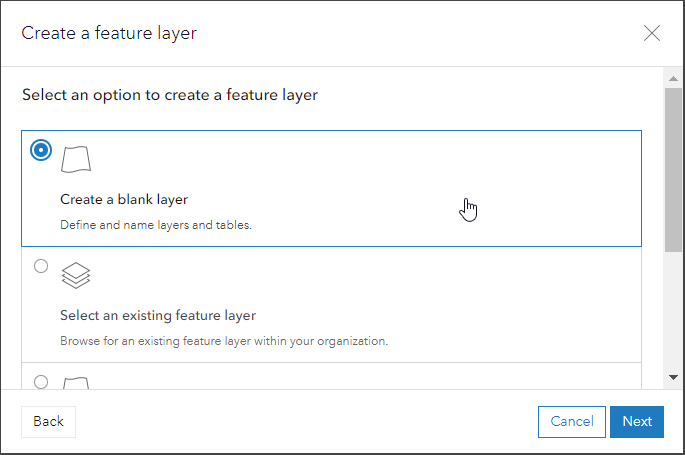
Step 4 — Choose Create a blank layer, then click Next in the lower right.
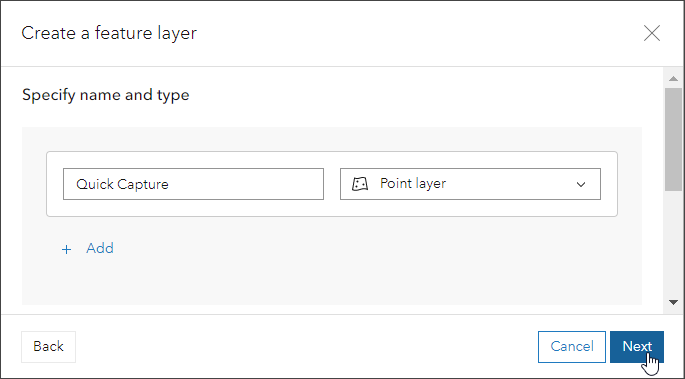
Step 5 — Specify a name for the feature layer and ensure the type is Point layer. Click Next.
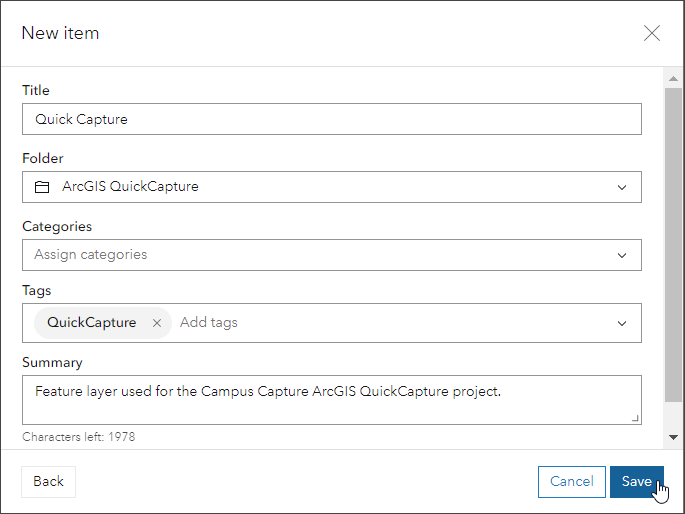
Step 6 — Enter information for the new feature layer item. Click Save when finished.
Step 7 — A new feature layer item is created and you will be reminded to complete setting up the layer.
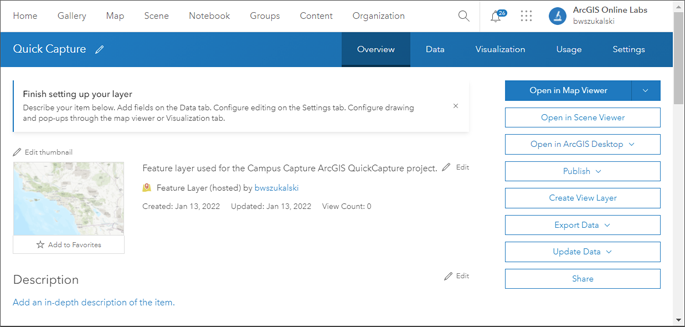
Tip: It’s a best practice to complete the item pages after the hosted feature layer has been created. Consider adding a better thumbnail and a detailed description. You can also set Delete Protection in the Settings tab. See Protect your ArcGIS Online items for more information.
Configure the feature layer
In the steps that follow, the attribute fields will be configured to capture the desired information.
In this example, a pre-determined list of values is needed to capture the features noted at the beginning of this article: trees, shrubs, rocks, signs, and so forth. The field that will hold the values will be named Capture.
Step 1 — Open the Data tab for the feature layer item, and click Fields.

Step 2 — Click Add

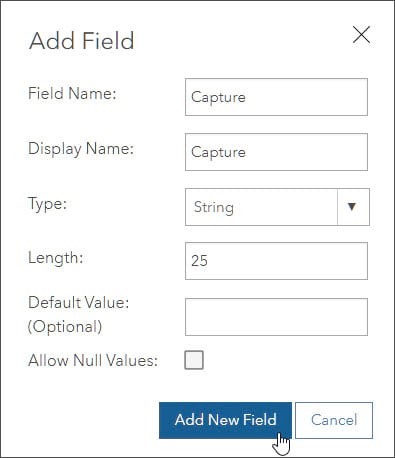
Step 3 — Add the Capture field. This field will store the type of captured feature (trees, rocks, signs, and so forth).
Add the Capture field name and display name. Ensure that the type is String. The length can be shortened to 25 characters. Disable Null values. Then Click Add New Field.
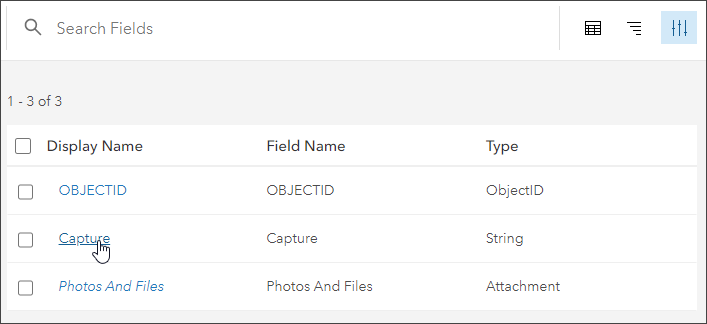
Step 4 — Select the newly added field by clicking the field name.
Step 5 — Create the list of unique attribute values. In the upper right, click Create List.

Step 6 — Enter Label (the displayed value) and Code (the stored value) pairs for the attributes.
The Code can be different than the Label, but for this example its simpler to keep both the same. Note that in other implementations, the field might be numeric and the code pairs could be string/number.
Click Add, or enter a carriage return, to add more pairs to the list.
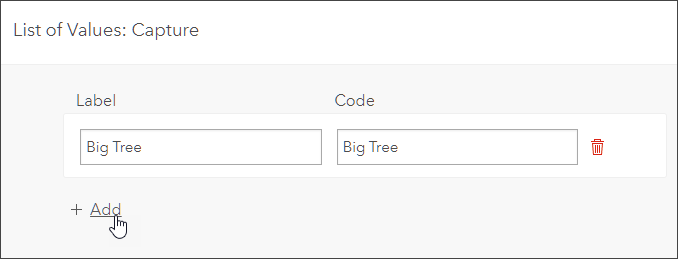
When completed, the label/code pairs should look similar to this:
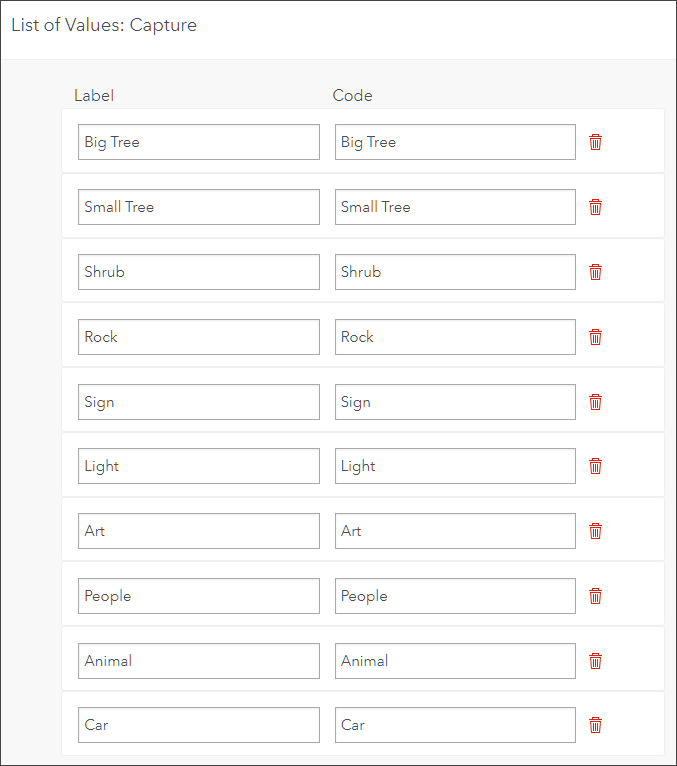
Click Save when finished.
Step 7 — Symbolize the values.
Rather than display all the values as one color, they can be displayed uniquely. Open the Visualization tab on the feature layer item page.

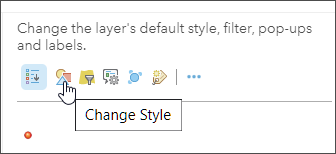
Step 8 — Click the Change Style button to edit the layer style.
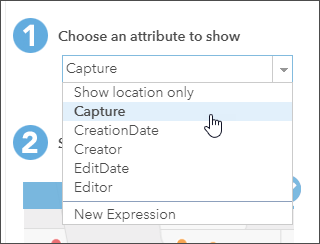
Step 9 — From the drop-down list, select the attribute you want to symbolize, in this case the field added in Step 3 above: Capture.
Step 10 — Change the symbols by clicking Options.
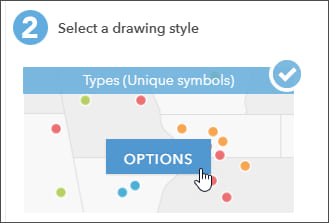
Step 11 — Edit the symbols as desired. You can reorder the list, change symbol size, edit the color, and so forth.
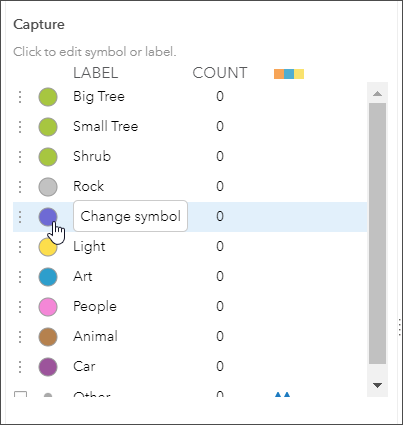
When finished, click OK, then click Done.
Step 12 — Click Save Layer to save all of the changes you have made.
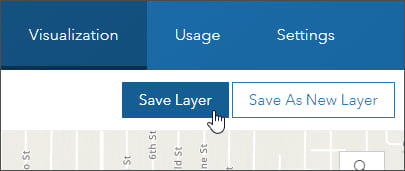
You’ve now successfully created an editable feature layer you can use in QuickCapture. Follow the QuickCapture project and app workflow to create a project for use in the QuickCapture app.
Create the feature layer using ArcGIS Pro
Feature layers can be created from a template, from an existing layer, from a URL pointing to an existing service, or from scratch. For this example, the feature layer will be created from scratch.
To create the feature layer follow these steps.
Step 1 — Open ArcGIS Pro and ensure you are signed in to your ArcGIS account. You must have sufficient privileges to create hosted feature layers.
Step 2 — In the Catalog pane, open the Databases folder. Right click the geodatabase and select New, then Feature Class.
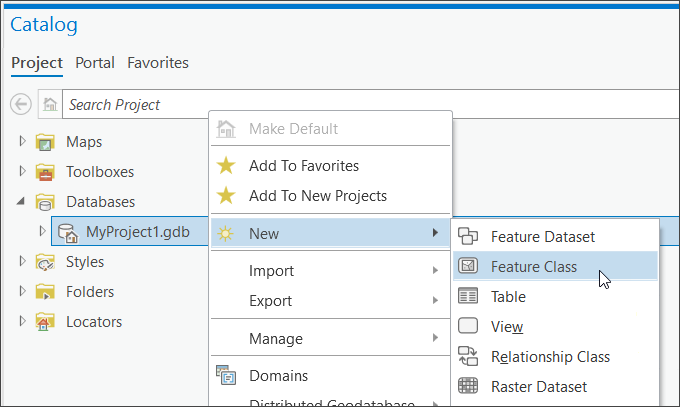
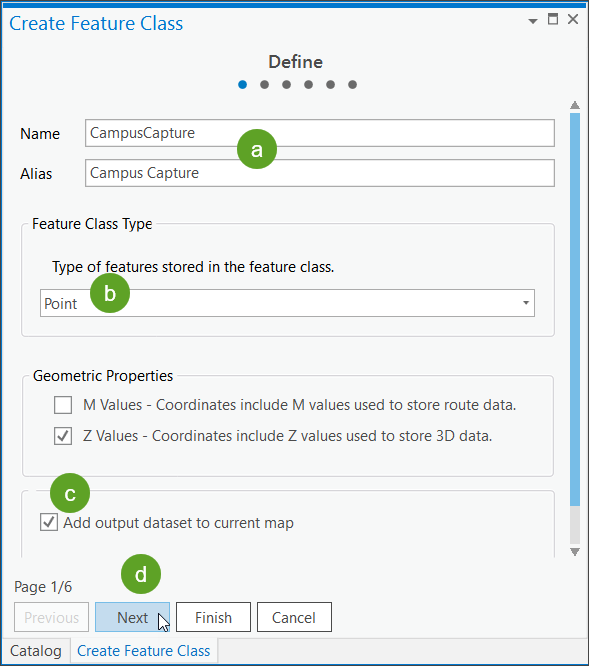
Step 3 — Define the feature class.
a – Add a Name and Alias.
b – Set Point as the feature class type.
c – Select Add output dataset to current map.
d– Click Next when finished.
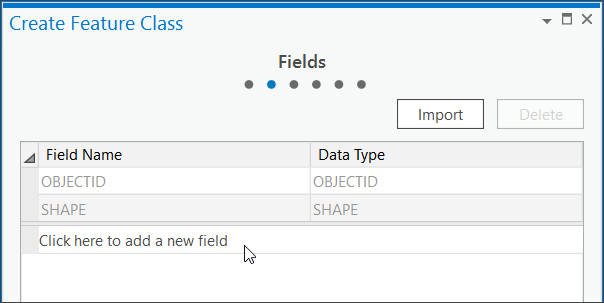
Step 4 — Click to add a new field.
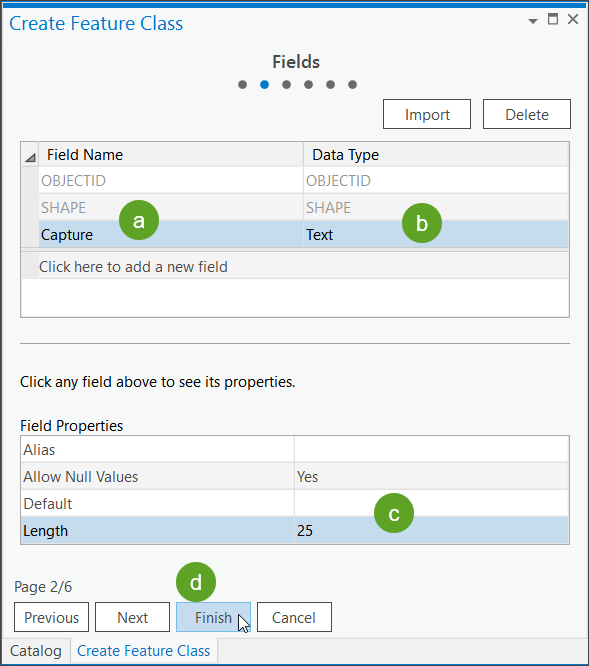
Step 5 — Add the field.
a – Enter Capture as the field name.
b – Choose a data type of Text.
c– Set the Length of the text field to 25 characters.
d – Click Finish when done.
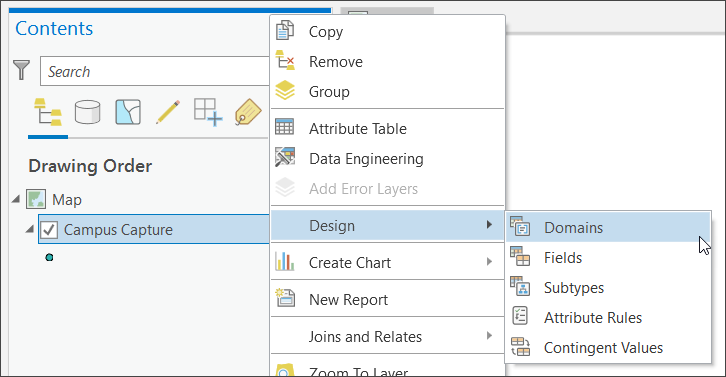
Step 6 — Right click the Campus Capture feature layer in Contents and select Design, then Domains.
Step 7 — Click the box in the empty row below Domain Name and Description to add a name and description.

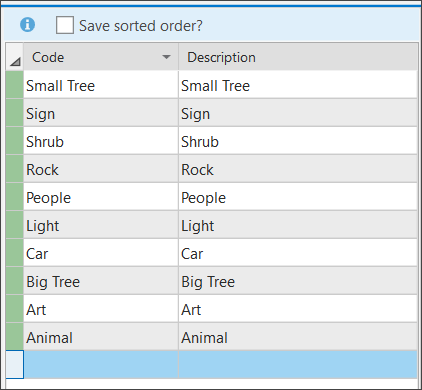
Step 8 — Ensure that the row with the domain added above is highlighted, then enter Code and Description pairs.

When completed, the code/description pairs should look similar to this:
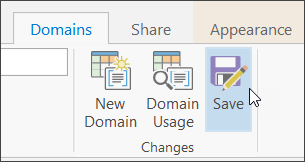
Step 9 — When finished, click Save on the Domains ribbon.
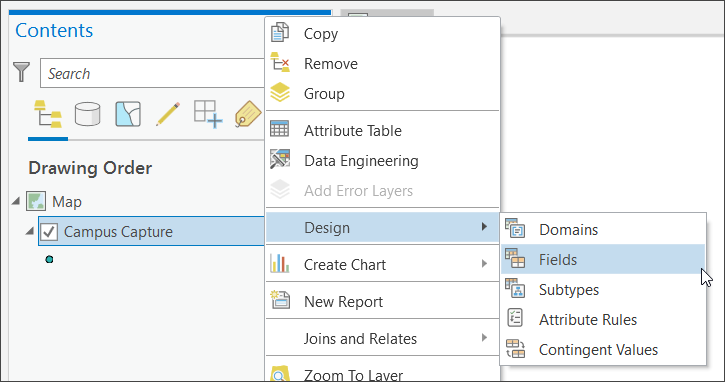
Step 10 — Right click the Campus Capture layer and select Design, then Fields.
Step 11 — In the Capture row, click Domain then choose CaptureType (the domain we created in Step 8 above).

Step 12 — Click Save in the Fields ribbon.

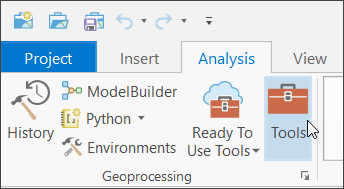
Step 13 — Open the Analysis ribbon and click Tools.
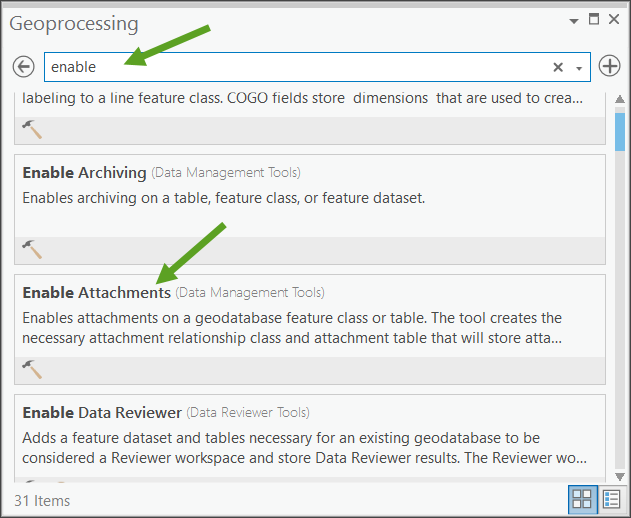
Step 14 — In the Find Tools search, enter “enable” and click Enable Attachments.
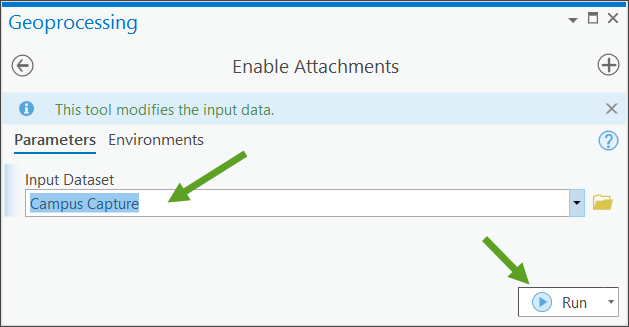
Step 15 — In the Enable Attachments geoprocessing tool, select Campus Capture as the Input Dataset. then click Run.
Tip: If you plan to use an external GNSS reciever to collect data you will need to add additional fields to collect the device data. In the Geoprocessing pane, search for “gps” and locate the GPS Metadata Fields geoprocessing tool, and run it against the Campus Capture layer.
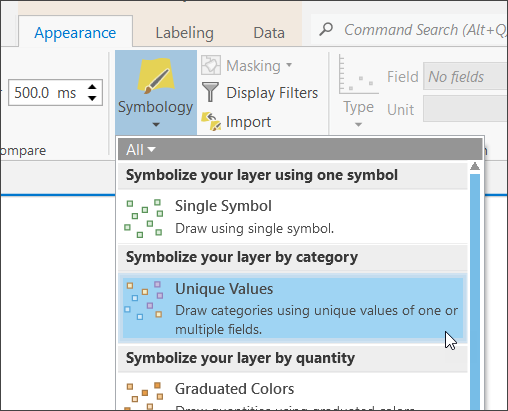
Step 16 — In Contents, click the Campus Capture layer to select it. Click the Appearance tab, then click Symbology and choose Unique Values.
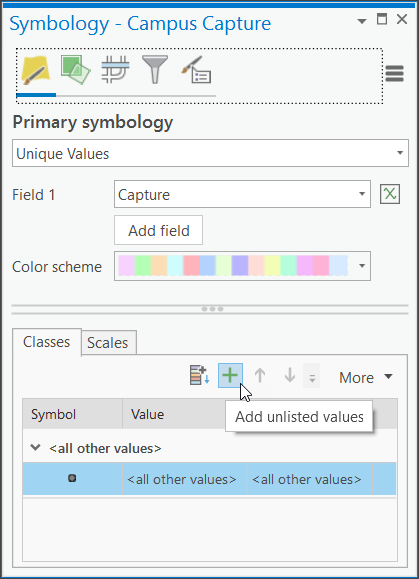
Step 17 — Click [+] to Add unlisted values.
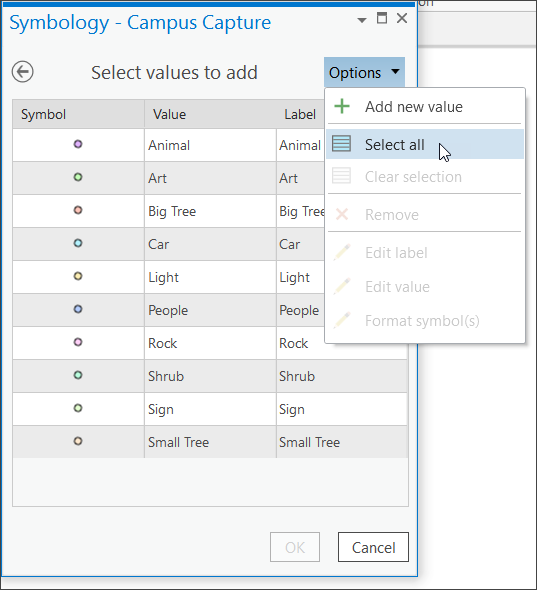
Step 18 — Under Options, click Select all to select all symbols. Then click OK.
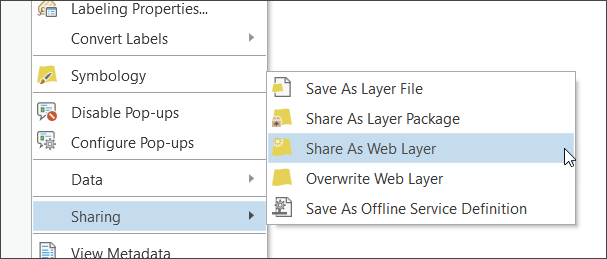
Step 19 — In Contents, right click the Campus Capture layer, then click Sharing, then Share As Web Layer.
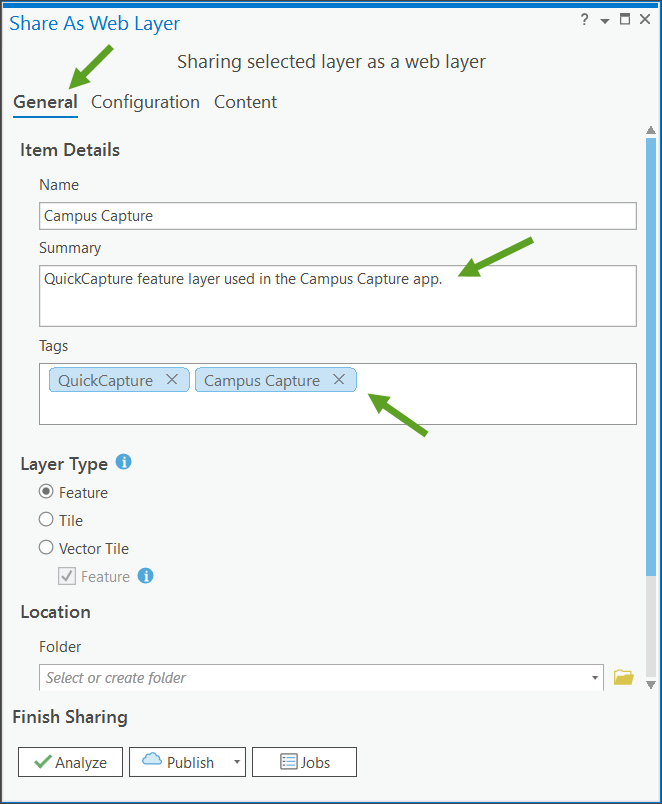
Step 20 — In the General tab, add a Summary and Tags for the feature layer.
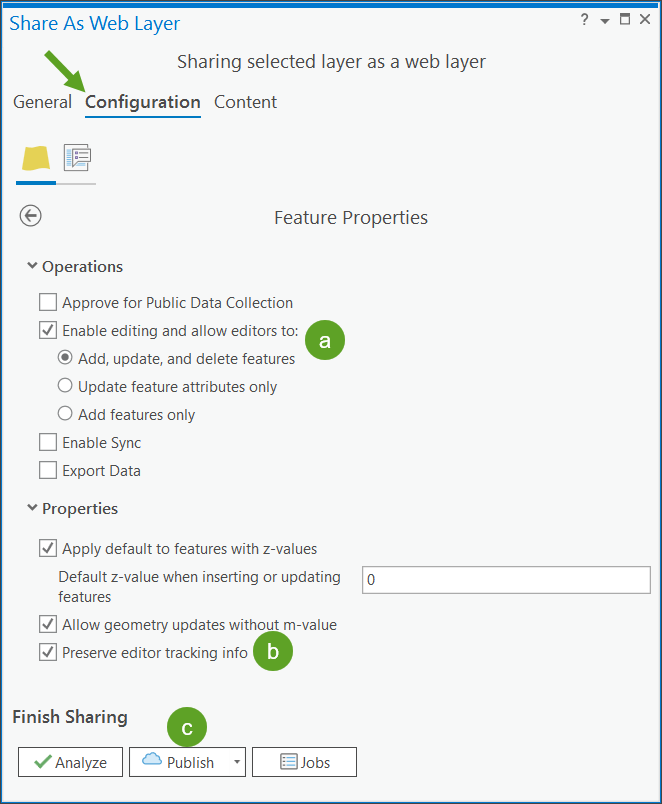
Step 21 — In the Configuration tab make the following settings.
a – Enable editing and accept the default for Add, update, and delete features.
b – Enable Preserve editor tracking info.
c – Click Analyze to check for any errors, if none click Publish.
Tip: It’s a best practice to complete the item pages after the hosted feature layer has been published. Consider adding a better thumbnail, and a detailed description. You can also set Delete Protection in the Settings tab. See Protect your ArcGIS Online items for more information.
You’ve now successfully created an editable feature layer you can use in QuickCapture. Follow the QuickCapture project and app workflow to create a project for use in the QuickCapture app.
Create the QuickCapture project
Before you begin
Now that you have created a hosted feature layer using one of the workflows above, you must consider the implications of enabling editing of the layer and take into consideration who has access to the layer and what they can edit. For example, if you enable full editing capabilities on a layer that is shared with the public, anyone—even people who do not sign in to your organization—can edit the layer.
It is recommended that you create QuickCapture projects based upon hosted feature layer views. Using a view, you can apply different editing settings, styles, or filters to the hosted feature layer and share the view in different ways: throughout your organization, within specific groups, or publicly. For example, you can create a hosted feature layer view that is available to QuickCapture users that only allows the addition of new records. Another layer view can allow public viewing, without editing. The most obvious benefit of using views is to limit accidental editing of data, but they can also improve performance of large layers.
Create feature layer views before you create a QuickCapture project. For more information, see:
- Create a project from existing feature layers.
- Create hosted feature layer views in ArcGIS Online
- Create hosted feature layer views in ArcGIS Enterprise
Create a project from your layer
Step 1 — If you have not already done so, sign in to your ArcGIS account. Open QuickCapture designer from the App Launcher, which is found next to the avatar button.
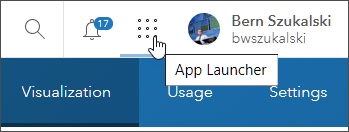
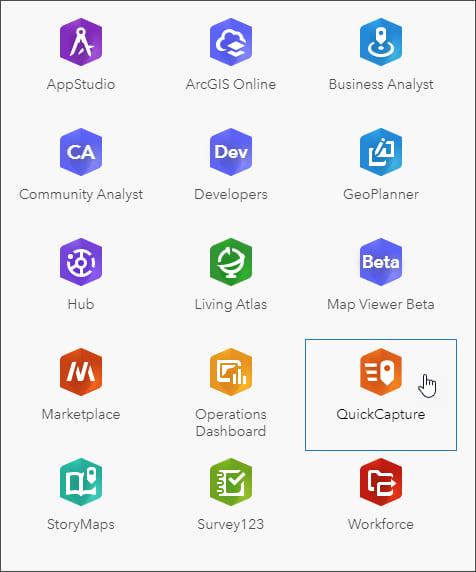
Note: The apps shown may differ from your apps.
Step 2 — Click New Project then Start from existing layers.
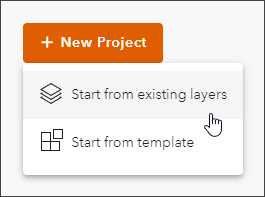
Step 3 — Choose the feature layer view created in the sections above. In this example the layer is titled Campus Capture.
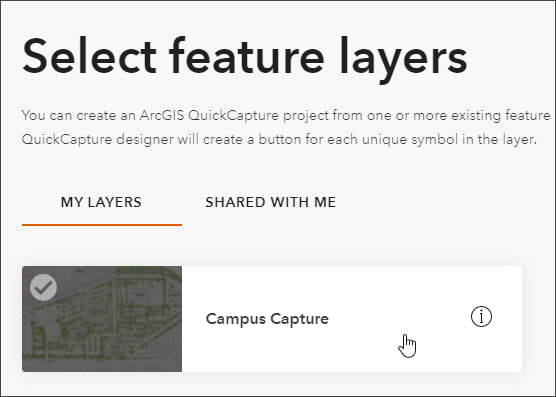
Then click Next.

Keep the checkbox on to Create buttons from layer symbology.
Step 4 — Confirm the project information, make any desired edits, then click Create.
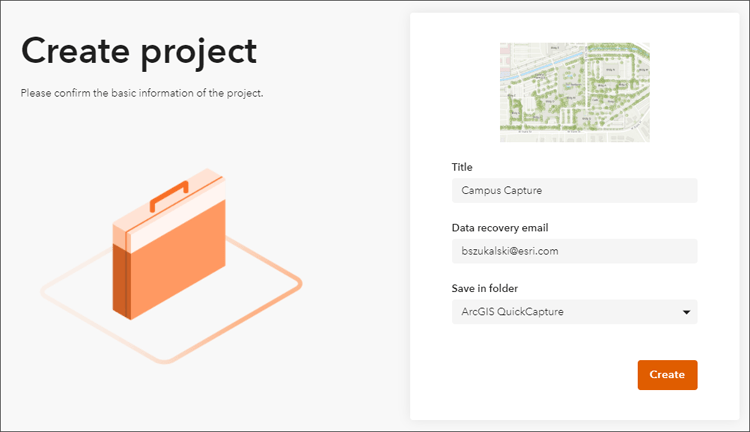
Design with QuickCapture designer
QuickCapture designer is used to modify the look and feel of the app. Designer can be used to change properties for an entire group, or for individual buttons, and is also used for a variety of other settings and options.
In this example, the defaults are a good starting point, however several changes will be made as described below.
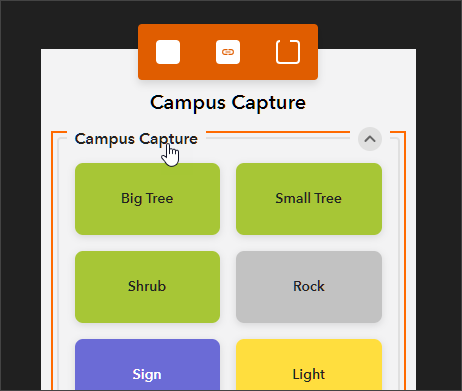
Step 1 — Click the group label to apply changes to the entire button group. When selected, the group will be outlined in orange.
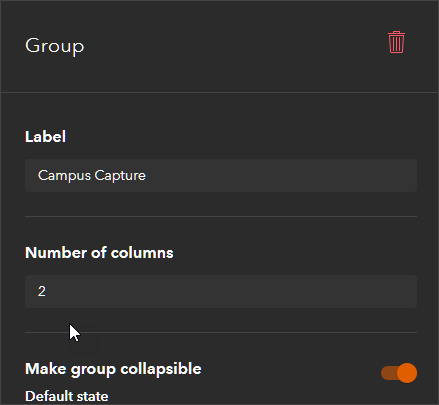
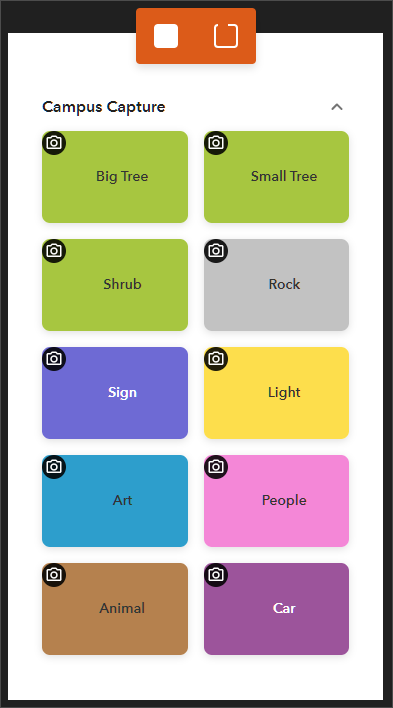
Step 2 — In the group properties, which appear to the right, ensure that the number of columns is set to 2.
Next, properties will be set for the buttons.
Step 3 — Press the <shift> key and click to select all of the buttons. Selected buttons will be outined in orange.
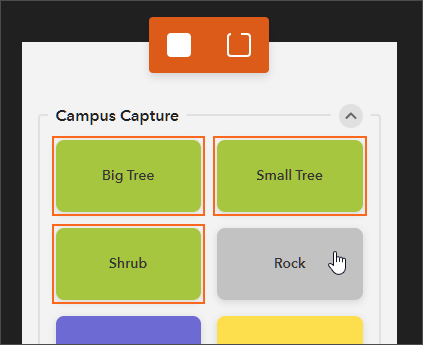
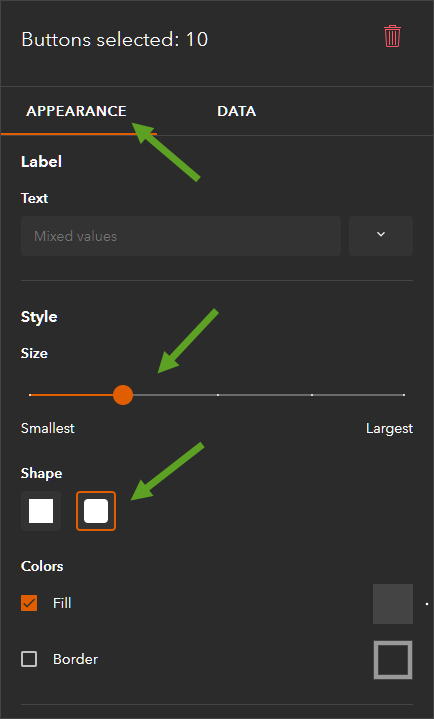
Step 4 — With all buttons selected, open the Appearance tab and use the slider to set the desired size. Also, set the shape of the button to show rounded corners.
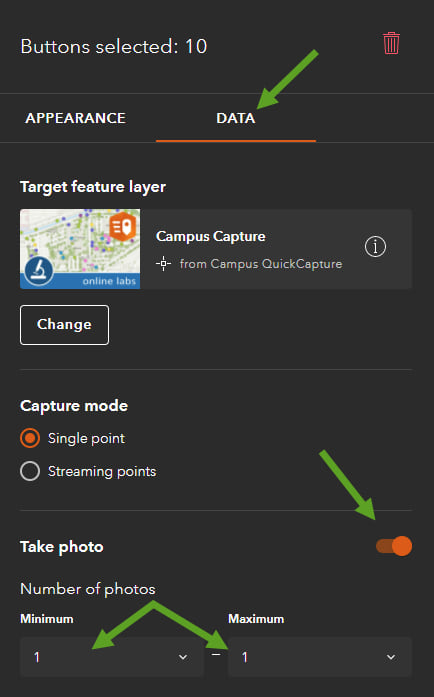
Step 5 — With all buttons selected, open the Data tab. Move the slider to the on position for Take photo, and set the minimum photo to 1 and the maximum to 1. This ensures that a photo is taken and sets the maximum number of photos to one per capture location.
Step 6 — Click Save to save all your settings.
Step 6 — Save and share the project.
Click Save when finished, then click Share to make the project available to others as desired. If you only want members of your organization to use the project, choose Your organization. You can also share it publicly, however this will allow anyone that discovers your project to add features.

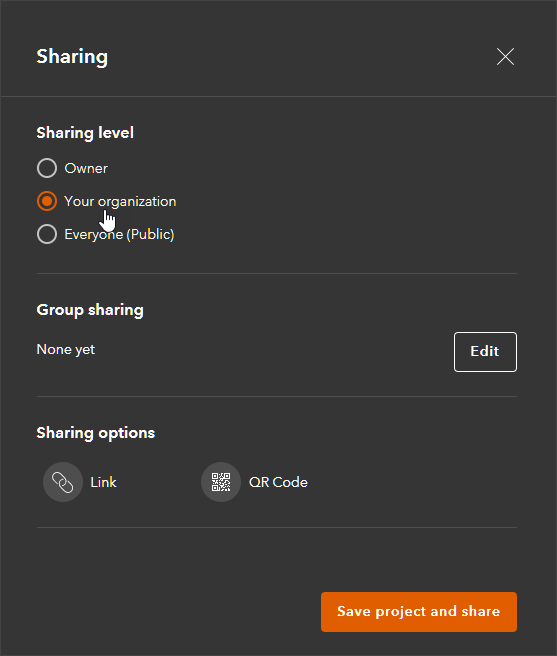
Tip: When you click Save a dialog appears from which a QR Code to open the project can be captured. The QR code can also be obtained from the Sharing dialog, which also includes a link to the project. The QR code is handy if you have the device in hand, or the link can be emailed to members to open the project.
Open the project in the QuickCapture app
In this section, the project just designed will be opened and used on a mobile device. The pictured device is an iPhone.
Step 1 — Install the QuickCapture mobile app from the Apple or Google Play app store onto your device.
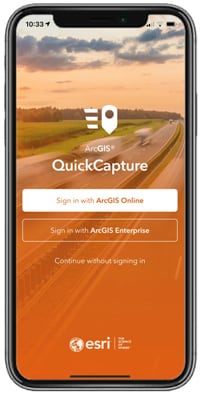
Step 2 — Open the QuickCapture mobile app and sign in to your account. Since the QuickCapture project is only shared to members of the organization (Step 6 in the previous section), signing in is required to access the project.
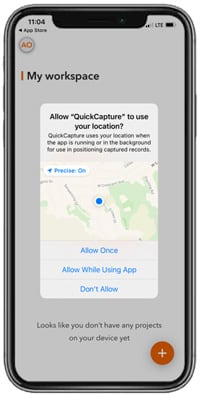
Step 3 — If prompted, choose to allow QuickCapture to access your location. This enables the device location to be captured in the feature layer.
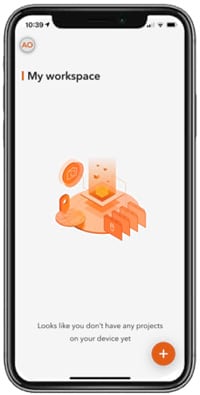
Step 4 — Open the project.
Tap the orange (+) to obtain available projects.
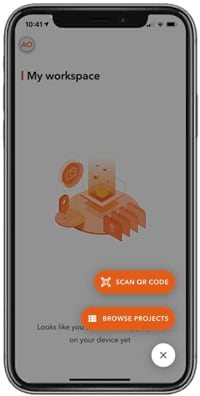
Step 5 — Click Browse Projects. Optionally, you can add the project by scanning the QR code.
Step 6 — Download the Campus QuickCapture project.
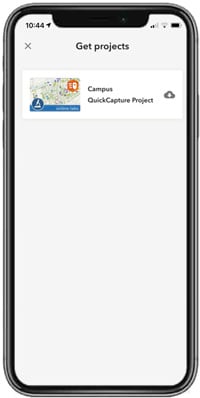
Step 7 — Open the project.
After the project has downloaded, click the project to open it and begin capturing.
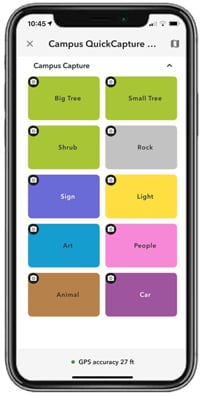
When collecting data, click the appropriate button to capture a feature. Since the photo has been enabled as part of the capture, the camera will open when a button is clicked. When finished, the location and photo will be stored in the feature layer, along with the date and account name of the QuickCapture user.
View the QuickCapture results
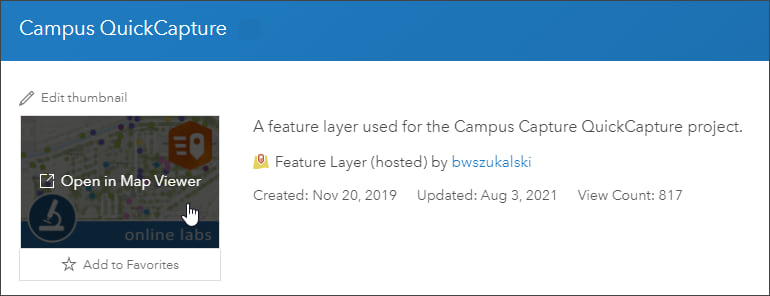
To view the QuickCapture data, find the feature layer item in your contents and click the thumbnail to Open in Map Viewer. Save the map if you want to use the QuickCapture data in an app or dashboard.
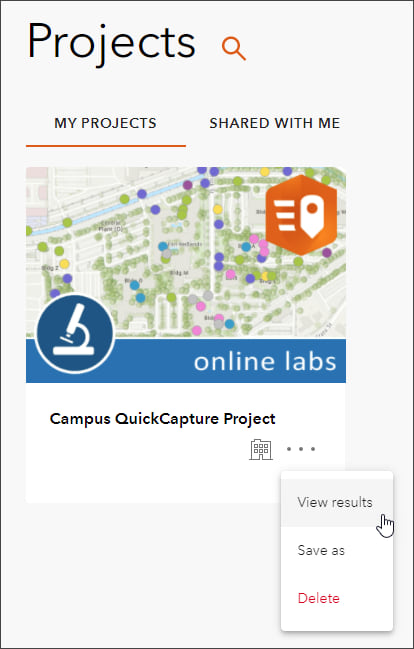
You can also open the QuickCapture designer. Click the options (…) then View results.
More information
ArcGIS QuickCapture offers many more capabilities than covered in this blog article. You can capture data for multiple feature layers, and capture line and polygon feature types. QuickCapture designer lets you add images to buttons, specify horizontal accuracy, edit the project JSON, and more.
For more information see the following:
This article was originally published on November 21, 2019, and has been updated.


Commenting is not enabled for this article.