You have a rectangular spreadsheet data set that contains place names. You want a feature layer of points that you can use in ArcGIS Online. You are unsure if all your place names will be correctly geocoded when you publish your feature layer. Good news: you can easily review both matched and unmatched locations when creating your layer. Let’s explore how.
I have created a spreadsheet that contains information by country. The only location-based field we have in our spreadsheet is official country name, such as “Russian Federation” rather than “Russia.” All the other fields are numeric. I can publish our spreadsheet as a point feature layer, and handle matching issues that come up as we go.
Let’s get started! Feel free follow along and download the spreadsheet of data on the percentage of women in national parliaments.
Publish the spreadsheet as a point layer
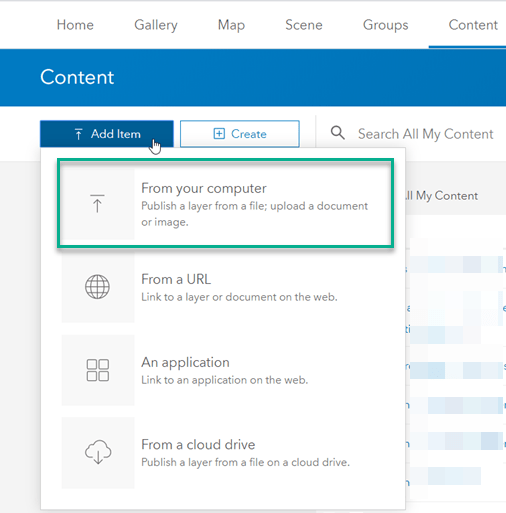
I’ve prepared my spreadsheet, and I’m signed in to ArcGIS Online. I start by adding this item from my computer to my ArcGIS Online Content.
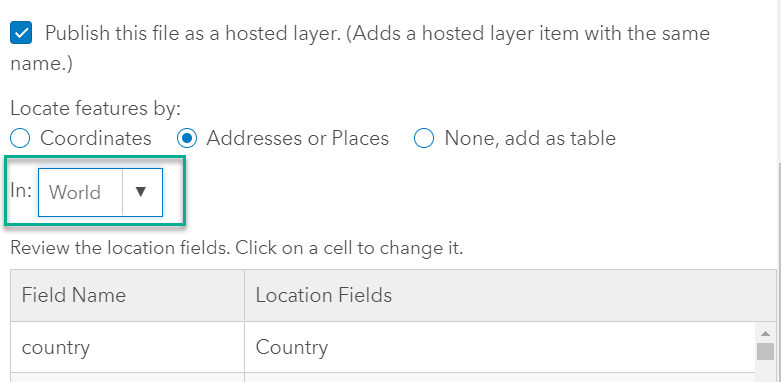
ArcGIS Online picks up on the fact that this is a table, and gives me the option to publish as a hosted feature layer as the default option. It scans my data and sees that there are no coordinates, no addresses, but that I do have a field called country, so it suggests that I match on this field. If you have addresses in the United States address format, you’d want the “In” dropdown option to say “United States” (or whatever country your addresses or places are in). I’ll change the dropdown option to World rather than United States since I’m working with a table of countries.
Make sure the title and search tags are what you want, and then click Add Item. Depending on how many records your data has, it can take a few minutes to publish.
See how many locations matched
Once published, a dialog box appears that tells you how many of your locations matched, and you’ll get a chance to review any unmatched cases. In my case, I have three unmatched countries:
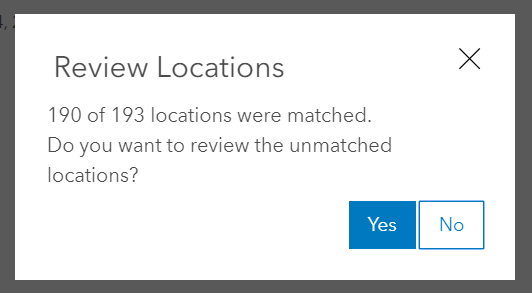
Review unmatched locations
After clicking Yes to review my unmatched records, I’m taken directly to the Map Viewer with a checklist of these three for me to review. Curious which three didn’t match? It was Bolivia, Venezuela, and Iran:

I’ll start with Bolivia. Clicking on the record allows me to edit the text here. I’ll change the text to simply “Bolivia” instead of “Bolivia (Plurinational Republic of)” – which brings up a whole list of suggested point locations for me to review:
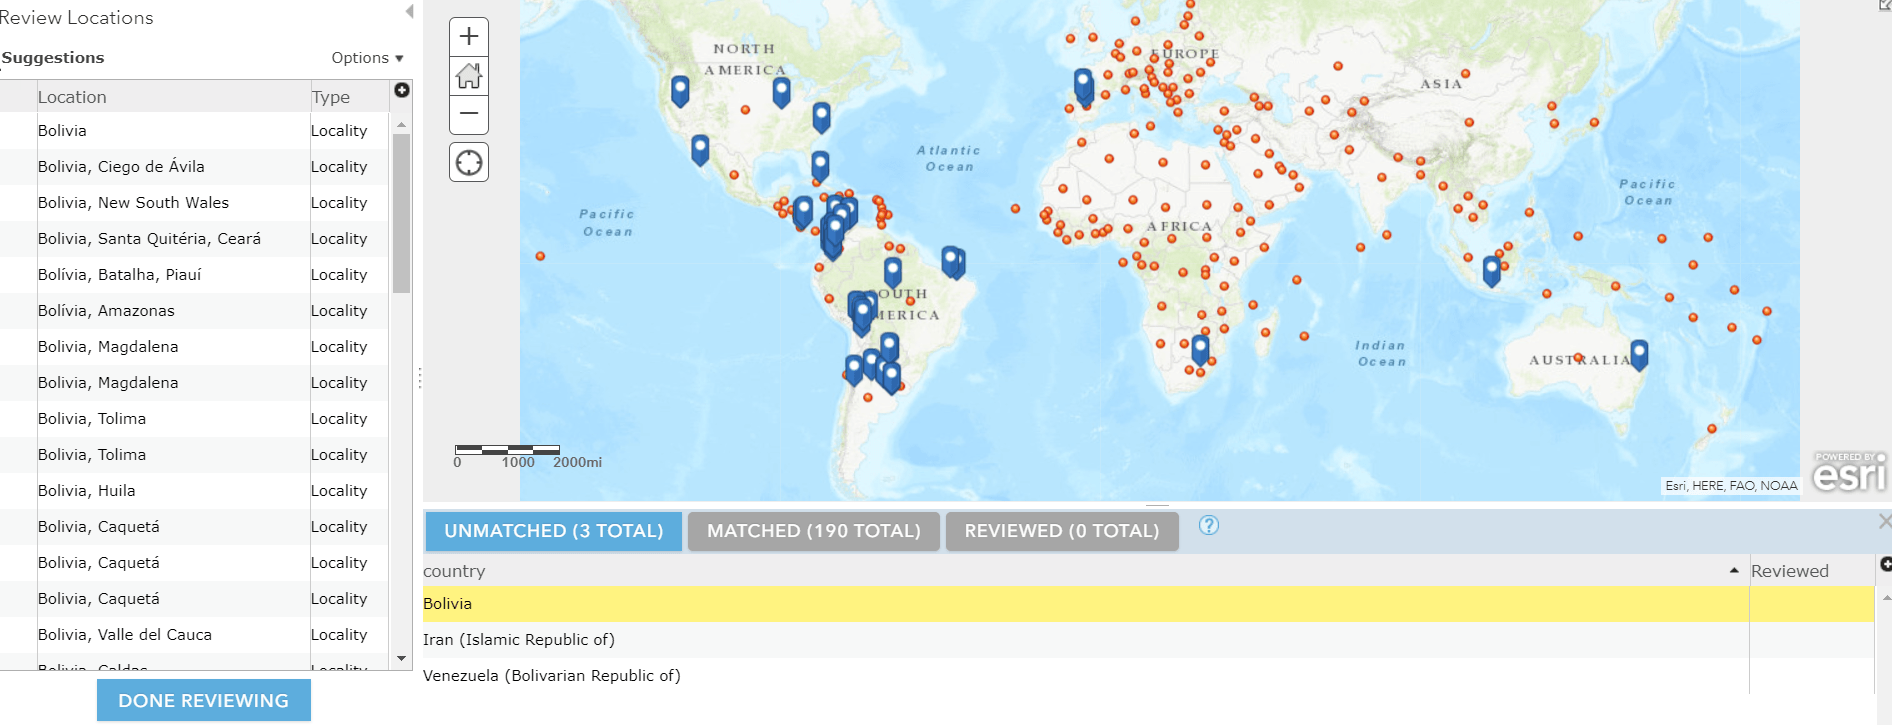
I think the first one is the one I want, but I want to see where it is in the map before selecting it. I can highlight this suggestion in the list and see where it is on the map, as well as get the coordinates. This suggestion is the one I want, so I’ll click MATCH.

Now this record appears with a check mark in the Reviewed column:

Review remaining locations
I went through this same process with the other two unmatched records: Venezuela and Iran. From here, I can either review matched cases in a similar way by clicking on the Matched tab and make any necessary changes, or I can confirm that I am done reviewing.

Edit data on locations that matched correctly
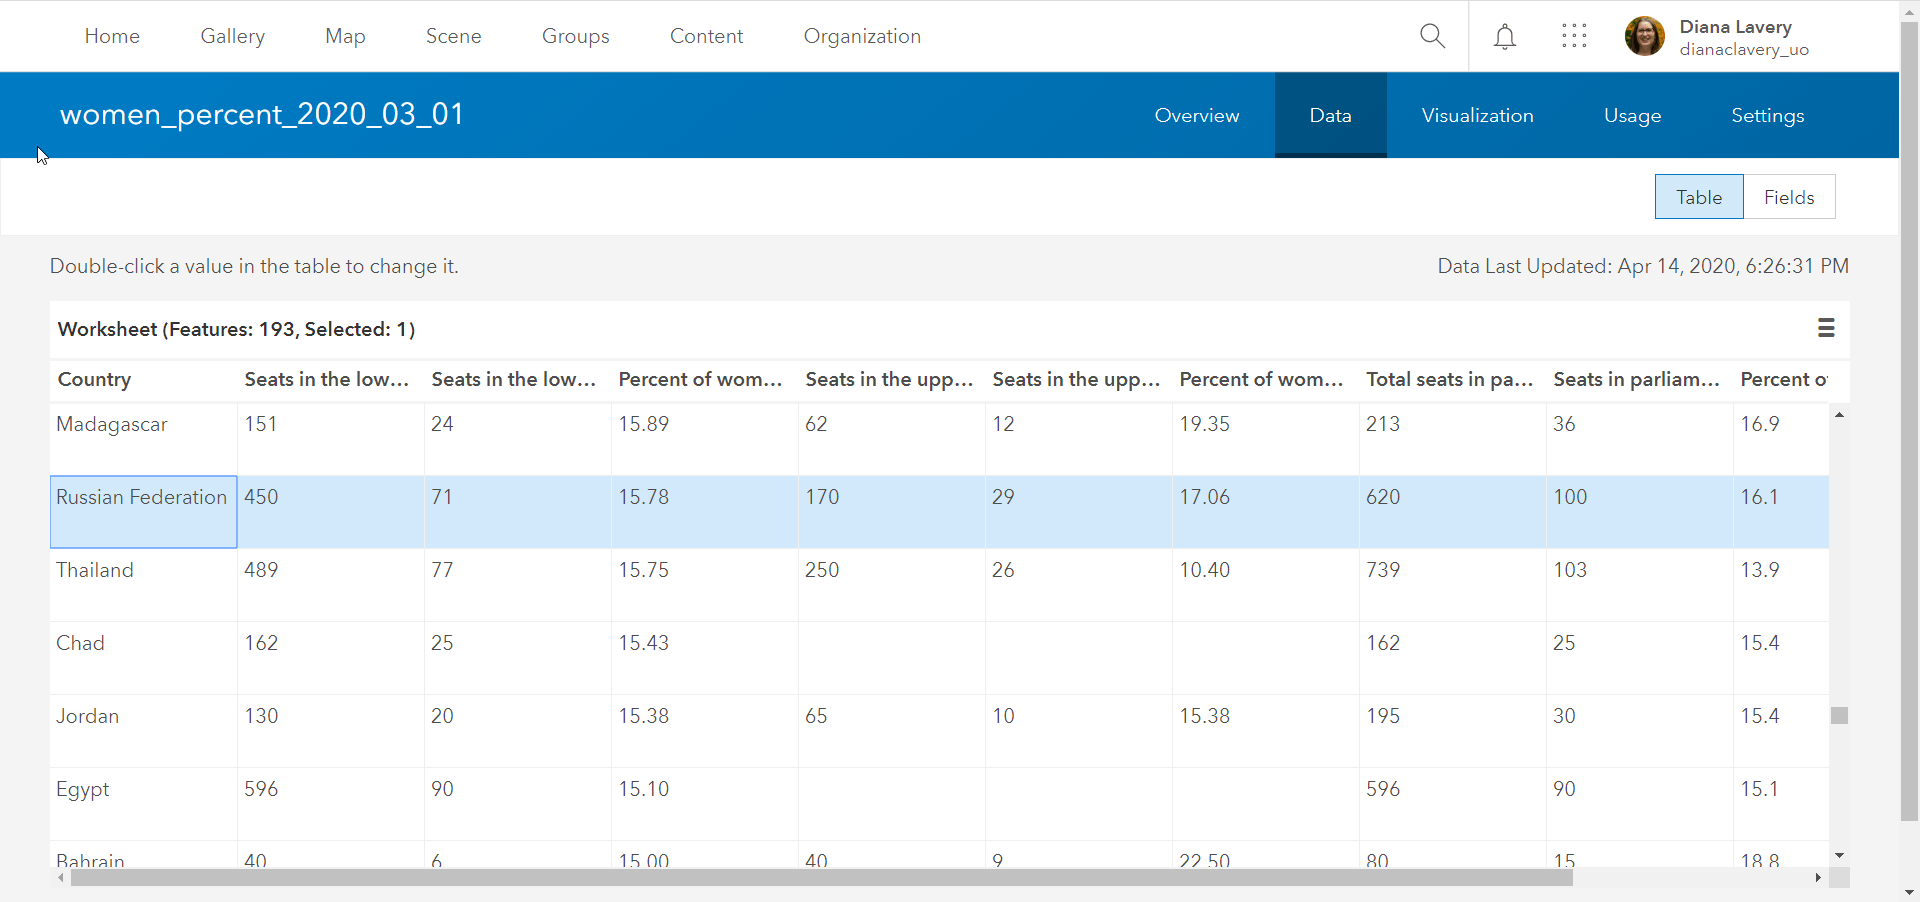
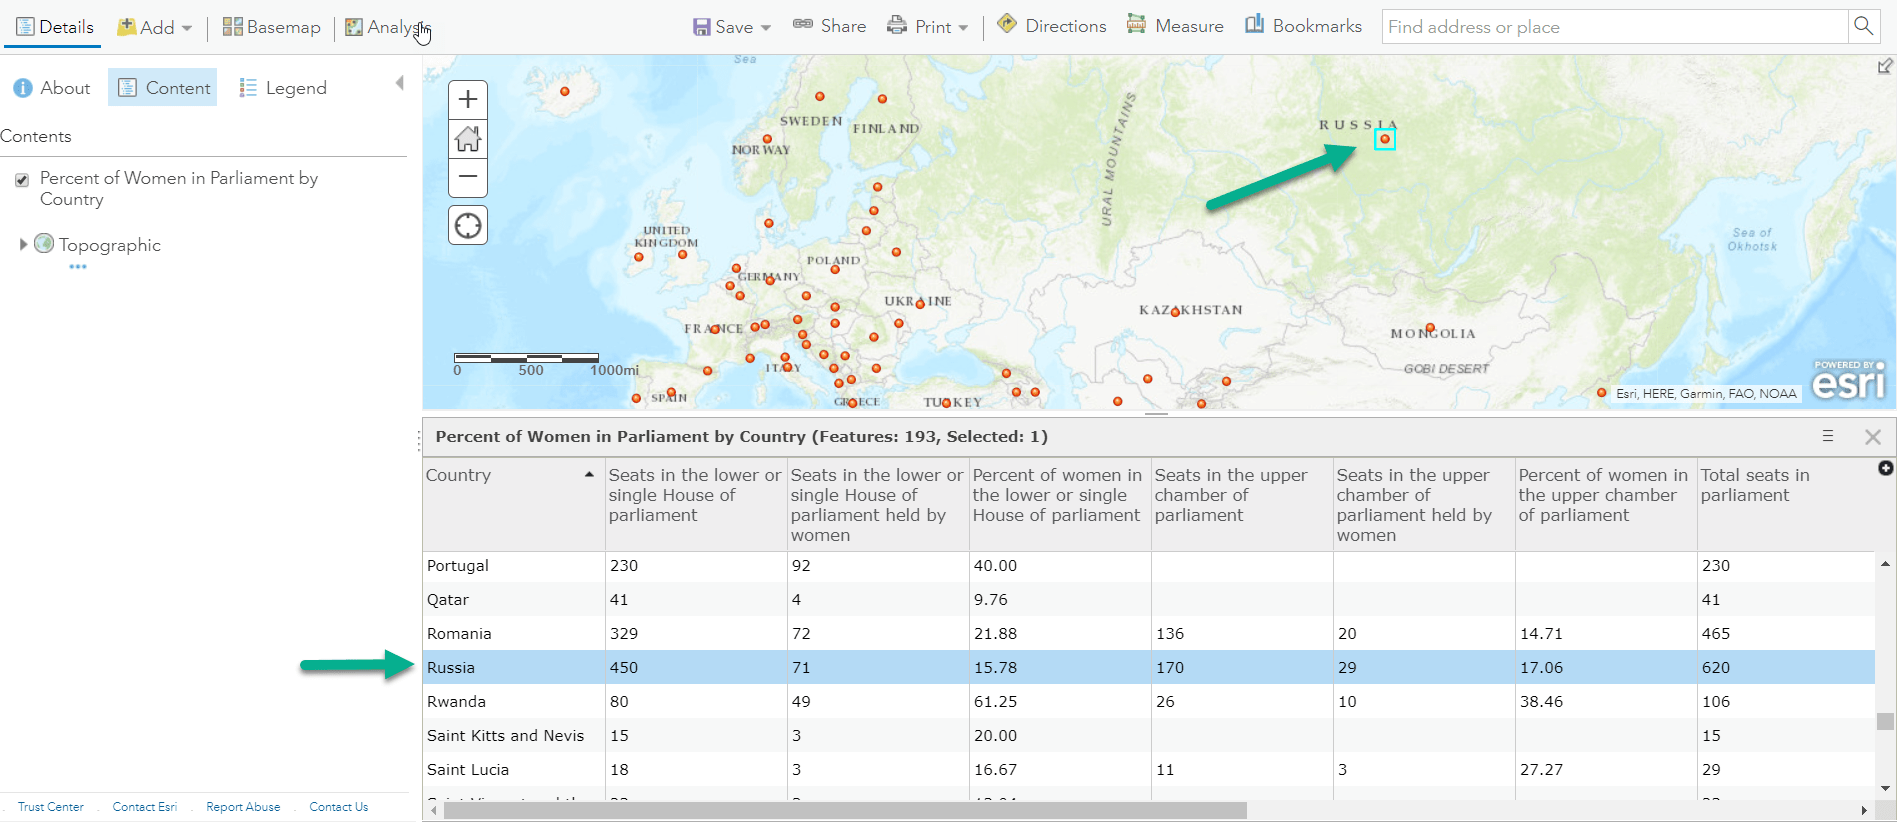
Even though my “Russian Federation” record didn’t result in an unmatched case, I want to ensure that it matched correctly. By examining my layer’s points and attribute table, I can see that it did match to the correct location. I would like to change the country name to “Russia” since that’s more widely used. I own this layer, so I have that ability.
I like to do this from the layer’s metadata found in the Item Details page under the Data tab. From here, I can add understandable field aliases, long descriptions, and attribute types to each attribute. This will help me as well as others who might be working with this layer. I can also edit the tabular data itself. I’ll change this country name to “Russia”:
Now I can bring this layer into the Map Viewer. I see that my edit to this point record is as desired:
Note to those following along: There were a handful of other countries with formal names that I changed this same way, such as “United Republic of Tanzania” to simply “Tanzania”.
Next steps for authoring a layer
- Fill out that Item Details page! Make your layer easy to find, understand, and use by others.
- Spend some time creating great field aliases and descriptions. The payoff is worth the effort.
- Take advantage of the many Smart Mapping capabilities and mapping styles in ArcGIS Online to symbolize on key attributes.
- Configure your pop-up so that you present the information your symbology is conveying.
- Create a high-quality thumbnail for your item.
- Interested in polygons rather than points? Use the Join Features analysis tool to join this new layer you just created to a polygon layer of boundaries.

Article Discussion: