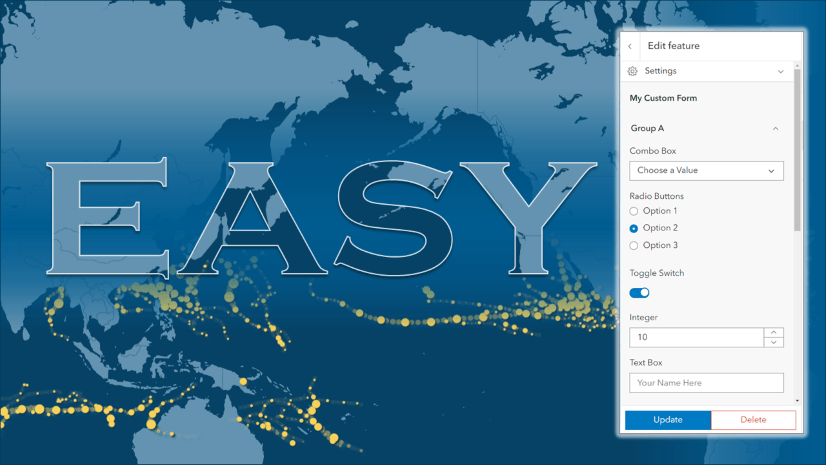
We’ve added several new enhancements to web editing with the February 2025 update. From editing attributes for multiple features in Web Editor, to a new suite of drawing tools in Map Viewer, we’ve got you covered. Another exciting addition at the top of our list is support for managing templates in Map Viewer. Now you can quickly duplicate, format, and remove templates without leaving the map, saving you time while helping ensure data integrity. Keep reading to discover how you can get started.
Templates
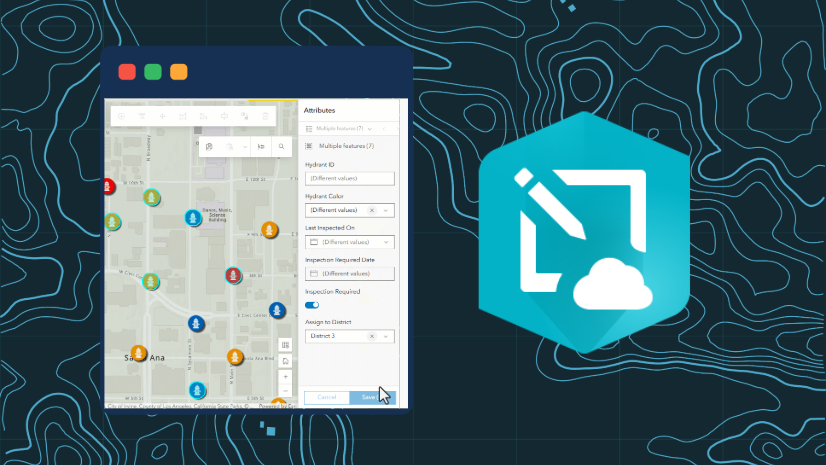
Templates are an integral part of any editing workflow. Leveraging templates for specific types of features can help ensure cleaner data from the start. For example, let’s say you have a hydrants layer. You can create templates based a specific value like hydrant color, then add default values for other attributes that are driven by the hydrant color, like the flow capacity. Setting default values for each template leads to less typing during data collection, minimizing the time spent editing attributes – while simultaneously reducing the risk for errors.
Getting started
To view or manage templates in Map Viewer:
- Select an editable layer in the Layers pane
- Click the Configure editing button on the light toolbar
- In the menu that appears, choose Templates
Note: You can manage templates when you’re the owner of the layer or an administrator in your organization. When neither of those apply, you can view templates for editable layers in read-only mode.

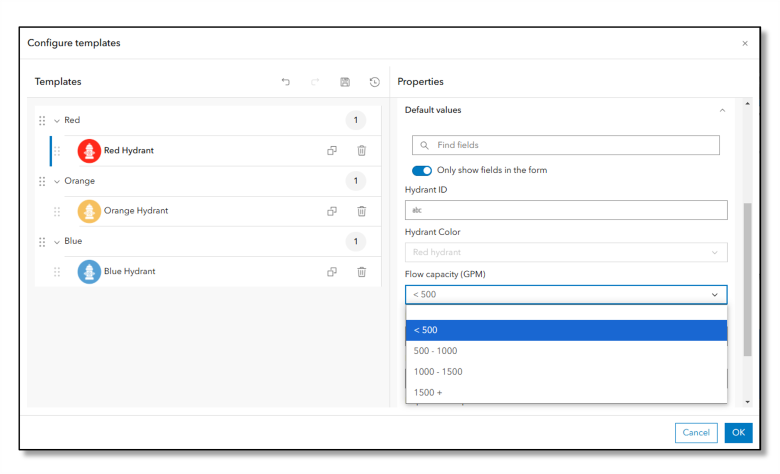
Configure Templates
Inside the Configure templates window, you’ll see a list of types and their templates. You can customize both the templates list as well as the properties for each template. Let’s explore some of the steps that you can take to make the most of your templates.
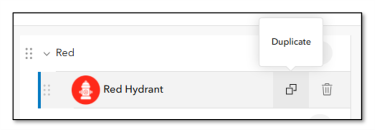
Add or Remove Templates
- Use familiar buttons to duplicate or delete items in the list.
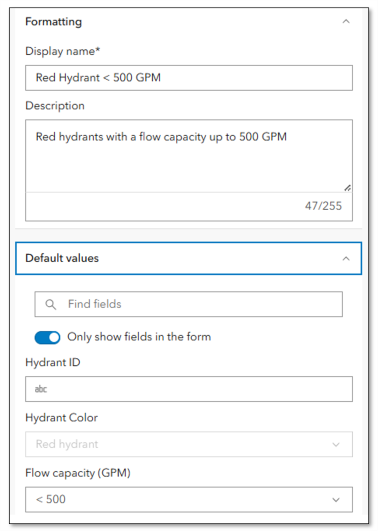
Format Templates
Select a template to format the following properties:
- Display Name
- Description, and
- Default attribute values
The most important properties you format may be the default values associated with each template. Prepopulating fields with default values simplifies editing. It saves the editor time during data collection and helps improve data integrity. Like we saw earilier in the hydrants example, we set default values for fields including Hydrant Color and Flow. Similarly, you can set default values for different types of features in your own layers to prepopulate the attributes while minimizing the risk for errors.
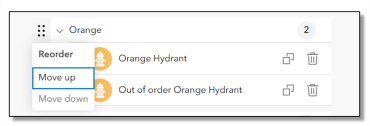
Reorder Templates
- Drag, drop, or select a command to change the order of the templates in the list.
Save Templates
Any changes you make are saved to the layer. That means that the templates appear in any map that contains this layer. If you make a mistake, don’t worry, we’ve added buttons that allow you to:
- Undo an action
- Redo an action
- Save your changes as you work, and
- Undo or Redo a stack of actions in the History menu

Sync Templates to Styles
When you change a layer’s style from a single symbol to unique symbols based on a field, you might want to create templates for each of those values. Similarly, if you add a new value to a list or domain, you likely want a new template to match. With the latest update, you can sync the templates with the styles in your web map with the push of a button.
When you’ve finished styling the layer, open the Configure templates window. You’ll see an alert above the list of templates letting you know that the templates and styles are not aligned. Click Update to automatically match the templates with the styles.

Summary
Configuring and using templates can help make data collection smooth, efficient, and nearly error-free. This latest enhancement enables you to seamlessly manage templates within Map Viewer, helping you ensure data integrity while saving you time. We hope you’ll harness the power of templates for efficient data collection, reduced data clean up, and easier data management. There may be no such thing as a perfect dataset but, using the right tools, we can get close.


Commenting is not enabled for this article.