The World Imagery basemap is updated regularly with newer imagery. When and where updates occur, the previous imagery is replaced and is no longer visible. In the vast majority of cases the updated imagery is better, more recent, and is preferred, but there may be exceptions. For example, the previous imagery may better align with your GIS layers, or may offer fewer shadows, clouds, or snow cover. In these cases, you may want to access a previous version of the World Imagery basemap or layers. Another reason is that you may want to go back in time to view change that has occurred as the result of development, fires, or other events.
Use the following links to jump to a section of interests.
- What is Wayback imagery?
- What is the Wayback app?
- Make a map using Wayback
- Wayback swipe mode
- Wayback animate mode
- Browse the Wayback archives

What is Wayback imagery?
Wayback Imagery is a digital archive of the World Imagery basemap that enables you to access over 150 versions of World Imagery captured over the past 8 years. The different vintages of imagery are published as tile layers that you can add to your maps or can use as basemaps. Note that this archive is based on the date that it was published in the World Imagery basemap, not on the date the imagery was actually acquired, which may differ.

What is the Wayback app?
There are two ways that you can leverage Wayback imagery; using the online archive, or using the Wayback app. The Wayback app is the easiest and recommended way to get the most out of Wayback imagery. The app also supports saving a web map from selected imagery, using swipe to compare imagery of different dates, and also animating imagery over time.
The app displays a timeline and list, letting you browse all archived versions based on location and scale. You can focus on only imagery with local changes, preview preview imagery by hovering or selecting individual layers, or use swipe and animation mode to explore further.

Use Wayback to make a map
Choose one or more Wayback layers to place them in a queue, when finished you can add them to a new ArcGIS online web map. Follow these steps to make a map using Wayback.
Step 1 — Open the Wayback app.
You can also find the app in the Apps tab of the ArcGIS Living Atlas website, in the Wayback Imagery group, or by searching ArcGIS Online. Favorite the app or share it into one of your groups for easy access.
Step 2 – Zoom to your area of interest
One the app is opened, use Search to zoom to your area of interest.
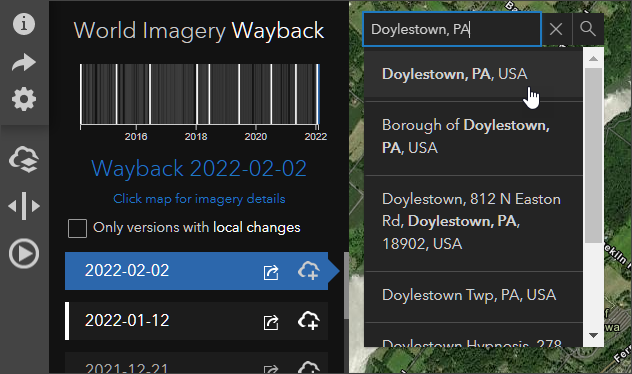
Step 3 — Examine the available imagery
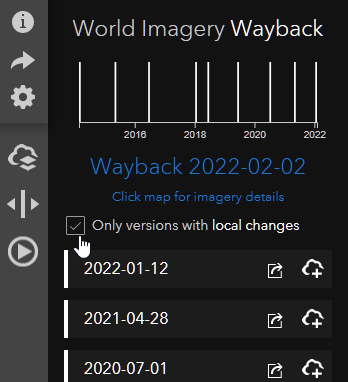
Pan and zoom in or out to the desired location and level of detail, the results shown in the app are based on location and scale. The layer list shows all vintages, those with local changes are highlighted in white. In the upper left a timeline is visible, with dates with local changes highlighted. Check the box to see only the versions with local changes.
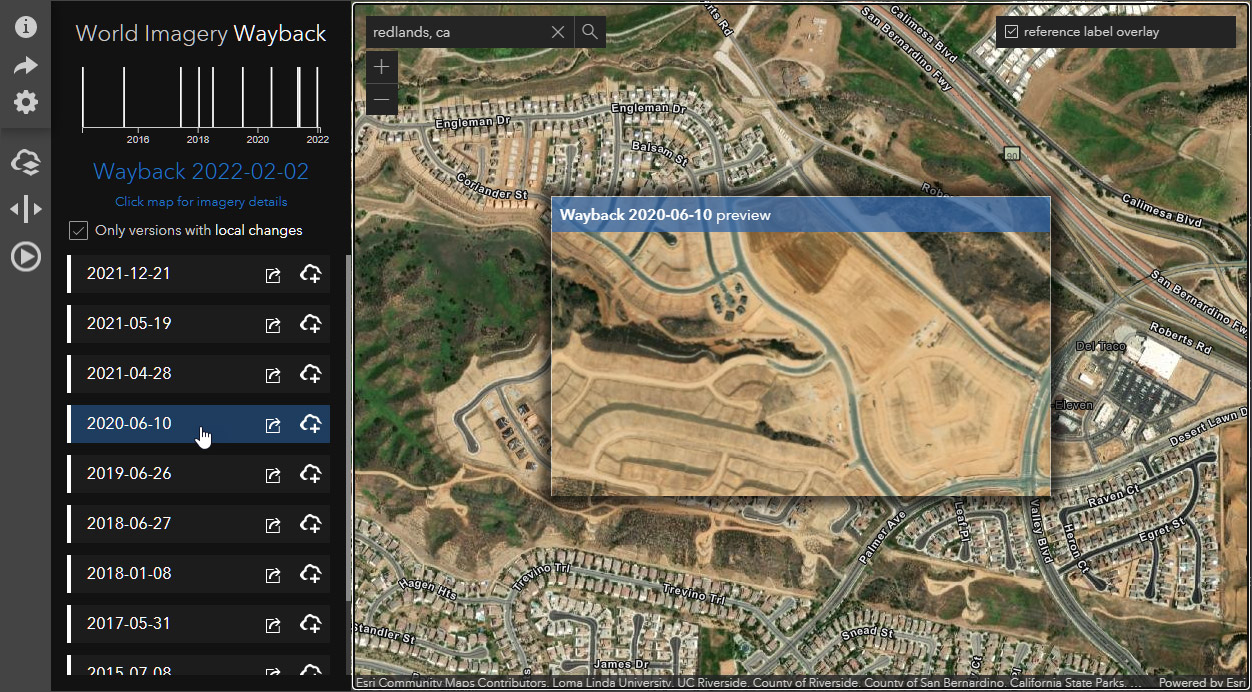
Step 4 — Explore and select the layer(s) you want to add to your map
Hover over any layer to see a preview on the map. To explore the imagery in full screen mode, use swipe mode (see the Use swipe mode section below).
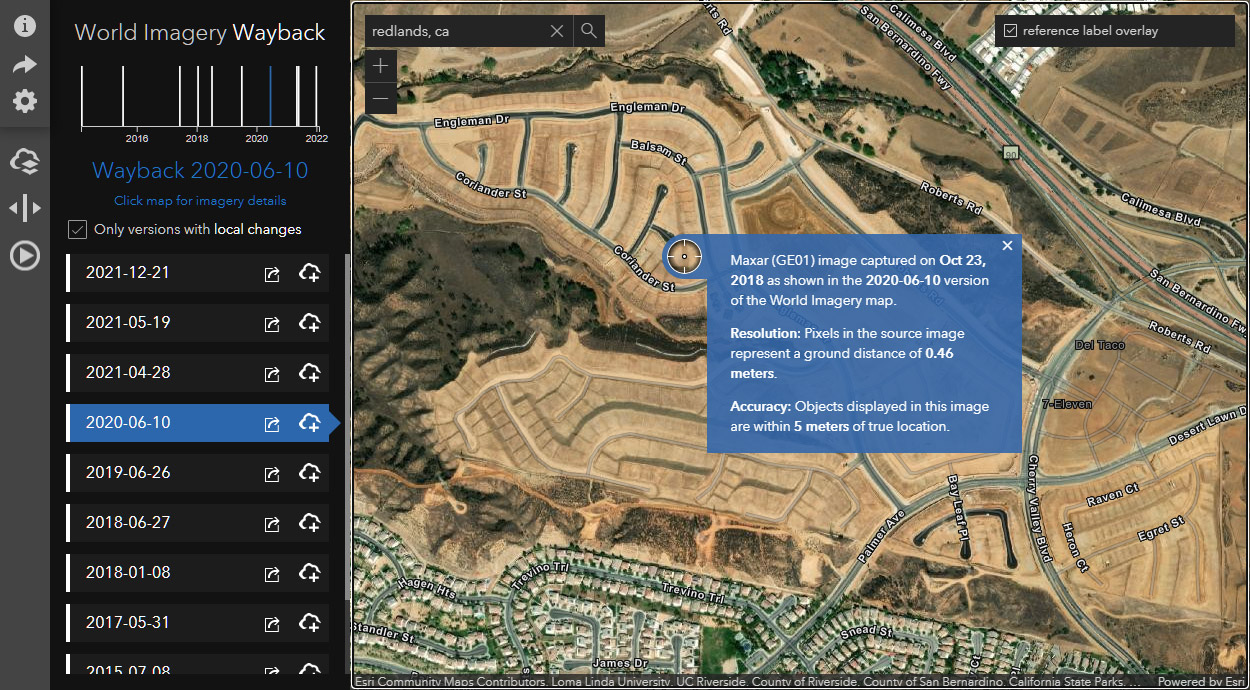
Click a layer to see it on the map, and click the map to view all details.
Add layers to the map queue by clicking the Add icon.
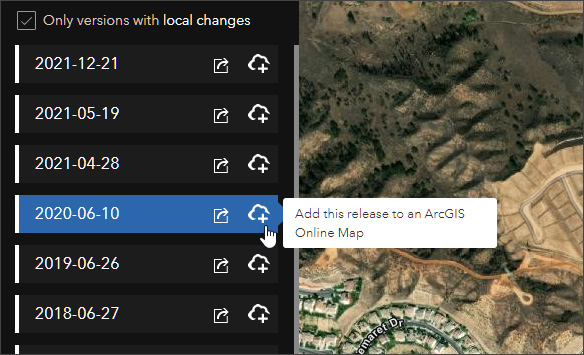
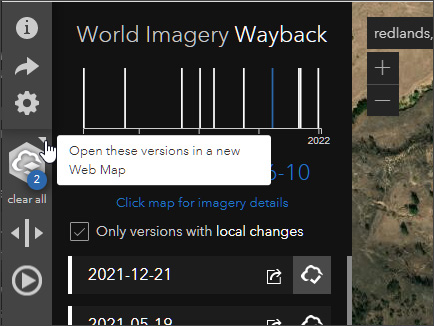
Step 5 — Make a web map.
Layers you have selected are queued in the app. The blue circle shows the number of layers selected. Click the web map icon to add the selected layers to a new map.
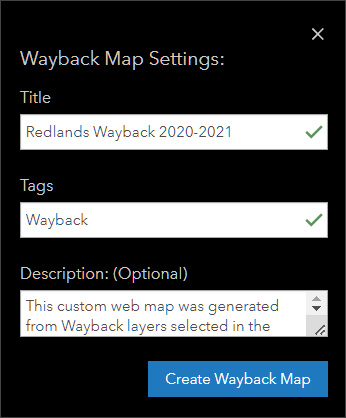
You’ll be prompted to sign in to save your map. After signing in, you can enter a title, tags, and description. Click Create Wayback Map to save the map with the desired imagery layers.

Wayback swipe mode
Swipe mode lets you to use a slider to view imagery from the Wayback archives, vastly improving your ability to compare imagery over a broad area and select the imagery best suited for your needs. To use swipe mode, follow steps 1 through 3 above, then follow the additional steps below:
Step 1 — Click the swipe mode toggle to enter swipe mode.
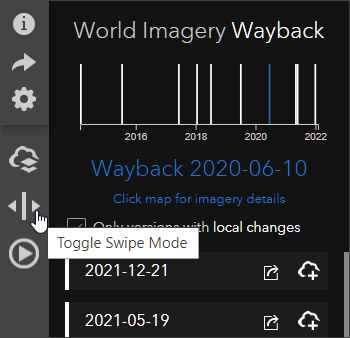
Step 2 — Select imagery on the left and right to swipe.
The available imagery is listed on the left and right side of swipe mode. Click to select and display the dates of interest and move the slider to compare the imagery.
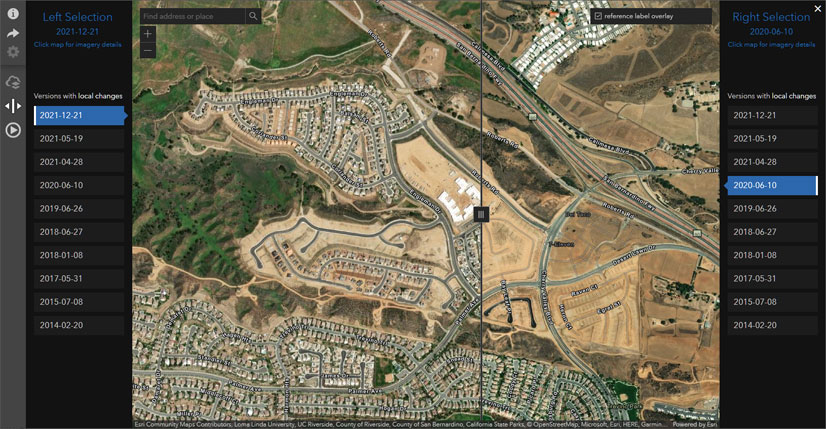
Step 3 — When finished, toggle swipe mode again to return to normal mode.
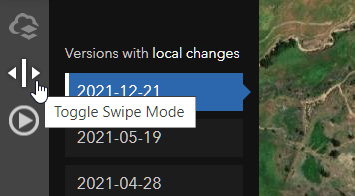
After exploring the imagery using swipe mode, you can add the layers you want to a new web map. See steps 4 and 5 in the previous section.
Tip: A powerful feature of swipe mode is that you can capture the selected imagery and map extent and share the swipe with others.
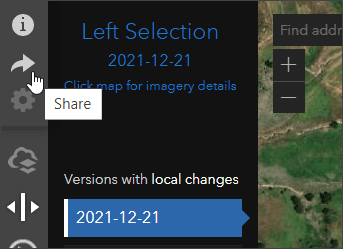
Step 4 — From swipe mode, click Share.
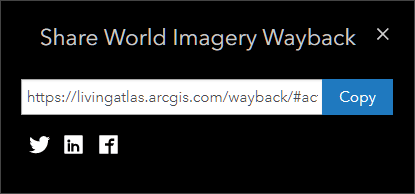
Step 5 — Click Copy to capture the URL to email, save the link, or share with others.
Here are several examples:
- View change in Yucaipa, California
- View change in Las Vegas, Nevada
- View change near Beijing Capital Airport
- View change near Quepos, Costa Rica

Wayback animate mode
Animate mode lets you view an animation of selected imagery. You can also save the animation to a GIF. To use animate mode, follow steps 1 through 3 above, then follow the additional steps below:
Step 1 — Click the animate mode toggle to enter animation mode.
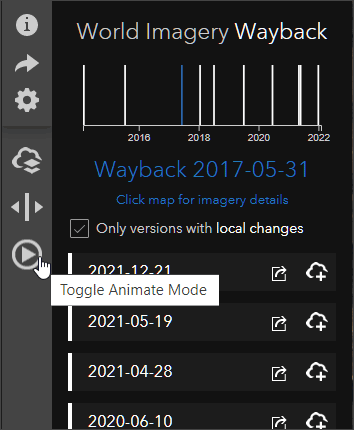
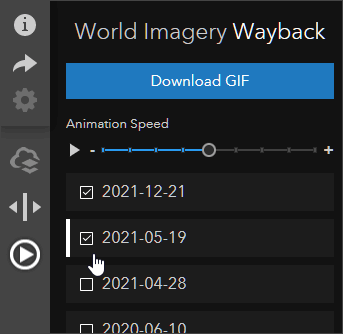
Step 2 — Check the boxes for imagery you want to use in the animation.
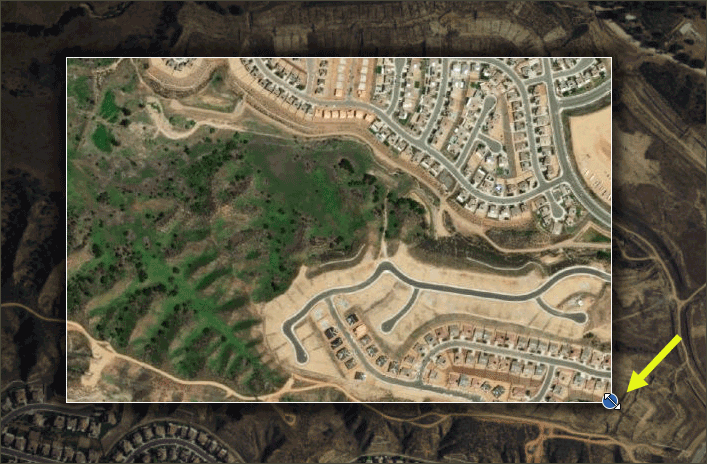
Step 3 — Click inside the animation pane and hold and drag the pane to view a different area. Click and drag the blue anchor to resize the pane.
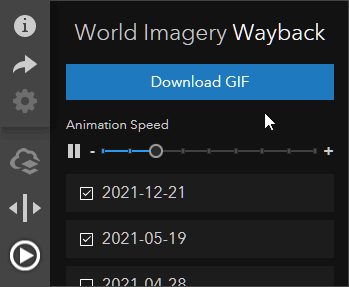
Step 4 — Use the animation speed control to play, pause, and control the speed of the animation. Click Download GIF to save the animation to a file.
Tip: A powerful feature of animation mode is that you can capture the selected imagery and map extent and share the animation with others.
Step 5 — From animation mode, click Share.
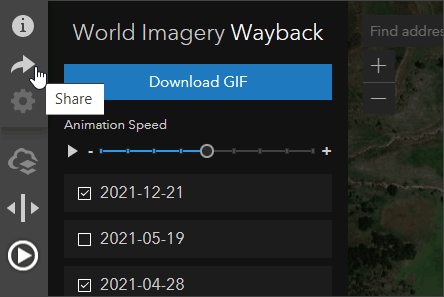
Step 6 — Click Copy to capture the URL to email, save the link, or share with others.

Here are several examples:
- View change in Yucaipa, California
- View change in Las Vegas, Nevada
- View change near Beijing Capital Airport
- View change near Quepos, Costa Rica

Browse the Wayback archive
The entire Wayback archive can be found in the Wayback Imagery group. Each item in the archive represents World Imagery as it existed on the date the imagery was published. Wayback includes all updated versions of World Imagery dating back to February 20, 2014.
Using the archive you can view the imagery as it existed on the publish date. Each is represented as an ArcGIS Online item. Select the version you want and use it as a basemap, or use it with other layers in your web map. Follow these steps:
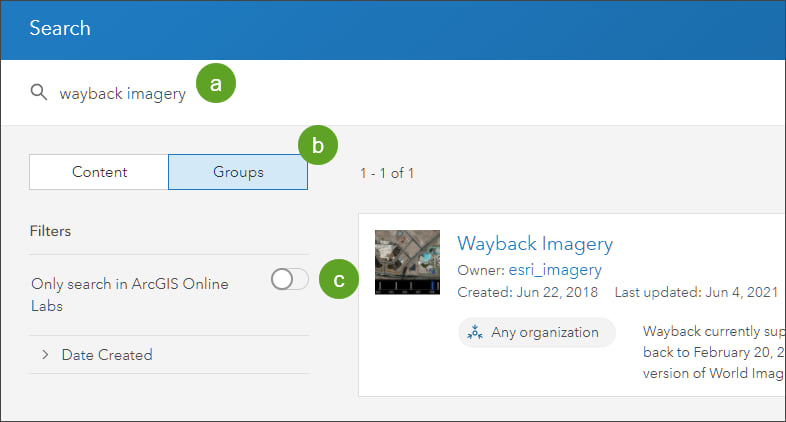
Step 1 — Sign in to your account. Search ArcGIS Online for the Wayback Imagery group.
a –Enter “wayback imagery” in search.
b –Select Groups.
c –Toggle search outside your organization.
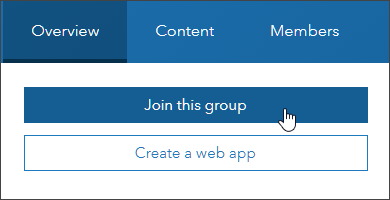
Tip: The group allows members from any organization. If you’ll be using group content frequently, click Join this group to become a member of the group. Once you’ve joined, the group will show up in your group list where it can be found easily.
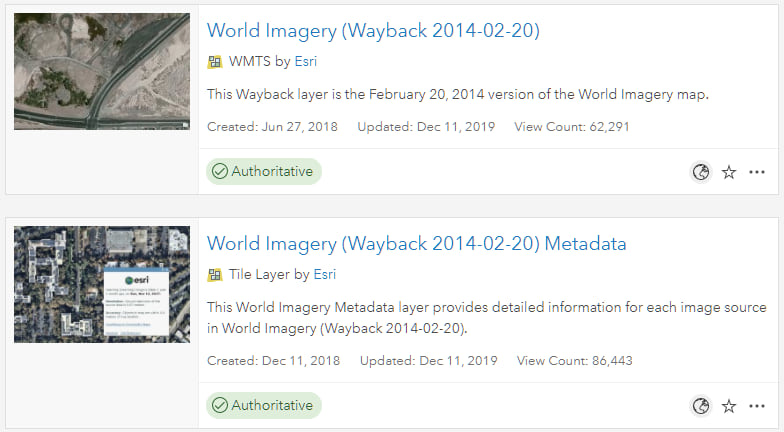
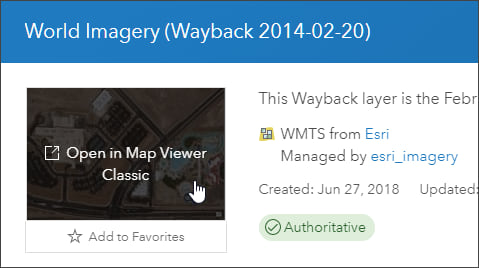
Step 2 — Open the group and browse the layers to find the vintage you want. The example shown below uses World Imagery (Wayback 2014-02-20). Note that the archived imagery is in paired layers; one is the WMTS layer that has the imagery, the other is a transparent tile layer with metadata.
Step 3 — Open the item details and add the layer to your map
Find the WMTS layer and click the title to open the item details, then click the thumbnail to open the layer in a map. Note that WMTS layers are currently only supported in Map Viewer Classic.
Tip: You can set the layer as your basemap and use it in individual maps or add it to your basemap gallery. For more information, see Use World Imagery Wayback to create a custom basemap.
Summary
Using these methods you can explore imagery for your basemap or for other other mapping workflows, such as visualizing change over time, via the Wayback app. As other vintages become available, they will be added to the Wayback archive and will be searchable using the Wayback app.

For more information
For more information, see the following:
- Do the Wayback Swipe (Blog)
- World Imagery Wayback App (Item)
- Use World Imagery Wayback to create a custom basemap (Blog)
- Wayback Imagery group (Item)
- ArcGIS Living Atlas of the World (Website)
This blog article was originally published on January 3, 2019, and has been updated.

Commenting is not enabled for this article.