Web tools allow you to share your analysis in your Portal for ArcGIS Enterprise. After you have shared your web tool, you can use it for many clients. These clients include ArcGIS Pro, a Python script, ArcGIS API for JavaScript, and many others. You can go to your portal content page to find your web tool after sharing your analysis. If you have many items, use Filters, and select Tools, then Geoprocessing Tasks to narrow down the content display
Use web tools in Portal for ArcGIS
If you have ArcGIS Enterprise 10.9 or earlier, Map Viewer is built-in with your Enterprise installation. And if you have ArcGIS Enterprise 10.9.1, you will need to use Map Viewer Classic to use the web tools. Once you have shared your web tool, or someone has shared a web tool with you, you can find the web tool item on the content page of the portal. In the upper right corner of this web tool portal item page, you can launch the web tool by clicking Open in Map Viewer Classic.
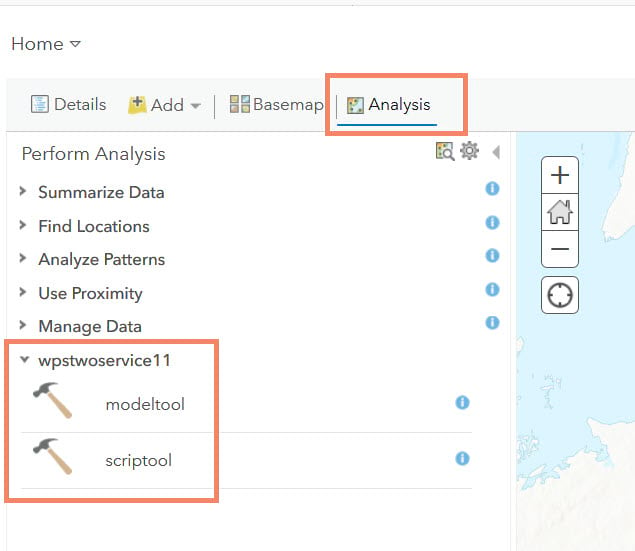
How to access web tools
Once a new browser tab is opened, you will find your web tool and its tasks in the table of contents of your web map. If you cannot find it, open the Analysis pane. Your web tool should be added at the end of the list with all tasks in it, after standard analysis tools.
If you are the owner of the tool, you shouldn’t have trouble launching the tool in Map Viewer. However, if you are a portal user, and are trying to launch the tool shared by colleagues in your organization, you will need to have at least the privilege to run analysis tools. Otherwise, the Analysis pane will not be available to you; hence you cannot use Map Viewer for the portal to run a web tool. Ask your portal administrator to add the Standard Feature Analysis privilege to your role. The role is under the General Privileges, Content and Analysis.
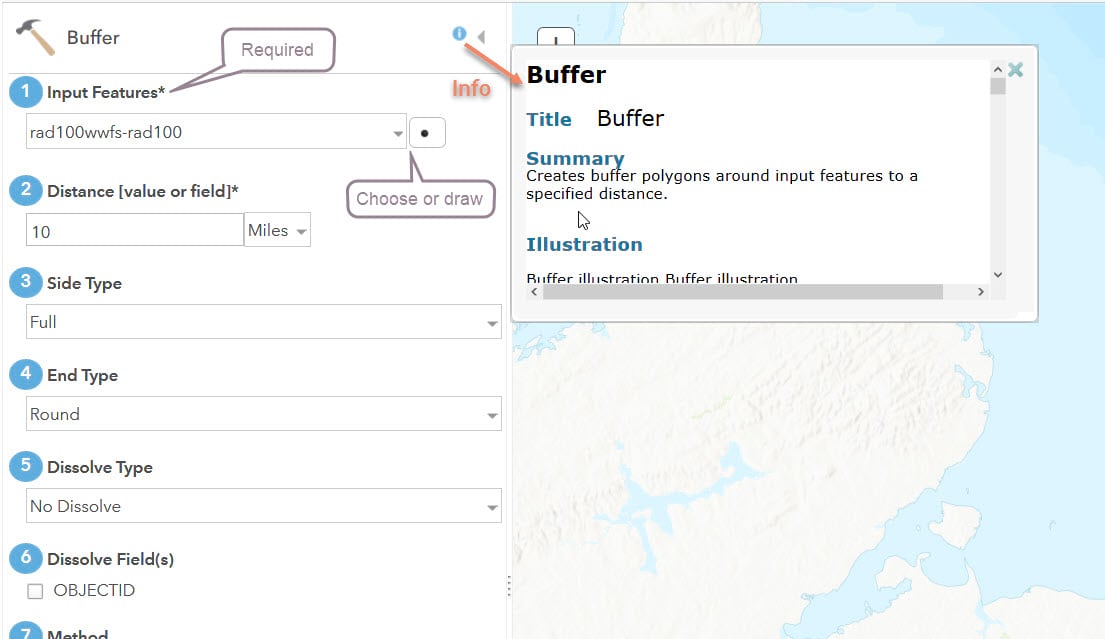
The user interface for inputs
The user interface is based on the data type of your web tool task parameter. Required parameters will have an asterisk. The information of the task, or metadata, is accessible through the blue information icon.
For a feature input, you can choose an existing compatible layer from the current map, choose a layer from a map in your portal, or create features on the current map. If your web tool task supports multiple geometry types of input, only the geometry type of the default value is available to you for the drawing option. We are working on adding the ability to choose all geometry types in future releases.
For a raster input, you can provide the URL to an image service or choose an image service from your portal, a URL to a raster file such as a TIFF file. To use the uploading your raster file option, you need to enable the upload capability. Other types of input also have an intuitive user interface.
If you have filters applied to any of your parameters, an error message will appear if a value is out of range. It also prevents you from running the analysis until you provide a valid value.
The user interface for outputs
For the output, you should provide the name of the output. This is unique to Map Viewer; you do not need to provide an output name when you use the web tool in ArcGIS Pro. This output name will be used as a layer name for Map Viewer to add the layer to the table of contents.
One exception is the use of an output feature service. If you choose to generate an output feature service, Map Viewer will disable the output name option. Instead, the result output feature service will be the result layer.
Use web tools in the Web AppBuilder
Other than the portal web Map Viewer, you can also add a geoprocessing widget to your web application by using Web AppBuilder.
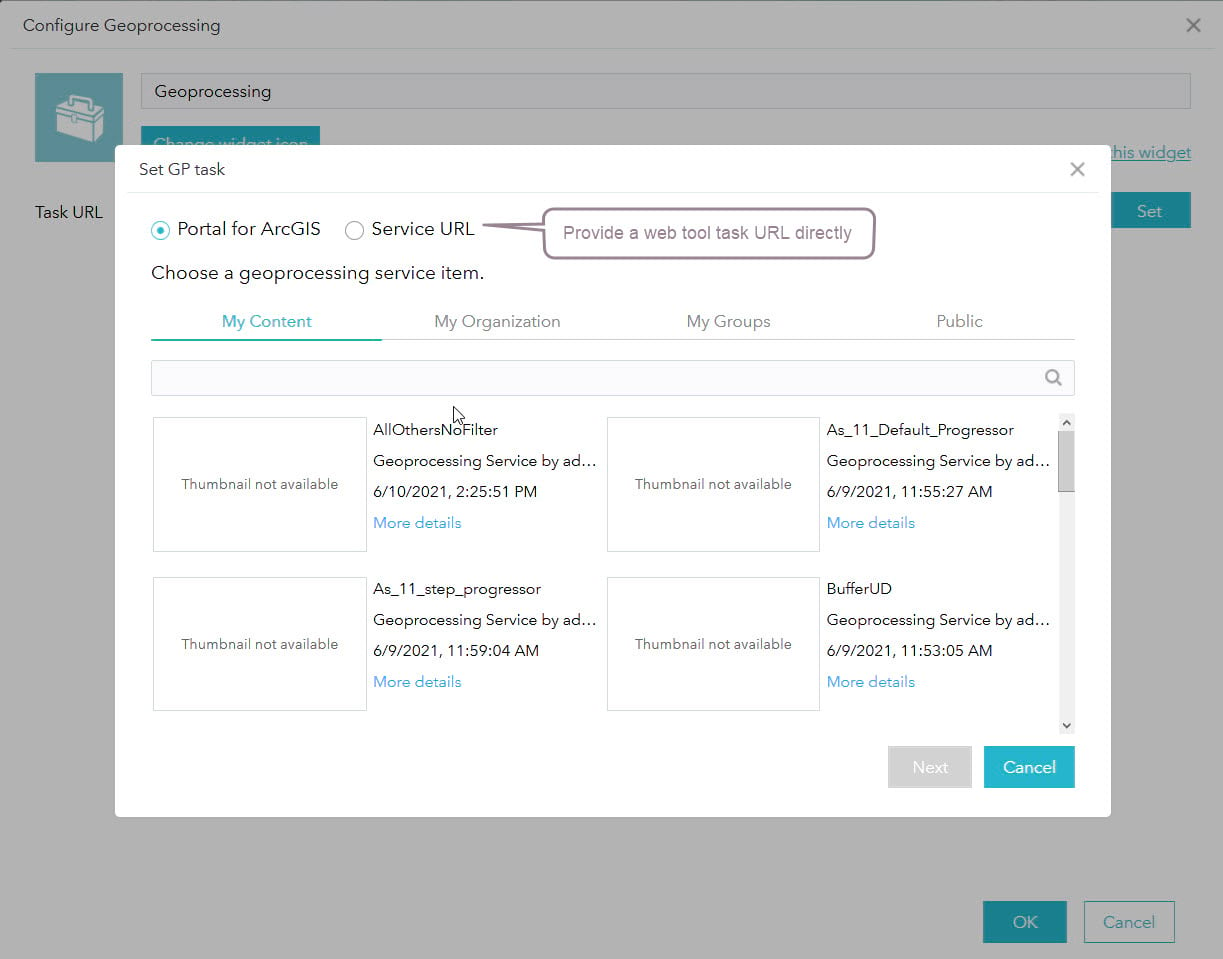
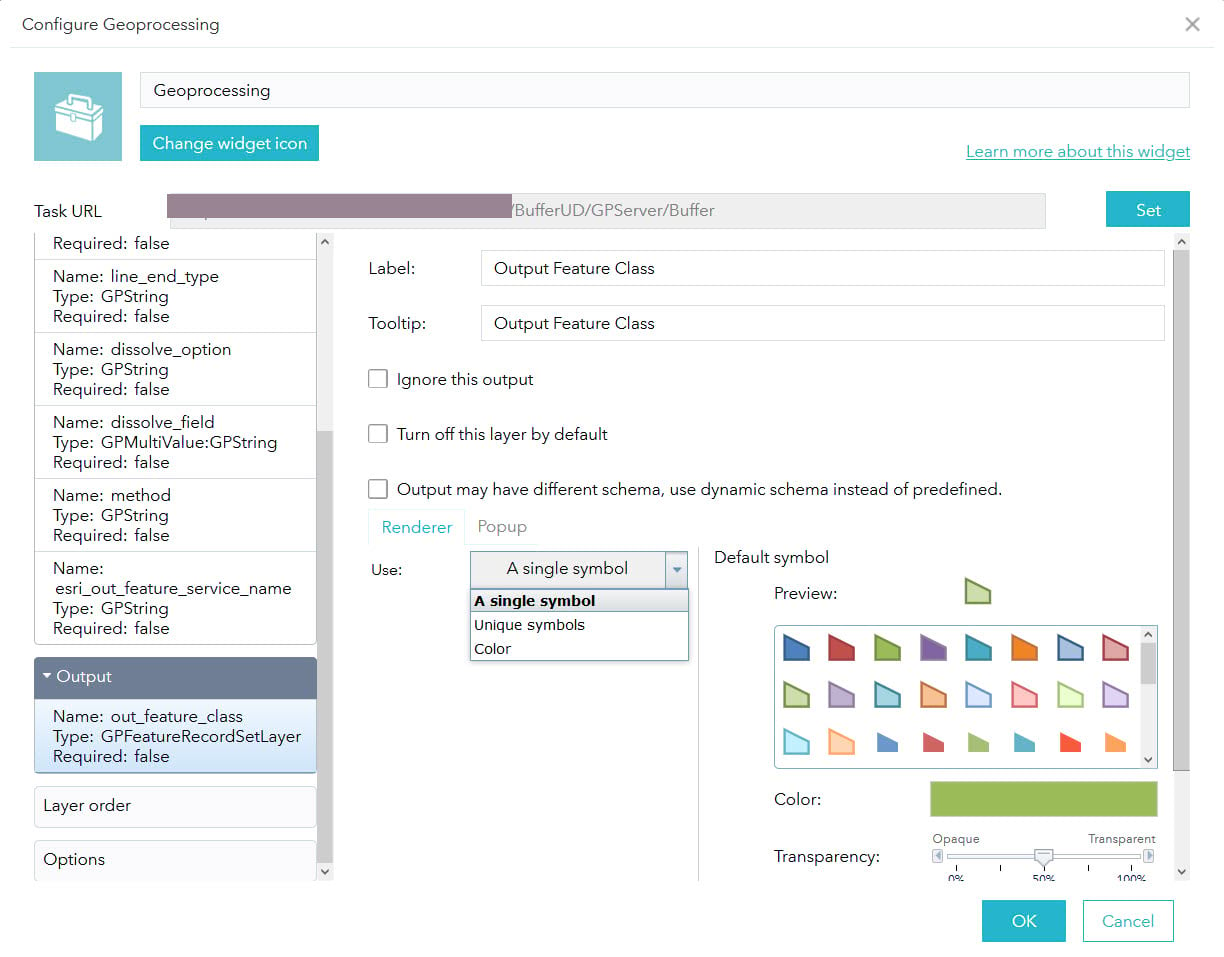
To use a web tool in Web AppBuilder, you configure a geoprocessing widget. First, create a web app in your portal. Once you select the style and map, you can add a geoprocessing widget and configure it. Notice you can only add one task for each geoprocessing widget, even if you have multiple tasks in your web tool.
To add multiple tasks in the same web app, you need to add multiple geoprocessing widgets. You can choose an existing web tool task from your content or your organization. You can also provide the web tool task URL directly. Make sure your audience has access to the web tool. Sometimes, a prompt will ask for the login credentials of a web tool task.
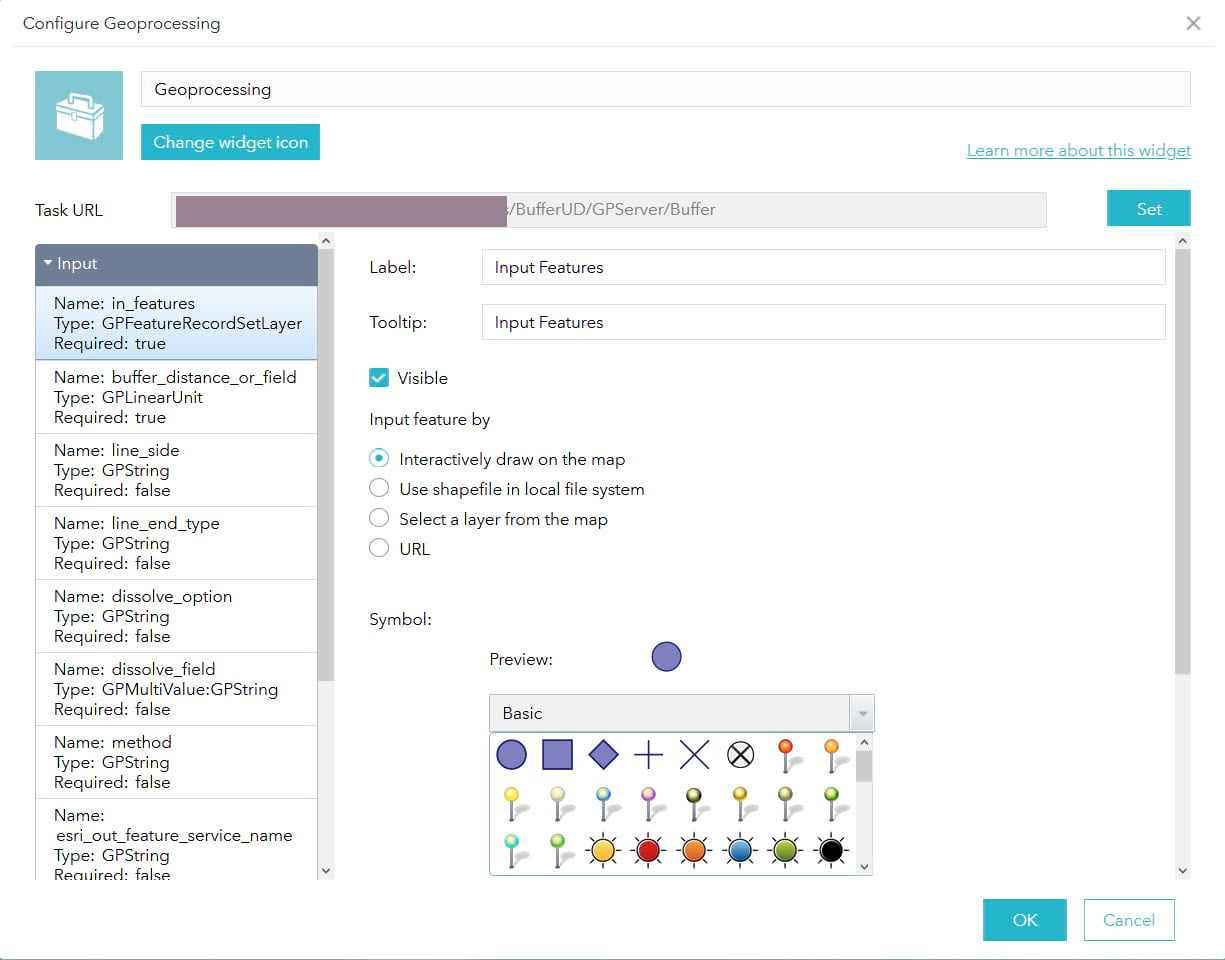
Once you have added your web tool task, you can configure the inputs and outputs. You can make them visible or invisible and control how the application captures the inputs. Should you choose to allow your users to draw features interactively on a map for a feature input, only the default geometry symbology can be configured. This is the case even if your input may support other types of geometries. If you choose Use shapefile in the local file system option, you do not need to add the Upload capability of your web tool.
To configure the output, you can specify a specific symbology based on the default schema. Alternatively, you can use the dynamic schema, but that would mean giving up the option to preset the output symbology. You can ignore the output or turn off the layer by default.
In this blog, I have shown you how to use web tools in your Portal for ArcGIS by using Map Viewer and Web AppBuilder. Be sure to check other web tool blogs referenced below, and other resources across the platform.

Article Discussion: