ArcGIS Enterprise 10.8 is now available! With this release comes many new options for your data.
This blog jumps right into 5 favorites (#5 being an assortment of enhancements and updates). Without further ado – here’s what’s new!
1) Create data store items from previously registered databases and folders
To give context to what’s new at 10.8, let’s take a look back at 10.7.1, which introduced a host of new options around data stores and publishing. These new workflows all begin with the ability to create a data store item in your Enterprise portal that represents a folder, database, or cloud store. Data store items provide much of the same functionality as data stores you register in Server Manager, with some added options.
When you create a new data store item (under Add Item as shown below), you register it with one or more federated ArcGIS Server sites.
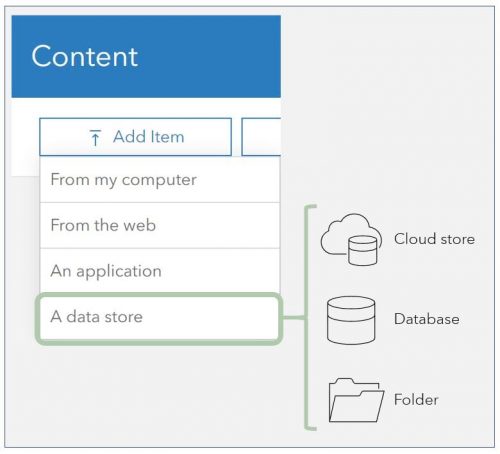
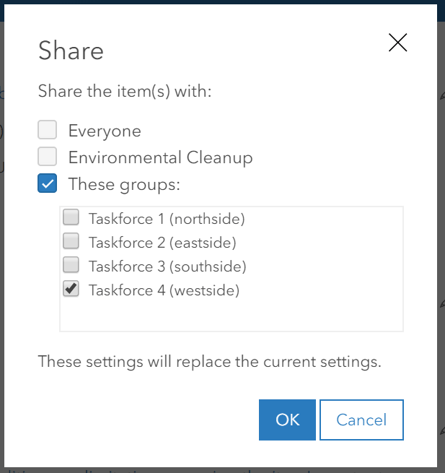
Once a data store item is created, the owner of it can share it with other members of their ArcGIS Enterprise portal, giving them access to publish layers and services from the data. The same sharing options apply to data store items as they do for layers, maps, and other item types:
When you are working with enterprise geodatabases, these new data store items also enable a feature called bulk publishing. Starting at 10.7.1, you can use bulk publishing to publish all feature classes and tables available to your database connection as map image layers (map services) and feature layers (feature services). With a few clicks, you can create tens or hundreds of layers that reference the live data in your database and are ready to use in maps and apps.
So, if all of these workflows existed in the release prior, what’s new at 10.8? At 10.8, you can easily create data store items from folders and databases that have previously been registered through Server Manager.
In other words, say you already registered SQL Server, or another enterprise geodatabase, prior to upgrading to 10.8. You’ve heard about bulk publishing and want to try it out but you know that you need a data store item for that workflow. Rather than unregistering and recreating the connection, there’s an easy way to ‘convert’ it to a data store item, from directly within Server Manager (shown below). This opens the gates to bulk publishing, enabling your organization to use all of that wonderful information in maps and apps. Remember, if you need others to be able to publish that data from ArcMap and ArcGIS Pro, you will need to share your data store item with them. But don’t worry, the workflow will alert you to this.
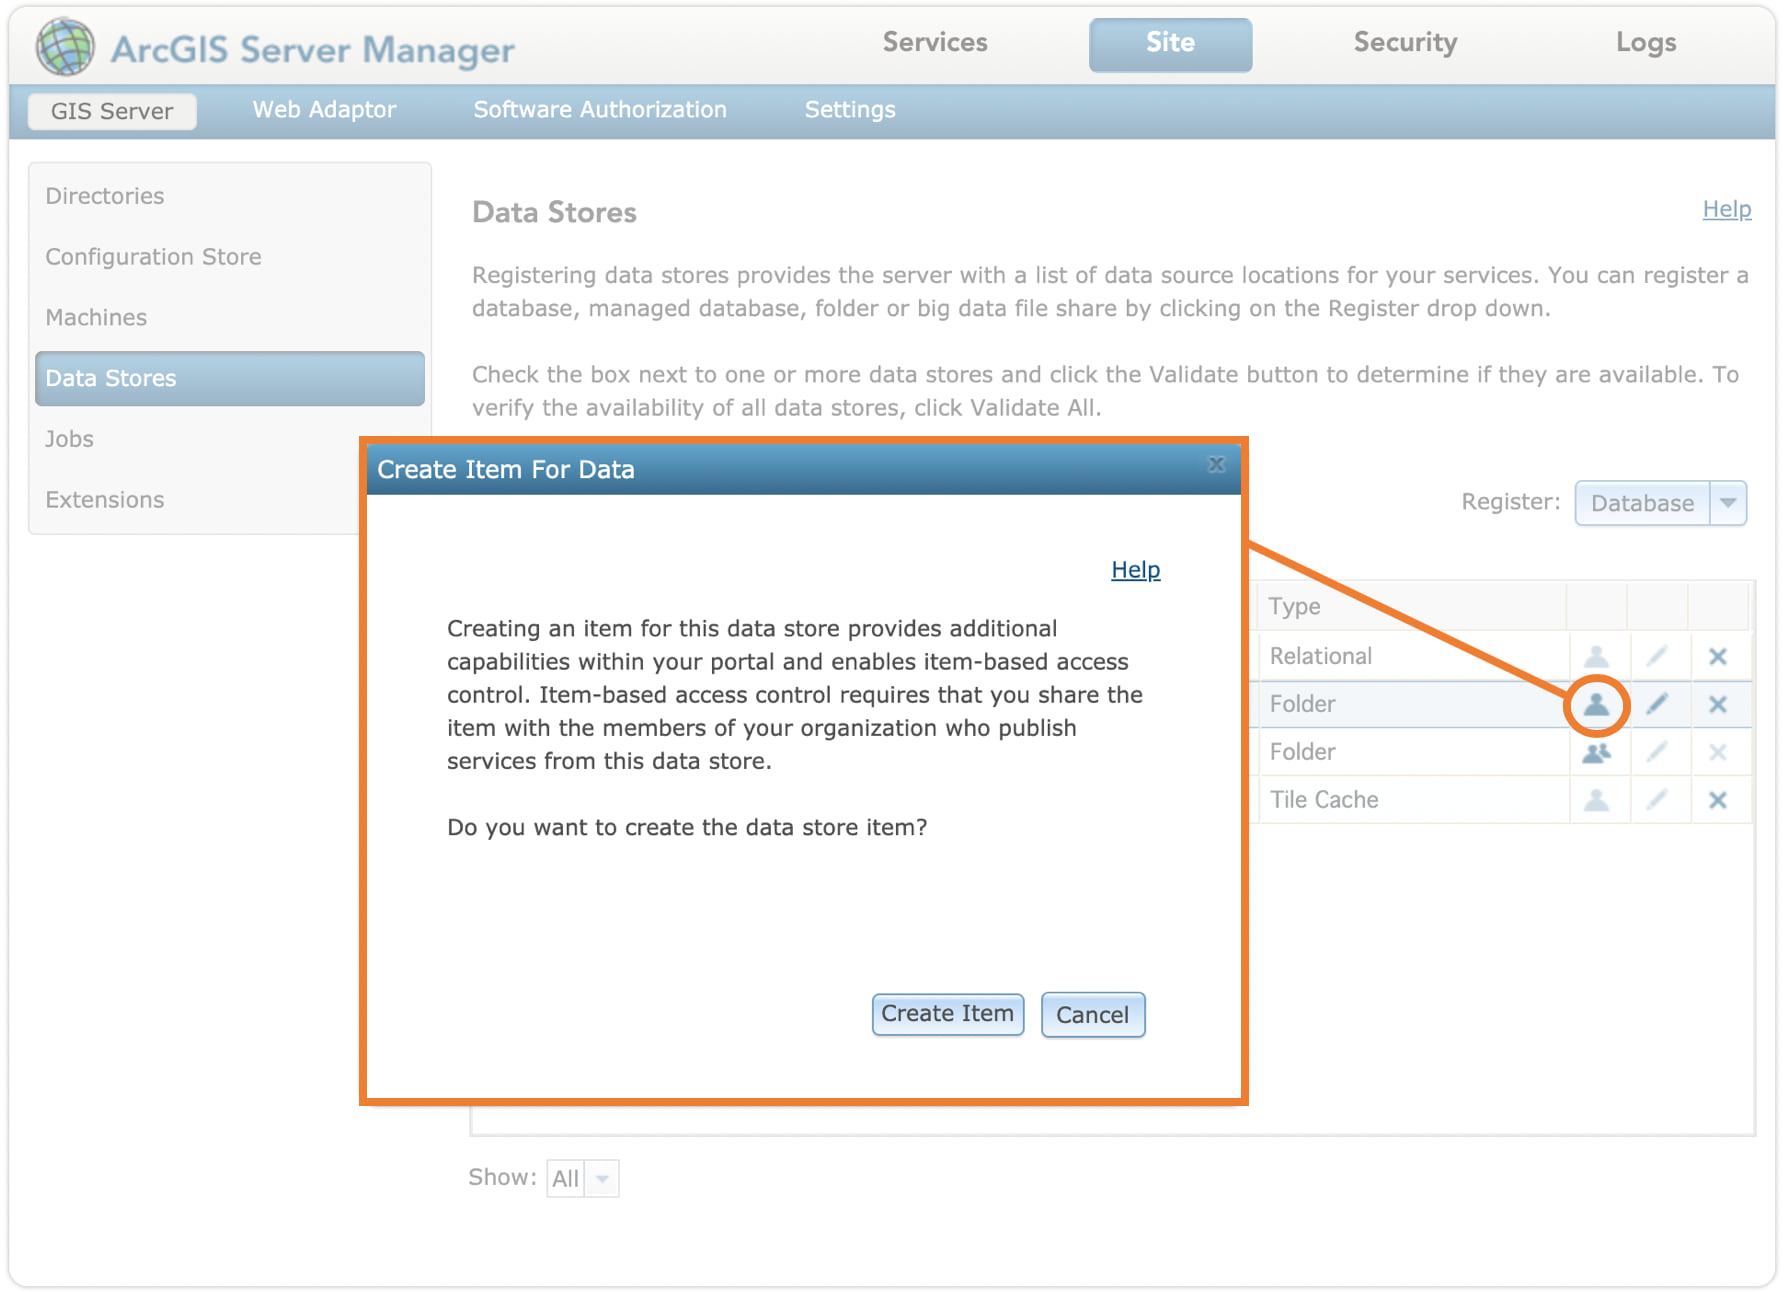
Note: this option is available to built-in Administrators only. See the help topic Create a data store item for an existing registered data store for more information.
2) Provide context about your data using field descriptions and field value types
If you have been looking for a way to provide more context about individual fields in your data, 10.8 has the trick with field descriptions and field value types for hosted feature layers.
Say we have a layer of public transit routes in our city. We’ve provided a summary, description, tags, and categories to help our colleagues understand these routes. This gives good context to the layer as a whole, but we might want to go further and provide descriptions for fields – maybe there’s a field that uses acronyms, is similar to another field, or could use some clarity in general. We can give our colleagues this understanding using field descriptions and field value types.
Here’s an example of how both can be applied to our transit layer within a field called “M_F”:
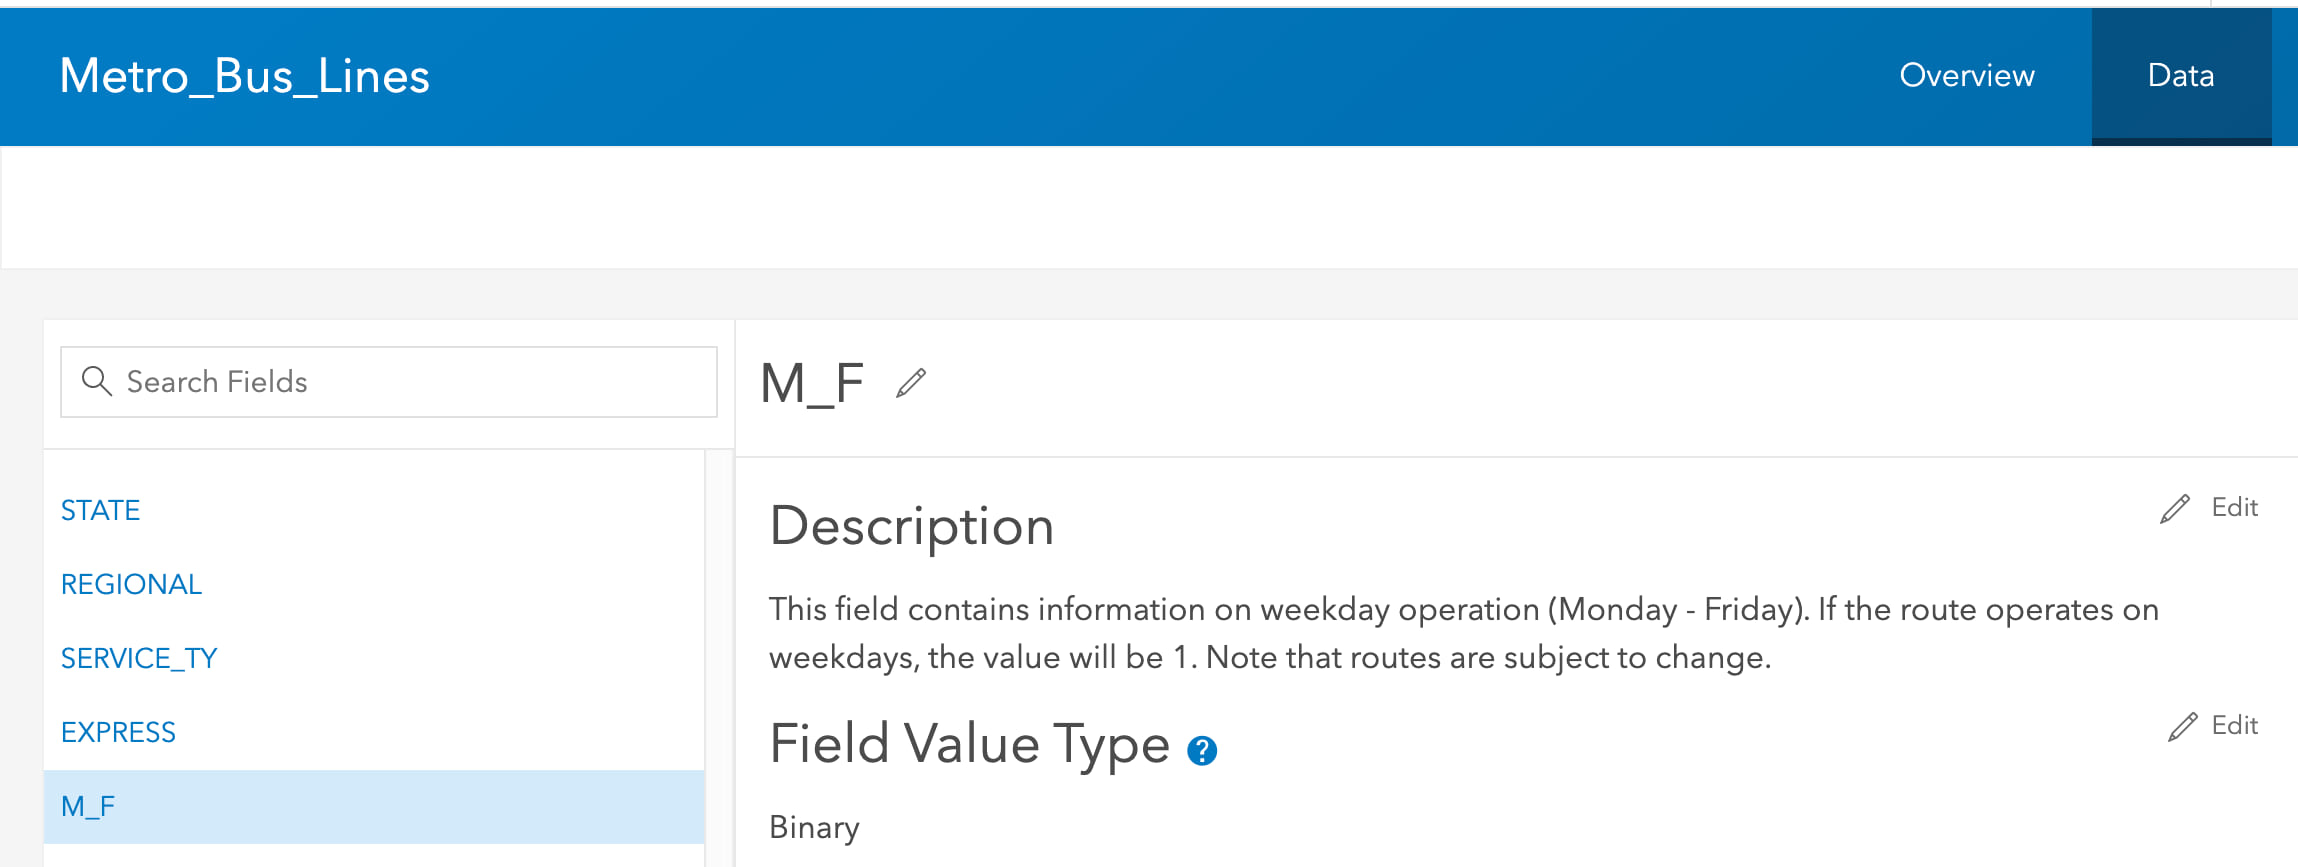
Using a field description, we can include additional information that may not be clear from just the field name.
Field value types are useful when using smart mapping in your web maps. For example, in the transit route layer, another binary field is titled ADA for Americans with Disabilities Act and accepts values of 1 or 0. 1 means the station is ADA accessible, and 0 means it is not.
Referencing field value types, smart mapping would first suggest symbolizing based on types – unique symbols.
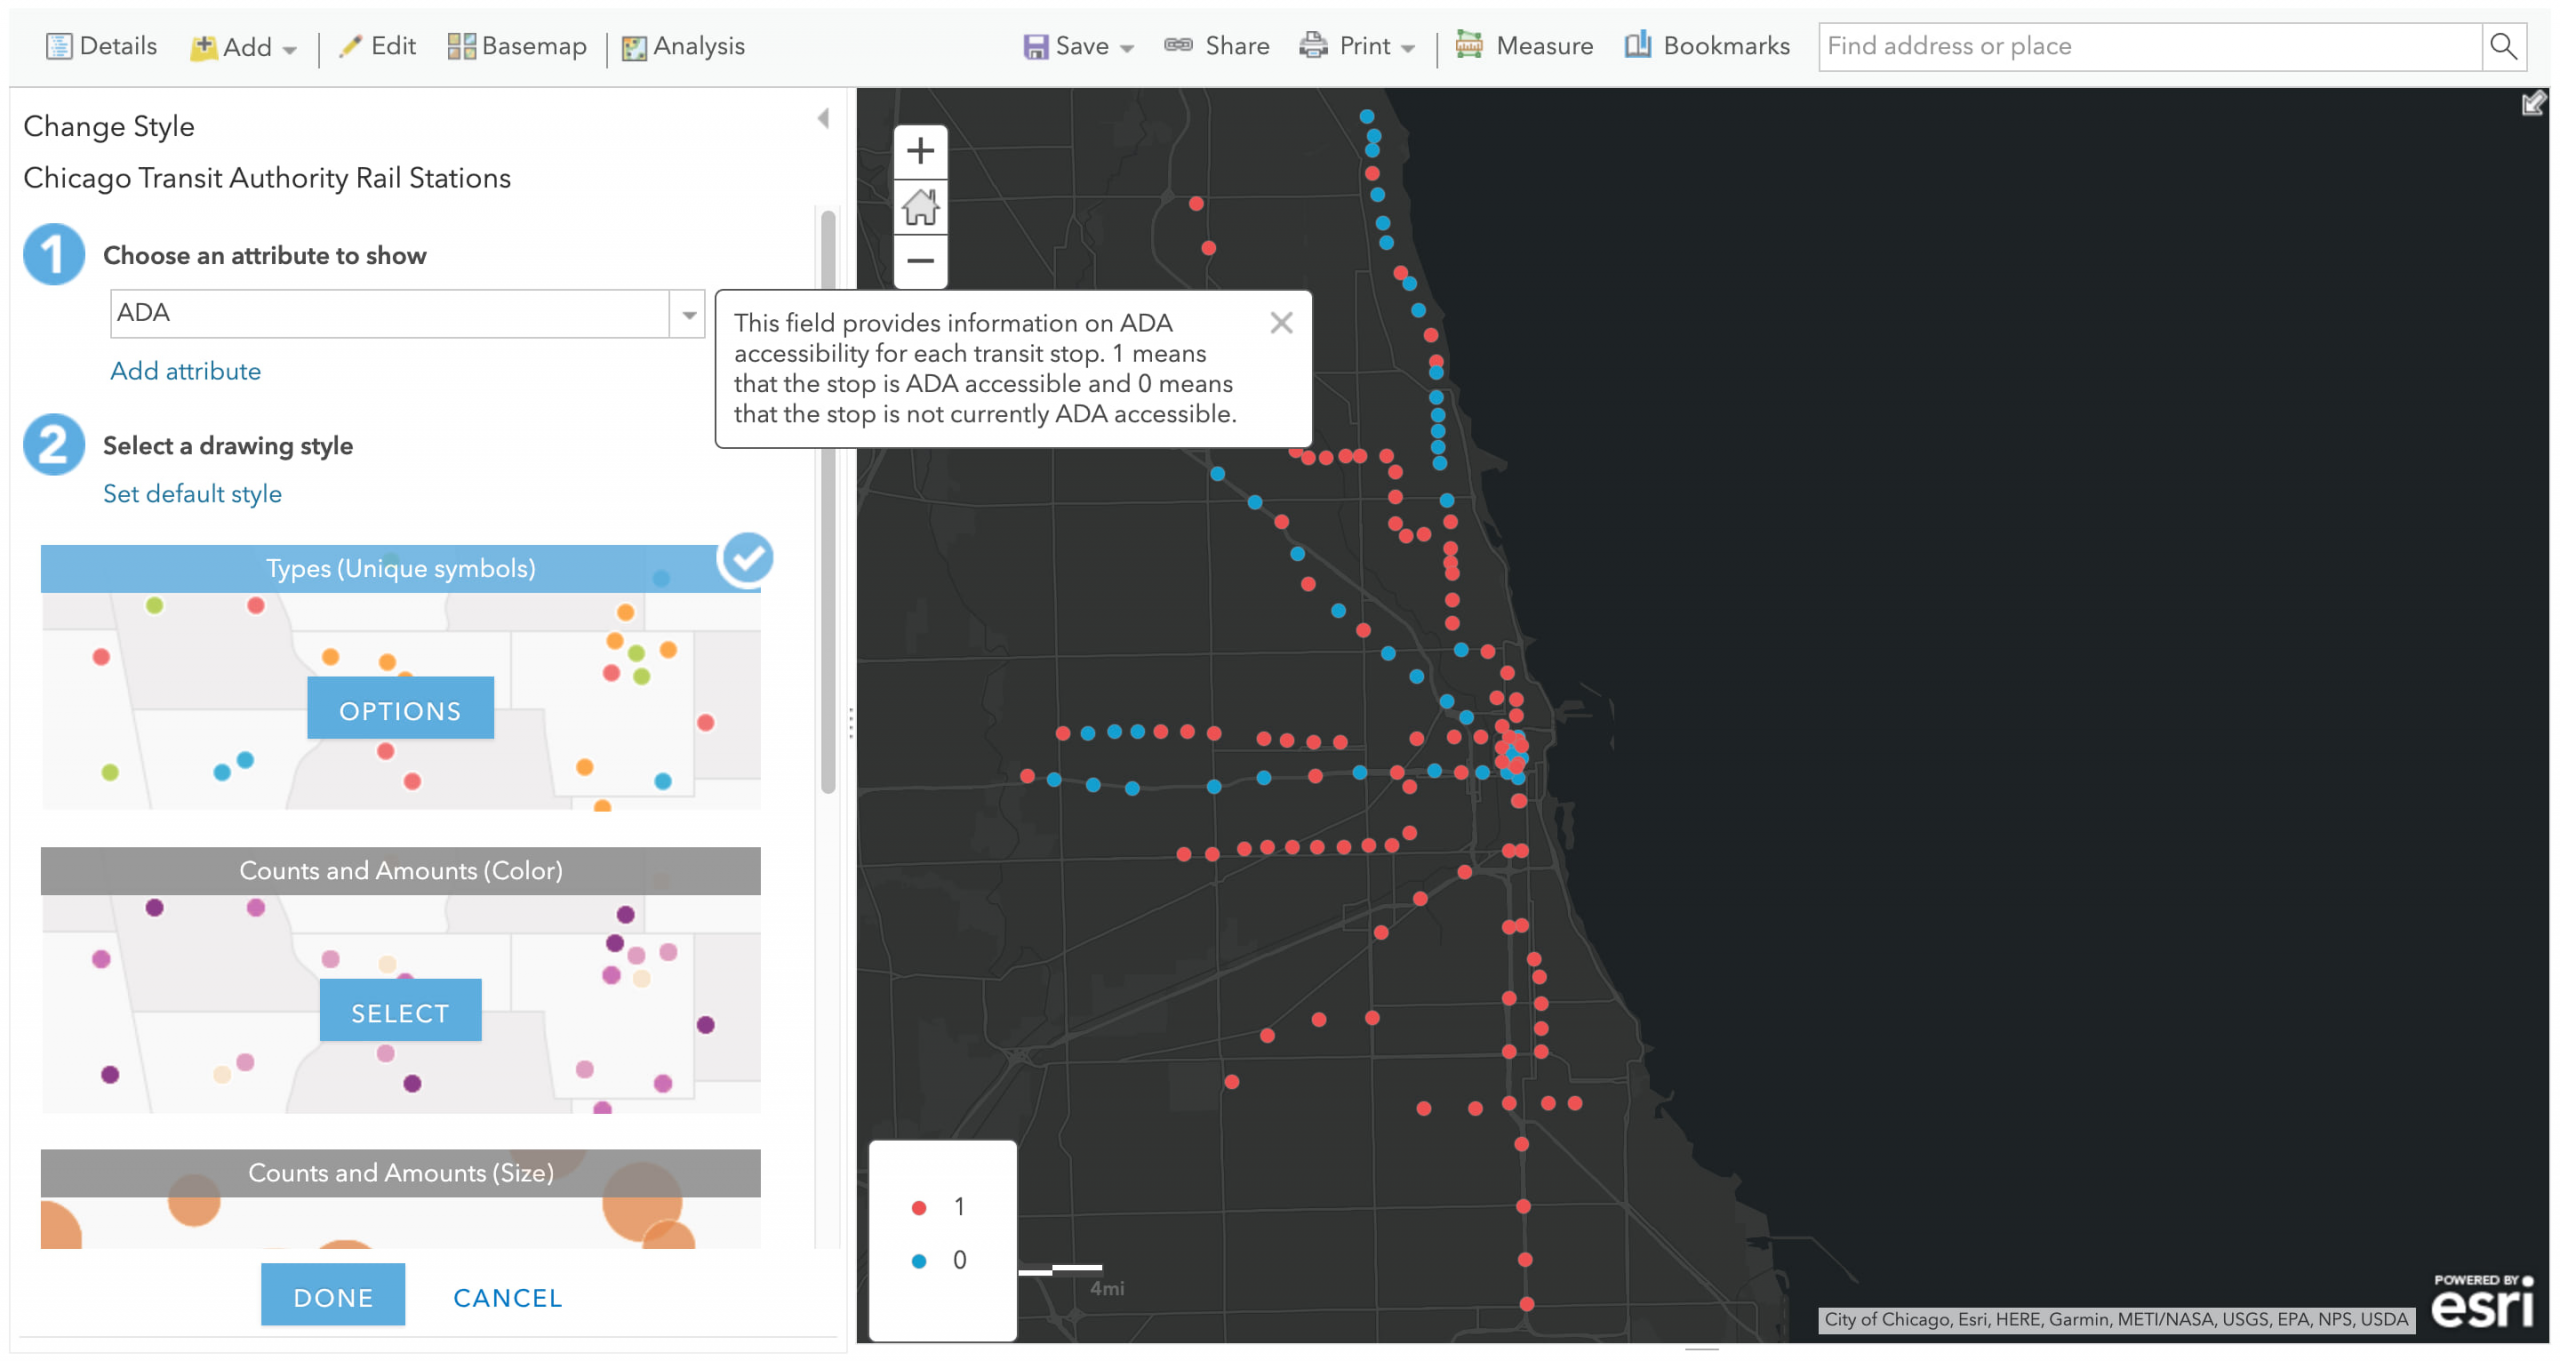
This makes the most sense for this data since the field is either yes or no. Notice you can even select next to the field and see the field description!
Ready to get started with field descriptions and value types? Navigate to your hosted feature layer item > select the data tab > select the Fields button > click the link to your field > add your details.
See the help topic Describe attribute fields for more information.
3) Work with auto-calculated length and area values
At 10.8, hosted feature layers now include system-generated fields for shape length and shape area. This applies to line (length) and polygon (length and area) features.
These two fields are called:
- SHAPE__Length
- SHAPE__Area
These fields can be very helpful when visualizing features on a map. For example, I have a dataset of historical landmarks in Washington D.C. I can symbolize based on the SHAPE__Area field and easily get a quick look at which landmarks are larger or smaller in size. I didn’t have to run any separate calculations for the area field since it was automatically generated by the system.
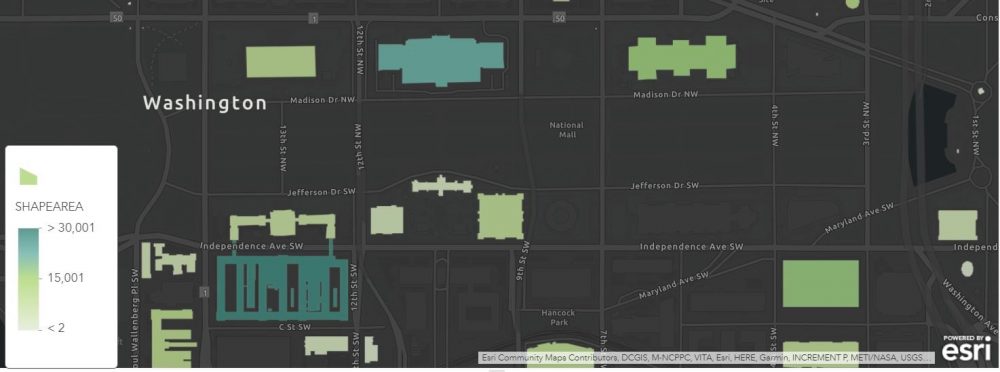
These two fields are also helpful for filtering your data (for example, over or under a certain area) and can be used to calculate new fields as needed.
4) Publish hosted map image layers
Next up is the ability to publish a hosted map image layer. It’s ok if your first reaction is “publish a what?” This is a new concept!
You can think of hosted map image layers as similar to map image layers (map services), but hosted. What do we mean by hosted? Here we simply mean that the source data is stored – hosted – by ArcGIS Enterprise, rather than your own database or folder. In the case of hosted map image layers, the source data is a hosted feature layer with data stored in the ArcGIS Data Store (relational or spatiotemporal big data store).
So when would I want to publish a hosted map image layer? This layer type is helpful when you are looking for:
- Custom and/or complex symbology not available through hosted feature layers
- Server-side rendering, which can result in fast drawing times
As an example, say I ran an analysis and my result was a relatively large hosted feature layer. I could publish a hosted map image layer from it so other users can explore my analysis results in a fast rendering, read-only fashion. I could also use the expansive symbology options in ArcGIS Pro to customize the style of my data.
Hosted map image layers are dependent on their source hosted feature layer. Any updates made to the feature layer will reflect in the map image layer automatically.
Ready to get started? You’ll need to start with a hosted feature layer and then use ArcGIS Pro to publish your hosted map image layer. See the help topic Data and publishing in ArcGIS Enterprise > Publish a hosted map image layer from a hosted feature layer for more information.
5) Additional updates
Last but not least is an aggregate of additional new features! Be sure to check out the many more enhancements and features for data and publishing at 10.8:
- Enhanced workflows when replacing vector tile layers: Manage hosted tile layers > Replace a hosted vector tile layer
- The ability to draw a polygon as the map area for offline web maps: Take web maps offline > Create a map area
- Scheduled map area updates: Take web maps offline > Manage map areas
- Compatible services published to brand new ArcGIS Server sites using 10.8 will use shared instances by default: Configure service instance settings > Configure the shared instance pool
- New protocol buffer (pbf) on hosted feature layers, which reduces the payload size, resulting in faster drawing times. Pbf has been available since 10.7 for non-hosted layers.
With 10.8, you can bring these workflows to your organization. Enjoy!

I really like the auto calculated length and area values. Any plans to do a similar thing for points and automatically calculate the x/y values when they’re created or edited (ideally we’d like in the current coordinate system of the map rather than just lat/long)?
Hi Gareth!
There is an option if you are using ArcGIS Pro by way of the Calculate Geometry and Add Geometry Attributes tools:
https://pro.arcgis.com/en/pro-app/tool-reference/data-management/calculate-geometry-attributes.htm
https://pro.arcgis.com/en/pro-app/tool-reference/data-management/add-geometry-attributes.htm
For calculating X and Y from the Enterprise portal – you might want to raise it over on the GeoNet Ideas site!