
Response caching is a backend server mechanism that stores the results of a query so that when the same query is made again, the server can quickly provide the stored answer instead of processing the request again. This significantly increases the performance and scalability, as the server doesn’t have to process the same request repeatedly using additional resources. It can respond much quicker by reusing the stored responses. This is ideal for read-only data or data that changes infrequently.
For example, if a map application that stores read-only or infrequently changing web feature layers – such as park or roads data – requests the same features to display, response caching ensures these features are quickly retrieved from the cache, making the map load faster for users.

With ArcGIS Enterprise, you will need version 11.0 or later to enable response caching on your hosted feature services. Currently it is not supported with feature services that are referencing a registered data store.
Note: For ArcGIS Online, this capability is automatically enabled on all hosted feature services.
This workflow example demonstrates enabling response caching on a hosted feature service layer. The hosted feature services were already published to ArcGIS Enterprise.

The hosted feature service contains two layers: parcels and HOA boundaries in Dallas, Texas.
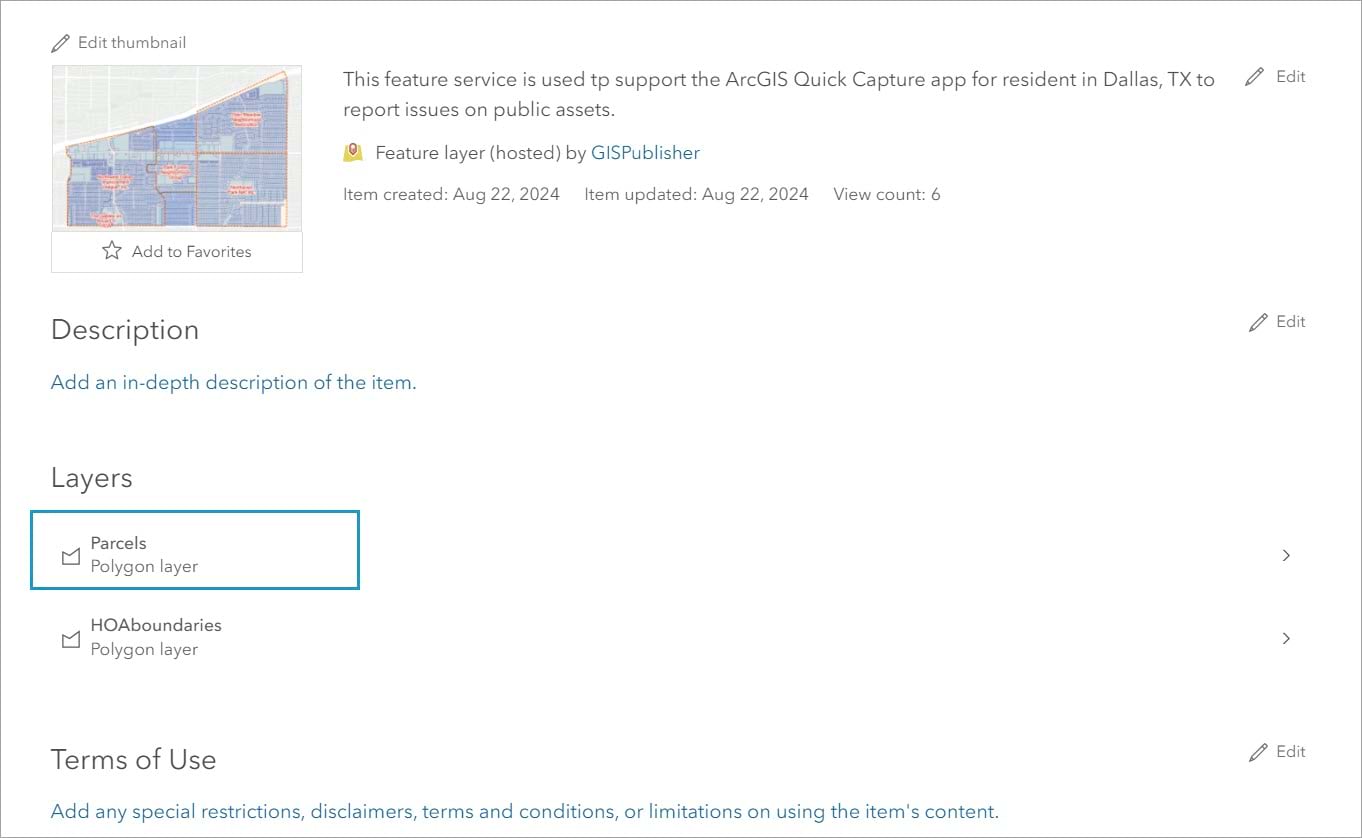
The Parcels feature layer is often queried by multiple departments within the organization to retrieve parcel and owner information. To improve the web app performance, response caching will be enabled on this layer.
The first step is to create the object store.
Create an object store
To enable response caching, you must configure the object store in ArcGIS Data Store. The object store is used for storing the responses and maintaining the last edit date metadata.
To create an object store, you can either use the ArcGIS Data Store configuration wizard or the configuredatastore utility. This example uses the ArcGIS Data Store configuration wizard.
1.Open the wizard from the data store computer’s shortcut menu or type the URL in a browser.
The Data Store Configuration wizard URL has the following format: https://datastoremachine.domain.com:2443/arcgis/datastore.
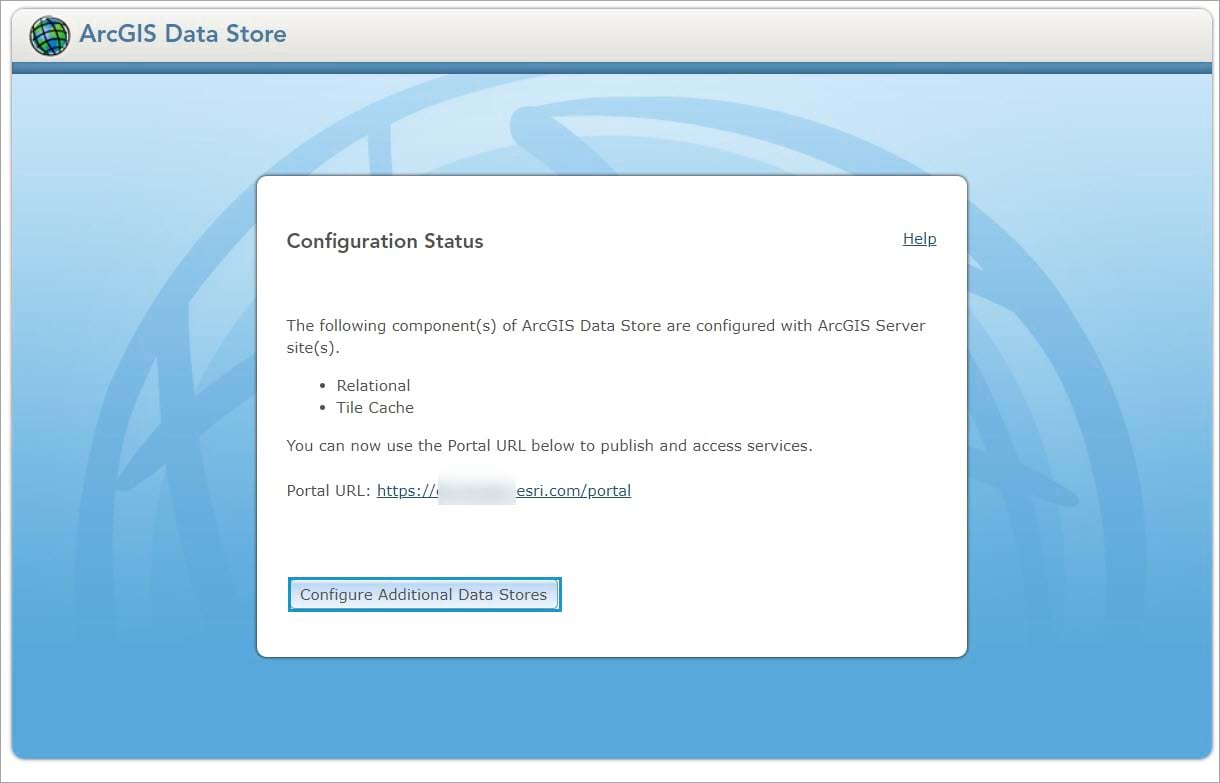
2. Click the Configure Additional Data Stores. If you already have an object store configuration, skip this part and jump to the enabling response caching section.
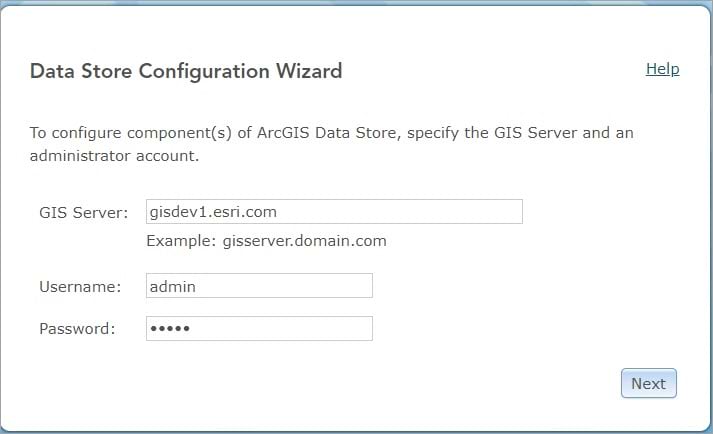
3. Provide the machine name using the gisserver.domain.com format. Then type the username and password of an ArcGIS Server administrator for that site.
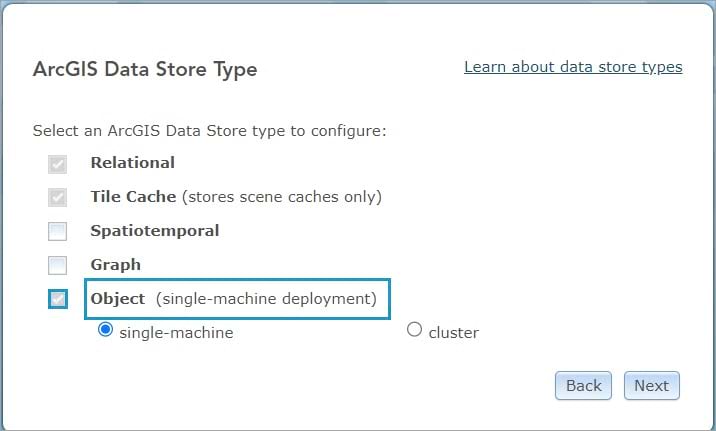
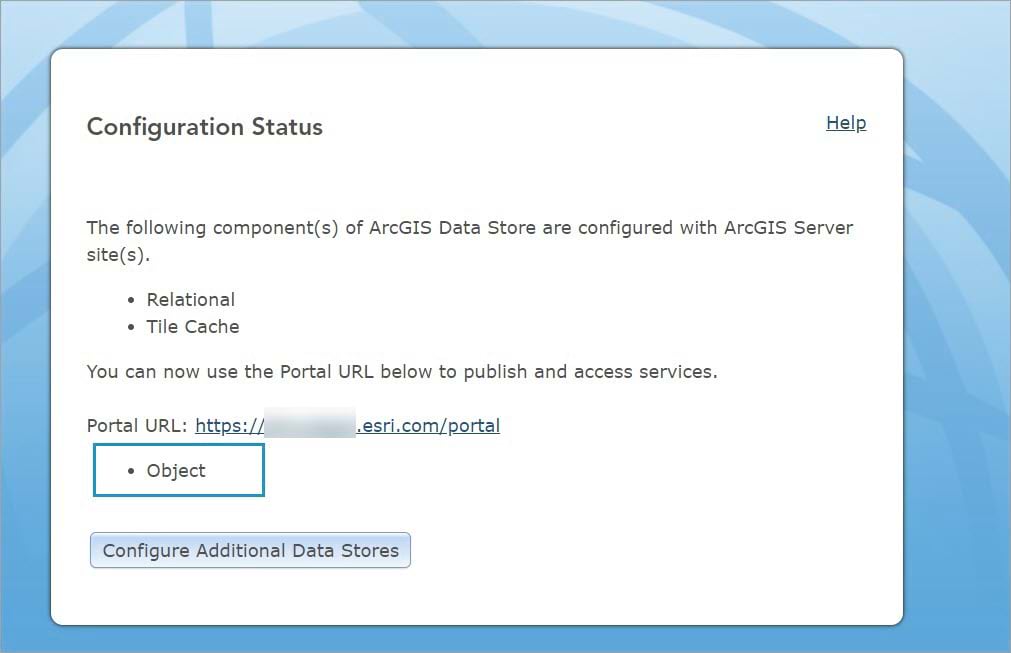
4. Next, select Object as the data store type you want to create. Then click Next and click Finish.
When you are finished, the object store is listed as an existing component of ArcGIS Data Store configured with your ArcGIS Service site.
5. Once you configured the object store, restart ArcGIS Server to allow hosted feature services to access it.
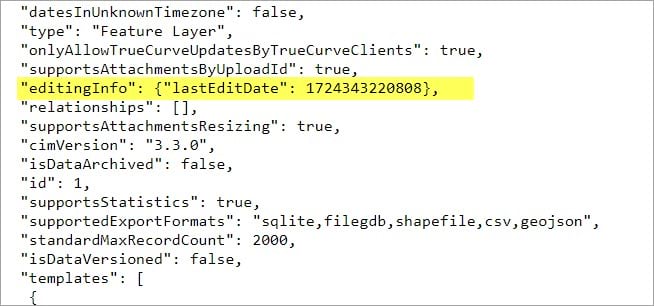
Once restarted, you can confirm the hosted feature service is using the object store by assessing the “editingInfo”: (“lastEditDate”: <dateValue>) layer property.
6. Access the REST endpoint of the hosted feature service.
In this example, the feature service is Dallas Parcels.
7. Click an individual layer that you want to enable response caching to.
Note: You can access the service URL from your organization portal layer description.

8. On the layer page, click JSON to see the layer details.

9. On the page, use the search shortcut and type editingInfo.
You will see the editingInfo property, which indicates the last time edits were made on that individual layer. The date of the last edit is an epoch date in miliseconds.
Note: You can use an online converter to transform epoch date to GMT date.
Now that the object store is configured all the newly published hosted feature services will have this property.
Next, enable response caching on the Parcels web feature layer.
Enabling response caching
The updateDefinition operation allows you to update a definition property in a feature service layer. In this example, you will enable response caching on individual hosted feature services layer. This granular level allows you to control which layers will write response cache content to the object store.
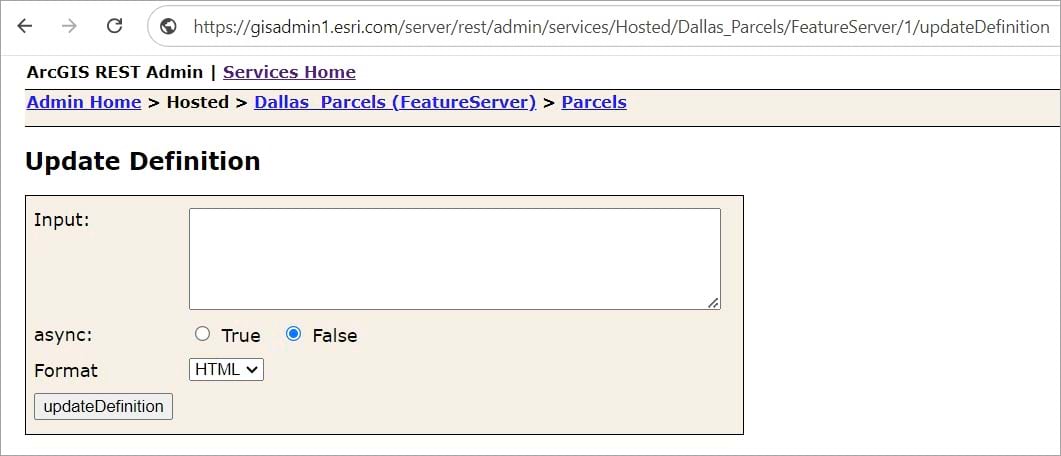
1.To use the updateDefinition operation, access the layer admin resource using the following URL format:
https://gisdev1.esri.com/server/rest/admin/services/Hosted/Dallas_Parcels/FeatureServer/1/updateDefinition
2. In the Input box, set the layer cache to true and add an expiration date to define the number of days a cache will be stored before it is removed.
In this example, the response cache is set to expire after one day.
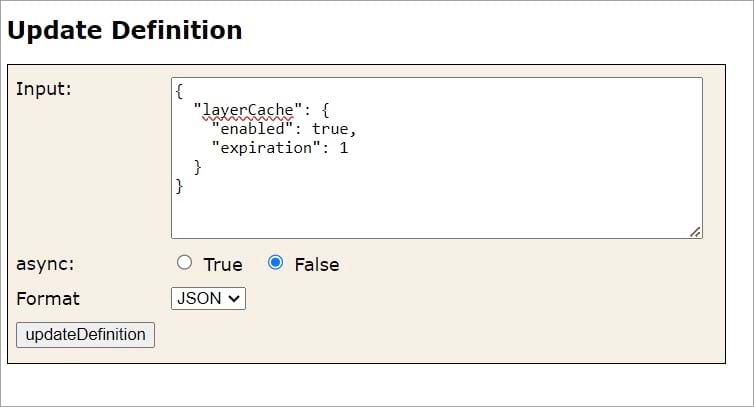
Once a cache is removed, a new response cache is created the next time the service is queried. The updateDefinition operation can be used to change or remove the expiration. An expiration value of 0 means the cache will never expire. The value for the expiration property must be an integer.
3. Click updateDefinition.
A JSON response confirms the operation was successful.

Once the operation is successful, you can confirm the change on the layer’s JSON page by checking for the “supportsQueryWithCacheHint” layer property.
Refresh the Parcels JSON layer page, and using the search shortcut, type supportsQueryWithCachHint.
Under advancedQueryCapabilities, you will see the supportsQueryWithCachHint property set to true. This indicates that layer queries support the cacheHint parameter and it has been enabled for response caching.

You can also disable response caching on an individual hosted feature service layer, using the same updateDefinition operation. But this time, set the enabled property to false.

This disables the response caching and sets the supportsQuerywithCachHint property back to false.
You can now use response caching in your workflows to improve performance and scalability on your hosted web feature layers in ArcGIS Enterprise.
For more content on feature services, check out the Geodatabase Resource Hub.
Commenting is not enabled for this article.