NOTE: This blog assumes that you have already installed and configured the following: ArcGIS Server 10.9 and Conda.
As part of the ArcGIS Server on Linux experience, we offer utilization of the Python 3 runtime. This is achieved by leveraging the power of the popular, open-source package/environment management system known as Conda. When working with ArcGIS Python functionality, this greatly comes in handy for all of your GIS workflows.
In this Monthly Linux Tip, we will look at setting up the Python 3 runtime in an ArcGIS Server 10.9 environment. Please see the table of contents below:
- What is the Python 3 Runtime?
- Download arcgis-server-py3 package
1. What is the Python 3 Runtime?
The Python 3 Runtime allows ArcPy scripts and tools to be ran independently of ArcGIS Server. This comes in handy if your enterprise is interested in ArcGIS Python functionality exclusively, rather than all of ArcGIS Server’s functionalities.
Older versions of the ArcGIS Enterprise software only supported the Python 2.7 runtime. This was problematic as there were limitations that tightened the scope of the runtime’s capabilities. However, with the Python 3 runtime, there are now more broadened capabilities, as indicated in the Python 3 Runtime readme file.
2. Download arcgis-server-py3 package
Below in my environment, we can see that I have already configured Conda:

(If you do not already have Conda installed, please refer to the Anaconda website to setup before proceeding)
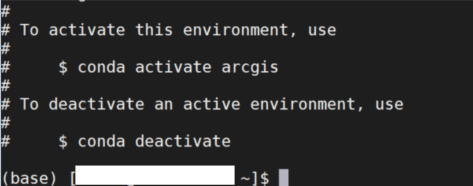
Once you have successfully configured Conda on your environment, you’re ready to install the arcgis-server-py3 package. This package is what enables ArcGIS Python functionality in your unique Conda environment. Before moving forward, I’ll want to make sure I create a Conda environment, which I will make below:


NOTE: The second screenshot is the end of the output of the prior screenshot.
As noted, I am specifying python=3.7 in this environment as I plan to use the Python 3 runtime. Additionally, we will need to set environmental variable ARCGISHOME. As the name suggests, this will allow our Conda environment to recognize our ArcGIS Server installation path. Without setting this, we will not be able to properly download the arcgis-server-py3 package. To avoid any issues, let’s set it now:

Once done, you can now activate the newly created Conda environment:

All good to go! Now all that is left is to download the arcgis-server-py3 package, which is done below:


NOTE: The second screenshot is the end of the output of the prior screenshot.
And that is all there is to it! We can verify our installation went smoothly by doing the following:

Additionally, you can directly invoke Python and attempt to import arcpy as seen below:

As we can see, this was successful, and we can now utilize the Python 3 Runtime!
That is all for this month, please let me know in the comments if this was beneficial. Also, as always, let me know what you would like to see next. Thank you for reading this Monthly Linux Tip!

Article Discussion: