The ArcGIS API for Python is a Python library that you can use to script and automate GIS workflows in ArcGIS Online and ArcGIS Enterprise. These workflows include administering your Web GIS, managing your organization’s data and content, visualizing GIS data and making web maps, and performing spatial analysis and data science.
While we recommend using the ArcGIS API for Python in ArcGIS Notebooks for consistency and compatibility reasons, we know that some of our customers want to install it via package managers and use it in Jupyter Notebooks, Visual Studio Code, PyCharm, Spyder, or whatever other IDE they prefer.
Recently, we’ve heard from several customers who are interested in installing and using the ArcGIS API for Python in Databricks Notebooks. The following sections walk you through the steps for getting this up and running in Microsoft Azure.
What is Databricks?
Databricks is a cloud-based, scalable lakehouse platform that enables organizations to use their data, analytics, and AI. It seamlessly integrates with the storage and security in your cloud account and deploys and manages cloud infrastructure on your behalf.
One of the key features of Databricks is their Notebook offering. These notebooks are fully managed (e.g. “hosted”) and come with a runtime containing pre-installed Python libraries. You also have the option to customize these runtimes by installing third-party or custom Python libraries, which in our case will be the ArcGIS API for Python.
Steps to install and use ArcGIS API for Python in Microsoft Azure Databricks
Prerequisites
- An active subscription to Microsoft Azure.
- A Databricks account. If you do not have one, you can create one by starting a Databricks free trial.
- A Databricks workspace. You can use these steps to create one, then open it a web browser.
- A Databricks compute resource (e.g. a “cluster”)
1. Install the ArcGIS API for Python
There are two primary ways to install Python libraries in Databricks: Compute-scoped libraries and notebook-scoped libraries.
Compute-scoped libraries are installed at the Databricks cluster-level, are available to all notebooks and jobs running on that cluster, and persist across the cluster even after it is terminated. Notebook-scoped libraries are installed at the notebook-level, and are available only in that notebook during the notebook session. They are not available to other notebooks running on the cluster, and do not persist within a notebook after the session has been terminated.
1a. Compute-scoped library installation steps
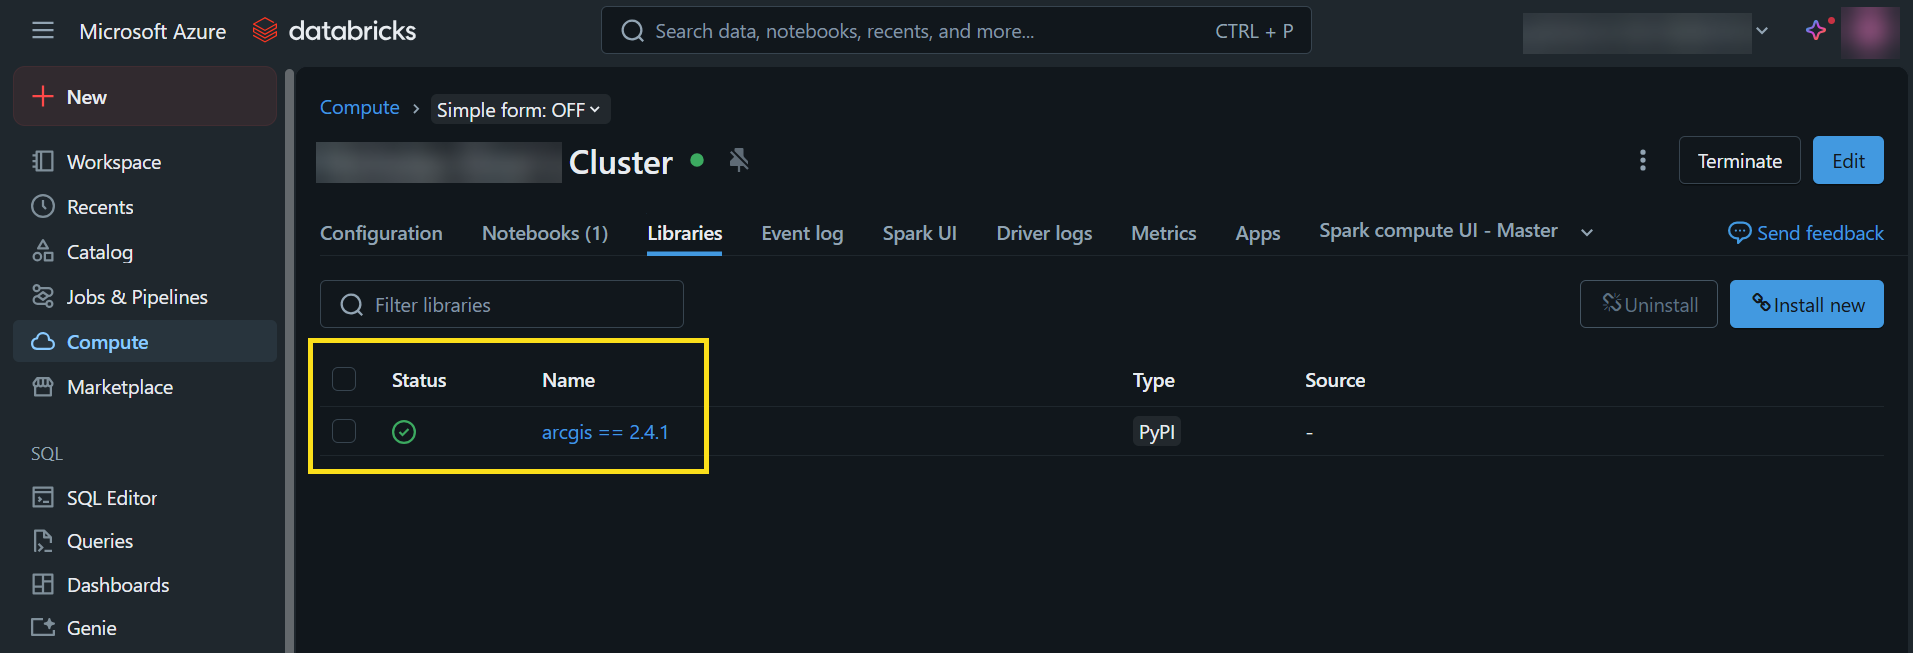
- From the Compute section of the workspace, click Libraries.
- Click Install new.

- In the Library Source button list, choose PyPI.
- Under Package, enter the specific version of the Python package you want to install. In our case, we’ll enter
arcgis == 2.4.1. - Click Install.
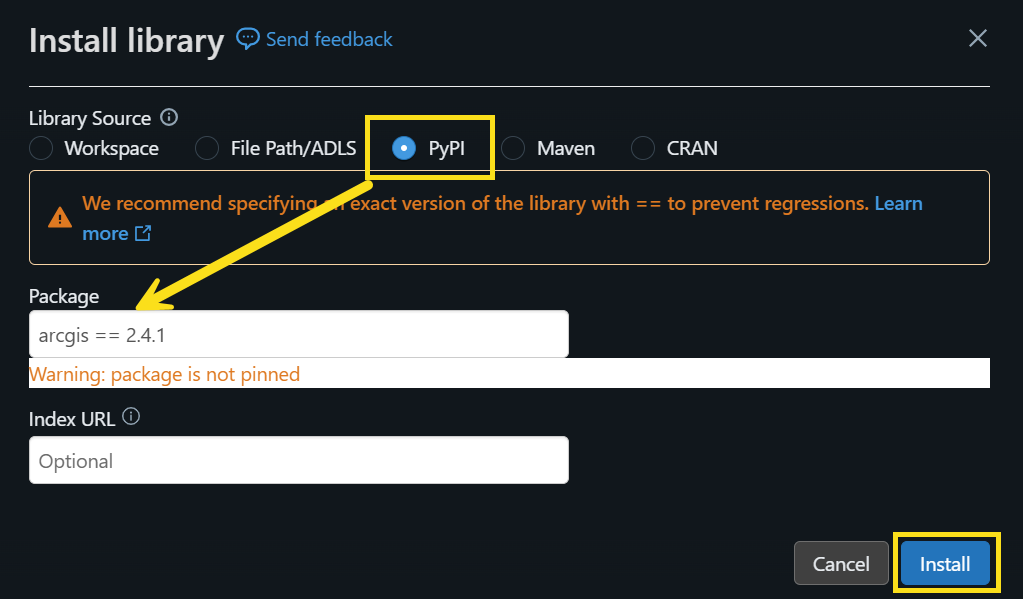
Once you see the green check under Status, you are ready to use the ArcGIS API for Python in any notebook that you attach to this cluster.
1b. Creating a notebook in Databricks
- To create a notebook in Databricks, click the Workspace tab on the left menu.
- Click the Create dropdown on the top right corner, and click Notebook.

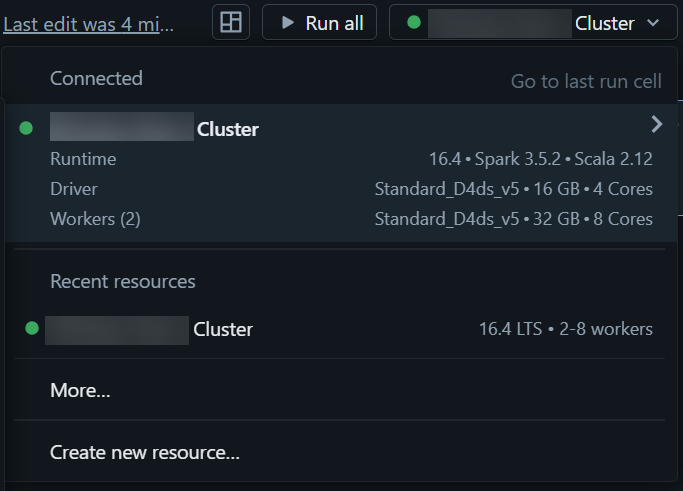
- Click the Connect dropdown on the top right corner and select the cluster to configure the notebook runtime to use the cluster configured with the ArcGIS API for Python.
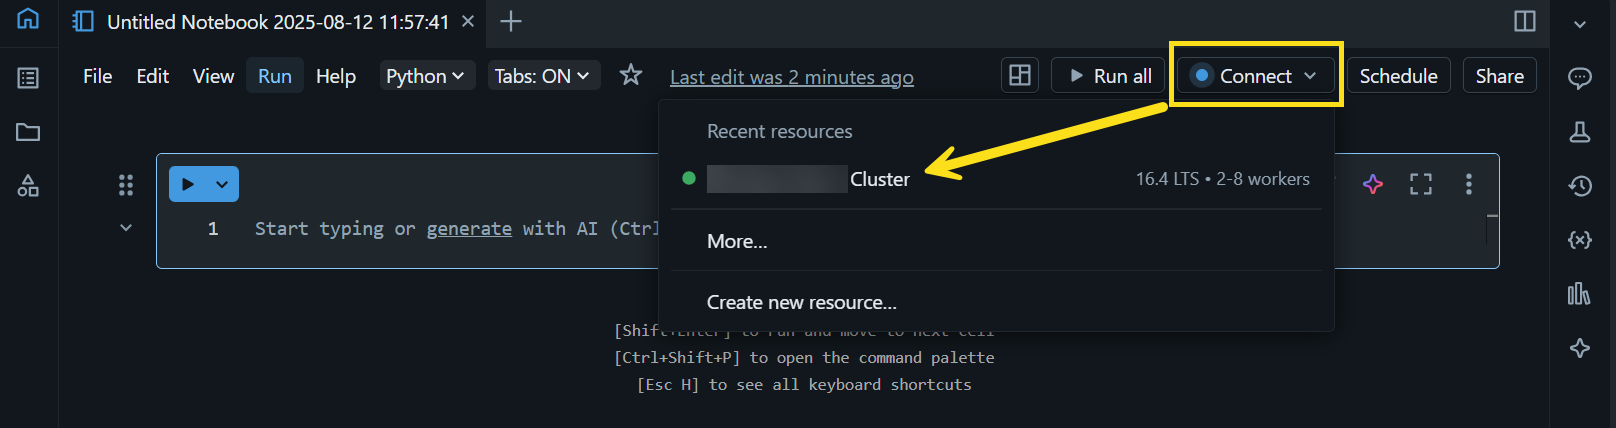
This may take a few moments. When the cluster is attached, the cluster name will appear as shown below.
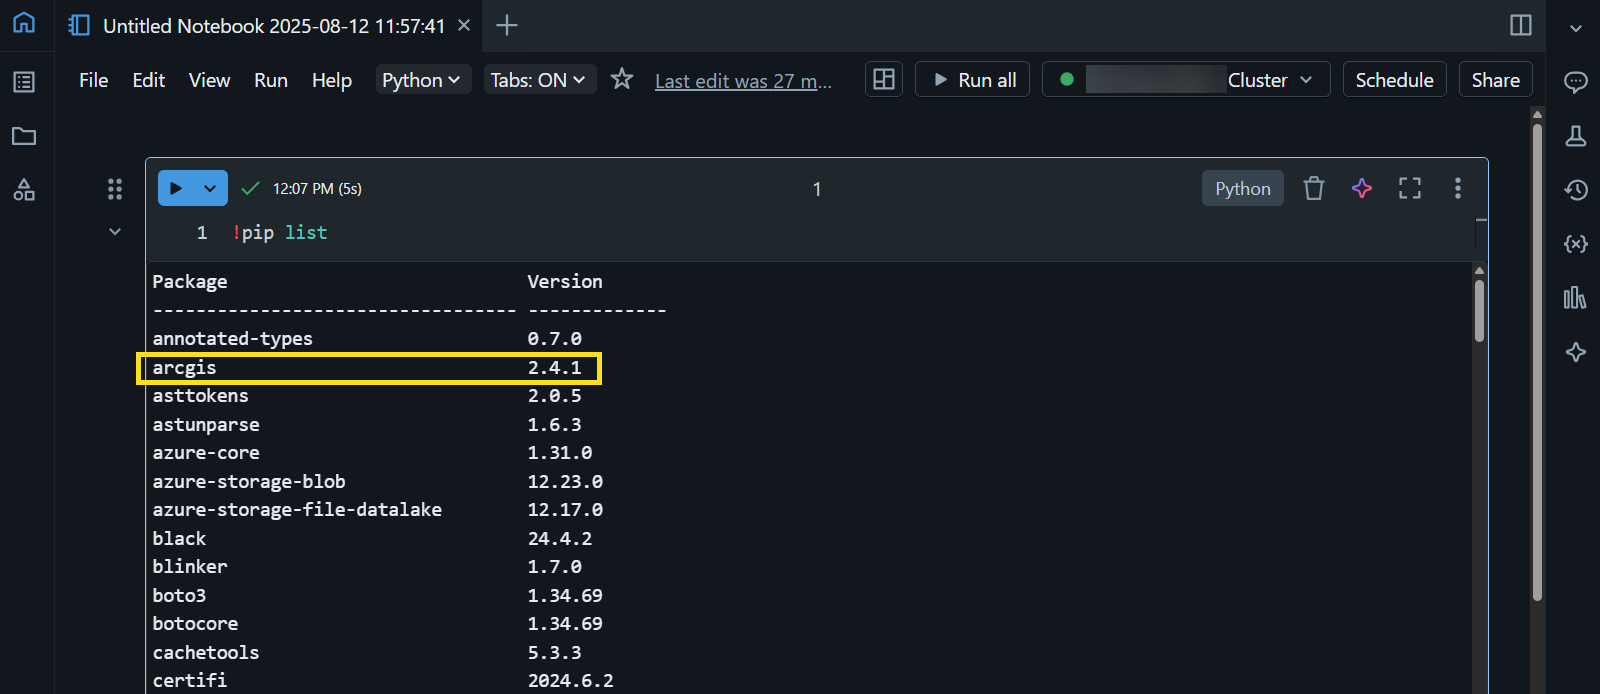
- In a notebook cell, type the command
!pip listto view the list of installed Python packages in the notebook runtime, and verify that the ArcGIS API for Python is one of them.
1c. Notebook-scoped library installation steps
- If necessary, follow the steps in the previous Section 1b to create a new notebook and attach it to a cluster.
- In a notebook cell, type
!pip install arcgis==2.4.1then run the cell.

- In a new notebook cell, type the command
!pip listto view the list of installed Python packages in the notebook runtime, and verify that the ArcGIS API for Python is one of them.
Now you are ready to connect to your GIS and start using the ArcGIS API for Python. Happy scripting!
2. Use the ArcGIS API for Python in a Databricks Notebook
Among the thousands of ways you can use the ArcGIS API for Python a Databricks notebook, here is one simple workflow for reading a ArcGIS Online layer as a Pandas DataFrame. The high-level steps include:
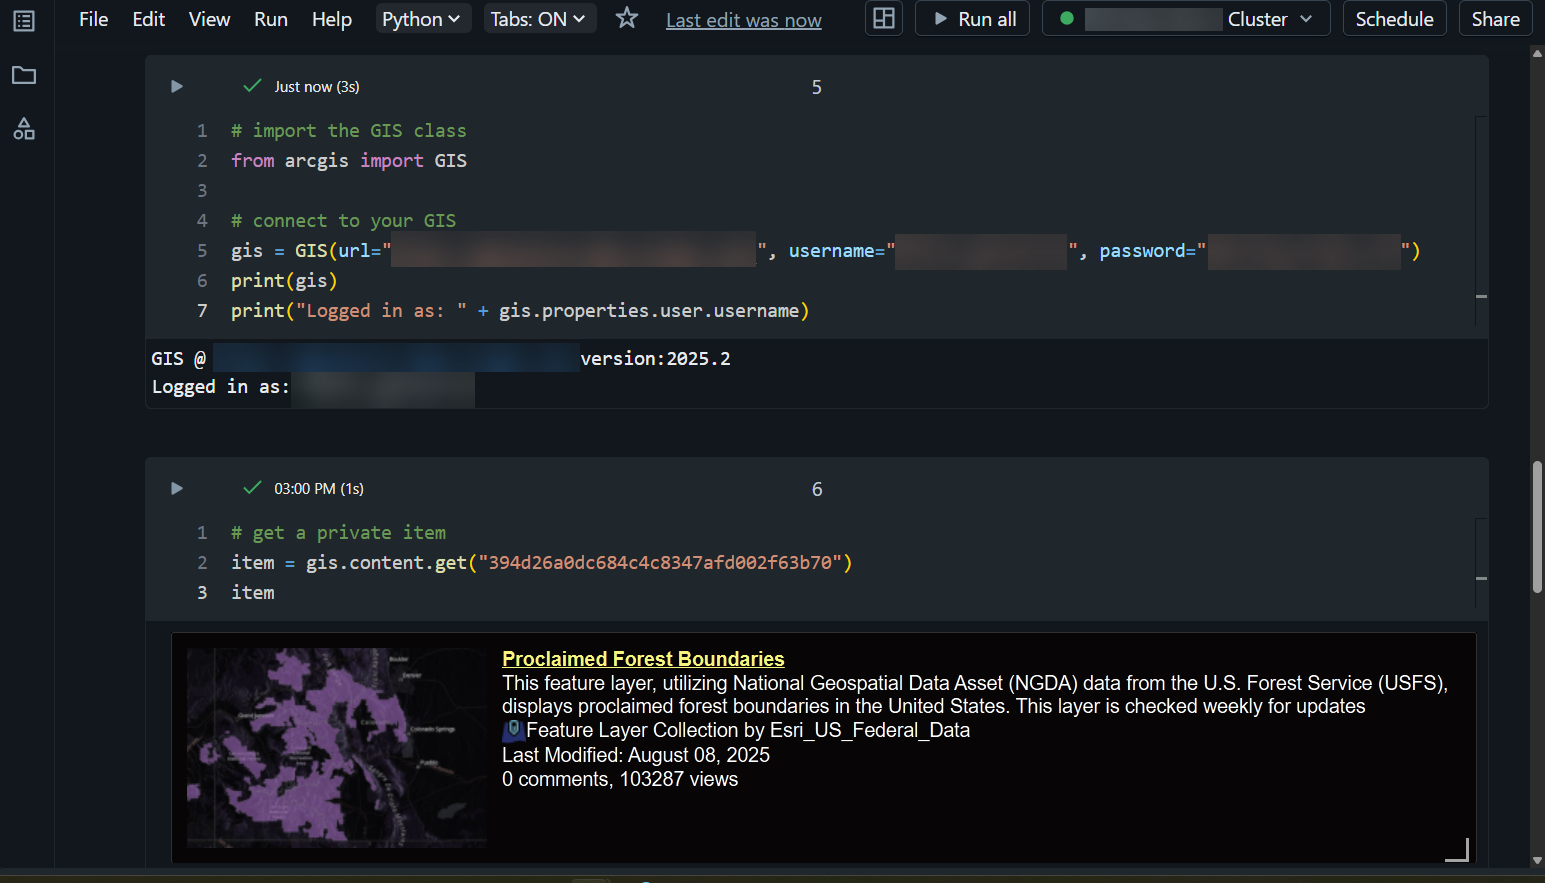
- Importing the GIS class
- Connecting to your ArcGIS Online organization
- Obtaining the feature layer
- Converting it to a Spatially Enabled DataFrame
- Running some basic Pandas functions on the DataFrame
- Publishing a cleaned/engineered version of the dataset back to ArcGIS Online
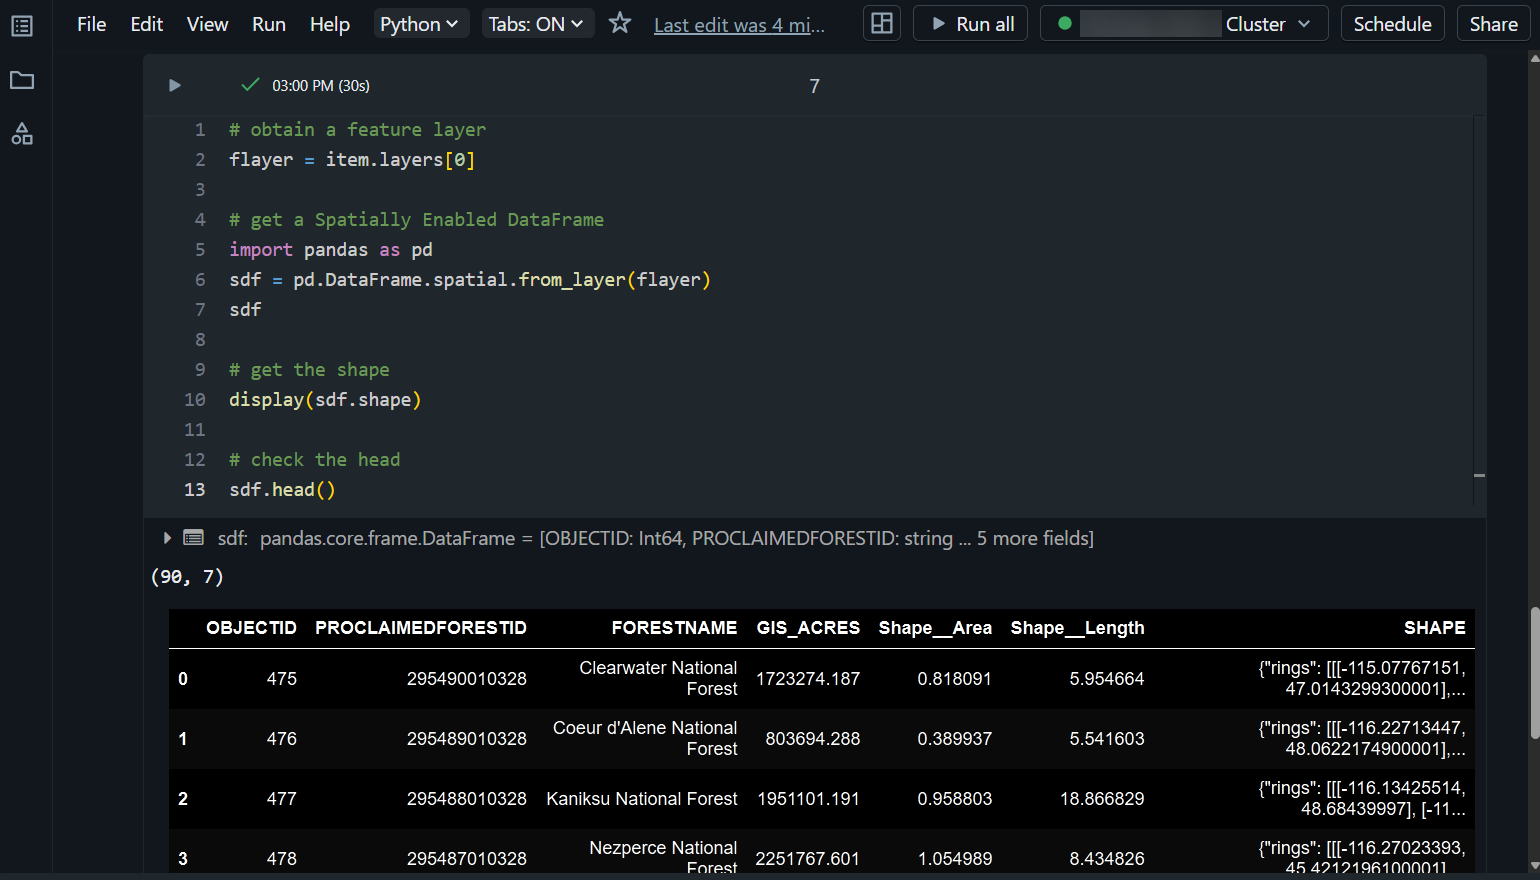
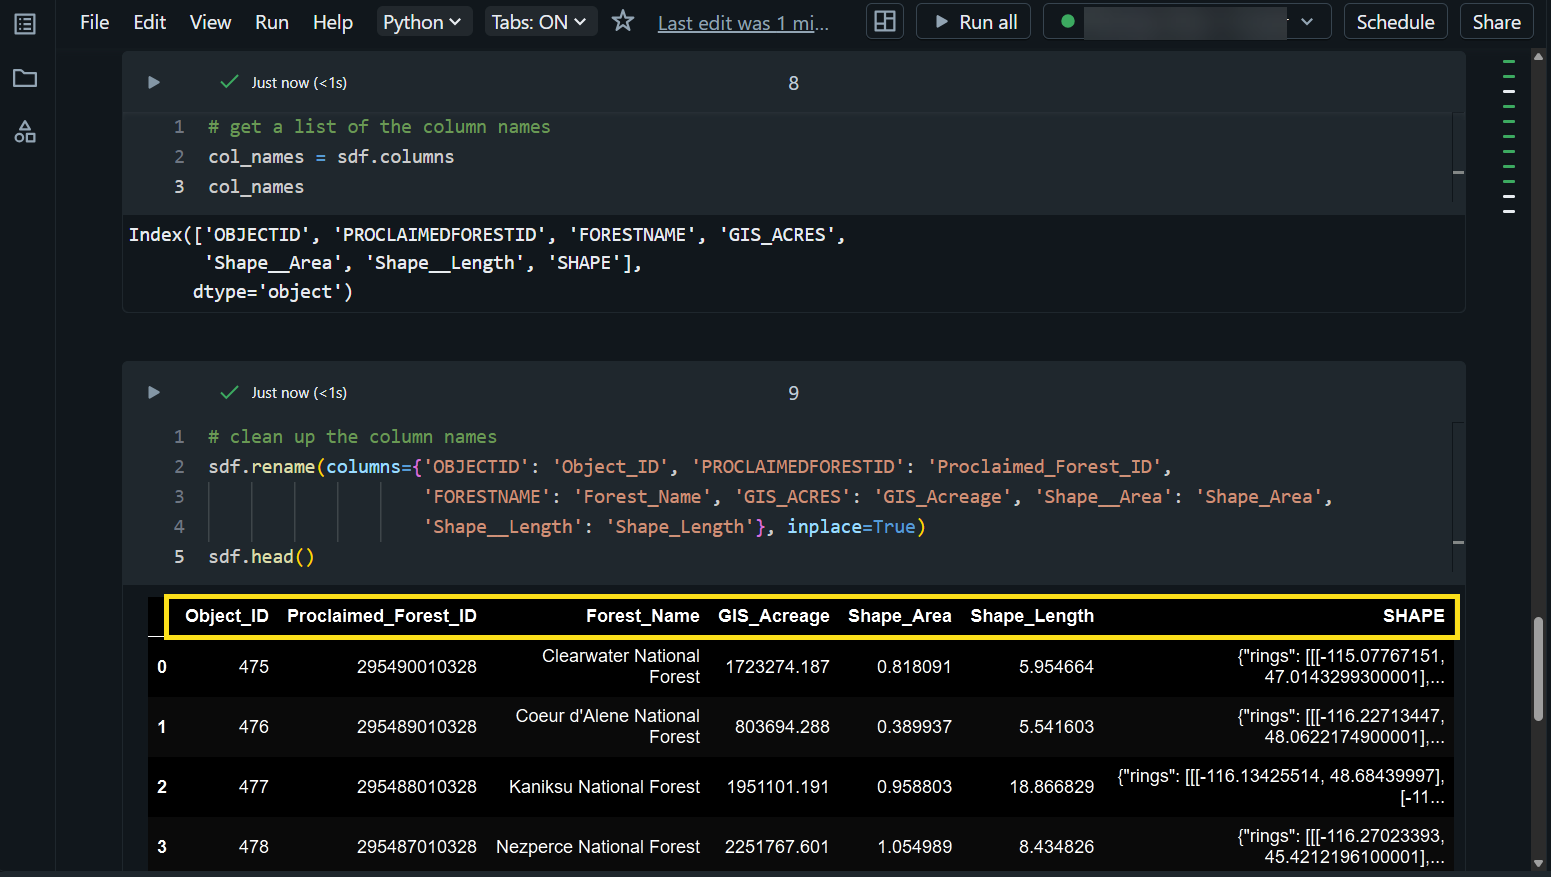
In the Proclaimed Forest Boundaries DataFrame, we can see that there are 90 rows and 7 columns. As a quick example, let’s run a few more lines of code to clean up some of the column names, create a subset of only the forests that are larger than 1 million acres, and then publish this subset as a feature layer back to ArcGIS Online.
Here we use the .columns property to list out the columns of a Pandas DataFrame. We then use the .rename function to rename the columns to something we find more appropriate. In our case, we have changed the column names from uppercase to Proper Case.
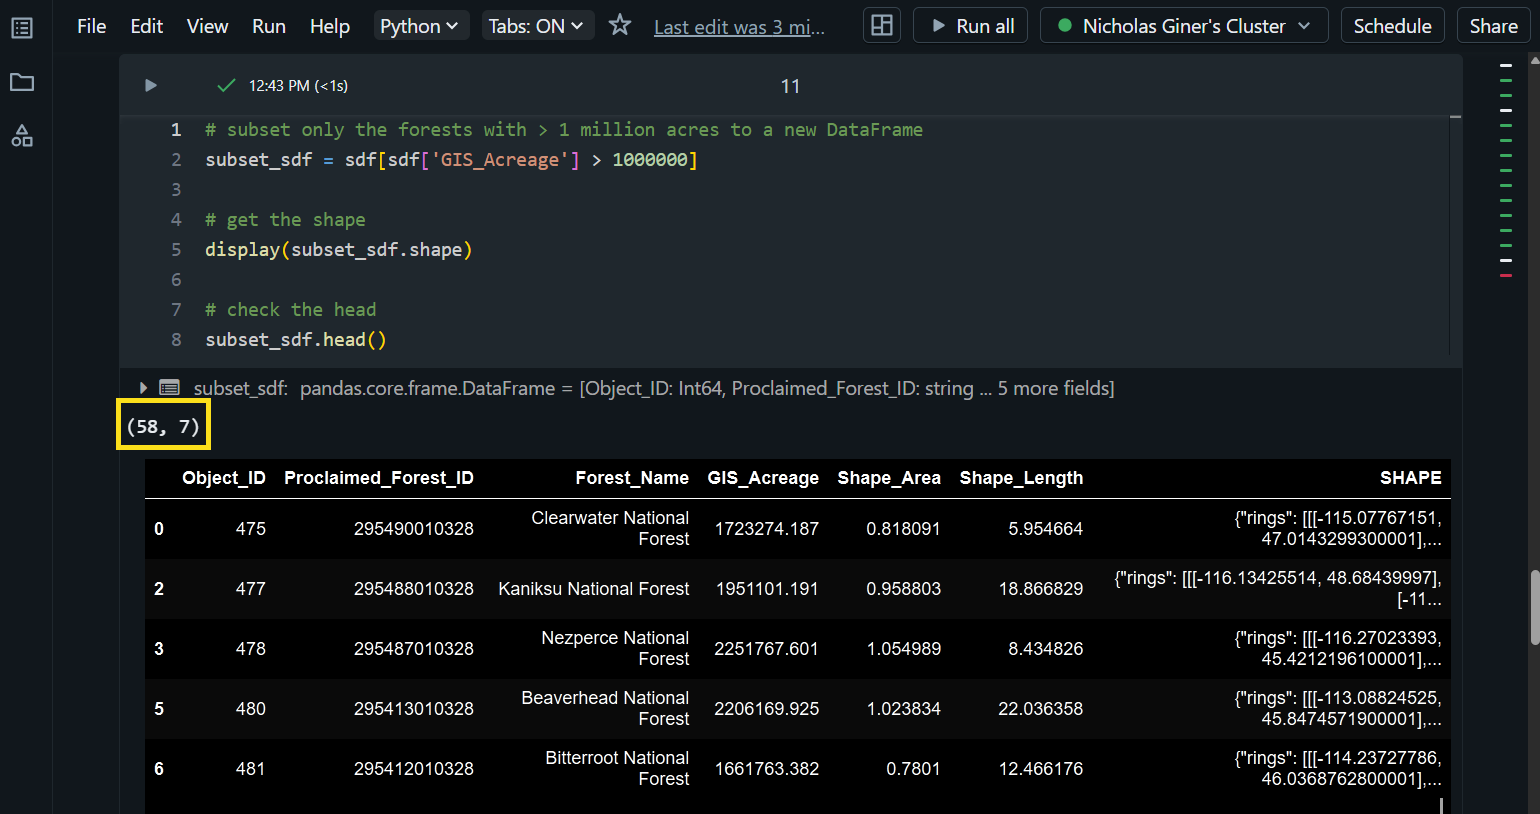
Next, we can use a conditional expression to filter specific rows from a DataFrame into a new DataFrame. Here, we subset all Proclaimed Forest Areas that are larger than 1 million acres. This gives us a new DataFrame containing 58 of the original 90 rows.
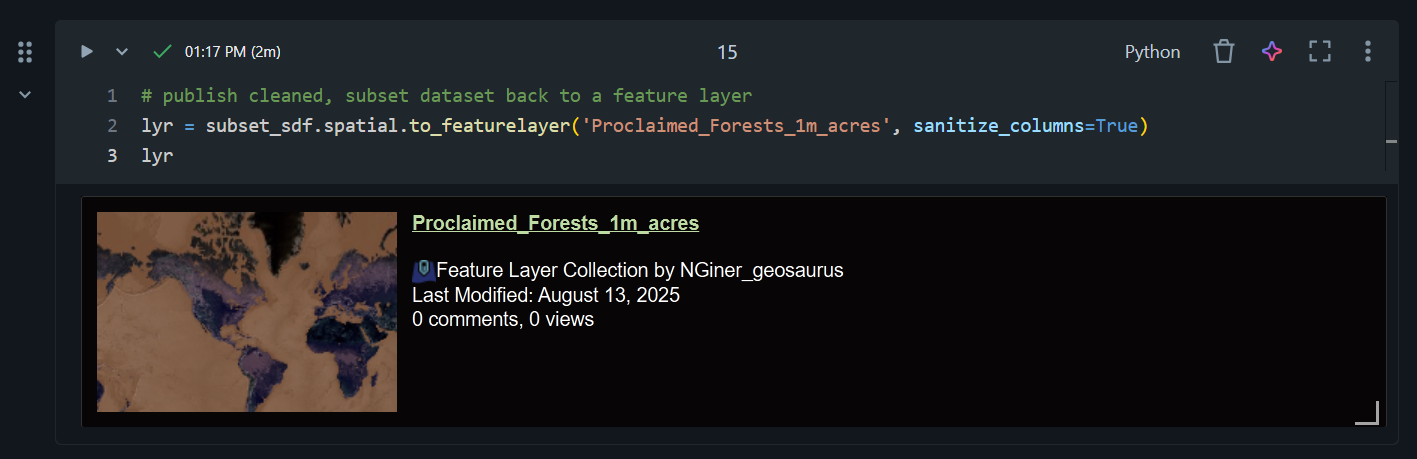
Last, we’ll convert our subset Spatially Enabled DataFrame to a feature layer in ArcGIS Online using the .to_featurelayer method.
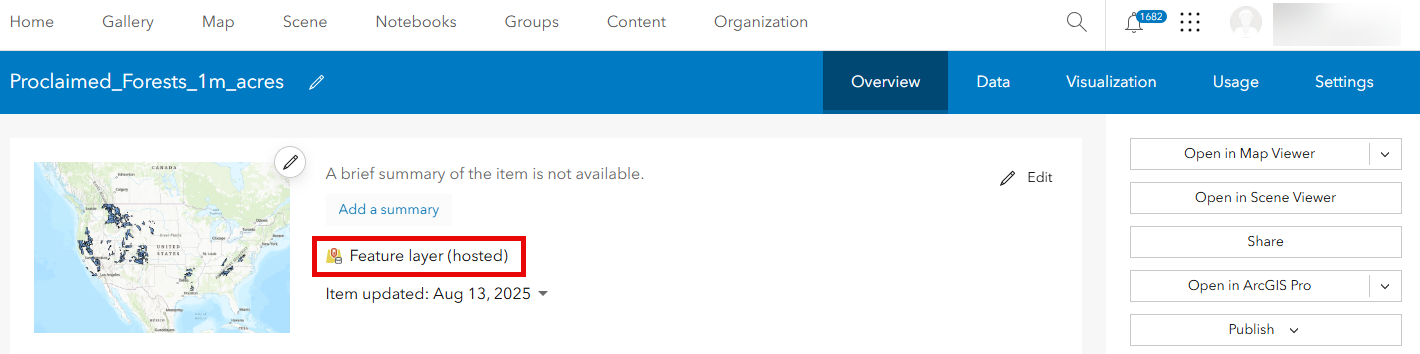
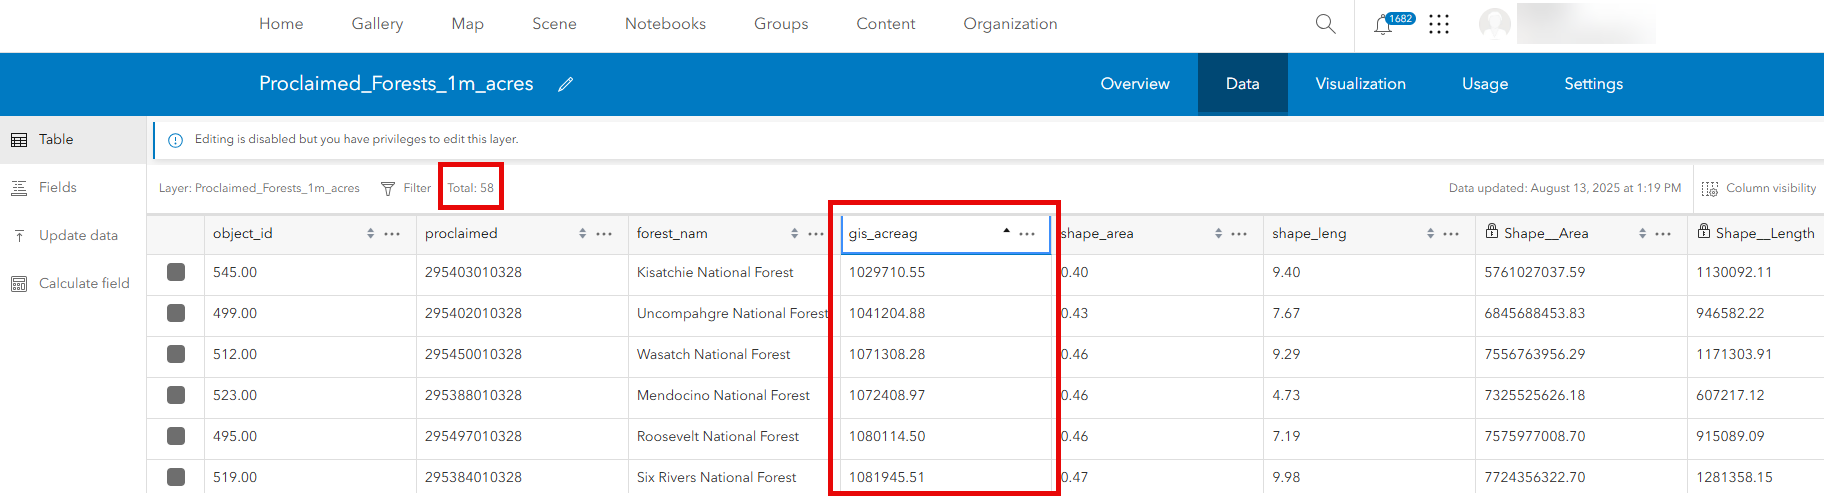
Back in our ArcGIS Online organization, we see our newly published hosted feature layer containing only the 58 Proclaimed Forest Boundaries that are larger than 1 million acres.
What about the map widget?
Currently, Databricks Notebooks are not compatible with the map widget (the arcgis.map module). The map widget in the ArcGIS API for Python requires ipywidgets 8.x, while Databricks Notebooks currently supports ipywidgets up to version 7.7.2. You can still use the Map and Scene classes in your scripts, but there are no visualization capabilities at this time.
Community and collaboration
You can use the ArcGIS API for Python Esri Community page to ask specific questions, suggest ideas for enhancements and improvements, connect with other users, and read recent blogs. You can also use the ArcGIS API for Python public GitHub repo to submit bugs, enhancement requests, and other issues. The team monitors these pages very closely, and we use your feedback and suggestions to help us prioritize what we build into the API going forward!


Commenting is not enabled for this article.