.
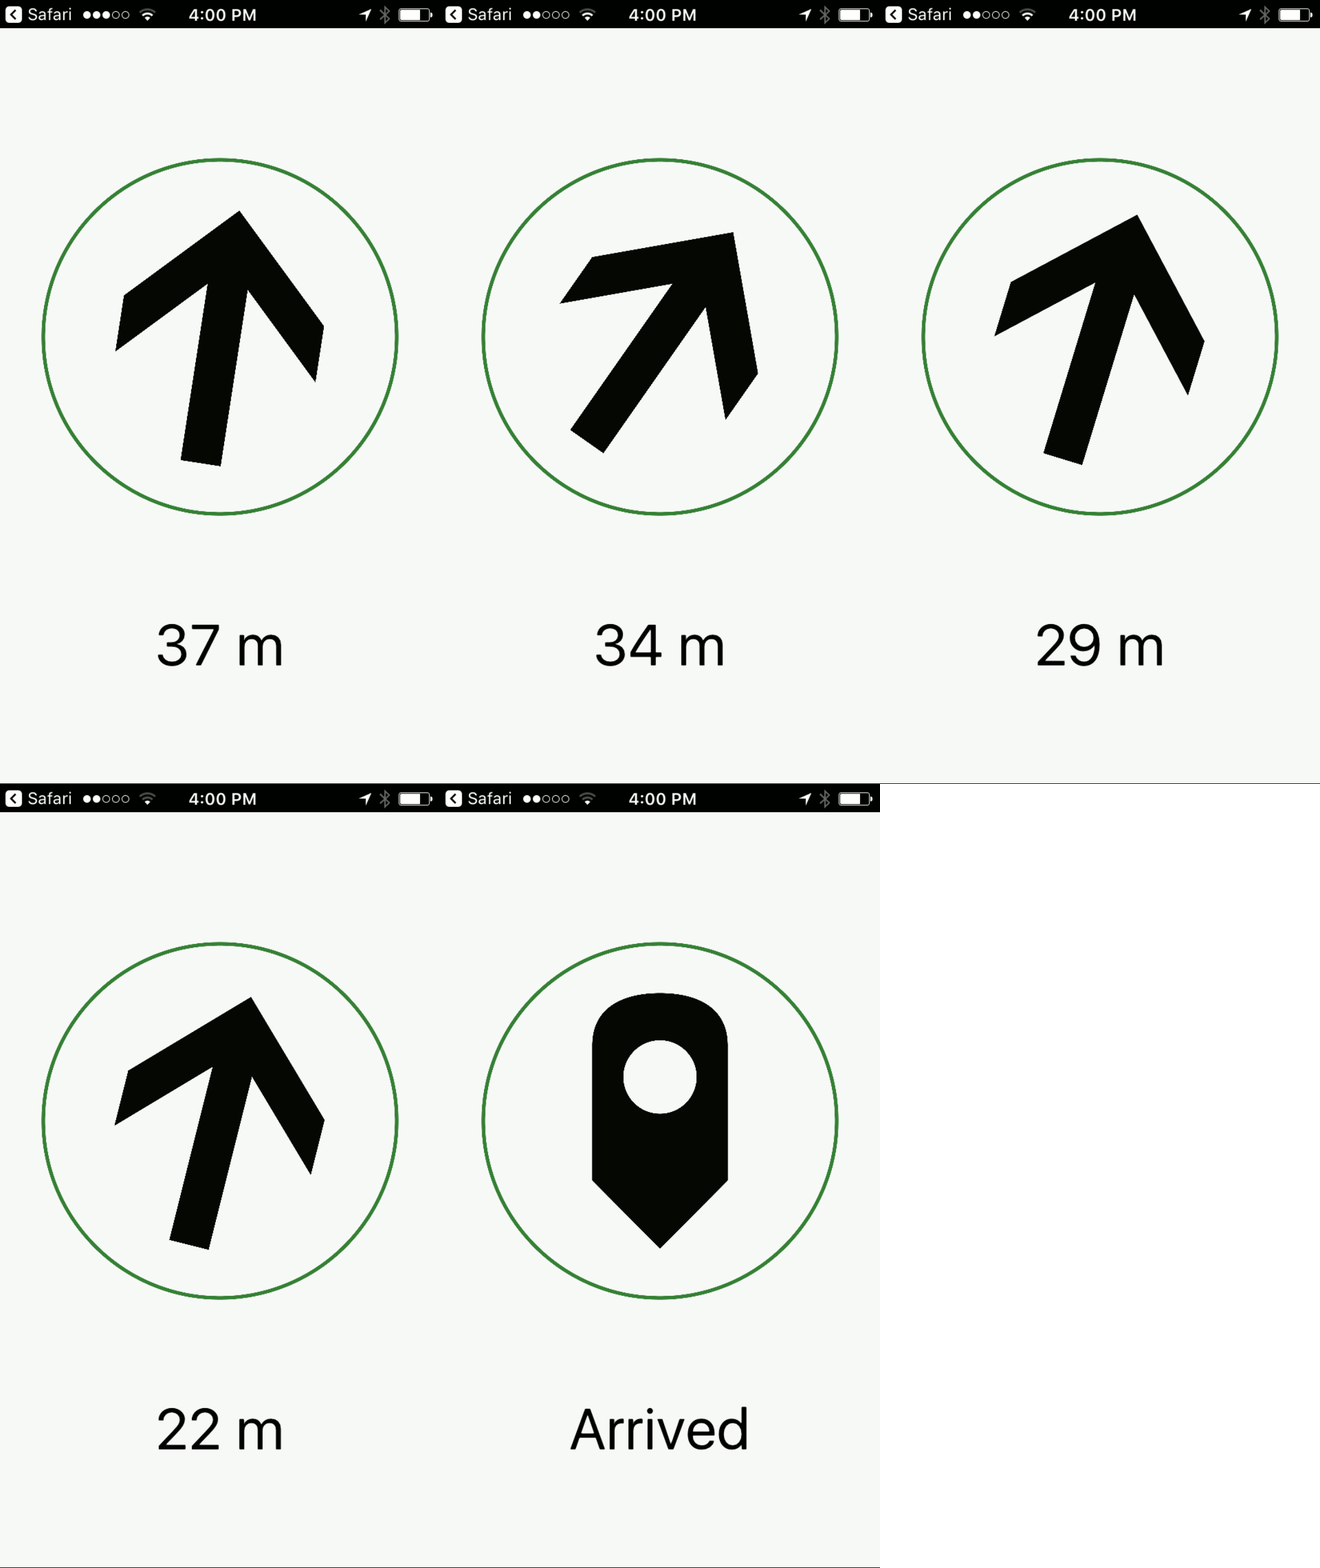
This blog introduces Trek2There, a new mobile app Esri Labs just published to the Google Play and iTunes app stores. You can think of this app as a smart compass that will always point to your destination. Unlike an ordinary compass, always pointing to magnetic North, this app will use your direction of travel to tell you in what direction you should go to reach your destination following a straight line.
.
Esri Labs projects are developed by Esri employees and are inspired by our interactions with ArcGIS users like you. Esri Labs projects are free to use but are not official Esri products. These projects do not go through the rigorous software development cycle so they are not holistically tested, documented or supported by Esri technical support.
.
Trek2There is particularly helpful when you are trying to find a location in an area where you cannot get driving directions. If you are working for example in a forest, or in a large agricultural property with not even dirt roads, using straight-line-navigation is often the most practical approach to arrive to a known location.
Trek2There only requires two things to work:
- The destination where you want to go provided in geographic coordinates (Latitude/Longitude).
- Be outside and moving so your device can fix your location and determine your direction of travel.
Let’s first try the app and then I will explain details of how to make it work with your own GIS assets in ArcGIS.
.
Trek2There, a quick first test
Start by downloading Trek2There onto your Android or iOS device. First, you need to feed the app with the coordinates of your destination, which can you can enter manually or alternatively pass from a separate application. For now, we will use a simple web-based app to pass the coordinates. On your device, launch this web app and tap on the map to select your destination. Next you will see a new dialog open from which you can launch Trek2There.
Now that the app is running, start walking in any direction and shortly the arrow will rotate to show you the direction and distance to your destination. Walking with caution and avoiding physical obstacles is all on you!
As Trek2There is launched in your mobile device, please be aware that the arrow and distance will only calibrate correctly when you start moving (walk, drive etc). You need to be outside and moving before Trek2There will give you any meaningful information. Trek2There uses your direction of travel to determine the direction in which you need to go. If you stand still, the arrow may temporarily point away from your destination, but things will go back to normal once you start moving again.
Trek2There’s custom URL scheme
Using the app is straight-forward as you can see. Launching it and passing the coordinates of your destination is what takes some thought but do not worry, it is not complicated at all. Trek2There can be launched remotely by invoking its custom URL scheme:
arcgis-trek2there://?stop=38.133453,-117.223455
If you copy the above string and paste it into a browser on your device, you will be able to launch Trek2There and set its destination at the provided latitude and longitude. You could send this URL as a link in an email, or programmatically invoke this URL from a custom developed application.
Launching native apps like Trek2There through a custom URL scheme -also often referred to as a deep-link- works fairly well across all platforms when you invoke the URL from a custom native application. If you invoke the app from a web browser it will work as expected on Windows, iOS and Mac. On Android you may find issues launching the URL scheme from some mail clients and in the Chrome browser.
.
Integrating Trek2There with Explorer for ArcGIS and Collector for ArcGIS
Say you already have an asset feature layer in ArcGIS and you want people to be able to tap on those assets and launch Trek2There to help them navigate to them. This can be achieved by building a custom feature pop-up in your web map. The pop-up will dynamically pull latitude and longitude values from your feature’s attributes, and construct a Trek2There custom URL scheme. By enabling this URL scheme string as a link, Trek2There will be just one one click away from users.
Lets do this step by step:
Adding XY coordinates to your features
If not already, you will want to add the XY coordinates to your features. This can be accomplished in different ways, but a simple approach is to run the Add XY Coordinates geoprocessing tool in ArcGIS Desktop. You will want to make sure the XY coordinates are added using the WGS84 coordinate system. Once your layer as the XY attributes, publish it to ArcGIS so the layer can be added to a web map.
Creating a custom attribute display feature pop-up
Once you have your feature layer with XY coordinate attributes added to your web map, you will want to create a custom attribute display pop-up. To learn the basics about custom attribute display pop-ups I strongly recommend you read this blog post from Bernie.
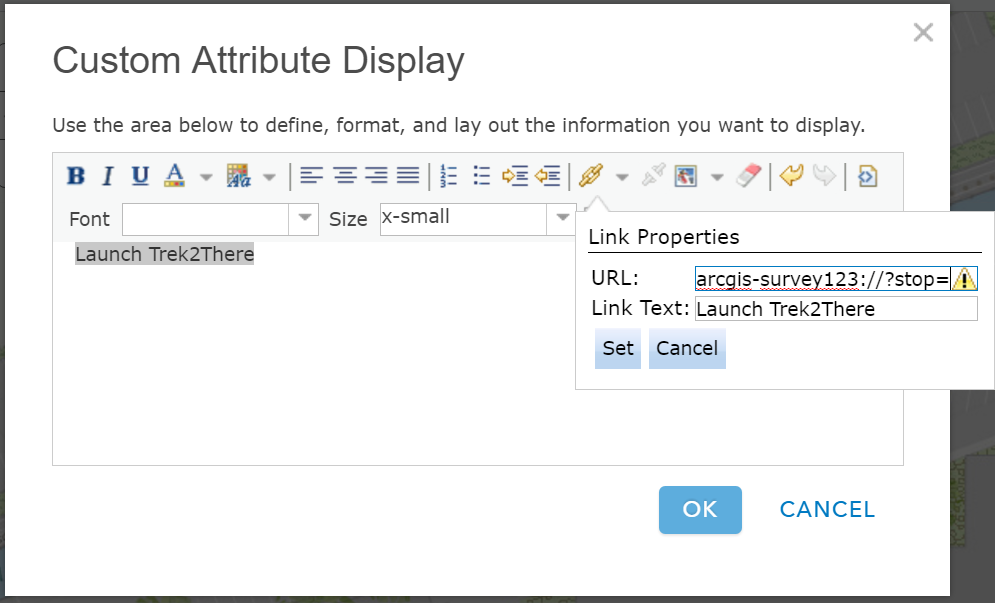
You will want to add a hyperlink within the attribute display as shown below, and ensure your URL is dynamically pulling the XY coordinates from your feature’s attributes.
The URL within the link properties will look something like this:
arcgis-trek2there://?stop={Point_Y},{Point_X}
If the name of the attributes containing the coordinates are different, you will want to adjust the Point_Y and Point_X values accordingly. The text within the curly brackets essentially references attributes in your feature. When you type the URL string, you can ignore the ‘Value entered is not valid‘ warning. Set the URL, save the popup and open your web map in a mobile device to give it a try.
Using your web map in a mobile device
Once your custom attribute display pop-up is ready, you can use your web map from a web browser in your mobile device, or even better from within Explorer for ArcGIS or Collector for ArcGIS.
.
Invoking Trek2There programmatically
In a web app or website, simply create an HTML link:
<a href=’arcgis-trek2there://?stop=38.133453,-117.223455′>Launch Trek2There</a>
In QML AppStudio for ArcGIS:
Qt.openUrlExternally(‘arcgis-trek2there://?stop=38.133453,-117.223455′)
In Java, using Android’s Intent:
PackageManager manager = mContext.getPackageManager();
Intent i = manager.getLaunchIntentForPackage(“com.esri.survey123”);
i.setData(Uri.parse(“arcgis-trek2there://?stop=38.133453,-117.223455“));
startActivity(i);
.
Using Trek2There with Survey123 for ArcGIS
You can also use Trek2There with Survey123 for ArcGIS. For example, you can create a smart form that lets user pick assets from a list, and dynamically create a user clickable link that launches Trek2There. It is essentially the same approach we the one we described above for web maps, but within a Survey123 smart form. There is more information about how to do this in the Survey123 for ArcGIS GeoNet blog.
.
Customizing and Contributing to Trek2There
The source code of Trek2There is shared under the Apache 2.0 License, so if you like you can take this app and make it your own. Perhaps you may want to embed this functionality within your own app, or re-brand Trek2There… your choice! You can find the source code at https://github.com/Esri/Trek2There. Esri welcomes contributions from anyone and everyone. If something is not working for you, create an issue… if you actually know how to fix existing problems or want to contribute, please follow these contributor guidelines.
Trek2There was developed using AppStudio for ArcGIS. AppStudio for ArcGIS is quite a powerful product for building your own cross-platform native GIS apps. If you are a Javascript developer, transitioning into AppStudio for ArcGIS is relatively easy. If you like tinkering with Python code in ArcGIS, becoming an AppStudio for ArcGIS efficient developer is perfectly within reach. With AppStudio you write your code once, and then you can easily compile your work so it runs on desktops (Windows, Mac, Ubuntu Linux) as well as tablets and phones (iOS, Android, Windows).
The easiest way to download the source code is by using AppStudio for ArcGIS Desktop Edition. Once installed, click on New App and search for Trek2There under the Enterprise category. You can look at the code, modify it and run it in your Mac or Windows development machine. If you have an AppStudio for ArcGIS Standard license, then you will be able to compile your code for Windows, Mac, iOS, Android and Ubuntu Linux. The AppStudio for ArcGIS GeoNet Group is quite active. A great place to address technical questions.
.
One last comment: Look ahead when you use Trek2There…


Article Discussion: