About 71% of the earth’s surface is covered by water. This means that in your daily execution of Reality Mapping workflows you are likely dealing with water areas, which require special attention to produce optimal results.
Water areas can be rivers, lakes, seas, swamps, or swimming pools. Also, water can have a different color and shape year after year at the same location. So, even if you have an existing water body geometry, it may not be accurate enough for your next production season.
Sometimes, you may not even have a water shape at all and you want to efficiently and accurately create a water body shape for optimal Reality Mapping outputs from drone, aerial or satellite imagery.
Why do photogrammetric solutions struggle with water?
The uniform texture, strong reflections, and variable appearance of water surfaces make it challenging to accurately reconstruct water bodies using stereo vision methods.
To acquire the highest quality results, ArcGIS Reality provides the possibility to crop and replace sparse and noisy data generated on water bodies with smooth data interpolated from 3D polygons. These polygons can be specified in terms of shapefiles (e.g. along coastlines, lakes, rivers, etc.), where each polygon vertex also has a height value (z-coordinate). During the DSM’s interpolation stage and/or Cloud Filter processes, the specified polygons will be applied to either the DSM or the Dense Clouds on-the-fly, leading to enhanced 2.5D and 3D surface models.
What can you do to create your own Waterbody shape?
In this blog post, we will demonstrate some options available in ArcGIS Pro that can help you create optimal inputs for ArcGIS Reality. Using the Image Classification Wizard in ArcGIS Pro along with basic geometry editing tools, we will generate results that can be seamlessly integrated into ArcGIS Reality Studio or your Reality Mapping workspace with ArcGIS Reality for ArcGIS Pro to initiate your Reconstruction.
Requirements for this workflow:
- An ArcGIS Reality suite product
- ArcGIS Pro with Image or Spatial Analyst license
- Accurately aligned drone, aerial or satellite imagery – post aerial triangulation or adjustment
Let’s get started!
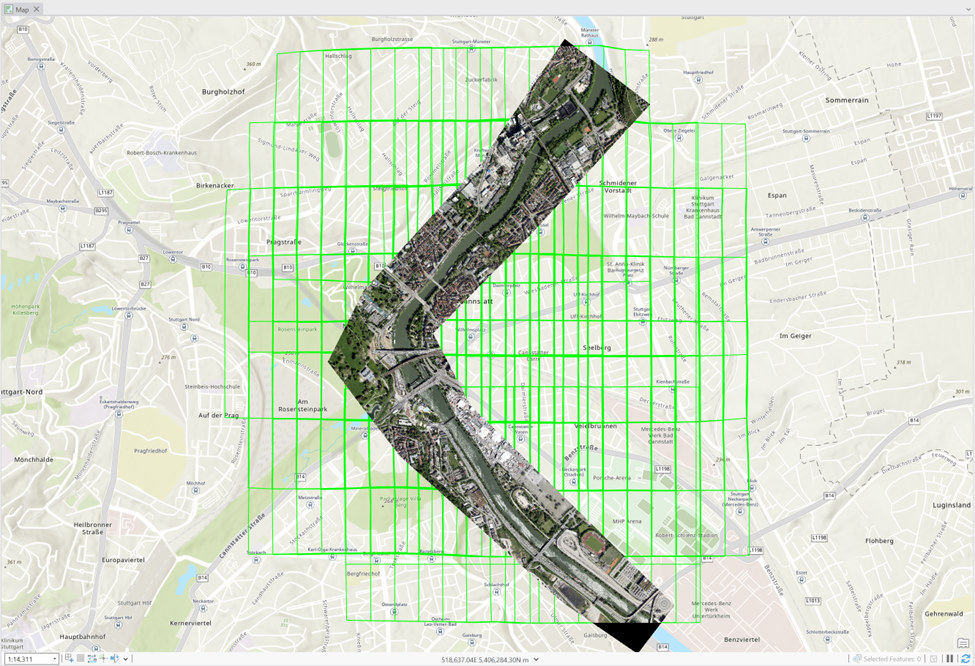
Create a Mosaic Dataset in ArcGIS Pro containing the aligned imagery. Learn how to do it here.
Note: if you are using the Reality Mapping workspace with ArcGIS Reality for ArcGIS Pro, the Mosaic Dataset is already created.
Speed up the processes of the upcoming steps by clipping the Mosaic Dataset to the area that includes the water bodies. Learn how to do it here.
Alternatively, you can use the Raster Functions to clip on memory if the Imagery collection is too large.
Data used for demonstration purposes in this blog is from GeoFly GmbH – Vexcel Osprey 4.1 – processed with ArcGIS Reality by Esri. Copyright © GeoFly GmbH/Esri
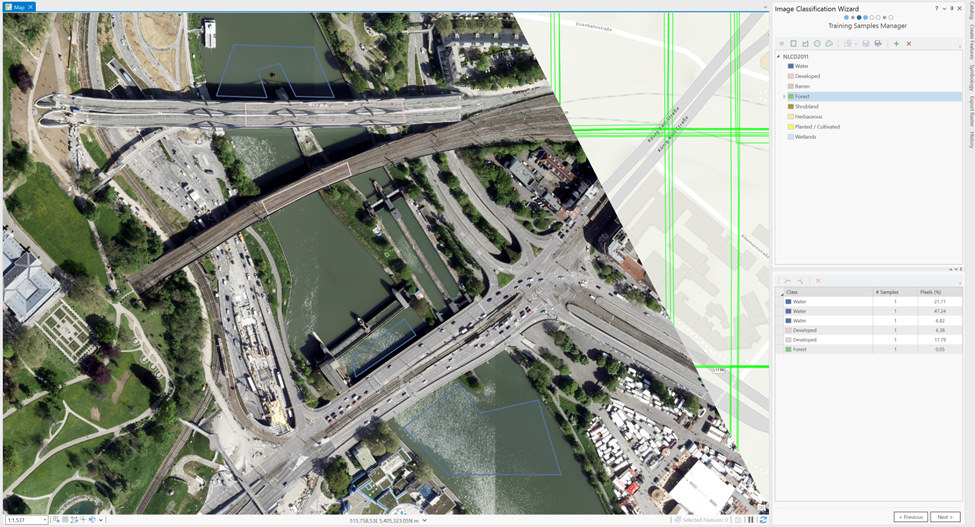
Classify the imagery in water and “not” water regions using the Image Classification Wizard.
For the current application, the classification based on the Pixel is enough as we’re looking for similarities in the color of the water pixels. Manually select water and “not” water regions in a performant way. It doesn’t have to be perfect as we’ll do some data cleaning later. For the non-water areas, try not to include pixel colors that fall within the range of the water pixels as this will make it harder for the Wizard to distinguish them (such as blue roofs, for example). The non-water areas can be grouped together, or you can choose to follow the normal workflow to define different classifications for further analysis outside of this suggested water-finding workflow.
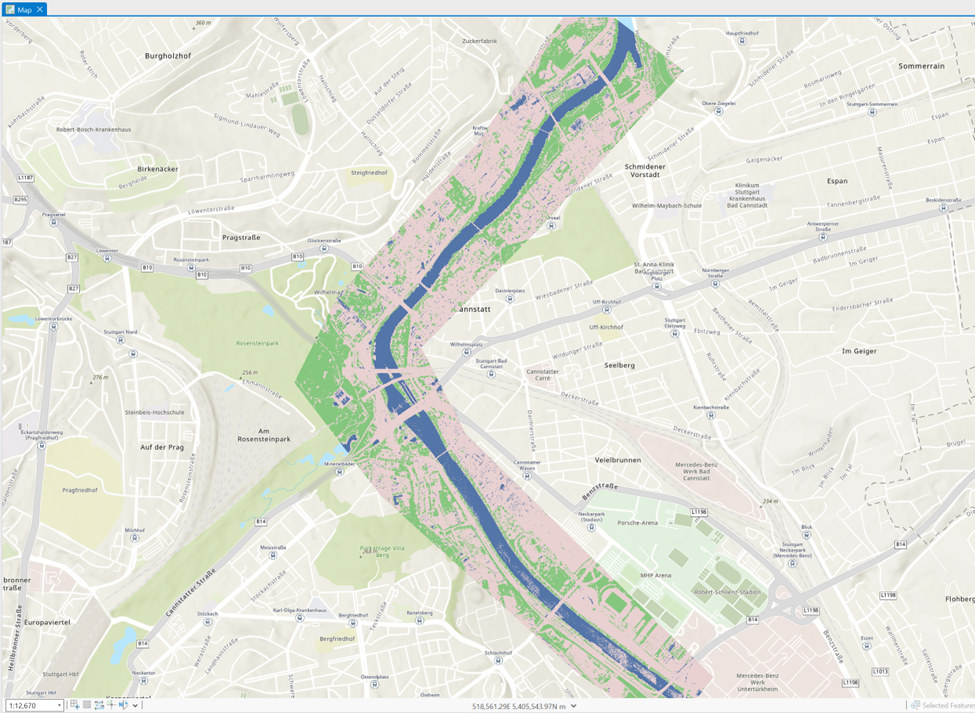
Proceed to the next step and investigate the quality of the Preview raster and validate your result is looking good. In case some improvements are required, iterate between these two steps.
Once you’re satisfied with the results, continue through the rest of the Wizard following all the default settings and steps and finalize with a Classified Raster. Congratulations!
Cleaning up the classified data
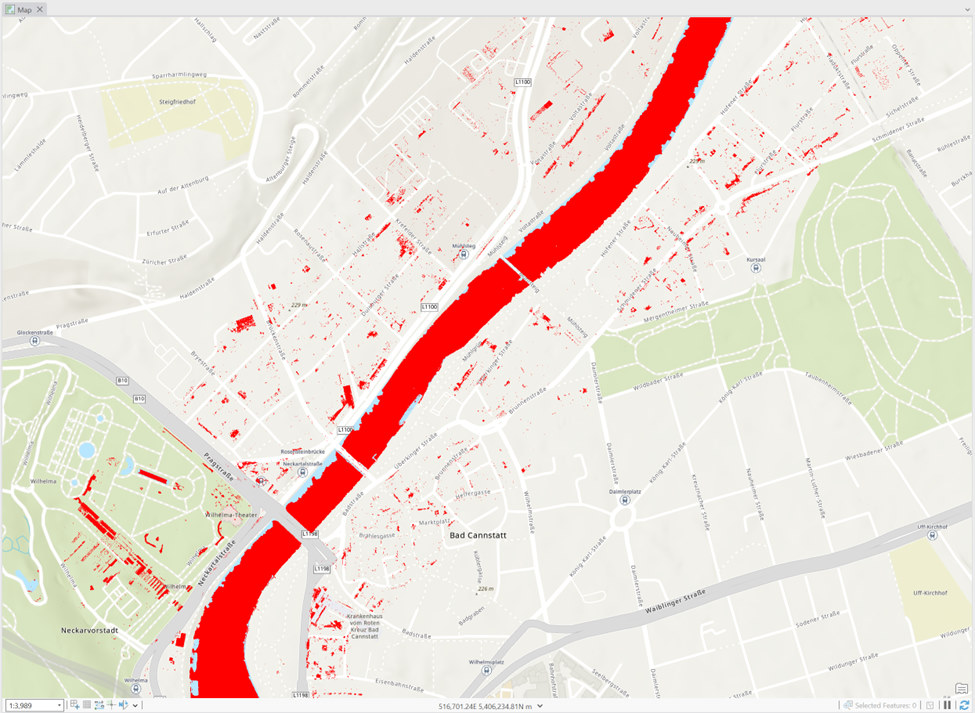
Remove the non-water classes from your data using Set Null Geoprocessing tool. In the tool use set Classes not equal to your water Class as Null.
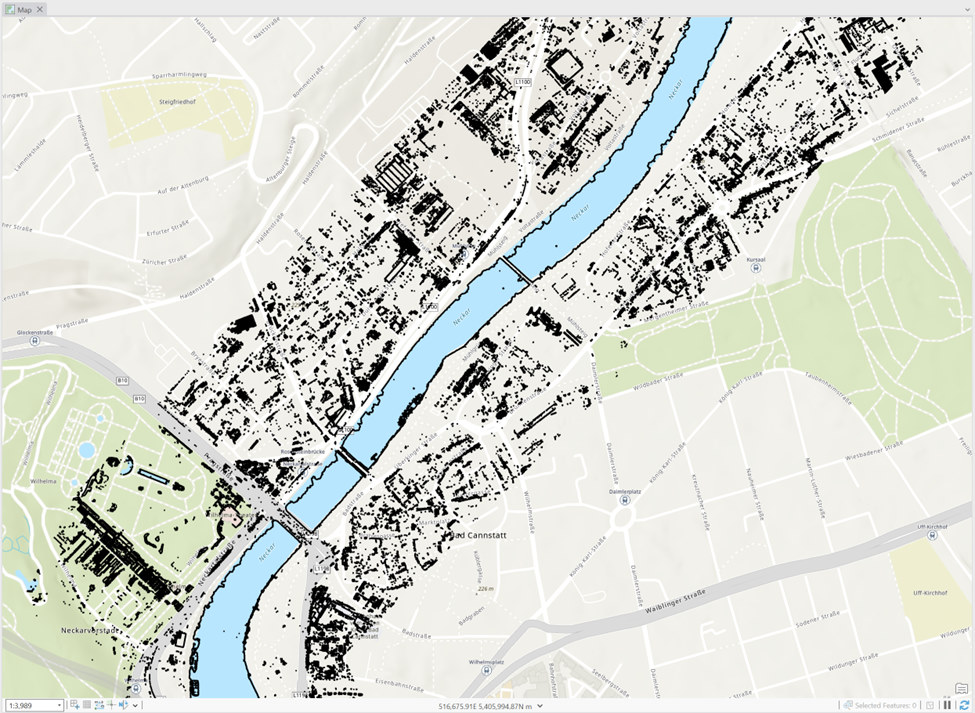
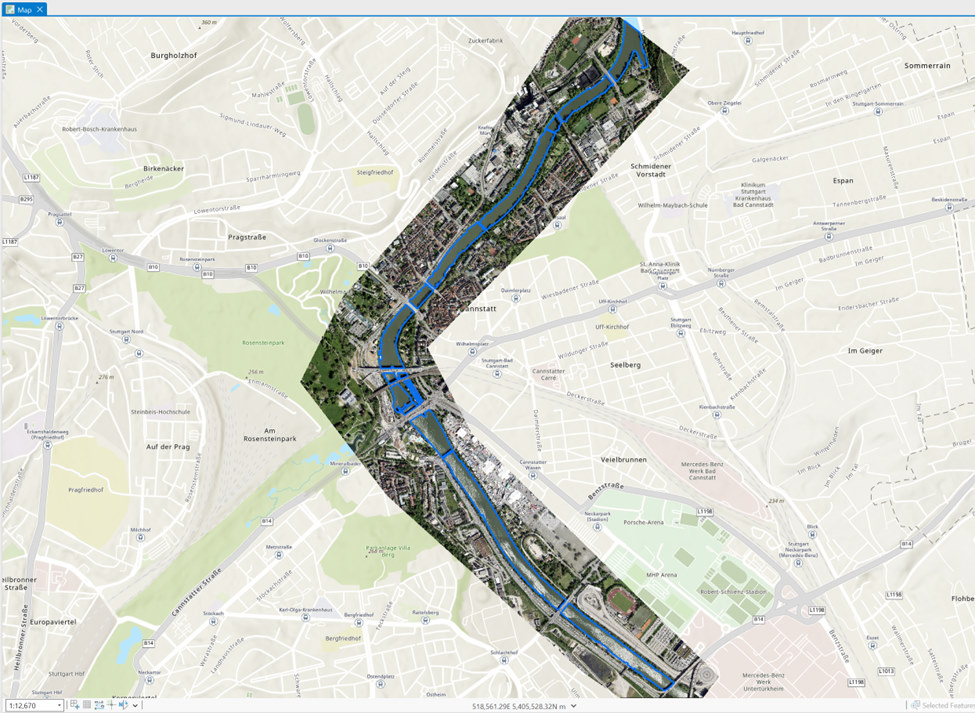
The result is a raster containing only pixels in the water-classified areas you created in the Classification Wizard.
Convert the raster to vector using the Raster to Polygon Geoprocessing tool. Leave all the default settings as is and click run. The result is a set of 2D polygons that were automatically generated around the pixels correctly or incorrectly classified as water.
Some incorrectly classified areas could persist, such as small donut areas in your water bodies. To remove them use the Eliminate Polygon Part Geoprocessing tool. Start with a Percent option around 10% and iterate, if required, until you eliminate the incorrect areas.
The result shows uniform, complete, larger water bodies.
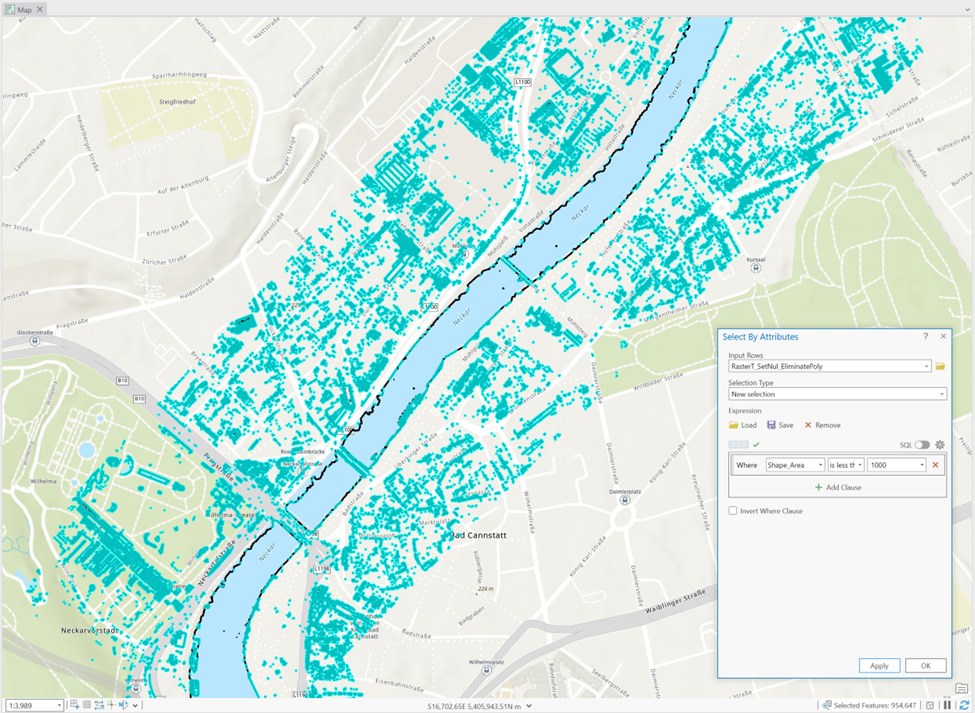
Some little non-water polygons could persist over land. You could remove them by filtering by area; for example, areas smaller than 1000 square meters. Use the Select by Attributes tool for this and iterate until your resulting water bodies fulfil your standards.

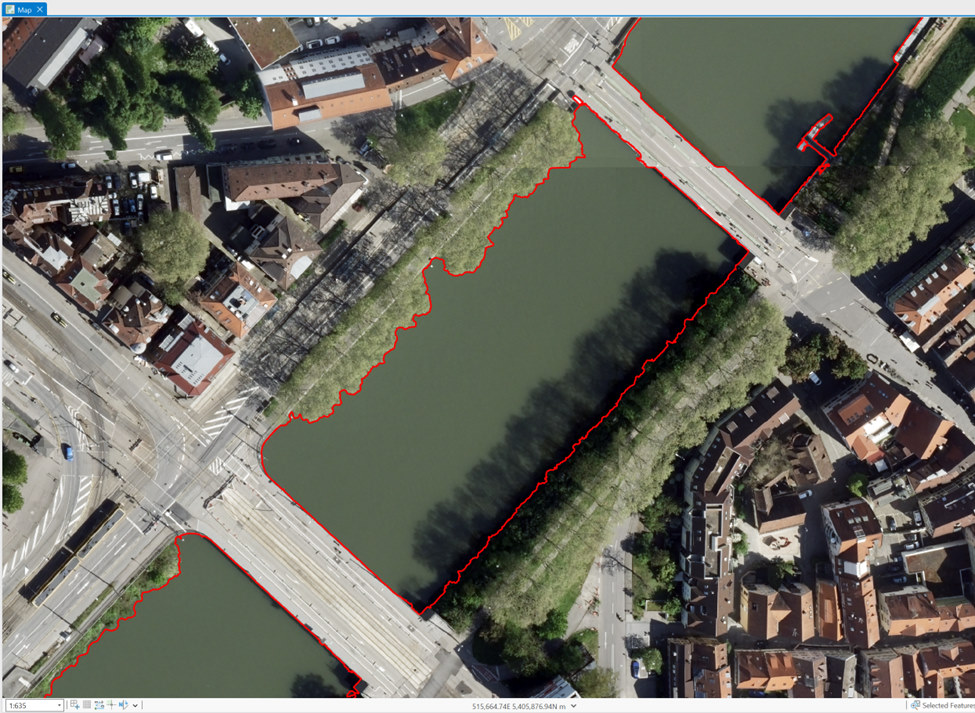
Sometimes the workflow isn’t perfect and there are areas where some more manual editing is required using ArcGIS Pro’s editing functionality.
Lastly, the edges of the water bodies features could benefit from smoothing. The Buffer tools will make the polygons smoother for your final reconstruction.
If you are already happy with the position and placement of the water polygons compared to your underlying imagery/dataset then all you need to do is a minus buffer and then a plus buffer of the same value. So -1m and then +1m to smooth out the polygon.
If you think the polygon is too tight to the underlying imagery/dataset then maybe just do a minus buffer and leave it at that! Again, play with different values until you are satisfied with the result.
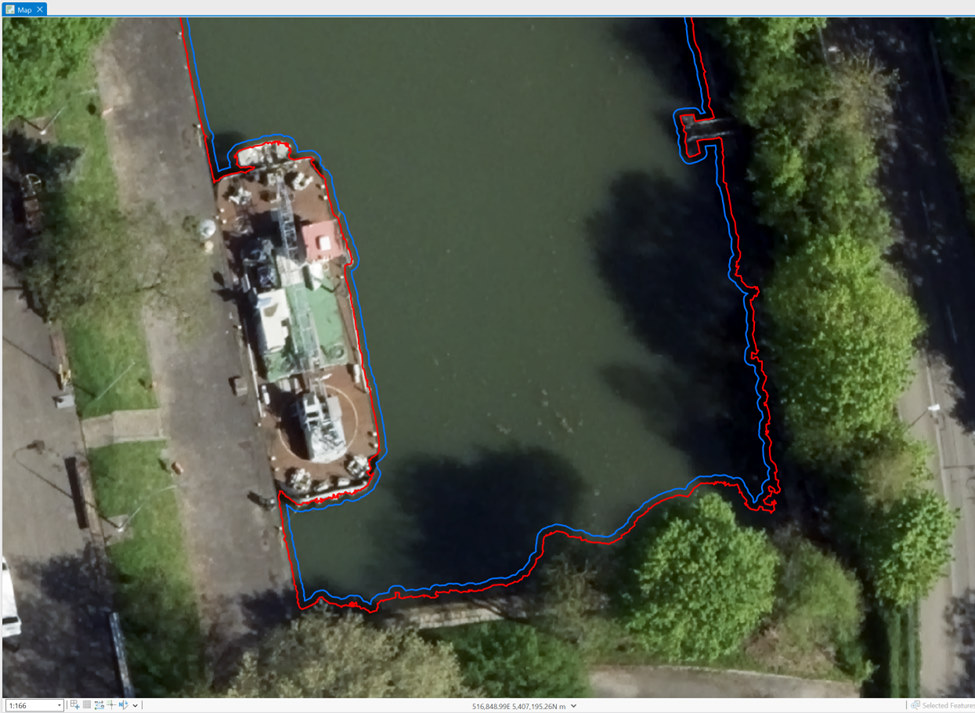
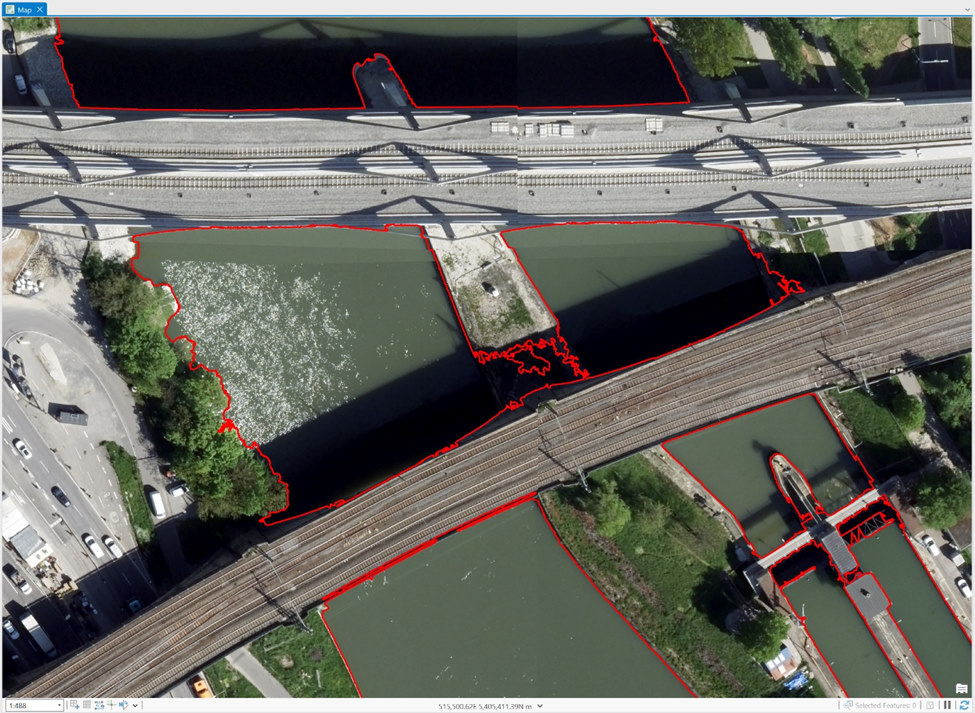
The 2D vector feature in your workspace is now ready to be used in your Reality Mapping reconstruction workflow.
This is not the only option for creating accurate water geometries and other possible methods for creating accurate water geometries that are available but not presented in this blog post:
- Processing the DSM and True Ortho with ArcGIS Reality and undertaking a similar workflow as described in this blog
- Stereo compilation of the water areas
- Exploit the NDVI band to find water areas
- Esri’s Living Atlas – extensive global water bodies already exist as part of this free dataset
- Field survey of the water’s edge and water height


Article Discussion: