3D technology has made exceptional improvements that have turned basic shapes into realistic objects. The applications of 3D continue to expand with users applying 3D to topics such as digital twins, architecture, and emergency management. With advancements, users are moving to 3D for nuanced analysis, visualizations, and mapping.
Previously, I wrote about how to add 2D features into a 3D scene. That was to help users dabbling in 3D GIS for the first time and adjusting 2D data for 3D visualization. But how do you officially convert 2D z-aware features, such as building footprints, into 3D features?
In this blog article, I will continue with the Tennessee Tech University mapping and cover how to transform 2D features into multipatch and 3D object feature layers (3D-OFL). I’ll demonstrate two methods: the Layer 3D to Feature Class tool and Copy-Paste Special. The Layer 3D to Feature Class method can be run for point, line, and polygon features, but Copy-Paste Special also works with extruded polygon features.
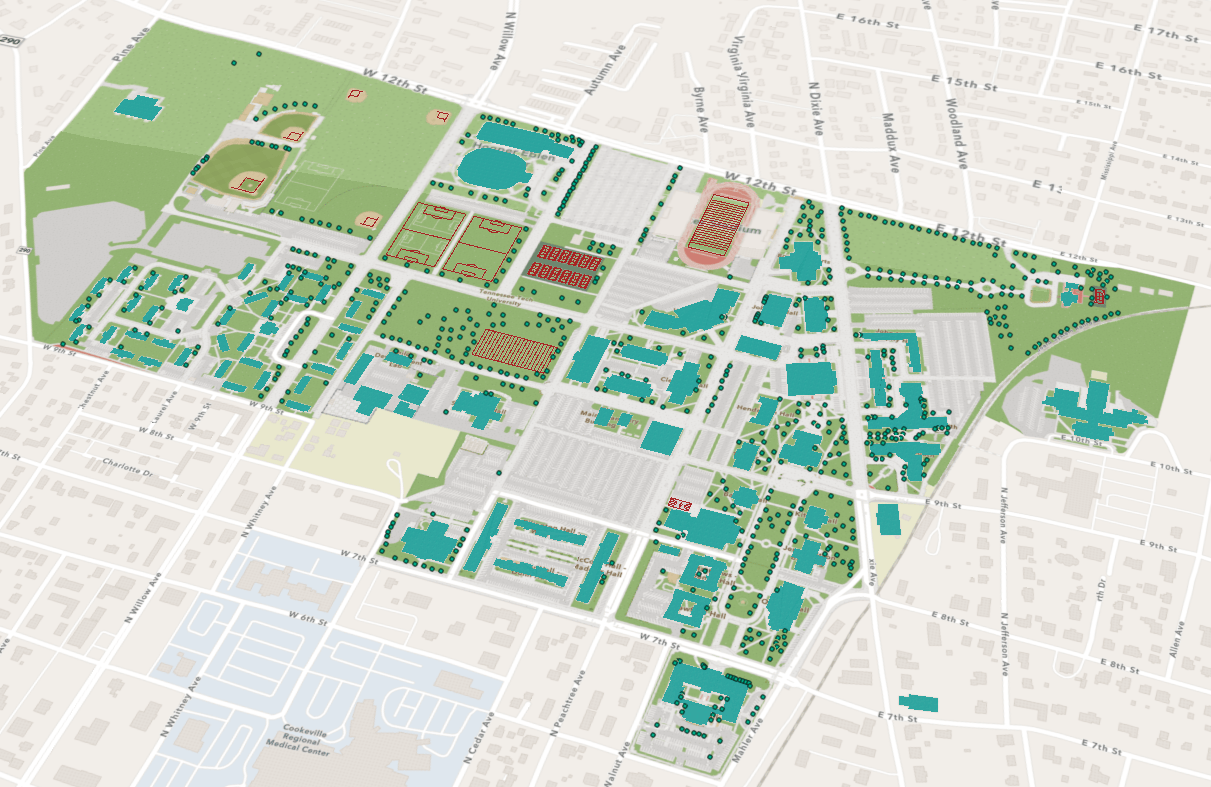
For this project, I’m focusing on building footprint polygons. A few important points: this data source was created in ArcGIS Pro, the data is z-aware, and displayed in a 3D local scene. Since I plan on creating new data, I’m going to work in a local scene rather than a global scene. For more information on local scenes, see Scenes in the ArcGIS Pro help..
To follow with this workflow, find an area you want to work in and create a z-aware polygon feature layer in a local scene for building footprints and generate a few examples to work with. For steps on this, see How to add 2D features to a 3D scene.
Prepare the 2D features
Now that I have created a few examples, I must prep the data. First, I establish a height for the buildings polygon layer. One way to accomplish this is by adding a new field to the attribute table for height, and then input different values for a range of heights. This will create a more realistic and diverse look for the university campus.

Extrude the polygons
Extrusion is the process of stretching a flat, 2D shape vertically to create a 3D object in a scene. For example, you can extrude building polygons by a height value to create 3D building shapes. Only points, lines, and polygons support extrusion. For more information, see Extrude features to 3D symbology.
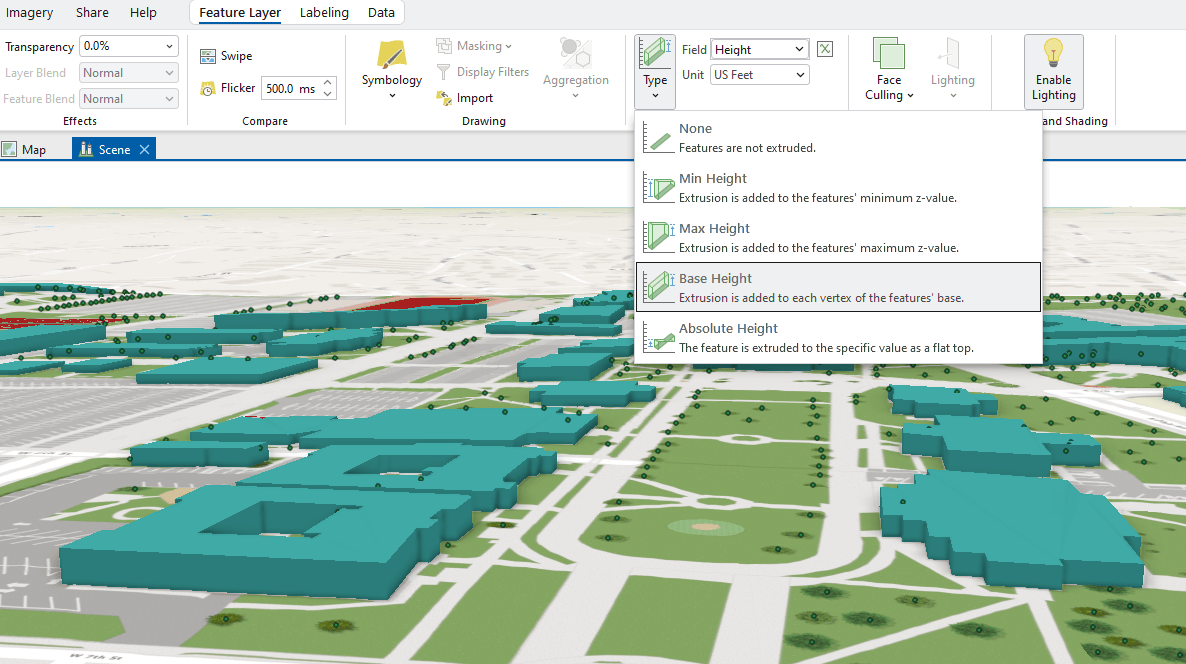
To alter the feature layer’s extrusion setting, select the layer in the Contents pane, browse to Feature Layer on the ribbon, and click the down arrow for Type in the Extrusion section. I selected Base Height because I want the vertices of my polygon to act as the base for my new 3D building. From here I choose Height on the Field drop-down menu and US Feet on the Unit drop-down menu. This approach uses the Height attribute that I created from that layer’s attribute table as the parameter for the new 3D buildings. As soon as I select the Height attribute, all polygons are extruded to the height determined in the attribute table.
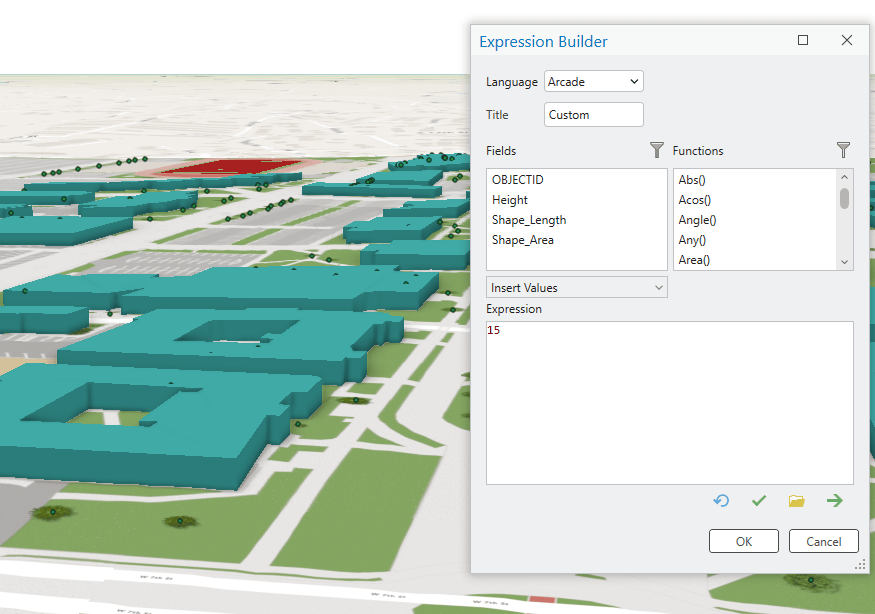
Alternatively, if you want your polygons to be the same height value without an existing field in your attribute table, click Extrusion Expression in the Extrusion section of the ribbon to open the Expression Builder pane. Type a value in the Expression text box, for example, 15. Click OK. Doing this will extrude all polygons on the selected layer to a constant uniform height, in this case, 15 U.S. feet.
Using either option will allow you to extrude your footprints into a 3D shape. Keep in mind these extruded shapes look like 3D models, but they are still considered polygons in ArcGIS Pro. This means you will not be able to texture the shapes, edit the shapes, or perform any operations that specifically work with 3D objects. You must complete another step to transform them into either a multipatch or a 3D object.
Method 1: Layer 3D to Feature Class Tool
With the data prepped and ready to use, there are two methods to transform the 2D feature data into 3D: geoprocessing tools or Copy/Paste Special. Copy/Paste Special will be discussed in the next section. If you choose the geoprocessing route, the options are Layer 3D to Feature Class and Interpolate Polygon to Multipatch. I recommend the Layer 3D to Feature Class (3D Analyst) tool over Interpolate Polygon to Multipatch, because it works with more than one feature class and can be used on points, lines, and polygons, but keep in mind both geoprocessing tools require the 3D Analyst extension for ArcGIS Pro.
To access the Layer 3D to Feature Class tool, click the Analysis tab on the ribbon and click the Tools button to open Geoprocessing pane. In the Geoprocessing pane, browse to the Toolboxes tab, expand the 3D Analyst Tools section, expand the 3D Features section, expand the Conversion toolbox to access the Layer 3D to Feature Class tool (Alternatively, you can do a quick search in the Find Tools bar).
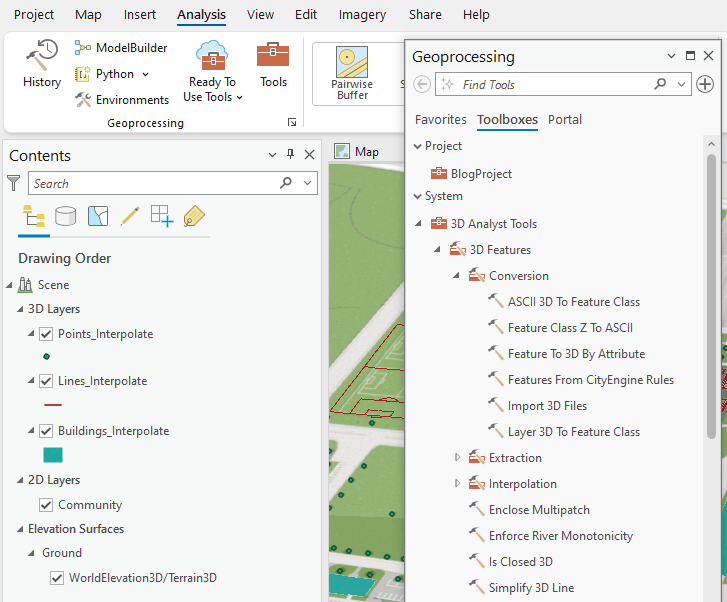
Click the tool and the Layer 3D To Feature Class pane appears. Select the polygon layer for Input Feature Layer and notice that it automatically populates a name in the Output Feature Class parameter. You can either modify the name of the output or use the default name. I’m going to use the default name for now.
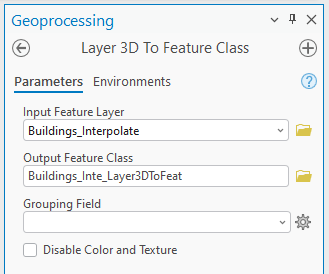
Click Run at the bottom of the pane and give the tool a few moments to process your request. When it’s finished processing, a new multipatch feature layer appears in the Contents pane that contains the new buildings. From here, you can texture, perform analysis, or edit the buildings further using Editing tools.
Method 2: Copy-Paste Special
This method works primarily on polygon feature classes. For this method, I create a new empty feature class and paste the data inside. This method doesn’t require an extension and allows you to translate data into any 3D feature class type (multipatch or 3D-OFL). If you want a 3D object feature layer (3D-OFL), Copy-Paste Special will allow you to bypass the multipatch to 3D-OFL conversion and directly paste 2D data into a 3D-OFL. Also, 3D-OFL has more options to work with and room to grow in comparison to a multipatch feature class. For this example, I’m going to work with a 3D-OFL.
First, create a 3D-OFL from scratch. Create a new feature class by right-clicking the geodatabase and selecting New, and then clicking Feature class. For Feature Class Type, select 3D Object and click Next.
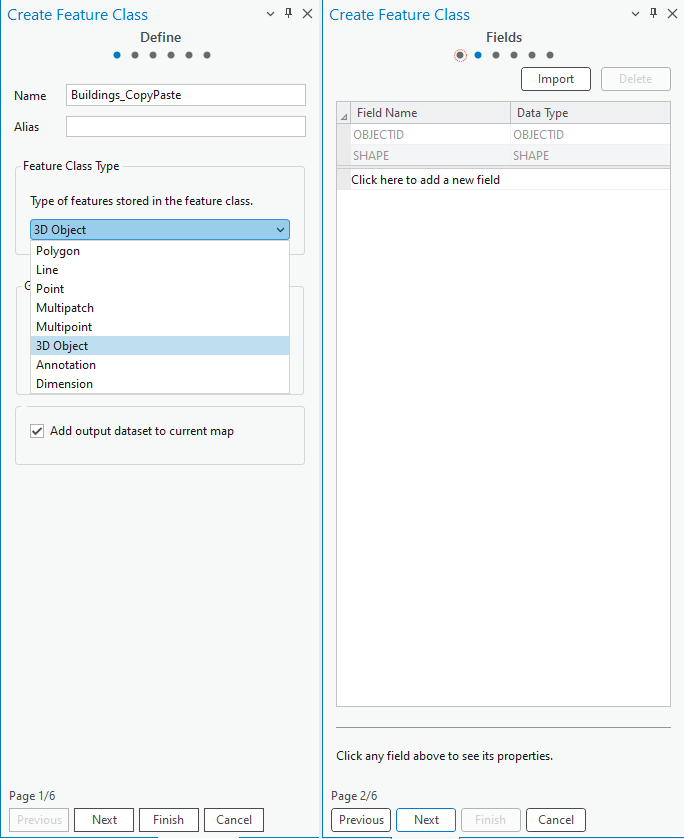
For Fields, click Import at the top and navigate to the original feature class that contains the data. Fields from the original attribute table will be added, and any unnecessary fields can be removed by right-clicking the fields and selecting delete. It is important to match the desired fields of the created feature class with the original to maintain the data schema. If the fields match the data will transfer over, but data without a corresponding field will be lost which is time consuming to fix later. You can also define the spatial reference using the wizard.
With the fields matching, click Finish, and a new 3D object feature layer is created.
To select features, click Select in the ribbon bar and manually select features to copy. Once they are selected in the local scene, right-click to copy the features. This will copy your selection to the clipboard. Then browse to the Edit tab on the ribbon and go to the Clipboard section.

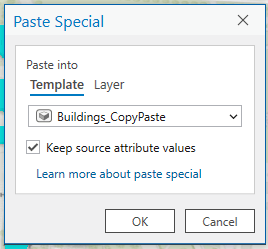
Click the Paste down arrow and select Paste Special. This opens the Paste Special window that allows you to choose where the copied data will go. Choose the newly created 3D-OFL template and click OK. Once the data copies from the clipboard, you will see a translation tool (red, blue, and green arrows) appears at the center of the data. Optionally, move the features and click Finish to apply the translation. Note that Ctrl C and CTRL V keyboard shortcuts will not work in the same manner as using the dedicated button.
My buildings data has successfully been moved into my 3D-OFL, so I can now turn on all my layers for a 3D map of the Tennessee Tech campus.
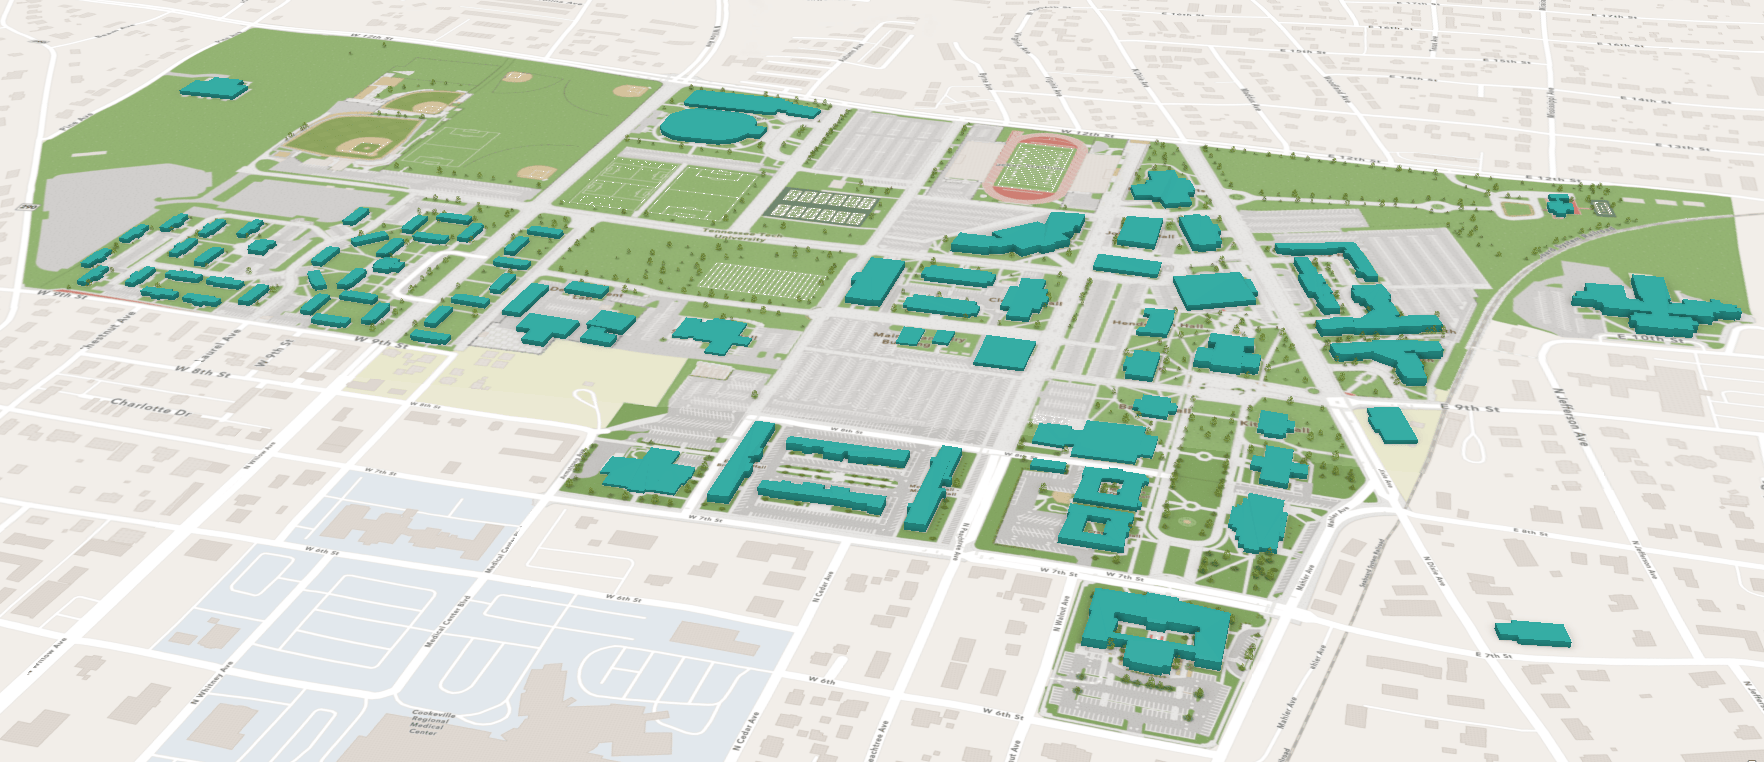
I have a newly created and populated 3D-OFL and can now print, publish, or conduct 3D analysis, mapping or altering the features with modify tools and symbology.
You can provide feedback and suggest other topics that you want to learn about in the Esri Community. Check out the 3D tutorials such as Model a 3D city block and Create realistic 3D urban scenes or sign up for a training course to expand your 3D capabilities.
Licensing information
ArcGIS Pro Basic, Standard, or Advanced: Requires 3D Analyst

Article Discussion: