Part of any planning process involves evaluating alternative options to the path forward. ArcGIS has several powerful tools and workflows to create and compare plan alternatives using geospatial data. Detailed visualizations with authoritative data enable informed decisions. Maps, layers and views are a great way to filter data based on unique attributes to visualize a given scenario. For a Geographic Information System (GIS) analyst in an organization, there are several options to tailor datasets and experiences for planners and designers with a mixed range of ArcGIS skills.
This blog post explores a simple use of ArcGIS Online web layers and arcade to create alternative scenarios that can be used to compare plans. Whether you are just starting off on your geodesign journey with ArcGIS, or looking to migrate ArcGIS GeoPlanner scenario workflows to another platform, we hope this blog helps you explore the power of data management and arcade when it comes to planning with scenarios.
What is a scenario?
A scenario is a unique design alternative to be considered during the planning process. Typically, it is a collection of design features identified by an attribute to represent a goal or state of the design in a planning cycle. A scenario could represent current conditions in an area or site, while a different scenario could represent proposed conditions based on the subject matter expert’s knowledge in conjunction with contextual data layers to design new features. A use case for this would be to illustrate proposed placement of solar arrays based on suitability analysis.
In GeoPlanner’s case, scenarios were encoded in the GeoPlanner project’s feature service in an attribute labeled, “GEODESIGN_SCENARIOID.” This, along with other important attributes, constituted data associated with a plan or design. With the GeoPlanner deprecation, other ArcGIS workflows model the concept of scenarios using feature attributes and filters. Let’s detail the methodology to define scenario layers using your own design layers and forms.
Scenarios and Arcade schema prep
To work with web layers as scenarios, start with a feature template and publish it to an ArcGIS organization as a hosted feature layer. If you aren’t familiar with this, review the following help documentation topics before proceeding:
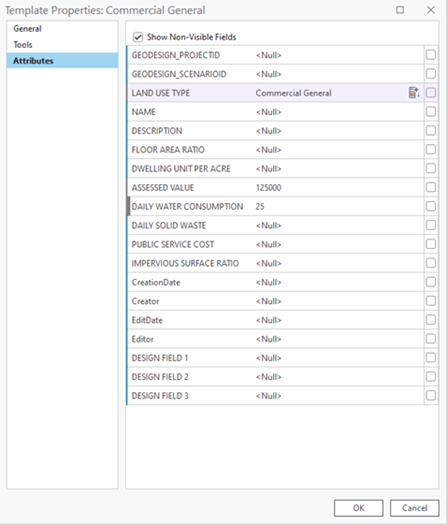
1. Create a feature template using ArcGIS Pro—Make sure to include a GEODESIGN_SCENARIOID field, or another scenario field, and important attribute and type needs for your design process. The Scenario ID field should be a text field, with a length sufficient to store descriptive scenario names, such as 50 characters or more.
2. Share the template—Shared to your ArcGIS organization as a hosted feature layer.
3. Manage hosted feature layer editing in an ArcGIS organization—The following is an example schema for designing a commercial land use plan:
Creating layers for scenarios and Arcade
Once it’s published as a hosted feature layer in your ArcGIS Organization, follow these steps to create any number of scenario layers for your use:
1. Open the hosted feature layer in Map Viewer.
2. Rename the layer to append “_template” to the layer’s name.
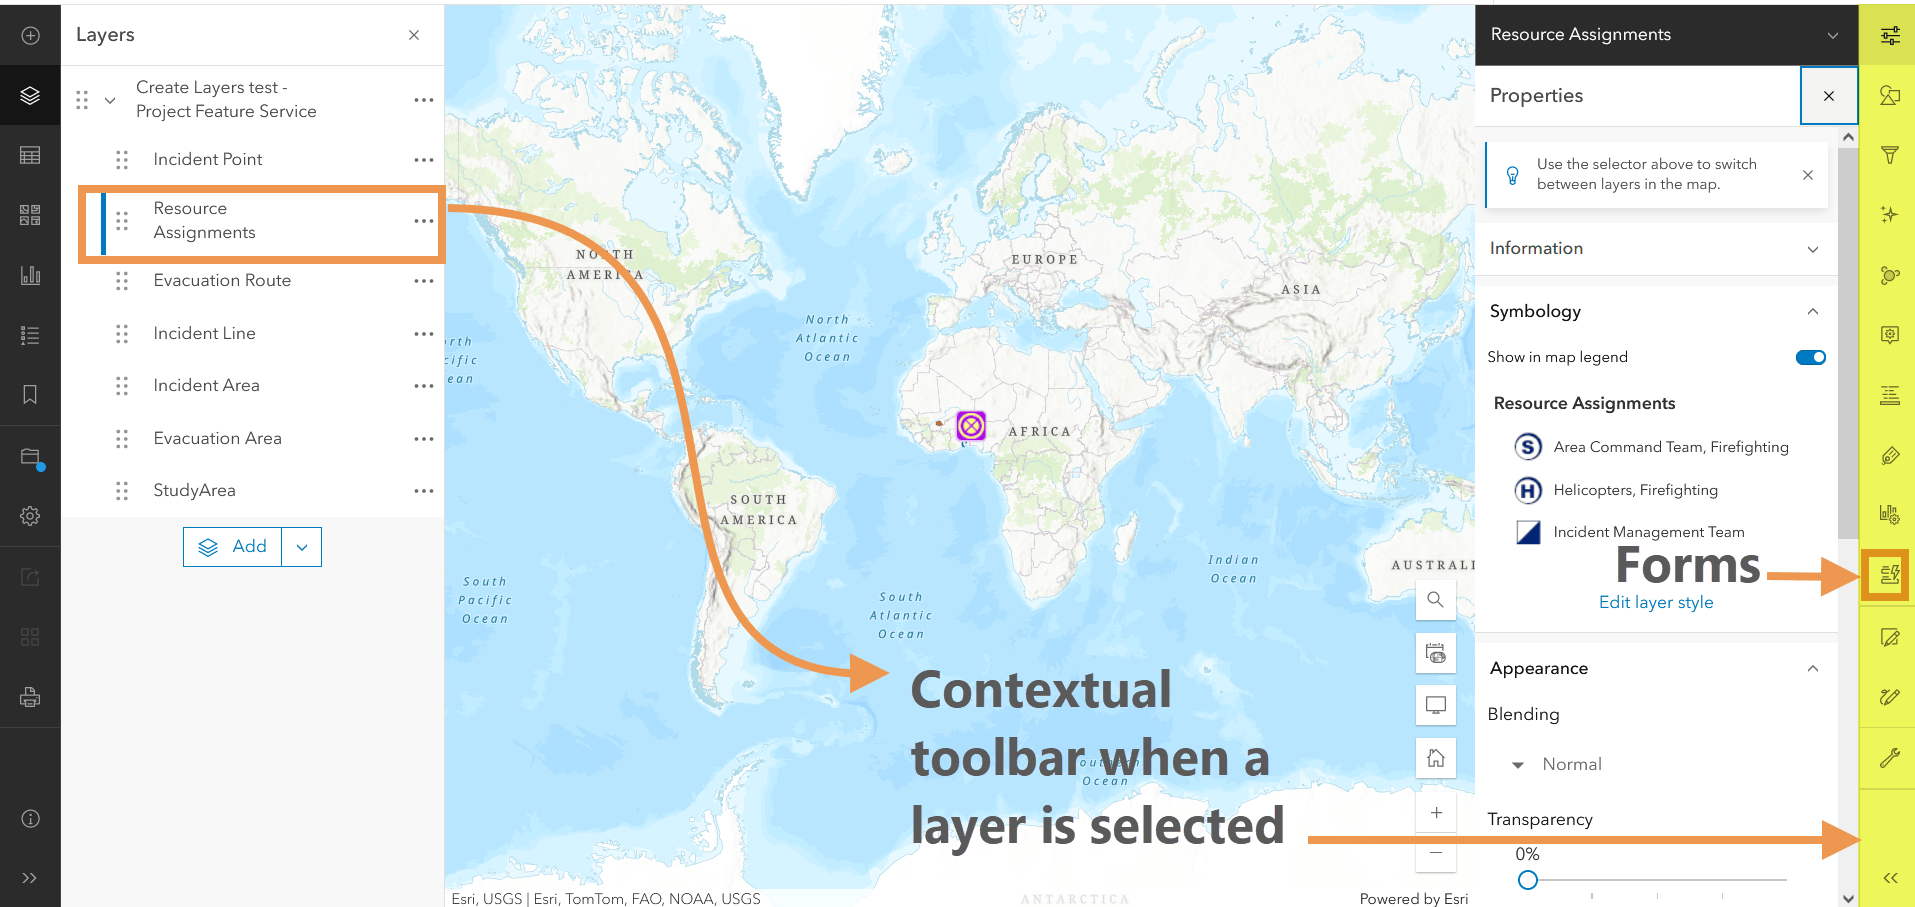
Next, you can use Forms to configure the GEODESIGN_SCENARIOID field and calculate a unique value with an Arcade expression.
3. Make sure that the template layer is selected to bring up the contextual toolbar and click Forms.
4. Drag the GEODESIGN_SCENARIOID field onto the Form builder canvas.
5. Click on the GEODESIGN_SCENARIOID field on the canvas builder to select it.
6. From the Properties menu, scroll to the Logic section and click on the Calculated expression settings icon to add an expression.
7. The following expression automatically populates this field with a Layers name:
var val1=GetFeatureSetInfo($layer).webMapLayerTitle
return val1
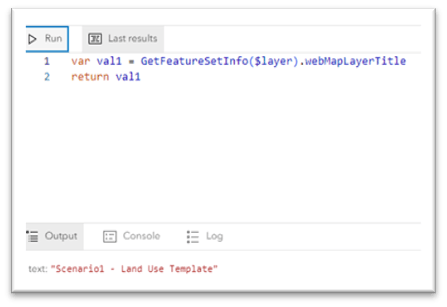
This method allows adopting a convention-driven approach for attributing designs with a scenario label such as a scenario layer name.
TIP:
Forms are a great way to automate several other parts of data creation such as key performance indicators (KPIs) or designs performance metrics.
Learn more about Forms in this blog
8. Click OK to save the changes and save the map.
9. Duplicate this template layer and rename the new layer, “Scenario A.”
Next, we’re going to add a filter so that the map only displays features belonging to this Scenario.
10. Select the “Scenario A” layer.
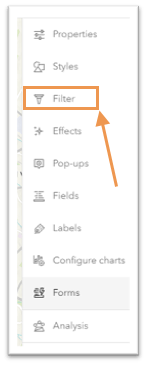
11. Open the Filter tool and set a filter where GEODESIGN_SCENARIOID is “Scenario A.”
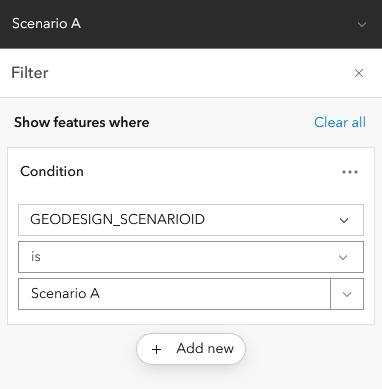
12. Repeat steps 9 – 11 to create multiple scenarios in your map.
Your map is now ready start designing.
TIP:
When you start designing, turn the template layer visibility off while creating your scenario design or plan. Optionally, turn off scenarios you won’t be actively working on.
Designing in ArcGIS
There are several options to create or define a design or plan using ArcGIS editing workflows. A benefit of using forms and arcade when configuring layers for design (editing) is that many of the automations are natively supported when creating or modifying your design features. We’ll dive into those details in another blog. For now, here is a short overview of some options:
ArcGIS Web Editor
ArcGIS Web Editor is a new web-based editing app that provides a modern way to make GIS data editing easy for you and your team members. As a map-centric editing app, it includes draw tools, contextual menus, guides, constraints, snapping control, and supports preset templates.
Experience Builder edit widget
The Edit widget in Experience builder can be combined with other useful widgets such as Layers, Charts, and Suitability Modeler to build a tailored experience and simplifying tasks for your organization’s planners. Furthermore, the experience you develop can be saved as a template for reuse across projects.
Conclusion
Tools and workflows available in the ArcGIS can help you transform your organizations planning workflows from a manual one to a digital one using simple application of smart forms and web-based maps.
For advanced techniques related to planning and scenario management, check out ArcGIS Pro and ArcGIS Urban resources.
Commenting is not enabled for this article.