Suitability modeling helps identify areas that “suit” an organization’s needs. In short, by determining a set of criteria and assigning values to each criterion, a scale can be derived to rank locations based on those specific characteristics. The criteria are weighted relative to one another and combined to create a suitability map for a comprehensive visual.
In ArcGIS, it’s a powerful way to help answer questions such as:
- Where are the greatest risks for insect damage?
- Where are optimal locations for a commercial development?
The answers can help inform important considerations when planning new communities, exploring alternatives for an area or its use, or simply exploring your geospatial data in the context of other geospatial factors. When combined with unique experiences designed with ArcGIS Experience Builder, you can truly harness the power of parallel-processing to explore your data and better understand your world.
Behold the Suitability Modeler Widget
The Suitability Modeler widget is a configurable tool in ArcGIS Experience Builder that lets users leverage raster analysis to model and visualize data based on multiple underlying factors from preconfigured or user-defined models. The Suitability Modeler widget uses a special type of imagery layer known as a weighted raster overlay (WRO) service. There are several preconfigured WRO services provided by Esri and available publicly in ArcGIS Online, including ecological and physiographic datasets that have global extents.
Perform the following steps to use the Suitability Modeler widget in ArcGIS Online or ArcGIS Enterprise:
- Sign in to your ArcGIS organization and open Experience Builder.
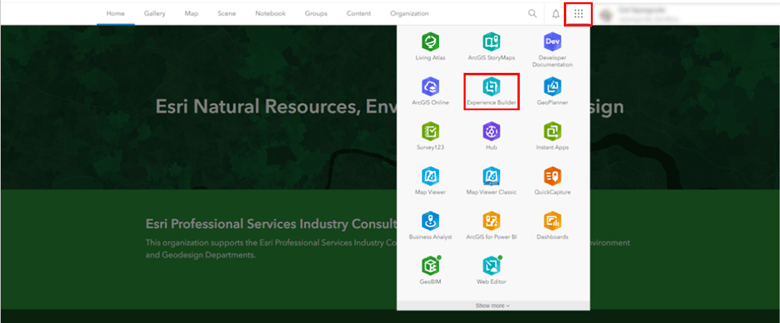
2. Click Create new and choose a template, or start with a blank Experience.
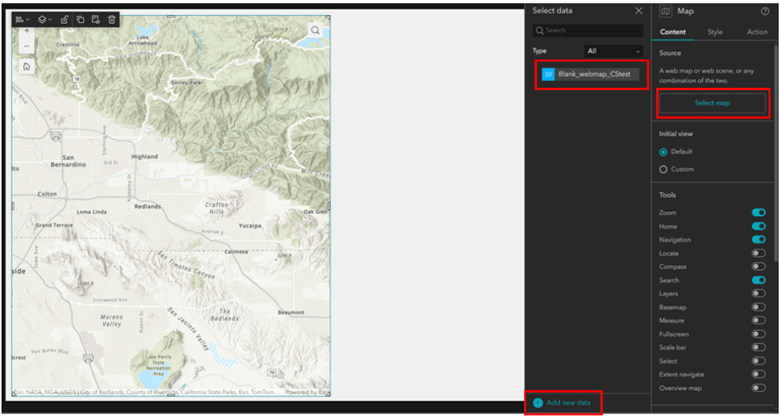
3. Add a Map widget into the canvas and resize it as needed.

4. In the control panel for the map widget, click Select map then click Add new data. Browse maps from your ArcGIS content, or Living Atlas, select the desired map for your suitability model, and click Done.
5. In the Select data pane, choose the map you just added and set it as the selected map.
6. In the Insert Widget pane, find the Suitability Modeler widget and drag it onto the canvas.
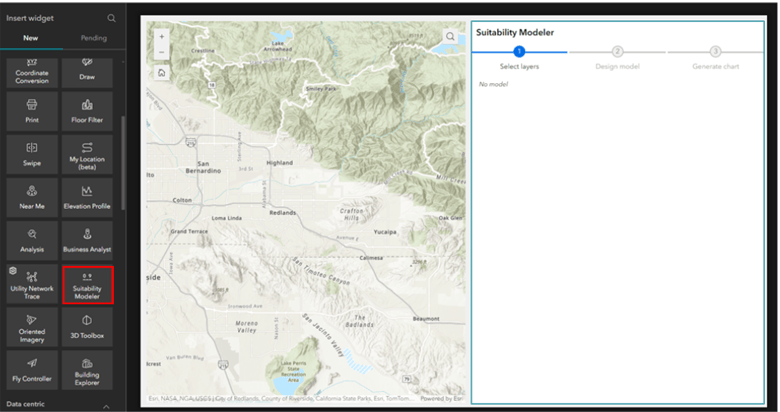
7. Click on the Suitability Modeler widget in the canvas to open the configuration pane for the widget.
8. In the Image service URL text box, provide the image service URL for the weighted raster overlay (WRO) service to the suitability model you will be using.
Tip: Use one of the example modeling services listed in the settings panel by copying and pasting it in the Image service URL box.
9. Click the check mark to validate your WRO Service.
Learn more about weighted overlay services or how to configure one.

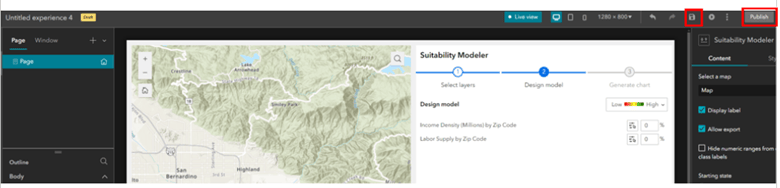
10. Save and publish your app.
Now that you have created this experience you can share it with others for use. The end users of your modeling experience will have the following options when modeling with Suitability Modeler in Experience Builder:
- Select layers – Specifies the layers to include in the modeling output.
- Design model – Assign each selected layer a relative weight and assign suitability scores (0 to 9).
- Run model – Triggers processing and adds the result to the connected map widget.
- Export model – Requires an ArcGIS account with privileges to create content in their organization and enables saving the model results as a WRO service that can be added to other experiences or used as a preconfigured model.
For more details on using Suitability Modeling to build your own tailored experiences for exploring geospatial information, review the widget’s documentation. Whether you are just beginning your journey of exploration using data with suitability modeling or migrating your GeoPlanner workflows to other ArcGIS apps, we hope you’ll leverage the power of collaborative mapping with ArcGIS.


Commenting is not enabled for this article.