Users sometimes need to include multiple copies of a layer in their map and specify different, mutually exclusive filters on them. Feature layer views offer a new way to include that information in a map.
We looked at feature layer views in a previous blog post as a way to effectively control what information and capabilities different mobile workers see when working in Collector. Here, we’ll look at another mobile workflow enabled by feature layers: presenting the information of a single layer as two separate layers in a map. This offers more flexibility in the map and allows mobile workers to see a subset of the information by controlling visibility on each layer.
For example, let’s look at a layer of bike routes. Some of the routes in the layer are existing routes, and others are proposed. Mobile workers’ day-to-day responsibilities are about maintaining existing routes, but they occasionally need the additional context of new routes that are under consideration.
One approach is to add the same layer to the map twice, and apply different filters to each—but this won’t work offline. Your offline map doesn’t maintain the filters and symbology applied to each layer.
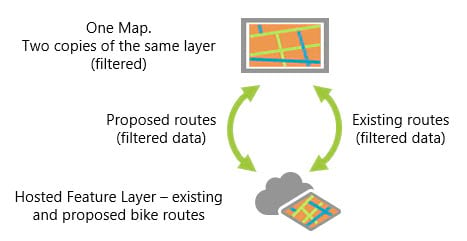
ArcGIS Enterprise users could publish multiple feature layers; but what if you’re not using ArcGIS Enterprise?
Enter feature layer views: creating a feature layer view creates a new layer. From your original feature layer, create two feature layer views and apply a filter to each (in our example, one of proposed routes, and one of existing routes). Make them editable, enable sync, and add both those new layers to the map. Let’s look at the steps for how to set up the feature layer views:
- In the browser, open the item page for your hosted feature layer. This is the layer that contains all the data: in our example, it has both proposed and existing bike routes.
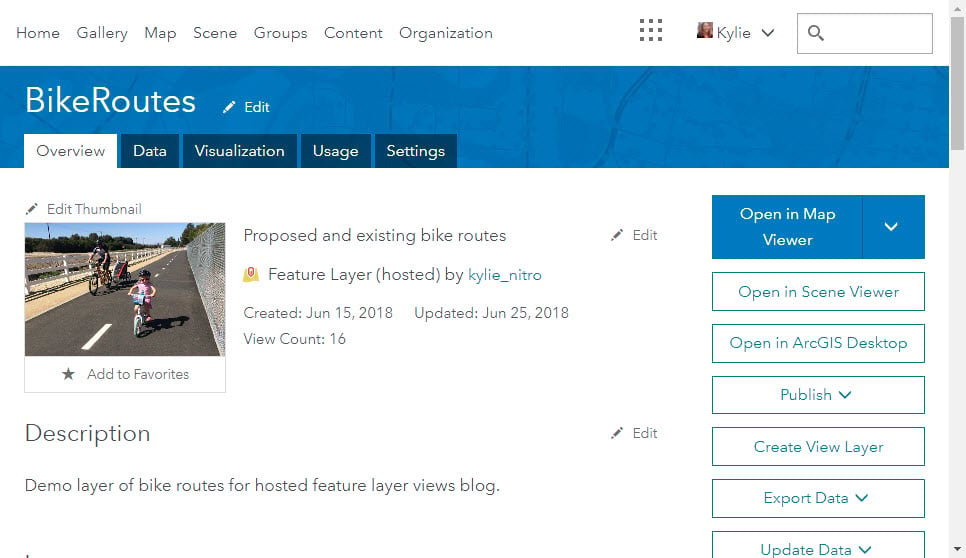
- Click Create View Layer to make a hosted feature layer view. In the Create View Layer dialog, give it a name and click OK.
The view is created for you, and you are taken to its item page. Here, I’ll make the one for proposed routes. - On the Visualization tab of your new hosted feature layer view, click Filter in the tools.

- Create a filter that will only display features you want in this view.
For this example, I’m going to filter on a “proposed” status. With the attribute and value selected, click Apply Filter.
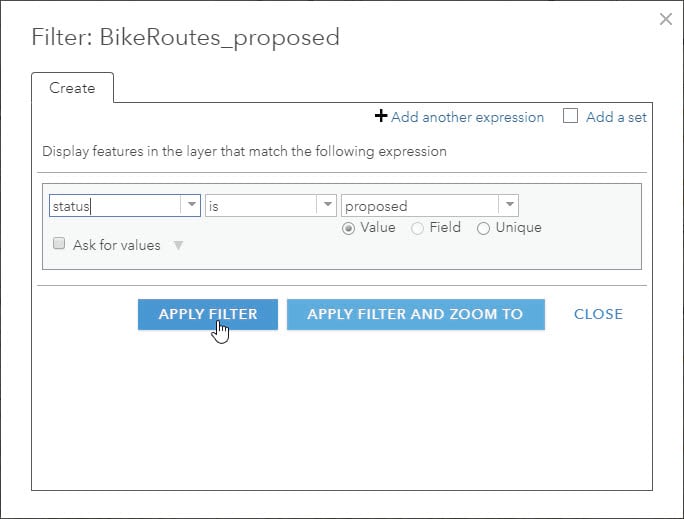
The map display updates to only show data with that status.
- Click Save Layer to create your feature layer view. It is now an item in your ArcGIS organization and can be used like any hosted layer.
- Go to the Settings tab of the of your hosted feature layer, and enable editing and sync (if you’ll be working offline).
You are now ready to add your hosted feature layer view to a map.
If you are following my bike routes example, you’ll want to take these same steps again to make a second hosted feature layer view. Instead of filtering for proposed routes in it, you’ll filter for existing routes.
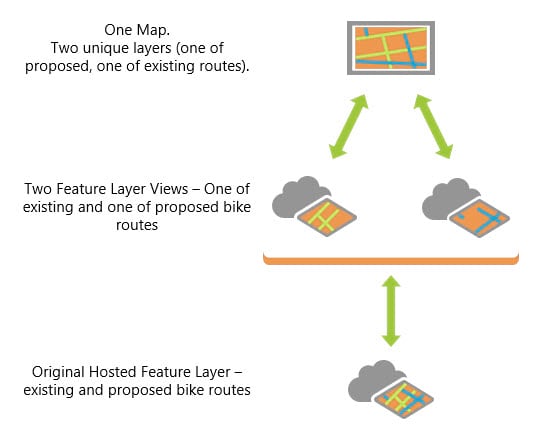
Now you can go offline: by creating separate feature layer views, the filters and symbology of both the proposed and existing routes are maintained in your offline map. Having used feature layer views you can achieve the effect of having multiple layers from the same service. All the data is still centrally managed and accessible using the source (original) feature layer, and changes made in one layer are reflected across all the layers.
You can also take advantage of the additional capabilities offered by feature layer views such as configuring different editing capabilities, synchronization settings, or popups.
Try it yourself
Ready to make a feature layer view from your data? See Create hosted feature layer views in ArcGIS Online or Create hosted feature layer views in ArcGIS Enterprise.

Commenting is not enabled for this article.