We are proud to introduce ArcGIS Web Editor with the June 2024 update of ArcGIS Online. Whether you are a GIS novice or a seasoned analyst, Web Editor has something to offer for everyone. This blog will walk through five tips and tricks to have you editing like a pro in no time.
- Explore drawing tools
- Use shortcuts
- Leverage editing constraints
- Use the selection pane
- Configure settings

Tip 1: Explore drawing tools
When creating or editing a feature in ArcGIS Online, the default drawing tool is a line. While this suits most use cases, you may want to create more complex features. This is where drawing tools come in! Rather than sticking with Line, explore our additional drawing tools (below) when creating, reshaping, or splitting a feature in Web Editor.
 Line Line |
Creates straight line segments |
 Right angle Right angle |
Creates 90-degree angles between vertices while drawing |
 Freehand Freehand |
Creates free-form shapes while you click and drag |
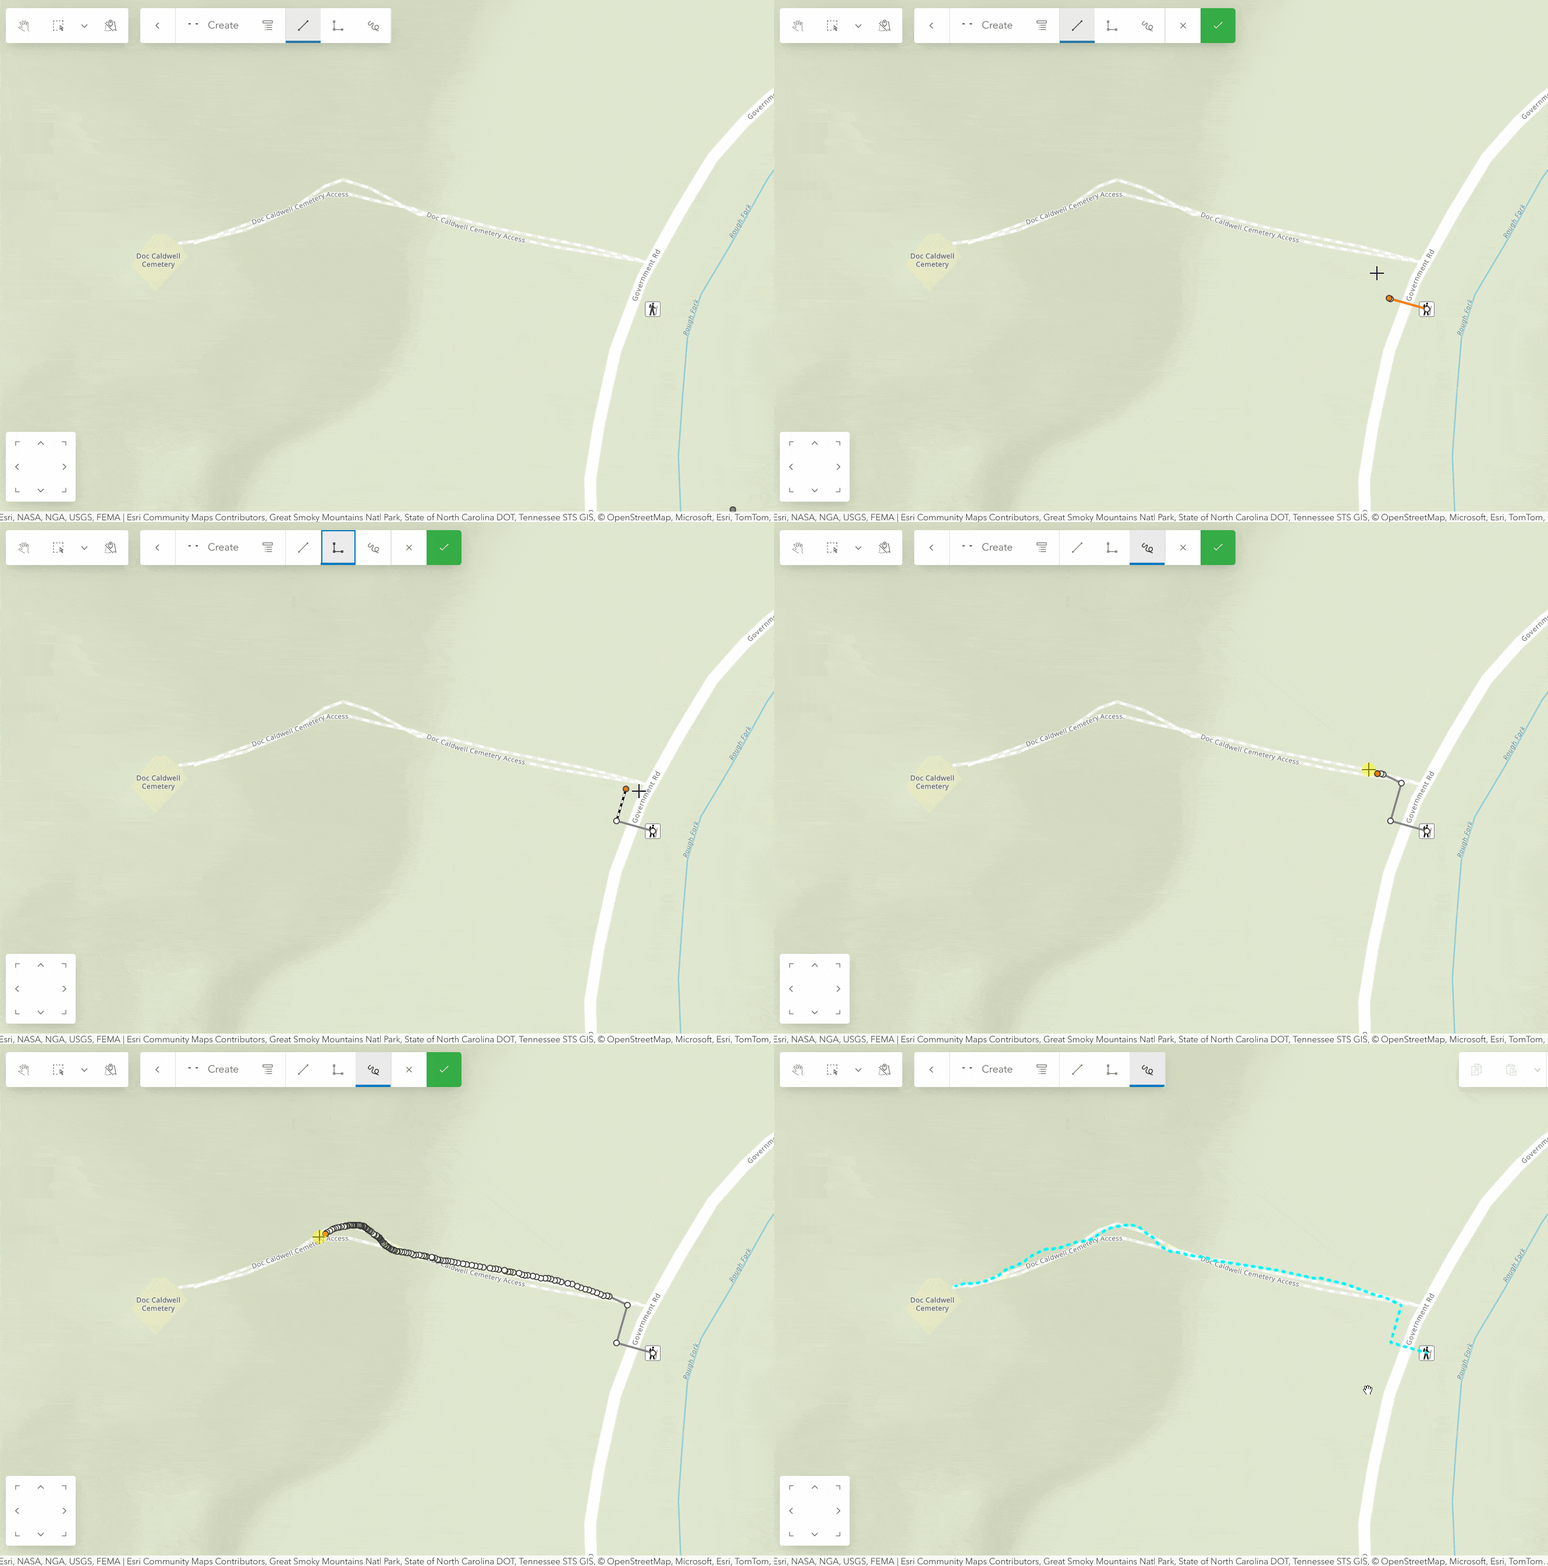
To learn more, see the draw features documentation.

Tip 2: Use shortcuts
Shortcuts: The GIS editor’s best friend. No one can deny how helpful shortcuts are to help you get into a groove while editing and save unnecessary mouse clicks. The biggest barrier to entry is simply trying to remember which shortcut does what. Fortunately, Web Editor provides two ways to easily view and search for keyboard shortcuts.
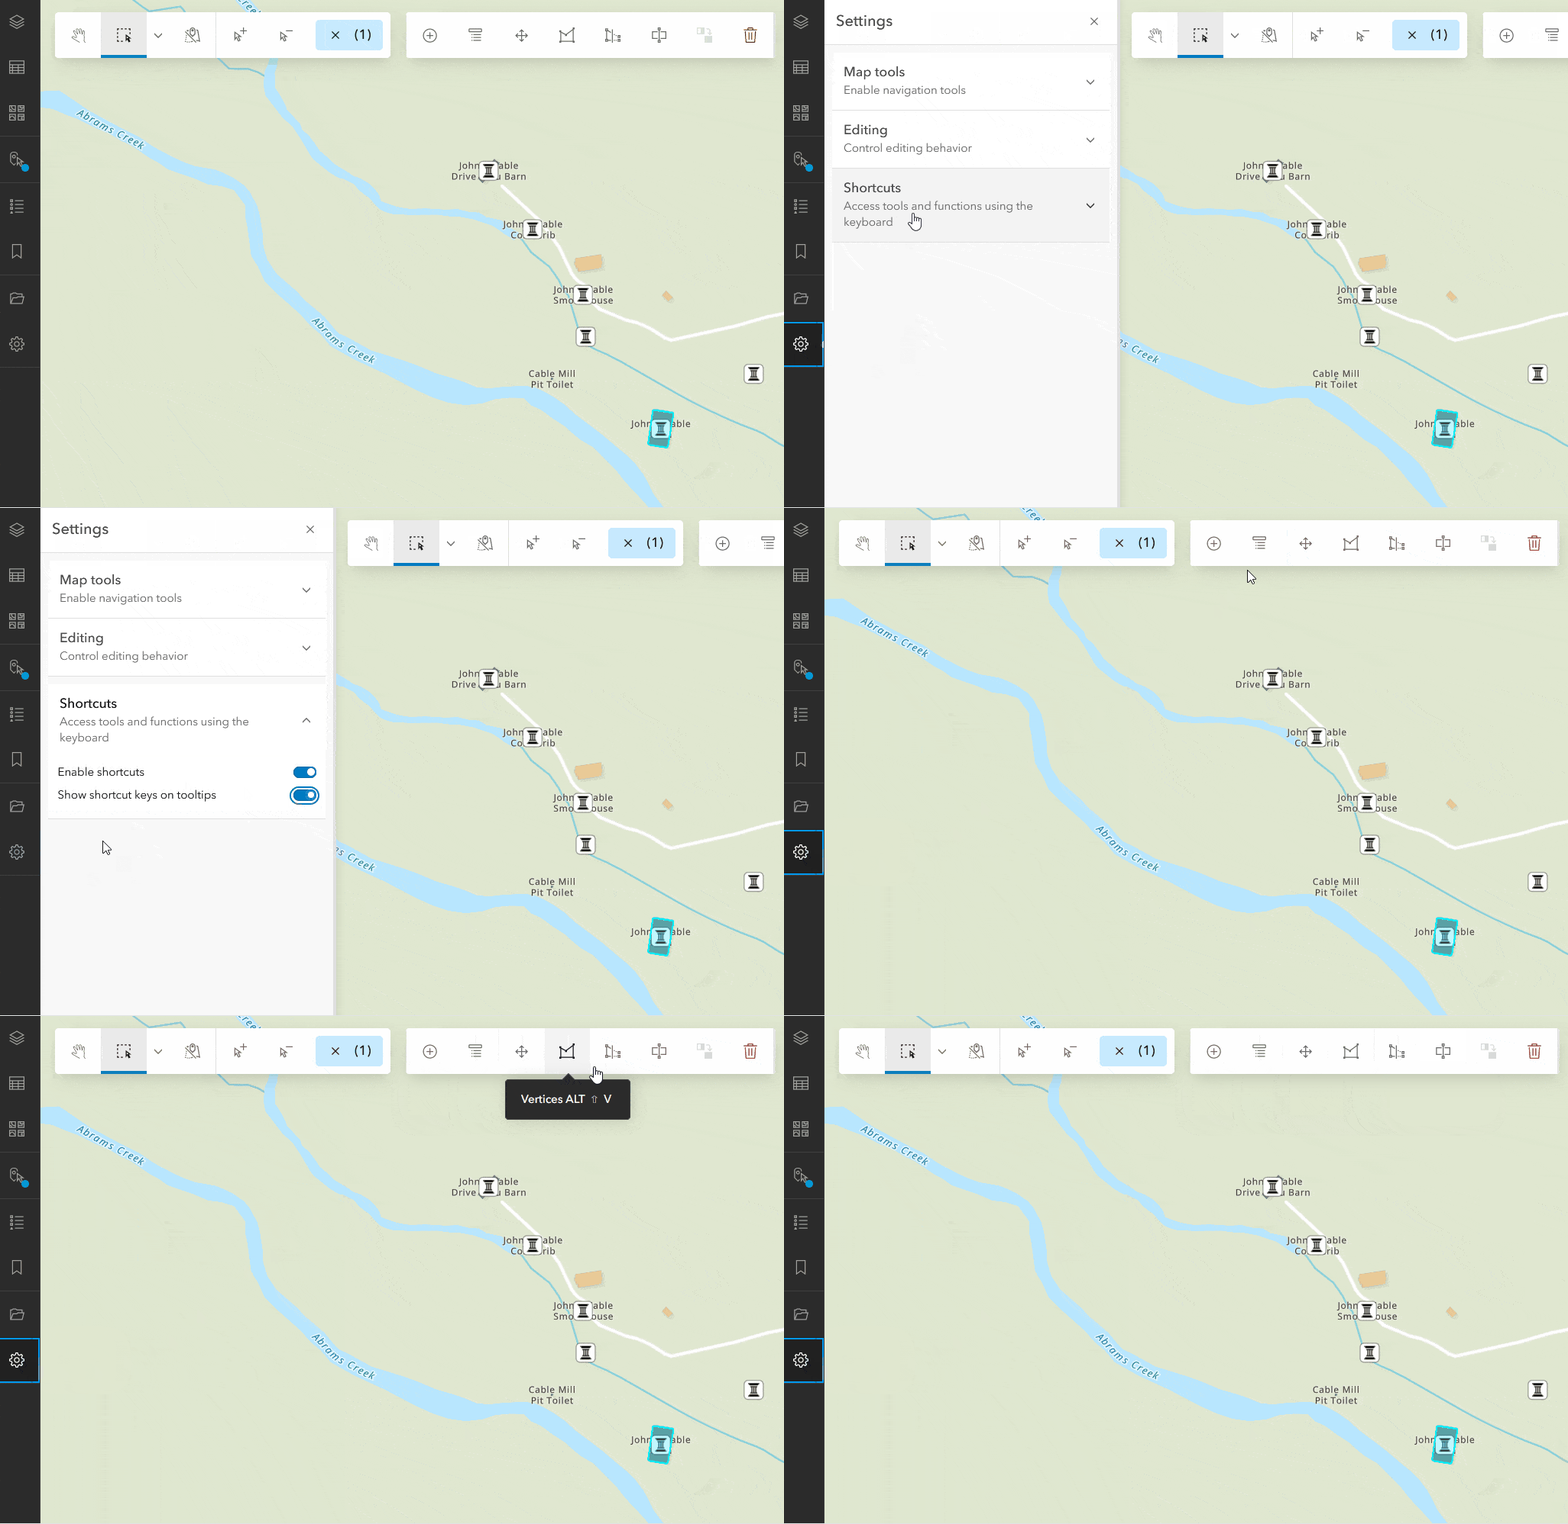
Shortcut tooltips
Want a more direct way to view shortcuts for your most used tools? Enable Shortcut keys on tooltips in the Settings pane to display them when hovering over tools in Web Editor.
Shortcuts menu
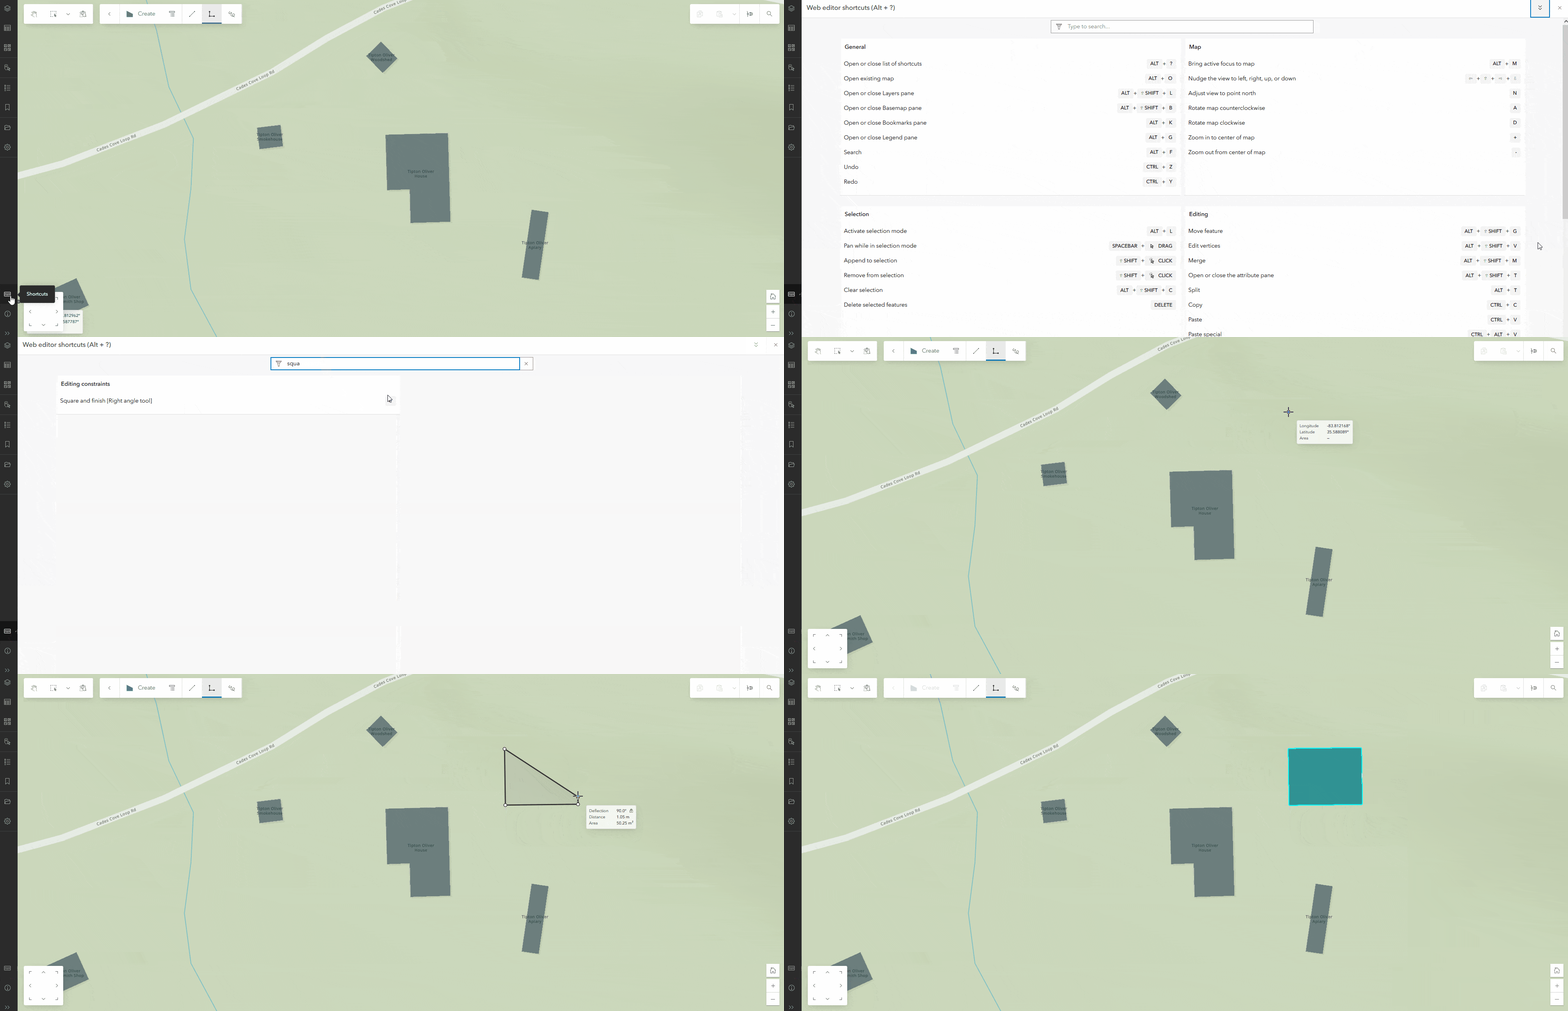
To view all the shortcuts available in Web Editor, click the Shortcuts  icon on the Settings (dark) toolbar. From here, browse through the list or use the search bar to find a specific shortcut.

Tip 3: Leverage editing constraints and tooltips
Editing tooltips
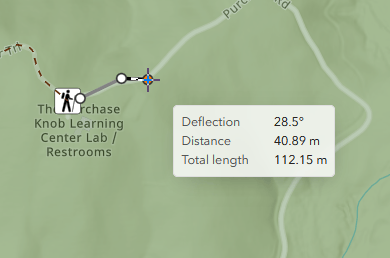
Tooltips are a great way to provide more context while you are drawing or editing a feature. Displayed in a floating menu near your cursor, tooltips show the following values while you edit:
- Distance from the last vertex
- Deflection (angle)
- Direction
- Latitude and Longitude
- Z values (if enabled)
- Area (for polygons)
Tooltips are enabled by default but can be toggled on or off through the snapping menu or by pressing the T keyboard shortcut.
To learn more about tooltips, see our blog article Map a Point by Coordinates in ArcGIS Online with Tooltips.
Editing constraints
Tired of using the measurement tool to estimate distances while editing? Try editing constraints! Editing constraints give you precise control over measurements while editing features, for example deflection (angle) or distance from the last placed vertex. To input a value, simply press Tab (while drawing) with tooltips enabled or use one of the keyboard shortcuts.
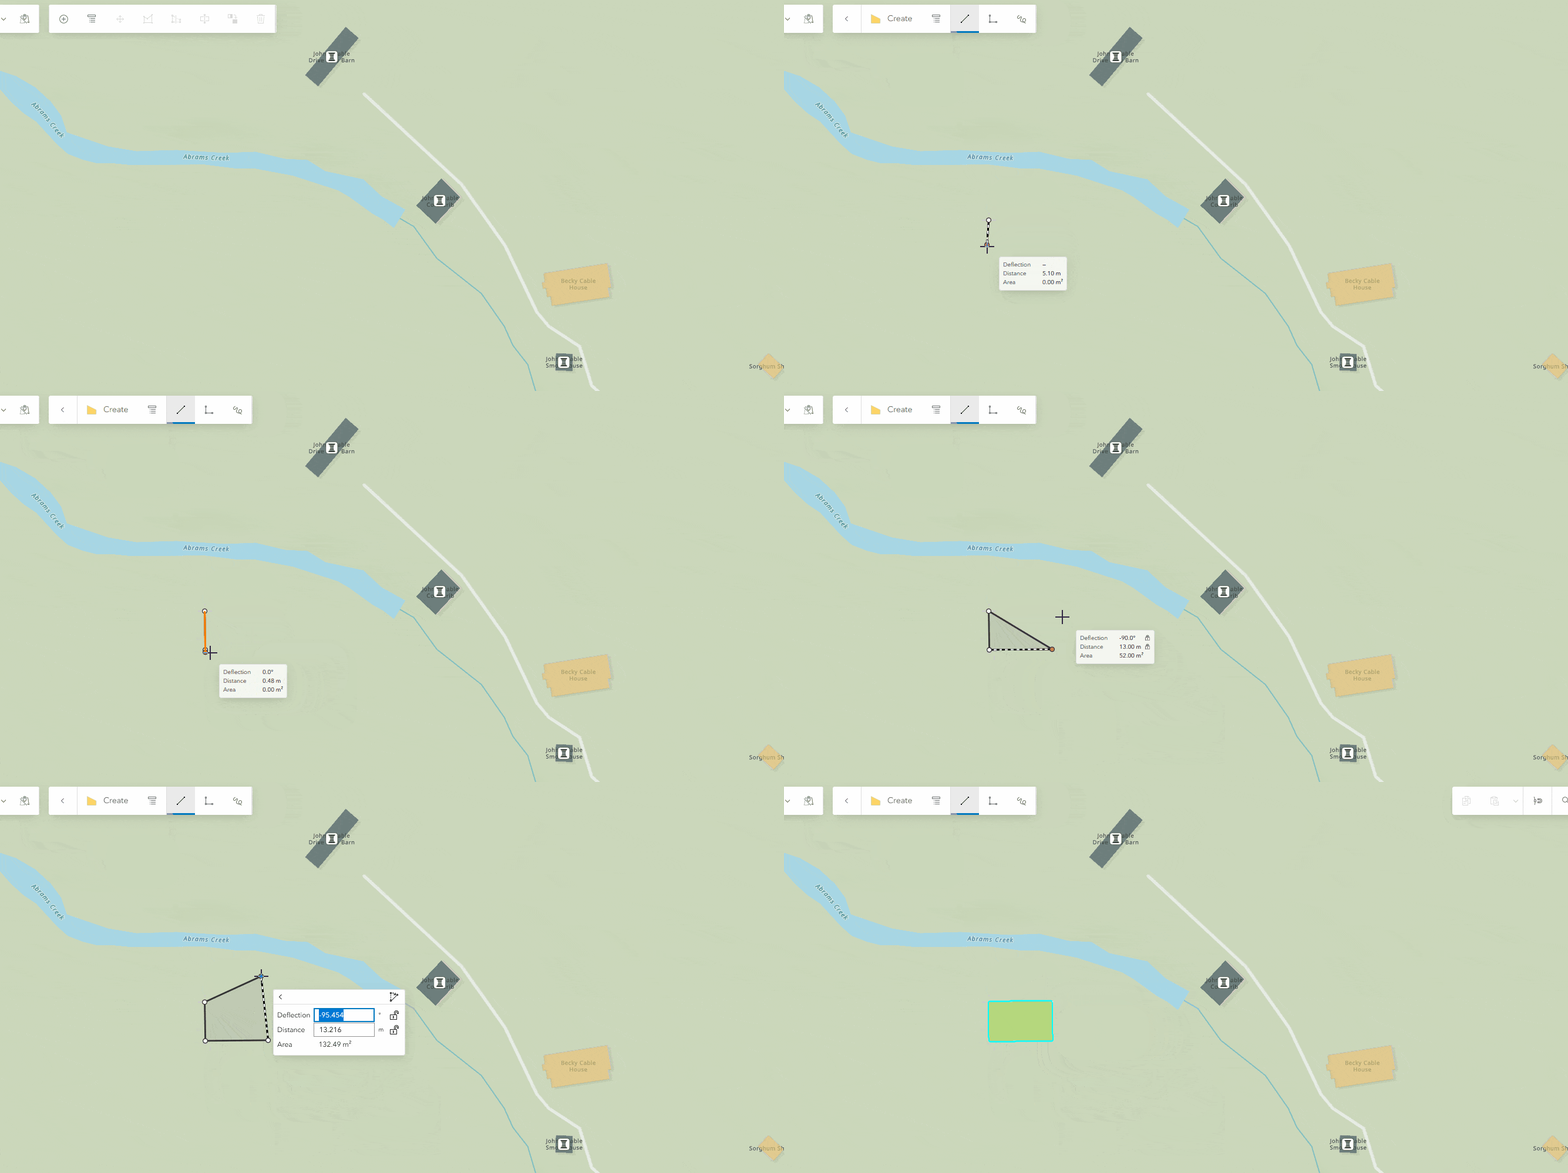
For a full list of editing constraints shortcuts, see editing constraints.

Tip 4: Use the selection pane
The days of selecting one feature at a time are over! Web Editor supports selecting features in bulk from the map, the table, or through an attribute query. However, when working with more than one feature it can be difficult to understand what features you have selected and refine them as needed. This is where the Selection pane comes in.
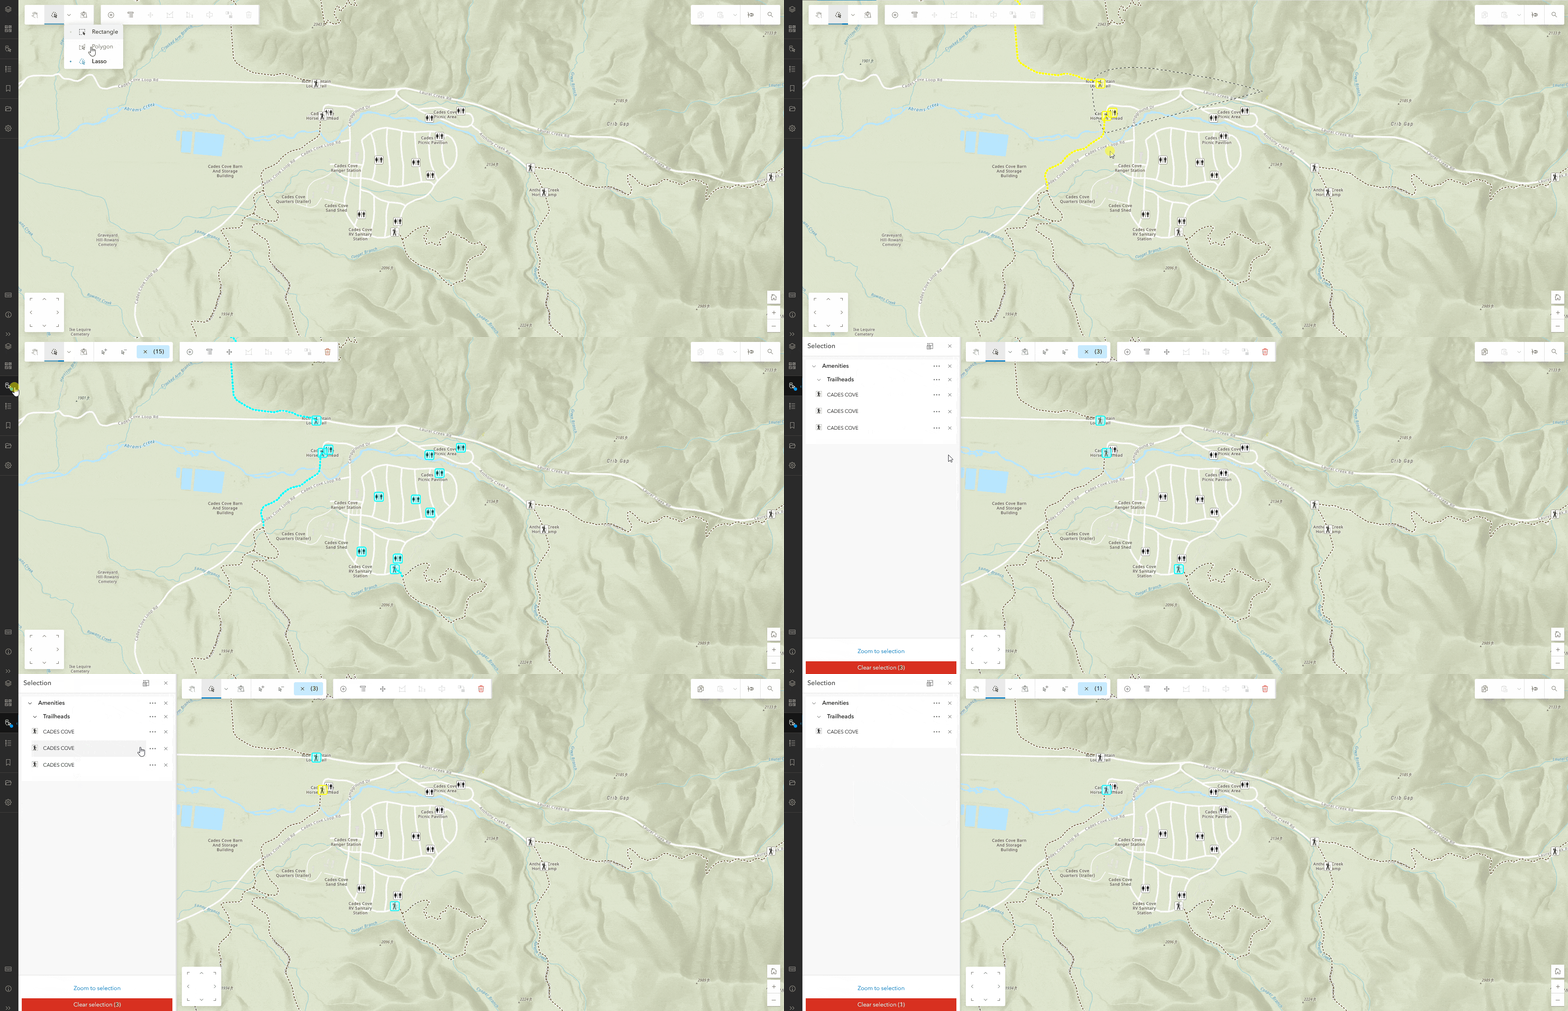
The Selection pane categorizes features into collapsible groups based on the layer to make browsing simple. Additionally, hovering over a selection in the list highlights the corresponding feature on the map to make it easily identifiable.
To refine the selection further, use the X to remove individual features and groups or use the Select only this feature option in the overflow menu.
To learn more, see the Selection documentation.

Tip 5: Configure settings
Want even more control over your editing experience in Web Editor? Take a look at the Settings  pane on the Settings (dark) toolbar. From here you can control whether the Attributes pane appears after creating a feature, toggle the delete features prompt and more. Keep an eye on the Settings pane as we will continue to expand it in future updates.


Summary
We hope the tips and tricks we explored in this blog article help you become comfortable with Web Editor and allow for more streamlined editing workflows.
To learn more about ArcGIS Web Editor, check out our blog article ArcGIS Web Editor – Your Data Maintenance New Best Friend. The Web Editor team will also be at the upcoming 2024 User Conference, so stop by our booth at the Showcase or add the following session(s) to your agenda:
ArcGIS: Exploring the New Web Editor
- Tuesday, Jul 16 | 1:00 PM – 2:00 PM PDT
- Thursday, Jul 18 | 1:00 PM – 2:00 PM PDT
Until then, happy editing!

This is neat! but… AGOL Web Applications Builder has a widget called Batch Attribute Editor, which has the functionally this editor is missing. You can edit a field on multiple features at a time while on here you are only allowed to edit one features attributes at a time. The Copy, Paste and Delete is great, but if we are going to phase out Web APP Builder this soon at least bring over its editing capabilities. I understand releasing partially built applications and waiting for the community to tell you what they want, but there is functionality that is missing… Read more »
Hi @Nick Creedon, thanks for the comment. Batch attribute editing is one of our top priorities and will be coming soon. Make sure to keep an eye out and follow along for updates!