Where’s my landcover dataset? In this folder? Nope. I know it’s here somewhere. Did I move it over there? Guess not. Shoot. When situations like this come up–or whenever you need a better sense of the data available in your project–what do you do? Search!
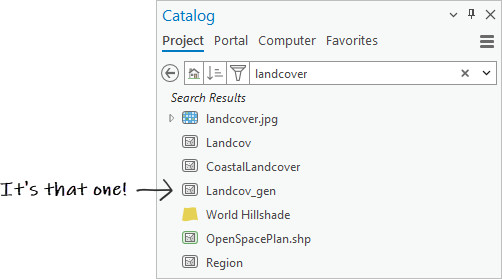
The ArcGIS Pro index, working behind the scenes, is what makes searching for items possible. It keeps track of the contents of all your projects: maps, layouts, databases, folder connections (including subfolders and their contents), servers, styles, and other resources.
Indexing in ArcGIS Pro 3.2 has some great new features:
- Task scheduling is more flexible and robust.
- You can index folders even if you don’t add them to a project.
- You can exclude folders from indexing.
- Custom indexes can be created and shared.
- The status of indexing operations is displayed.
If it’s been a while since you’ve worked with indexing settings, you access them on the Options dialog box in the application settings. It looks like this (without the scribbling):
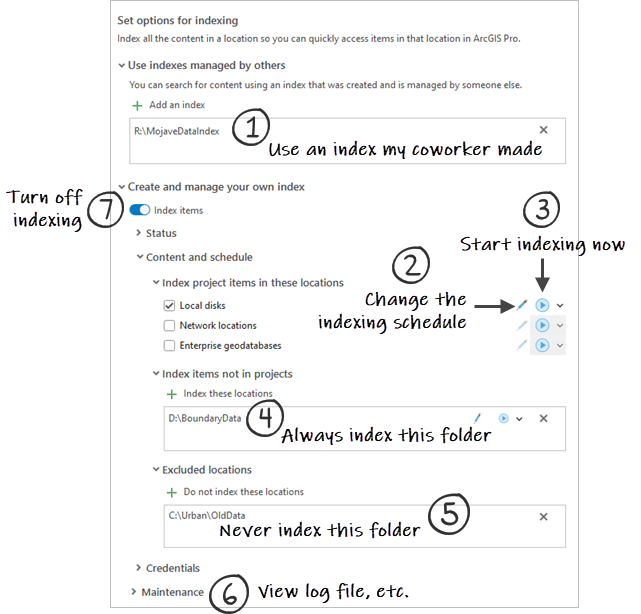

Suppose your colleague maintains data on a shared network drive. They can create an index specific to that location (more on this below) and share it with you. This allows you to search their network data without using your own computer’s resources to index the drive.
Managed indexes are especially useful for system administrators because they can be distributed throughout an organization. An administrator can use application settings to provide the same index automatically to all users in a workgroup or organization.

Each indexing task–incremental indexing, index rebuilding, and thumbnail generation–has its own schedule. When it comes to how often and when to run tasks, you can be as flexible as a yoga master. For example, you might rebuild your index daily or a couple of times a week, but only generate thumbnails once a month.
Schedules can also be different for local disks, network drives, enterprise geodatabases, and additional locations you designate for indexing.
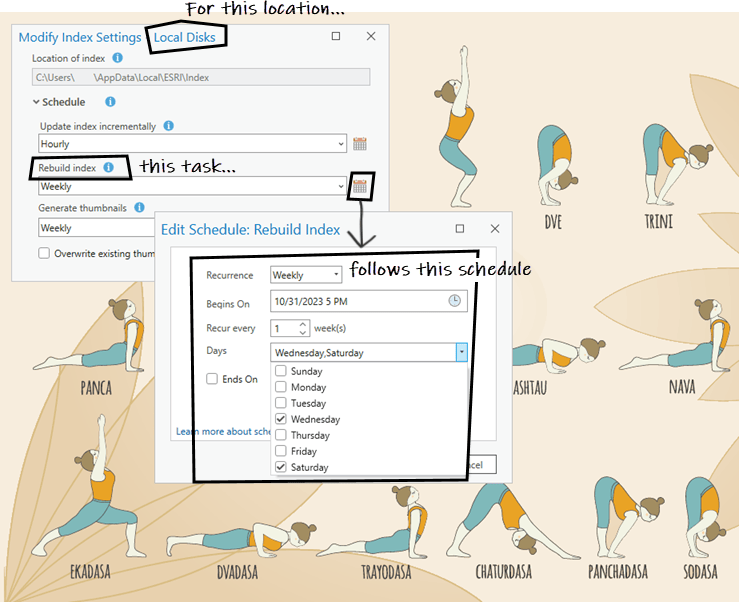
On the Modify Index Settings dialog box, expand the Status section at the bottom to see when the last indexing tasks were performed for that location. A green check mark means the task ran successfully. Other messages appear if a task is in progress or was cancelled for some reason.


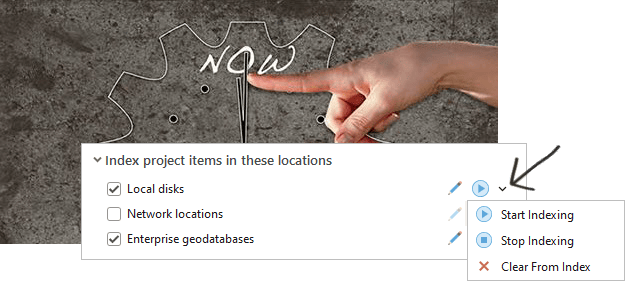
You can now manually start indexing at any time. You might do this to take advantage of some unexpected downtime when you don’t need to use ArcGIS Pro. You can even let indexing run as you work in the application. (Indexing tasks normally start when the application is closed.)
You can stop an indexing task in progress with the Stop Indexing button on the drop-down menu. Be careful, though–if you manually stop indexing on a location, such as local disks, no scheduled tasks run for that location until you manually restart indexing.

Before version 3.2, items weren’t indexed unless they were added to a project through a folder connection or some other connection. Now you can designate a folder to be indexed without adding it to a project. Items stored in the folder are returned when you search any project. This is a good way to make sure important data is always available and easy to find no matter what you’re working on.
By default, the content of a designated folder is indexed in your default resource index. You also have the option to make a new index specific to that folder in a different location. Either way, the folder has its own indexing schedule.
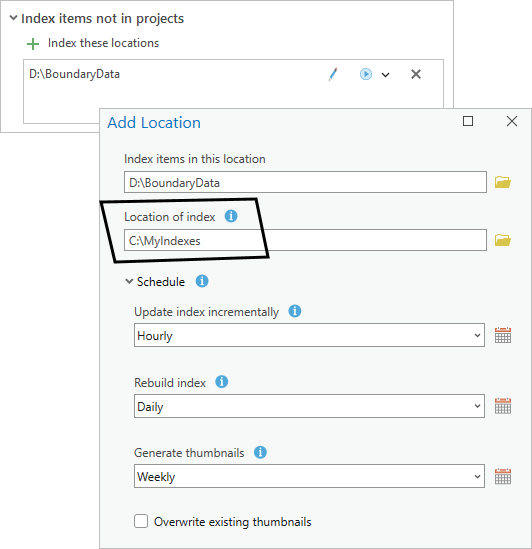

You can also exclude folders from indexing. This is useful, for example, if some subfolders in a folder connection contain older versions of data or data that needs further processing–stuff you need to keep but don’t want to appear in search results. If you exclude a folder from indexing, its content isn’t returned in a search of any project.
At any time, you can remove folders designated either for indexing or exclusion. The changes are processed the next time the index is rebuilt.

Normally, you don’t have to think about maintaining your index because the index rebuilding task does that for you. However, the option to delete your index manually and start fresh is always available. You can delete all indexed locations with the Delete Index button or use the Clear From Index button to delete the index for a particular location, like local disks or network drives.
A log file keeps information about which folders have been indexed at which times. You can adjust the log file size according to how much history you want to keep.
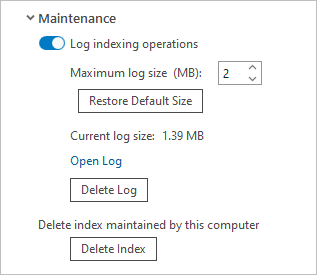

Indexing is turned on by default, but you have the option to turn it off. This isn’t usually recommended but there are situations where it makes sense–for instance, if you only use an index created and managed by your administrator. Or if you’re an incredibly well-organized person who would never lose track of an important landcover dataset.
Check out the indexing documentation at How projects are indexed and Manage the index. See Search the project for tips on refining search terms and managing search results.
Happy hunting!

Commenting is not enabled for this article.