In each release of ArcGIS Pro we strive to bring productivity and performance improvements as well as new functionality. This blog aims to list out improvements with regards to elevation.
arcpy support
You can now better access elevation surfaces and sources through arcpy. Have you ever needed to automate access to elevation surfaces and sources as well as set elevation surface settings? Now you can at ArcGIS Pro 3.2! We’ve added an ElevationSource and ElevationSurface class to support your key workflows. One of those workflows may require you to update the vertical exaggeration of the elevation surface. Checkout this code snippet for how to do this:

In future releases we will add more functionality such as adding and removing elevation source and surface layers as well as updating elevation properties on 3D layers.
Elevation source layer time and range
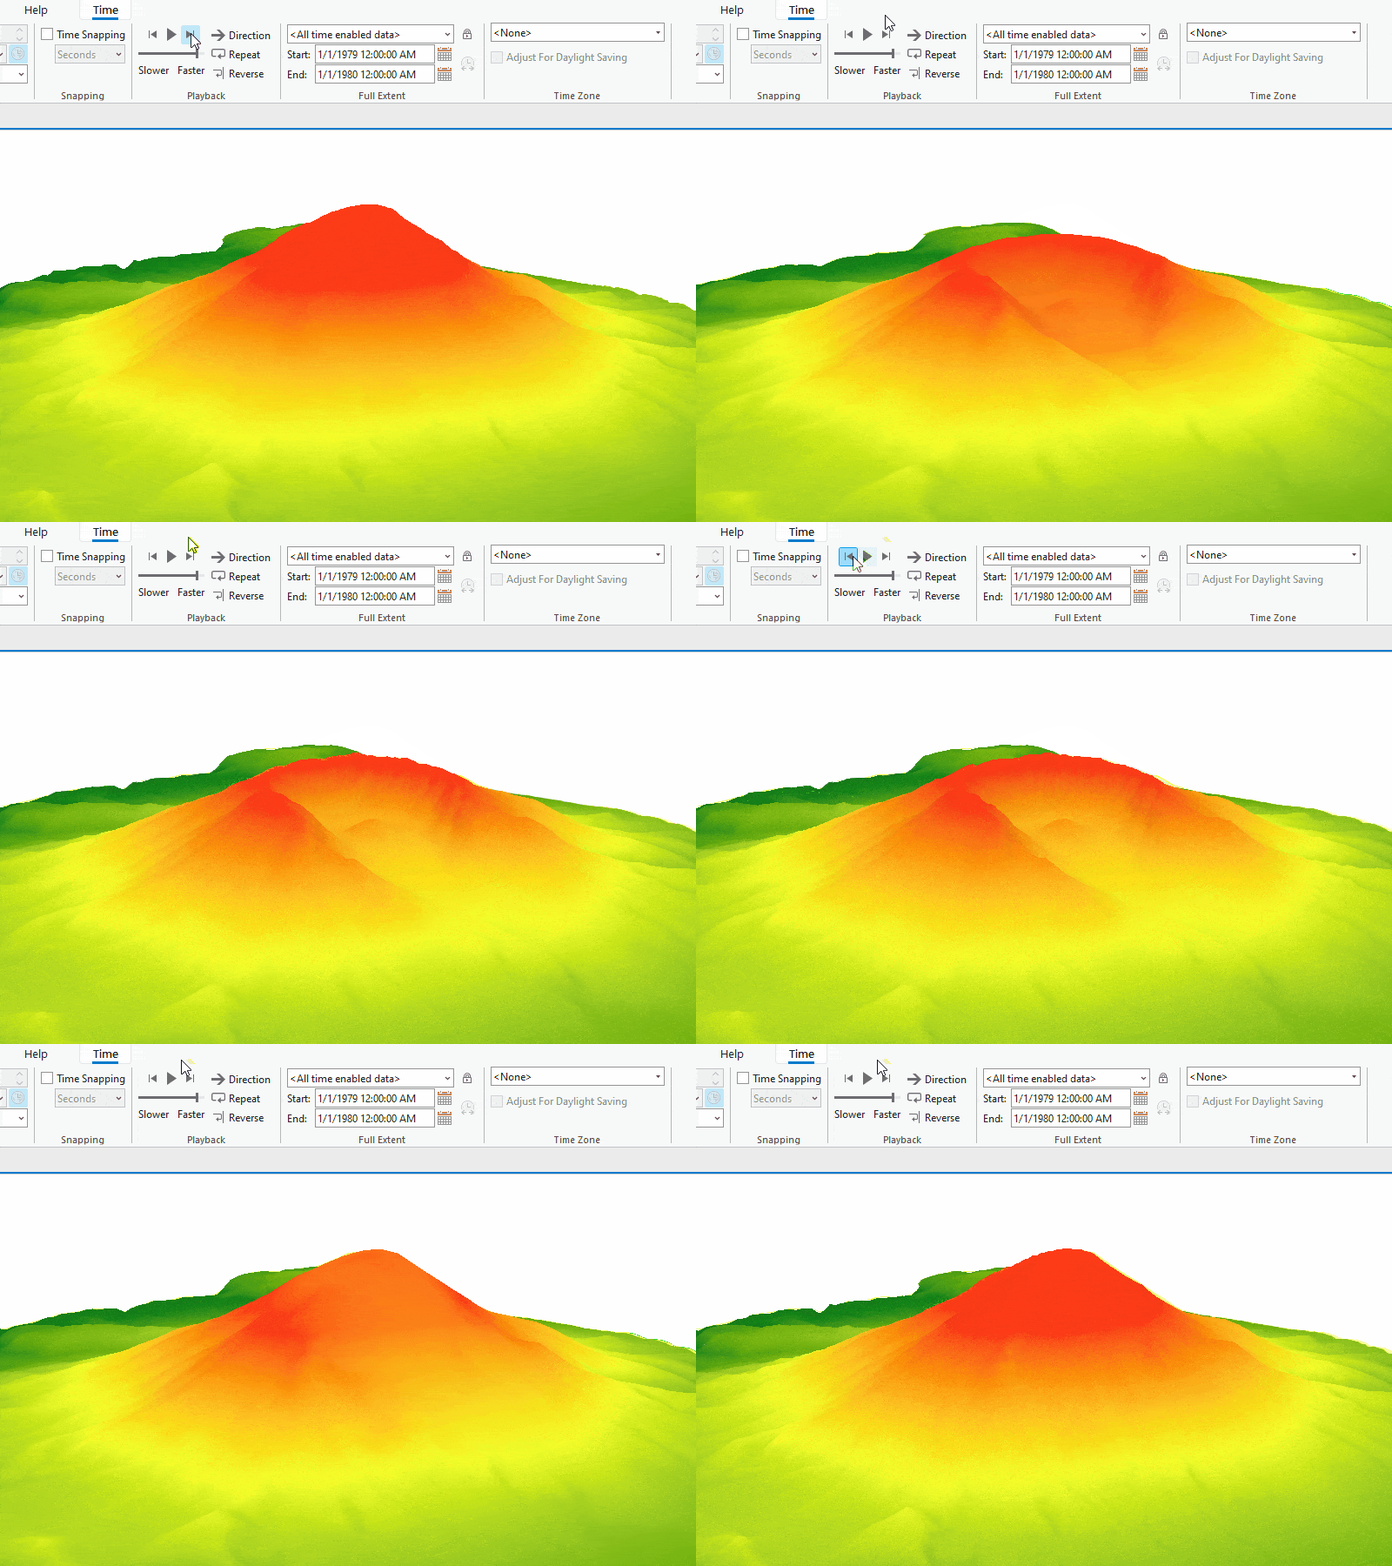
You can now enable time and range on elevation sources that support them. For example, you can add a mosaic dataset as an elevation source and leverage a time field to visualize change in elevation. In the example below you can see the before and after effects of the explosion of Mt St Helens. This 3D scene has one mosaic dataset as the operational layer which drives the symbology and another one set as the ground elevation source. All you have to do is enable time on both layers and your off to using the time slider to visualize change across time!

Elevation context menu
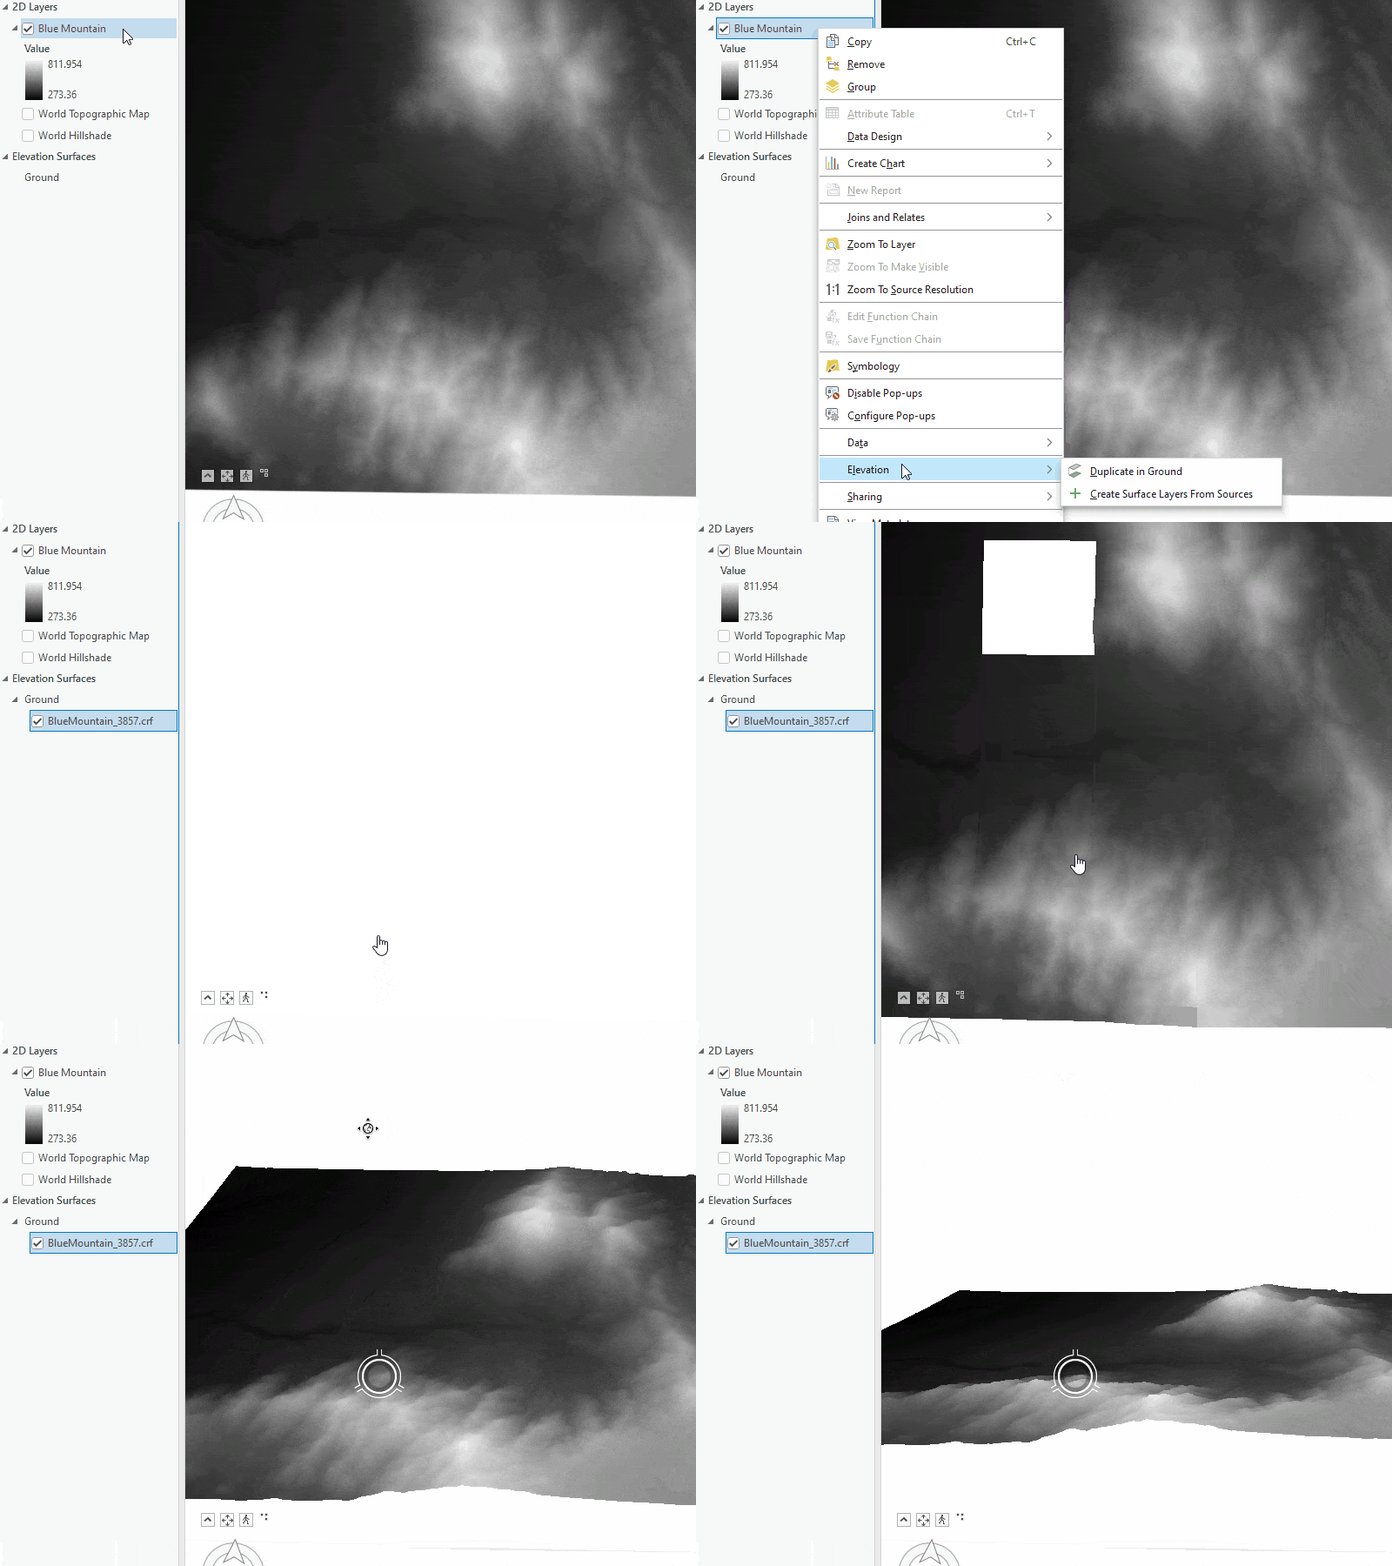
Have you ever added a raster or tin to a 3D scene and wanted to quickly add it to the ground elevation surface layer? At this release you can right click on the layer and choose the new elevation context menu and either duplicate the layer to the ground or add it as a new custom elevation surface layer.

Multiselect and update elevation properties
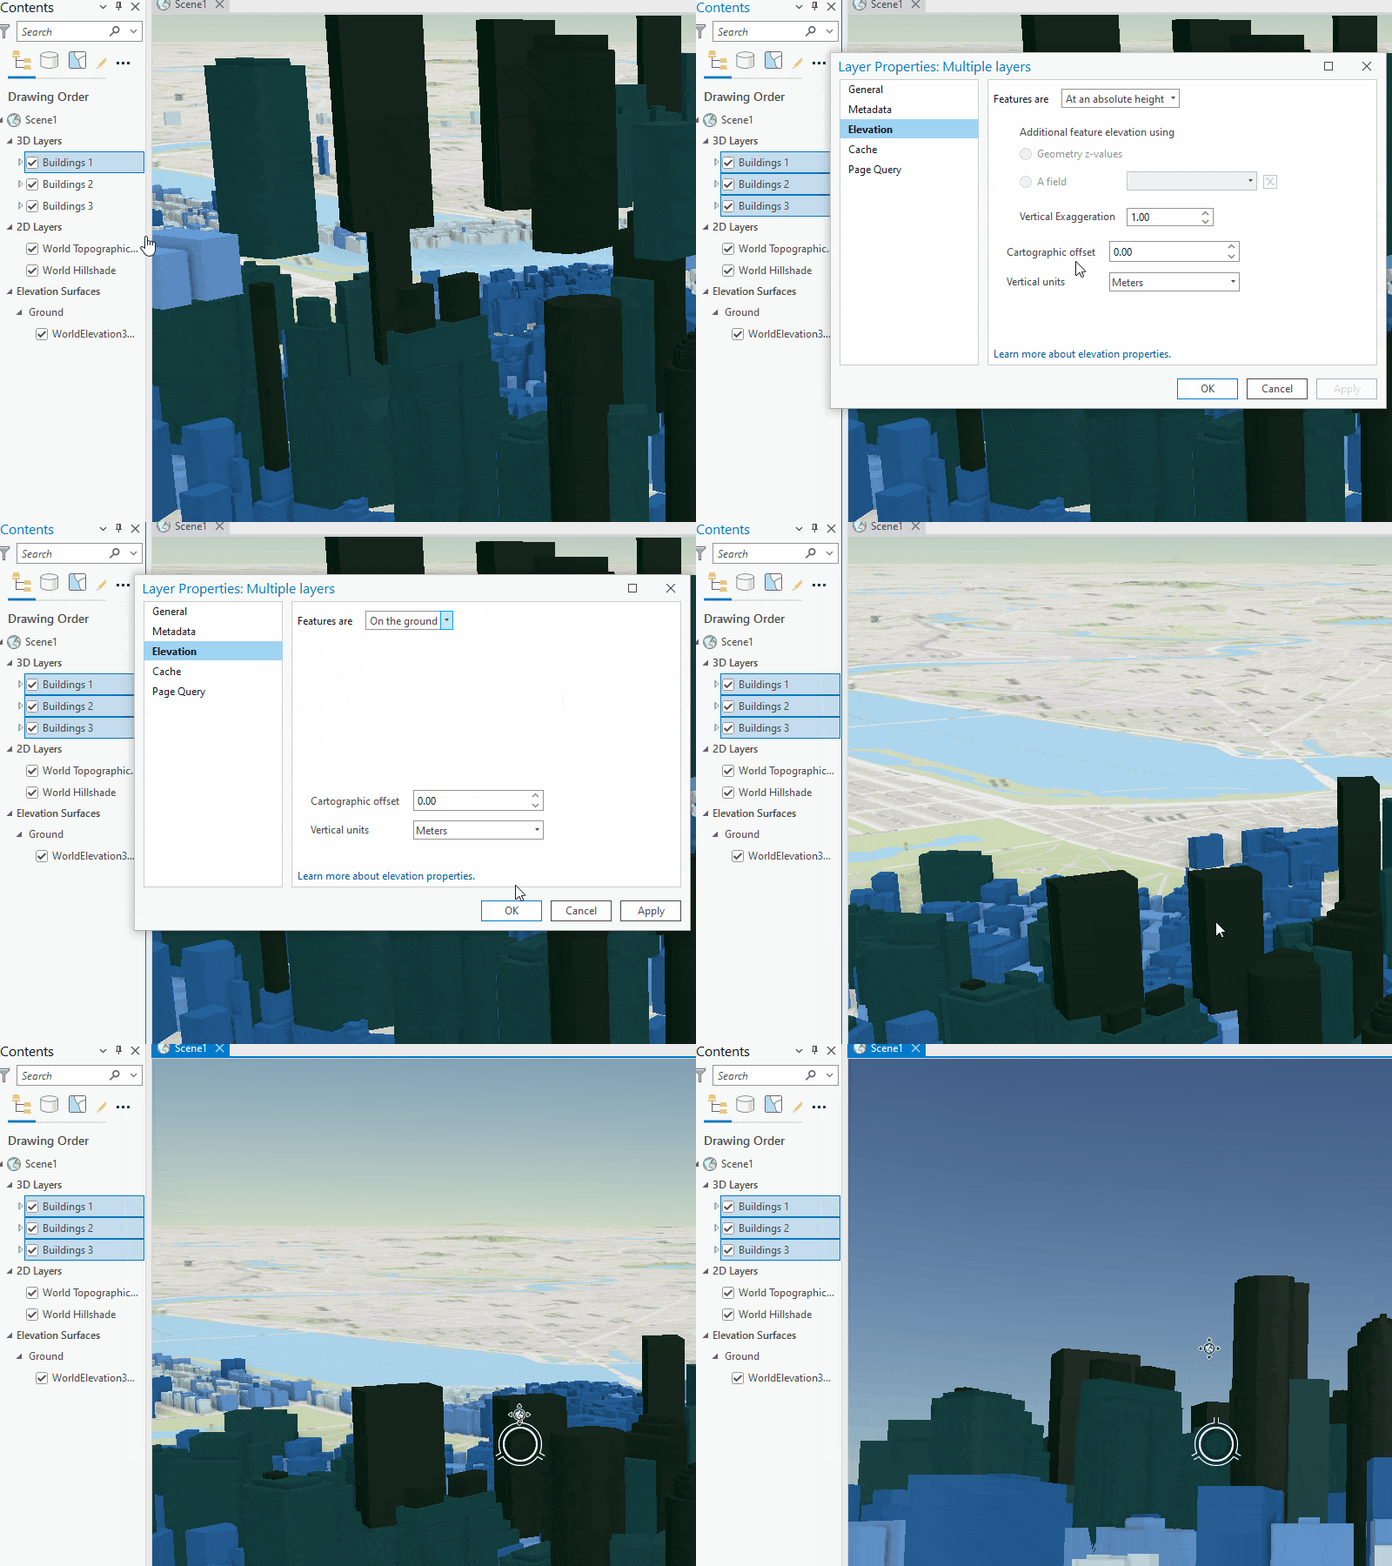
Have you ever needed to adjust the elevation properties for multiple layers in a 3D scene? Now you can quickly select multiple layers at once and adjust the elevation properties. For example, let’s say you want to set all your layers on the ground. Simply multiselect and open the layer properties to adjust that setting and click ok. All layers are now set to the ground.

Custom elevation surface layer creation
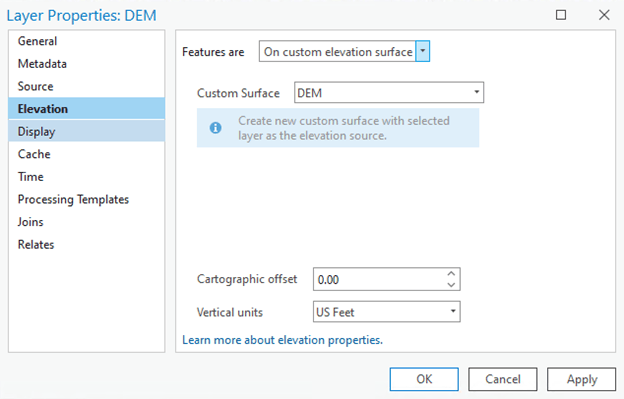
Another productivity enhancement is creating a custom elevation surface layer from the layer properties. Let’s say you have a raster in the 2D Layers category and you want to create a custom surface layer from this layer. You can use the context menu as mentioned above or you can open the layer properties and select on custom elevation surface. Click Ok and the custom surface is created. The benefit of this workflow over the context menu is we are able to set the rasters elevation mode to the custom surface so it creates the custom surface with the source as itself in one quick workflow.

Elevation caching
To speed up performance we have implemented improvements to elevation caching. What this means is that when you revisit the same area after an initial draw you will see improved performance. Checkout the ArcGIS Pro help to learn more about layer caching.
As we continue to improve the elevation experience please continue to submit ArcGIS Ideas so we can see what improvements you would like to see in future versions!
Commenting is not enabled for this article.