Have you ever had a Microsoft SharePoint list of addresses and thought, “I wish I could visualize these locations on a map”? To do that, you can create a dynamic ArcGIS for SharePoint map or use the List map function. But before you can get to mapping, you must have coordinates (such as latitude, longitude) in your list. ArcGIS Connectors for Power Automate has a quick way to do this for you. With Microsoft Power Automate, you can fill out a template to convert addresses to coordinates in your list and begin mapping them in ArcGIS for SharePoint.
Prepare your SharePoint list
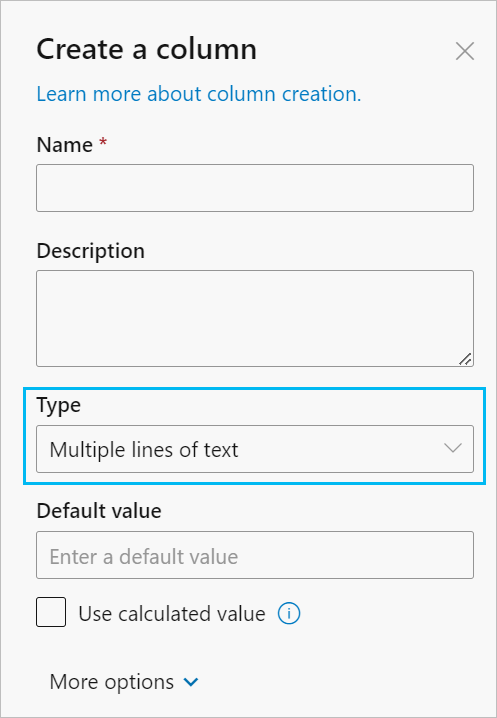
To get started, open your SharePoint list so you can prepare to include coordinates. It’s recommended that you start with one column of addresses containing as much address information as possible (city, state, ZIP code). From there, add two Multiple lines of text columns to your list. Name one column X and one column Y for simplicity. This provides somewhere for those newly processed coordinates to go.
Open Power Automate
Now your SharePoint list is ready to include coordinate values.
1. On the SharePoint list ribbon, click Integrate > Power Automate > Create a flow.
The Create a flow pane appears.

2. At the bottom of the pane, click the Show more drop-down menu.
The menu expands.

3. Click See more templates.
Power Automate opens and a search box appears.
4. Type ArcGIS in the search box.
5. Open the SharePoint Locate Workflow template that uses the standard (orange) ArcGIS Online connector.
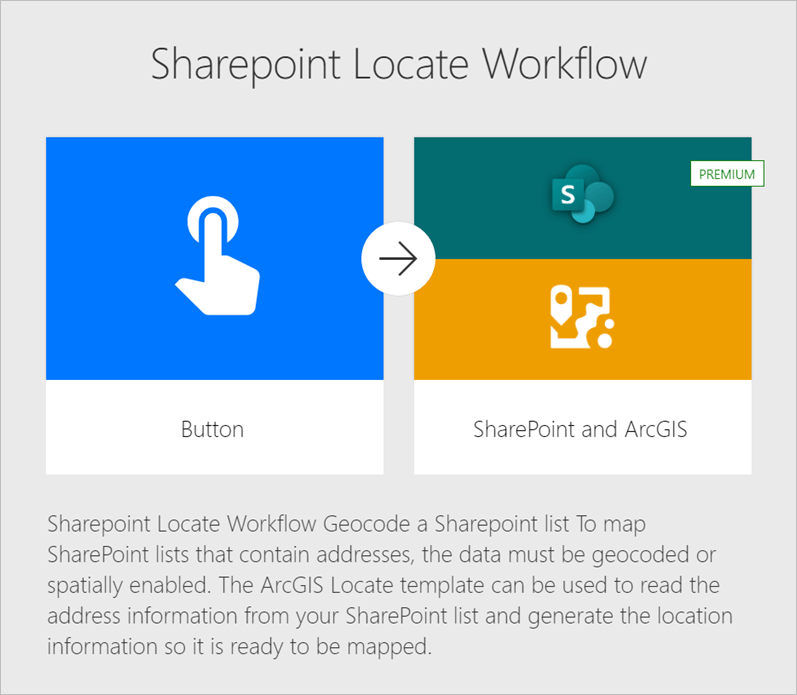
6. Click Try it now to get started.
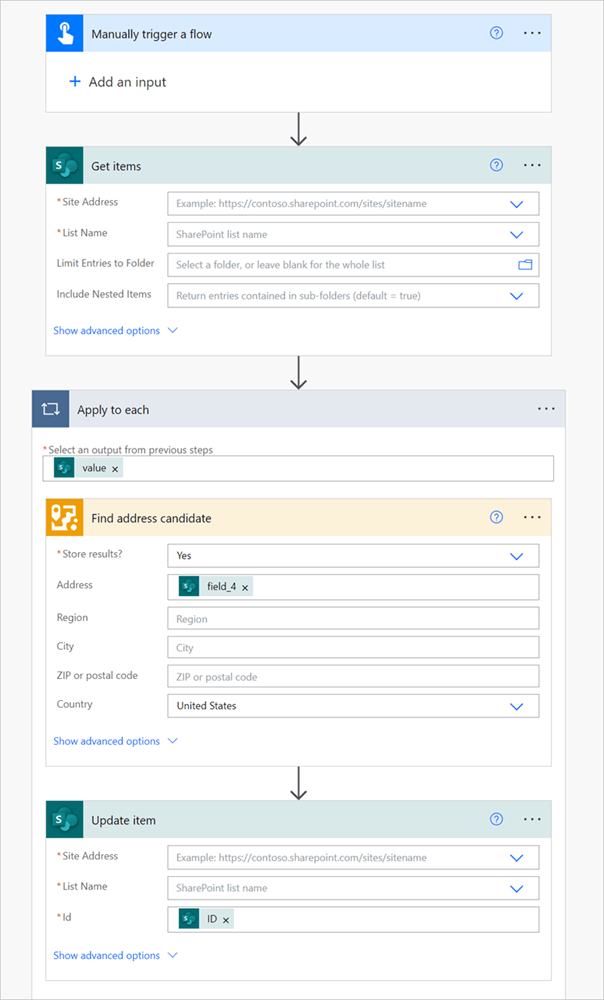
The templates opens to a form that contains multiple sections, each of which are actions that require specific input information in each parameter, or field, to make this and all subsequent actions run properly.
Use the Get Items action
To set up your SharePoint Locate Workflow, start at the top with the Get Items action.
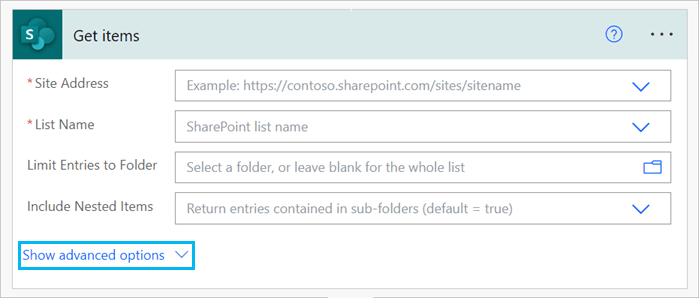
- Pick the Site Address location where your SharePoint list lives and, in the next line, choose the list (List Name) you want to geocode.
If you don’t see your list’s name, you may have selected the wrong site address. - Click Show advanced options to fine-tune your parameters, such as setting the total number of rows in the list in the Top Count box.
Once you run this action, your flow will retrieve the items in your SharePoint list and assign an ID to each item. You’ll use this ID later in the workflow.
Use the Find address candidate action
Move on to the Find address candidate action. You’ll notice this action is one of two enclosed in a gray outer box called Apply to each. This ensures that the actions enclosed in the outer box will apply to each item in your SharePoint list, as gathered by the Get Items action.
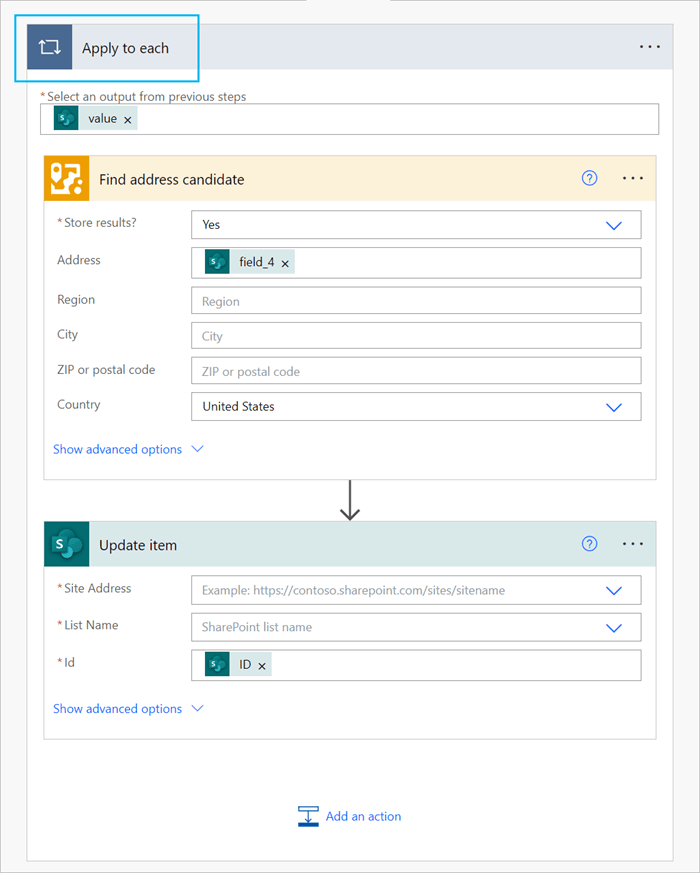
Using the Find address candidate action, Power Automate will find the address candidate (aka, the best match for complete address and coordinate information) for each item in your SharePoint list. Start by selecting the menu options (the ellipses on the other side of the action name) and ensure that ArcGIS is the selected connection. Ensure that Yes is selected from the Store results drop-down menu, so that when your flow runs, your resulting coordinates are stored in the list you prepared. There are two boxes that ask you to fill in Address and Country. From here, specify the column in your SharePoint list containing the address information you have and the country where your addresses are found, respectively.
Use the Update item action
Lastly, fill in the Update item action. This action ensures that each item in your SharePoint list is updated with the newly retrieved coordinate information. Site Address and List Name should match what you selected in the Get Items action. The Id field should point to the ID created by the Get Items action. Click Show advanced options and make sure the X column and Y column you made in your SharePoint list are populated with the Longitude (X) and Latitude (Y) dynamic values from ArcGIS (they should be enclosed in a box with the ArcGIS connector icon). This will ensure that the coordinates retrieved from the Find address candidate action are entered into your SharePoint list properly.
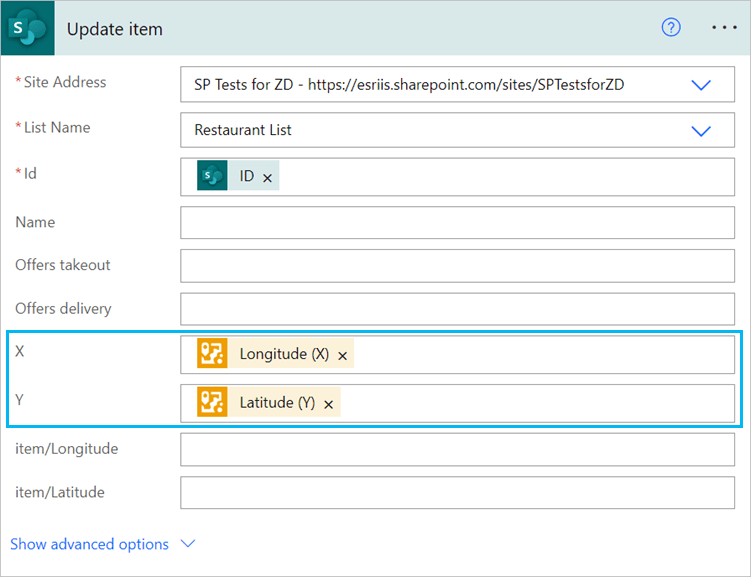
Run the flow
To put all the steps together, click Save. Run the Flow checker tool and click Test to test and run your flow.

In a few minutes, you will have a properly coordinated SharePoint list. Now, you’re ready to map your list in ArcGIS for SharePoint.
For more information about ArcGIS for SharePoint and ArcGIS Connectors for Power Automate, see the following resources:
- ArcGIS for Microsoft 365 resources page
- ArcGIS for SharePoint Esri Community page
- ArcGIS Connectors for Power Automate Esri Community page
Blog card photo by Jen Theodore on Unsplash
Banner photo by Clay Banks on Unsplash

Article Discussion: