Did you know you can create a new feature service in ArcGIS Online, without needing to create it in ArcGIS for Desktop first? This blog lists the main ways to create a new feature service that is hosted in your ArcGIS Online Organization account.
First, we actually call this type of service a hosted feature layer. Feature layers are useful when you need to expose vector data for display, query, and editing on the web. Maps, apps, and desktop map viewers can access your services from anywhere on the Internet if you choose to allow it. So regardless of whether you are a developer or a user, hosted feature layers give you the functionality to create new data in the cloud or import your own geodata into the cloud and expose them as REST services.
After you create a feature layer, you can easily add it to a map as a layer, edit or symbolize it within a web map or other applications, or consume it with your own custom applications. In either case you will need an ArcGIS Online subscription to do so. If you don’t have an account, don’t worry, you can easily get one by signing up for a trial ArcGIS Organizational Subscription or a free ArcGIS Developer subscription. Learn more about subscriptions here.
1) Create a new feature layer in ArcGIS Online.
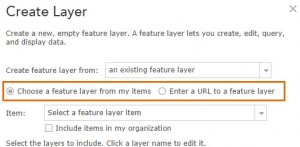
Login to your ArcGIS Online account, and in the My Content section, you can click the Create Layer button to create a new hosted feature layer. You can create a brand new layer from one of the templates, or you can create a new one from an existing layer. Creating a new layer from a template lets you start from blank canvas, but if you use an existing layer then you can create a new empty layer that contains the same attribute fields. This is really useful if you’re using the same layer over and over, or if you found one that you like and want to duplicate. You can use one you’ve found in your collection, in your organization’s collection, or if you see one elsewhere you can point to the URL of the feature layer.
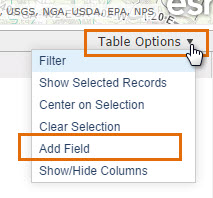
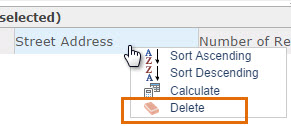
With either solution, you can add the layer to the map, open the table and begin customizing the attribute table by adding or removing fields. Then you’re ready to begin adding features.
Before you share the layer, be sure it’s got the right properties. You can edit them by clicking Edit on the Details page and checking the right options for your requirements:
- Editing: Let’s people edit the features, such as adding or deleting and updating attributes.
- Export Data: Allows people to export it and save it locally.
- Sync: Enables disconnecting editing.
- Track Edits: Controls if you want to track who created or updated features and if people can update or delete features they didn’t create.
Once you’re done, you can save a map with the feature layer symbolized and setup the way you want users to interact with it, or connect directly to the REST endpoint for the feature layer.
2) Create a new feature layer through the ArcGIS Developer site.
Go to Developers.arcgis.com and log in with your ArcGIS Online account. Then click the Hosted Data button at the top of the window.
This brings you to the My Hosted Data page where you can see all the hosted feature layers in your ArcGIS Online account. In the top right of this page, click the New Feature Service button. It walks you through the steps to create a new feature service (layer). First you provide the basic information, like a file name and define if you will be collecting points, lines, or polygons. Then you can define any fields for the attributes. Next, you choose a default symbol to use for this features service. Finally, you publish.
Just as above, you can start using it right away, or you may want to control some of the properties on the layer, which you edit within the Details page.
3) In ArcGIS for Desktop, create a new feature class or use one you already have, and share it to ArcGIS Online.
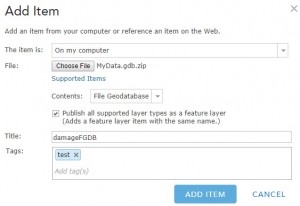
To get your feature data into ArcGIS Online you can upload the feature class file(s), or publish it from ArcMap. You can upload a shapefile to upload one feature class, or you can upload a file geodatabase to upload several feature classes. To upload these, you need to zip them and upload the zip file. Once you zip the files, log into your ArcGIS Online account, go to My Contents, and click Add Item. Navigate to the file, give it a title and tags, and keep the Publish checkbox checked (or you’ll need to publish the layer after its uploaded).
As in the first two examples, you can control the properties of the data to restrict or enable editing and more.
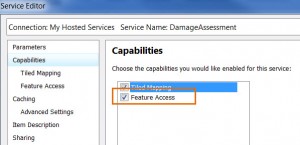
The other option is to add your data to a map document and publish the map document with the Feature Access enabled (you may want to turn off the Tiled Mapping option). The advantage of this is the layers will be published with any symbology you have chosen to use in your map. In this case the data permissions are set in the Service Editor dialog box, when you are publishing the service.

Commenting is not enabled for this article.