In ArcMap, the Business Analyst extension had convenient Store and Customer Setup tools. These allowed you to geocode your customer files using an installed address locator and connect your stores to customers in the workflow. The linked layers were conveniently used as input to other tools. We did not carry these exact Store and Customer tools over to the Business Analyst Pro toolbox, but the work can be done via Pro’s native Geoprocessing tools. This is yet another way to continue ArcMap workflows in ArcGIS Pro.
The most popular options to assign stores to customers in Business Analyst Desktop were:
- By closest store location
- By trade area
Each of these can act as a surrogate if an organization does not have customer attribute data from either point-of-sale, memberships, or loyalty programs (grocery stores, smart phone apps, etc).
Here’s how to recreate the process in ArcGIS Pro. We’ll assume you’ve already geocoded your address file.
By closest store location
The purpose of this option is to understand which customers are geographically closest to each store – this is useful to identify market areas, refine advertising campaigns, or reconsider delivery zones.
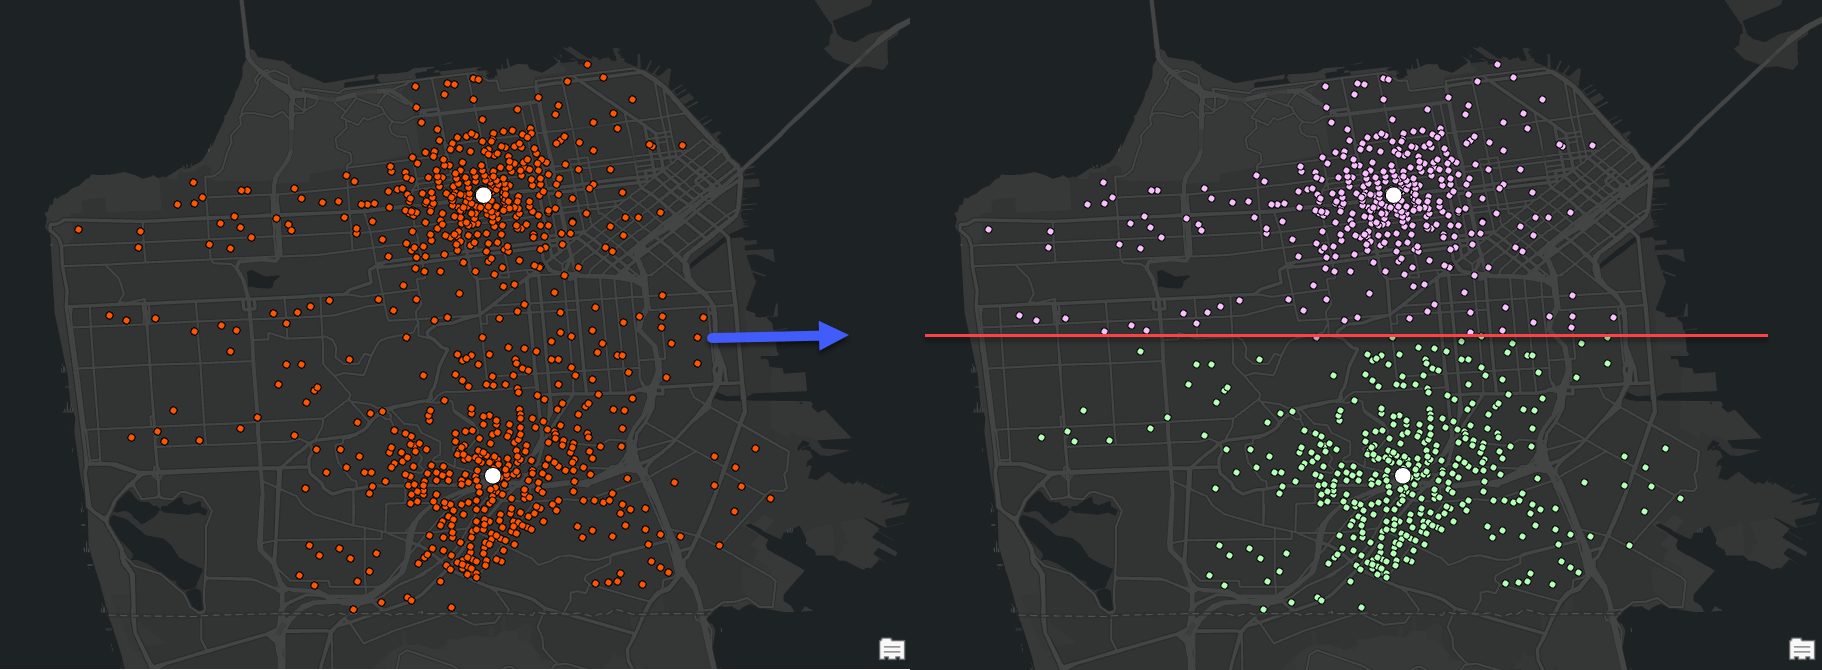
In the map below we have two store locations and hundreds of customers scattered everywhere (left side). We want to identify which ones are closest to each store (right side).
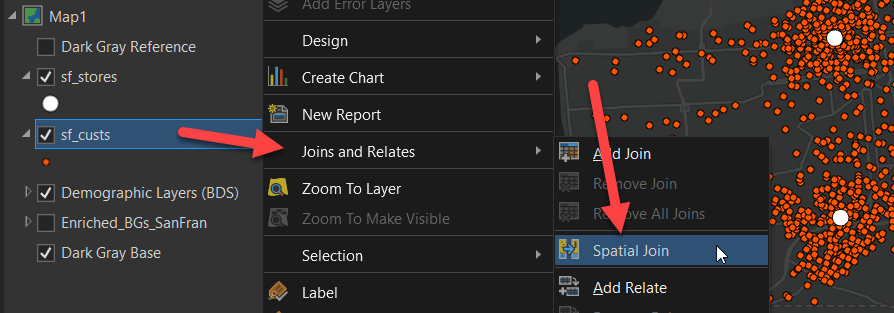
To accomplish this we’ll do a spatial join from your customer file to your store file. Right-click your customer layer to find Spatial Join.
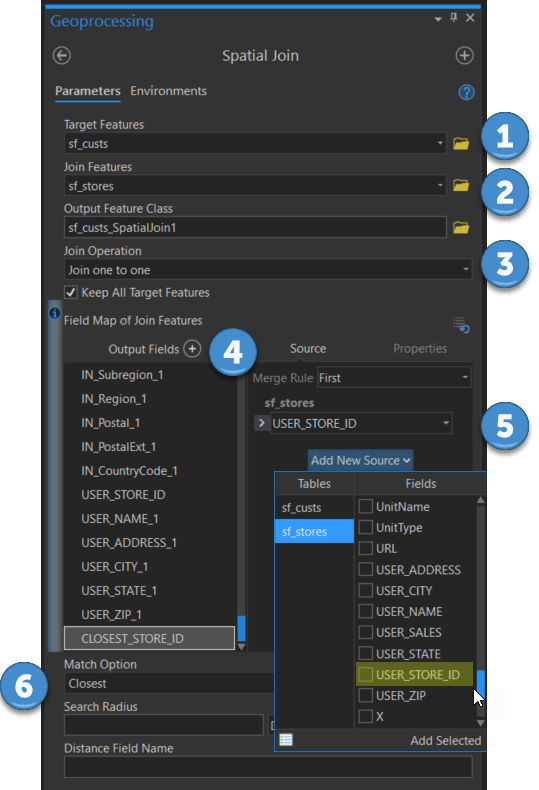
The Spatial Join geoprocessing tool opens. Let’s follow this workflow below to assign closest customer points to stores.
(1) Target Features = your customer layer
(2) Join Features = your store layer
(3) Join Operation = Join one to one
(4) Add a new Output Field to your customer layer, call it something like CLOSEST_STORE_ID
(5) In Add New Source, select a unique ID from a field in your store layer (this will assign the store and customer points)
(6) Match Option = Closest.
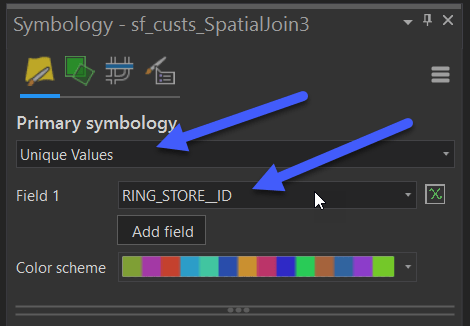
Now you simply symbolize the layer. Use the following options:
- Primary Symbology method = Unique Values
- Field 1 to symbolize = Your new ID linking customers to stores (here I used: CLOSEST_STORE_ID)
The next option is to assign customers to stores by trade areas.
By trade area
One of the ideas behind assigning customers to trade areas is to better understand which patrons belong to specific geographical boundaries. You can use this information to develop marketing campaigns, for example, to link customers per ZIP Code or to drive-time boundaries. Demographics can vary widely from one boundary to the next. You can benchmark the customers per trade area to understand sectors that are growing or declining over time.
In the map below we have customers scattered everywhere (left side). We want to identify which ones fall within each 1-mile trade area (right side) for further analysis.
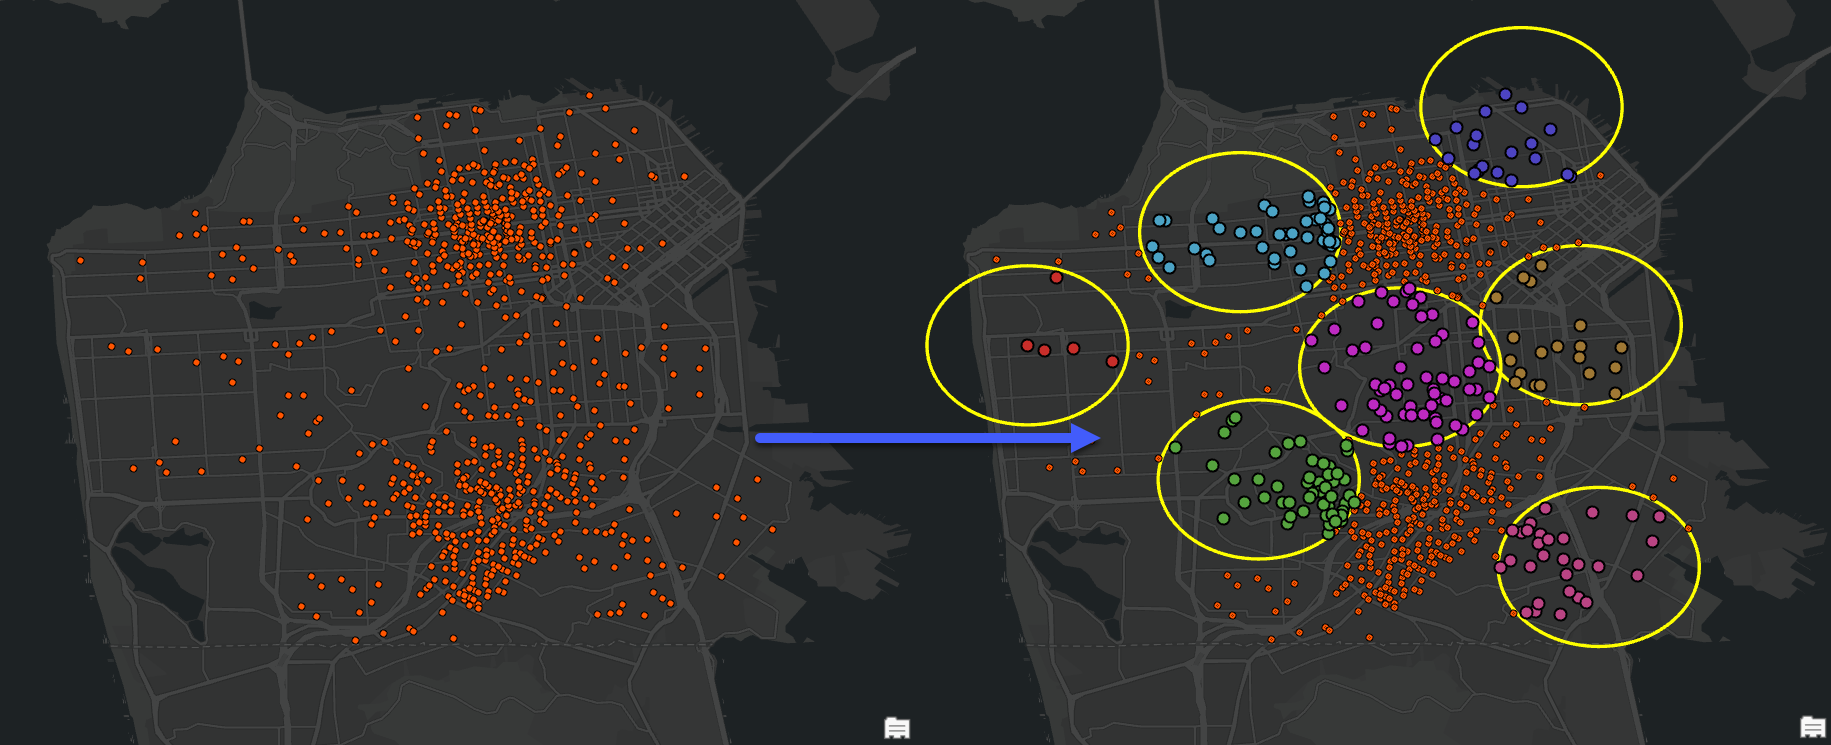
To accomplish this we’ll do another spatial join.
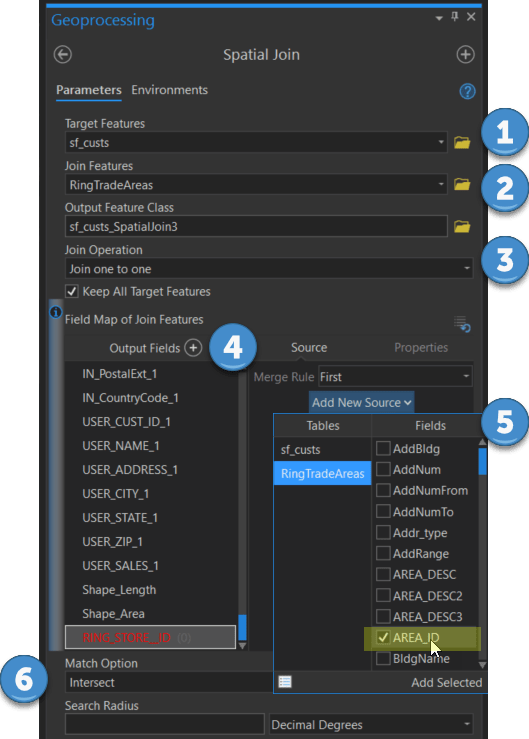
Once the Spatial Join geoprocessing tool opens, follow this workflow – this time linking the customer points to the trade areas.
(1) Target Features = your customer layer
(2) Join Features = your store layer
(3) Join Operation = Join one to one
(4) Add a new Output Field to your customer layer, call it something like RING_STORE_ID or TRACT_STORE_ID
(5) In Add New Source, select a unique ID from a field in your trade area layer (this will assign the store and customer points)
(6) Match Option = Intersect.
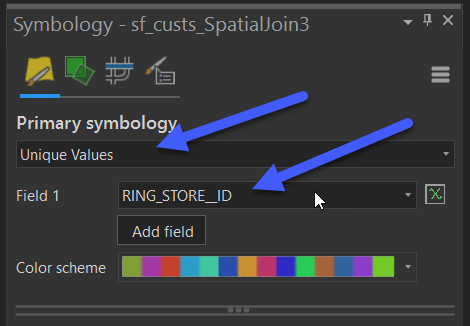
Then again you simply symbolize the layer with the following options:
- Primary Symbology method = Unique Values
- Field 1 to symbolize = Your new ID linking customers to stores (here I used: RING_STORE_ID)
To close out – the above options will aid in assigning your customer files in ArcGIS Pro, without the need to begin in ArcMap.
The ArcGIS Business Analyst Team
Commenting is not enabled for this article.