ArcGIS Field Maps provides a variety of ways to customize the forms mobile workers use in the field. Depending on your workflow, forms can become long and complicated, often including sections that aren’t relevant for each data collection or inspection. Conditional visibility helps solve this problem by allowing you to manage the form elements that appear when mobile workers fill out forms. Mobile workers can then spend less time scrolling on their device and more time recording observations.
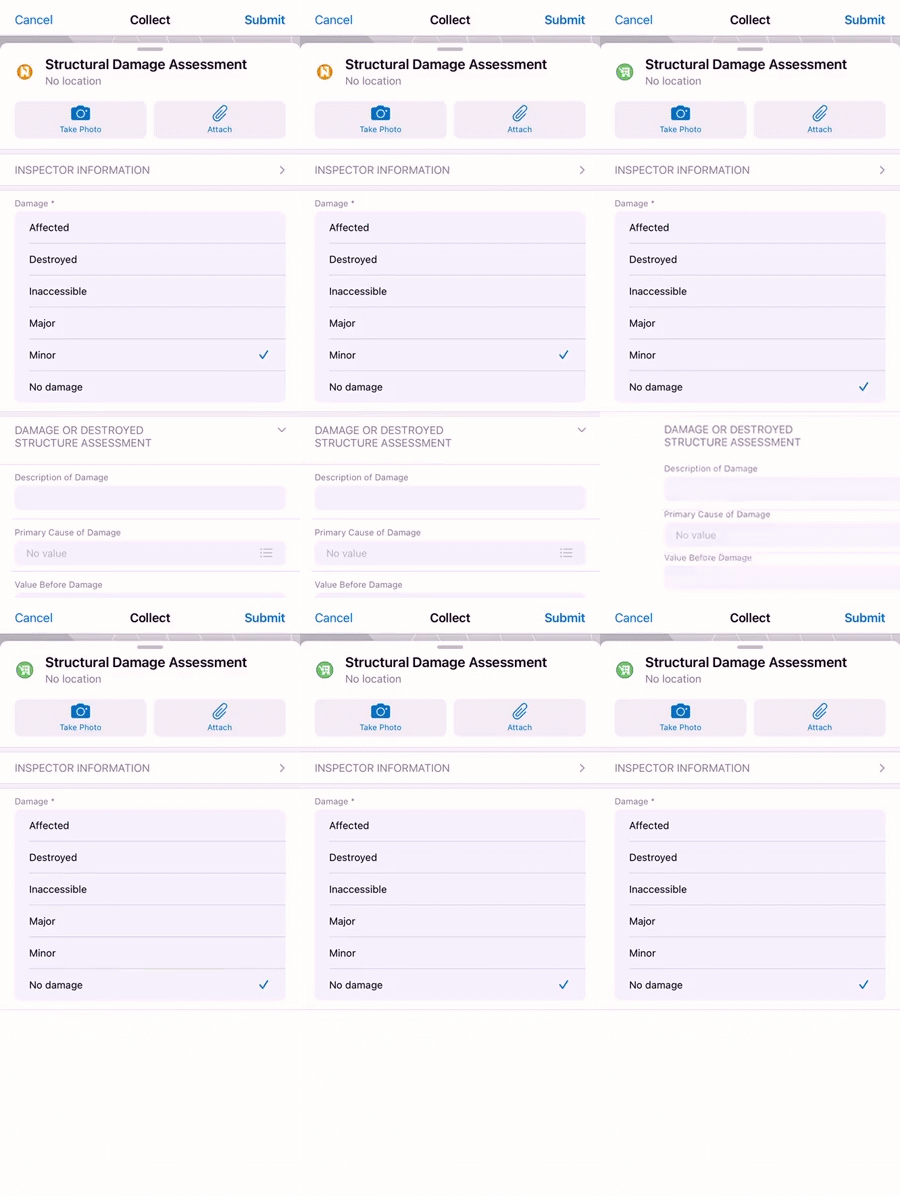
The following animation shows a damage inspection form with a conditional visibility expression applied to a group of form elements. When the Damage field is given a value of No damage, the Damage or Destroyed Structure Assessment group disappears, hiding information that’s no longer relevant to the inspection.
Build conditional visibility expressions
Conditional visibility expressions can be created when you’re configuring the form using the Field Maps web app. When you select a form element on the form canvas, the Properties pane appears with the option to add a conditional visibility expression.
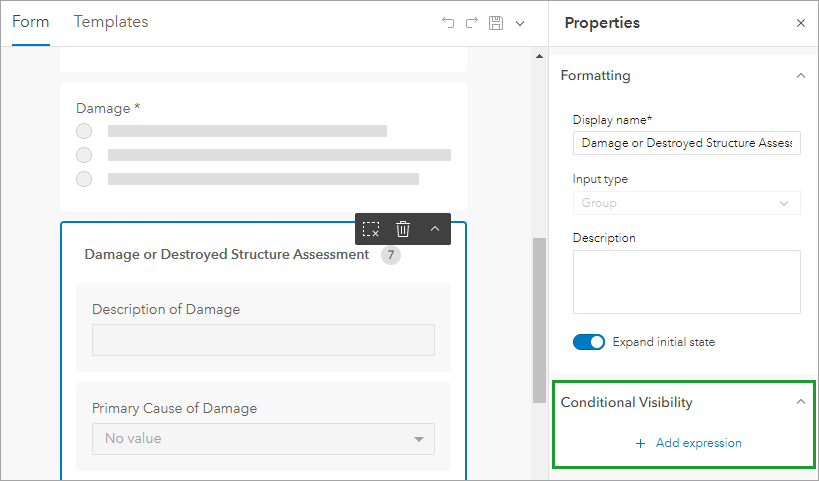
Clicking + Add expression launches the Edit expression window where you can create the conditional visibility expression.
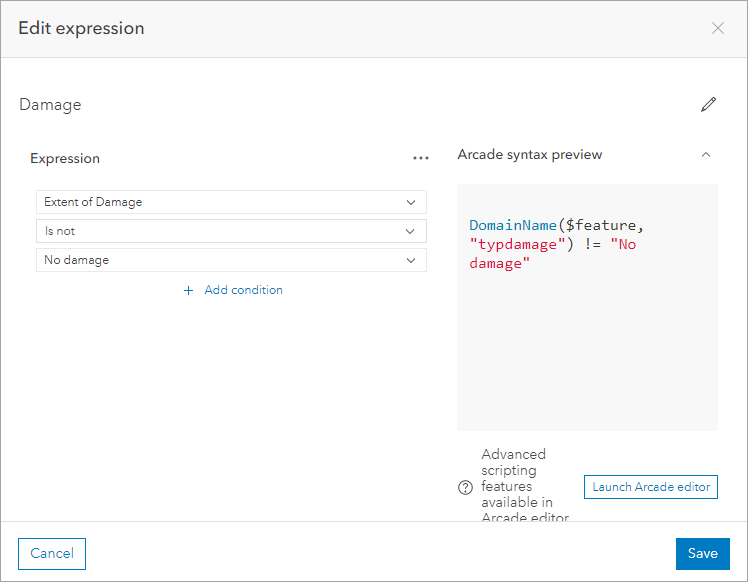
The Edit expression window includes the following components for building a conditional visibility expression:
- Title—Provide a title for the expression. This expression is titled Damage to indicate that a form element will appear if damage is recorded.
- Expression—Build the conditional visibility expression. Each expression is defined by one or more conditions. A condition includes a field name, an operator, and potentially, a value. The list of available operators is determined by the type of field (string, number, or date). For this example, the following inputs are used:
- Field—Extent of damage
- Operator—is not
- Value—No damage
- Arcade syntax preview—Preview what the expression looks like in Arcade syntax.
- Launch Arcade editor—Click to edit the expression using the Arcade editor.
After building the expression, click Save to apply it to the form element.

The conditional visibility icon  is added to the form element and the new expression appears in the Conditional Visibility section of the Properties pane. Now, this group will only appear in the mobile app if damage is indicated in the damage field.
Reuse expressions
You can reuse conditional visibility expressions you create on multiple form elements. For example, there’s an additional group on this form that only needs to appear if damage is indicated. You can apply an existing conditional visibility expression by selecting the group and then clicking the expression in the Conditional Visibility section of the Properties pane.
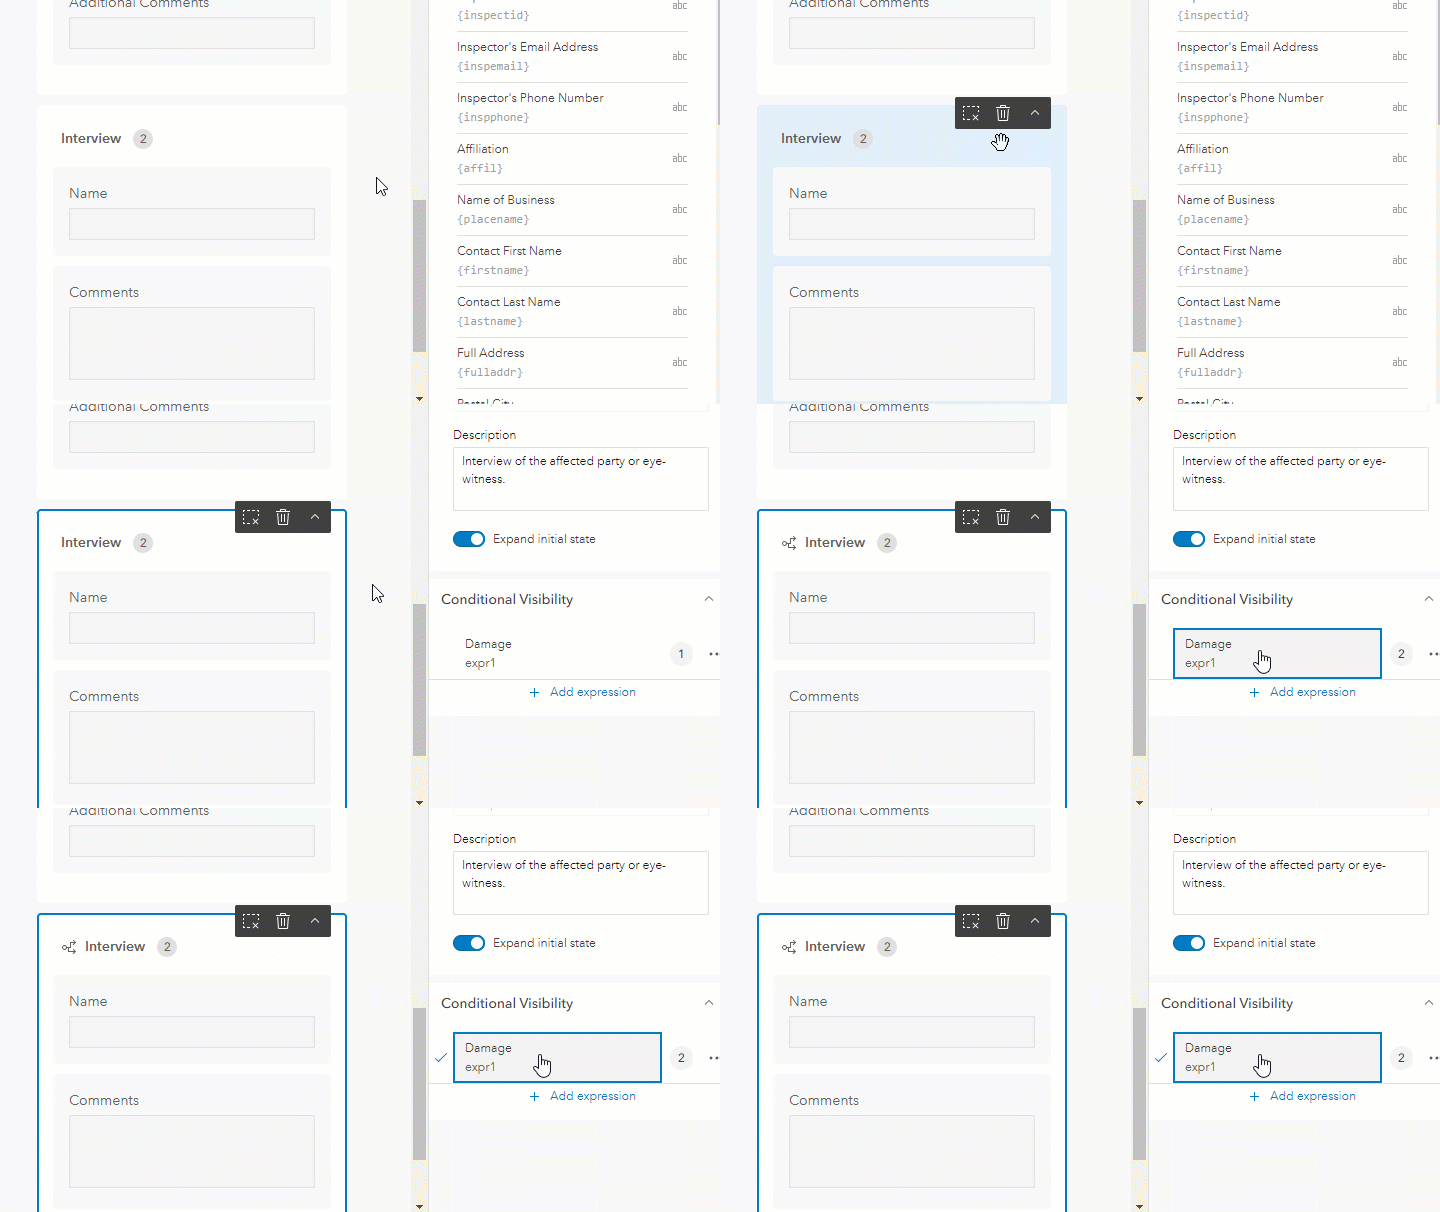
The number next to the expression corresponds to the number of form elements to which it’s applied. In this example, the Damage expression is applied to 2 form elements. From the expression’s overflow menu, you can duplicate, edit, or delete the expression.

Build expressions with multiple conditions
The Damage expression is a basic example that uses one condition; however, you may want to use multiple conditions to determine when form elements appear in the form.
For example, there’s a section of a water quality form that mobile workers must fill out if the pH level is outside the safe range for a freshwater system. The section should only appear if the pH level is below 6.5 or above 9.0. The following expression uses two conditions to satisfy this requirement.
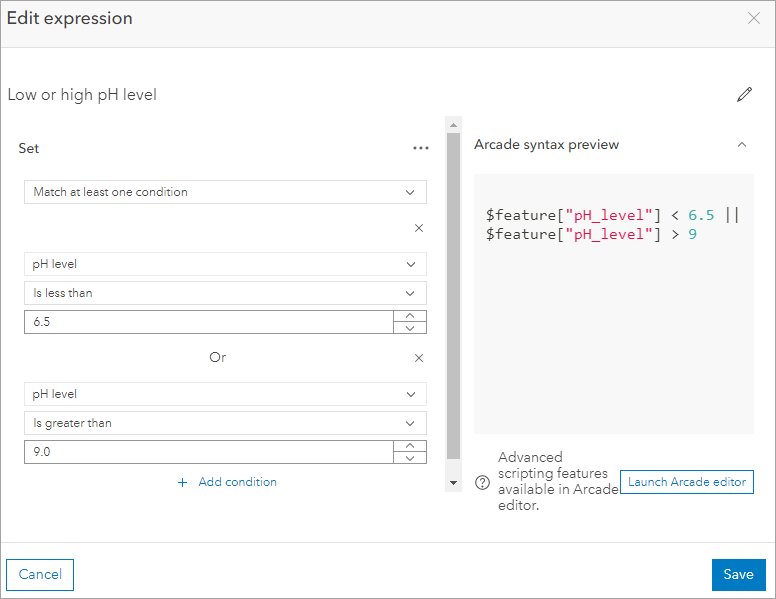
The two conditions indicate that the form element should appear if the pH level is less than 6.5 or greater than 9.0.
Since the section should appear if either condition is met, the Match at least one condition option is selected. If both conditions needed to be met for the section to appear, Match all conditions would be selected instead. While this example uses two conditions, you can add as many as you need to build your conditional visibility expression.
Build expressions with the Arcade editor
There are times when you may want to use the Arcade editor instead of the default experience for building conditional visibility expressions. The Arcade editor allows you to use different Arcade functions to determine when form elements appear in the form, giving you more options for building expressions.
For example, a tree inspection form includes a tree type form element with the following possible values: apple, plum, apricot, pine, oak, and elm. There’s a fruit tree group element that should display in the form if the tree type field is equal to apple, plum, or apricot.
Instead of adding three separate conditions for this expression in the default experience, you can write a single condition with the Includes function using the Arcade editor. To open the Arcade editor, click Launch Arcade editor in the Edit expression window.

When the Arcade editor is open, delete anything currently in the Expression window. From the Functions tab, search for and add the Includes function to the form. The Includes function has two main components: an array of values and the value it checks to see whether it’s included in the array of values.
The array should list the values that, if one were selected, would display the desired form element in the form. For this example, those values are apple, plum, and apricot. The value it’s checking against should come from the field where the value is provided: the tree type field.
Here’s how the expression for this example is written in Arcade:
Includes(['apple', 'plum', 'apricot'], DomainName($feature, "tree_type"))
Here’s how this looks in the Arcade editor:
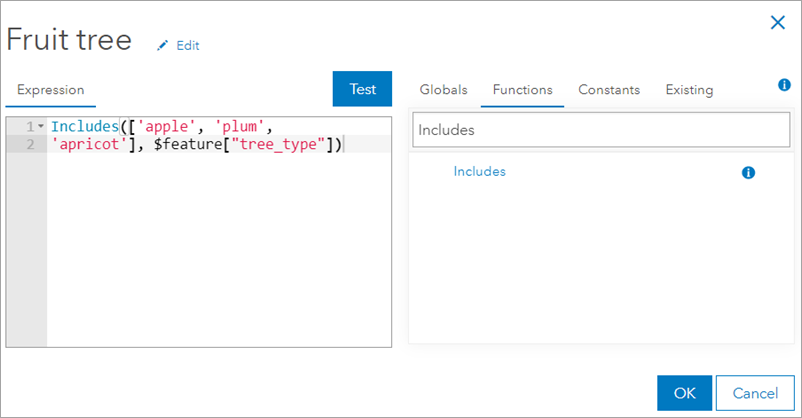
Click Test to test the expression, and click OK to apply the expression to the form element. Now, when mobile workers select apple, plum, or apricot for the tree type field, the fruit tree section will appear in the form. To learn more about functions available in Arcade, see the ArcGIS Arcade documentation.
Test your expression in the mobile app
Always test your map in the Field Maps mobile app before deploying it to the field. Ensure the form and conditional visibility expressions behave as expected and that mobile workers will be successful when collecting data or performing inspections. For more information, see Test your map.
Additional resources
Conditional visibility is just one of many ways to customize forms for field data collection. See the following resources to learn more about configuring maps and forms for ArcGIS Field Maps:
- Configure the form (Help topic)
- Configure the map (Help topic)
- Collect geological data with ArcGIS Field Maps (Discovery path)
- Try data collection in ArcGIS Field Maps (Discovery path)



Article Discussion: