Many local governments and utility agencies use Cityworks to manage their infrastructure assets. Many of these same organizations also use ArcGIS Field Maps to record new assets, perform inspections, and submit service requests. Did you know that these two products can easily work together? The Cityworks mobile app includes a link to open ArcGIS Field Maps, and now you can use webhooks and Integromat to automate workflows. In this blog post we’ll walk through how to use Integromat to listen for new features and then create corresponding service requests in Cityworks—all without writing code.
Create the service request layers and map
First, you’ll create the service request layer and map used to collect service requests directly in the Field Maps mobile app. Sign into your ArcGIS Online account.
Note: The Field Maps app in Integromat is not currently supported on ArcGIS Enterprise.
On the Content tab, click New item.

Click Feature layer, and in the Create a feature layer window, select Water Service Request.
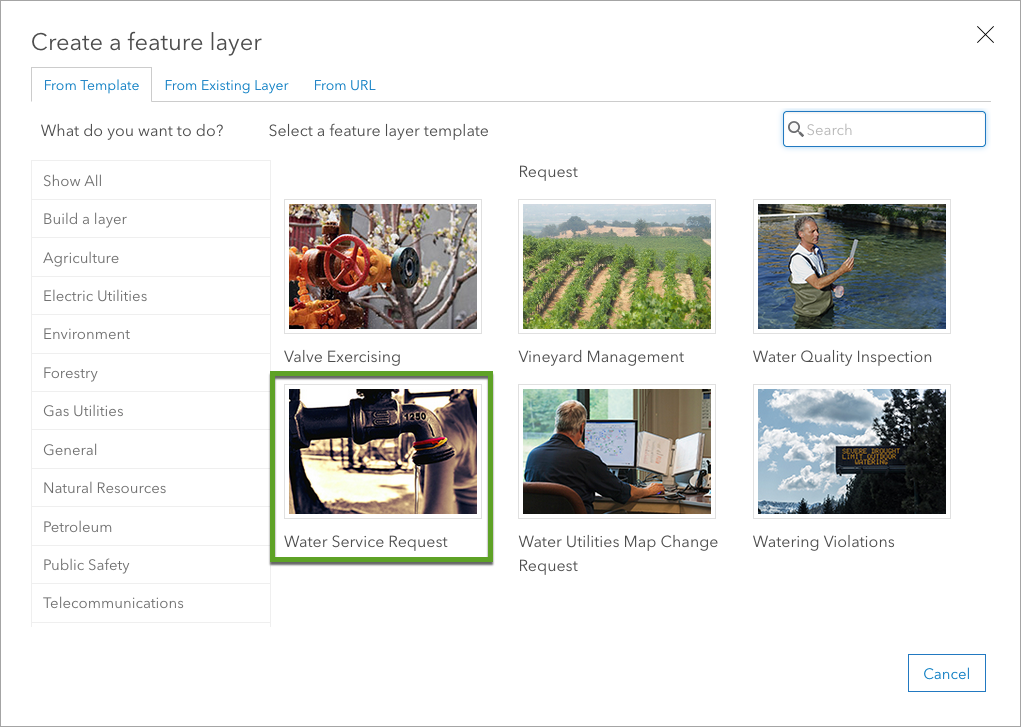
Click Create and follow the instructions for creating the layer. Use all the default options and provide a Title of “Water Service Request.” After you click Done, the layer is created and added to your content.
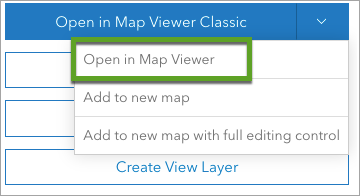
On the item details page of the new layer, click Open in Map Viewer.
Map Viewer opens with the Water Service Requests layer.
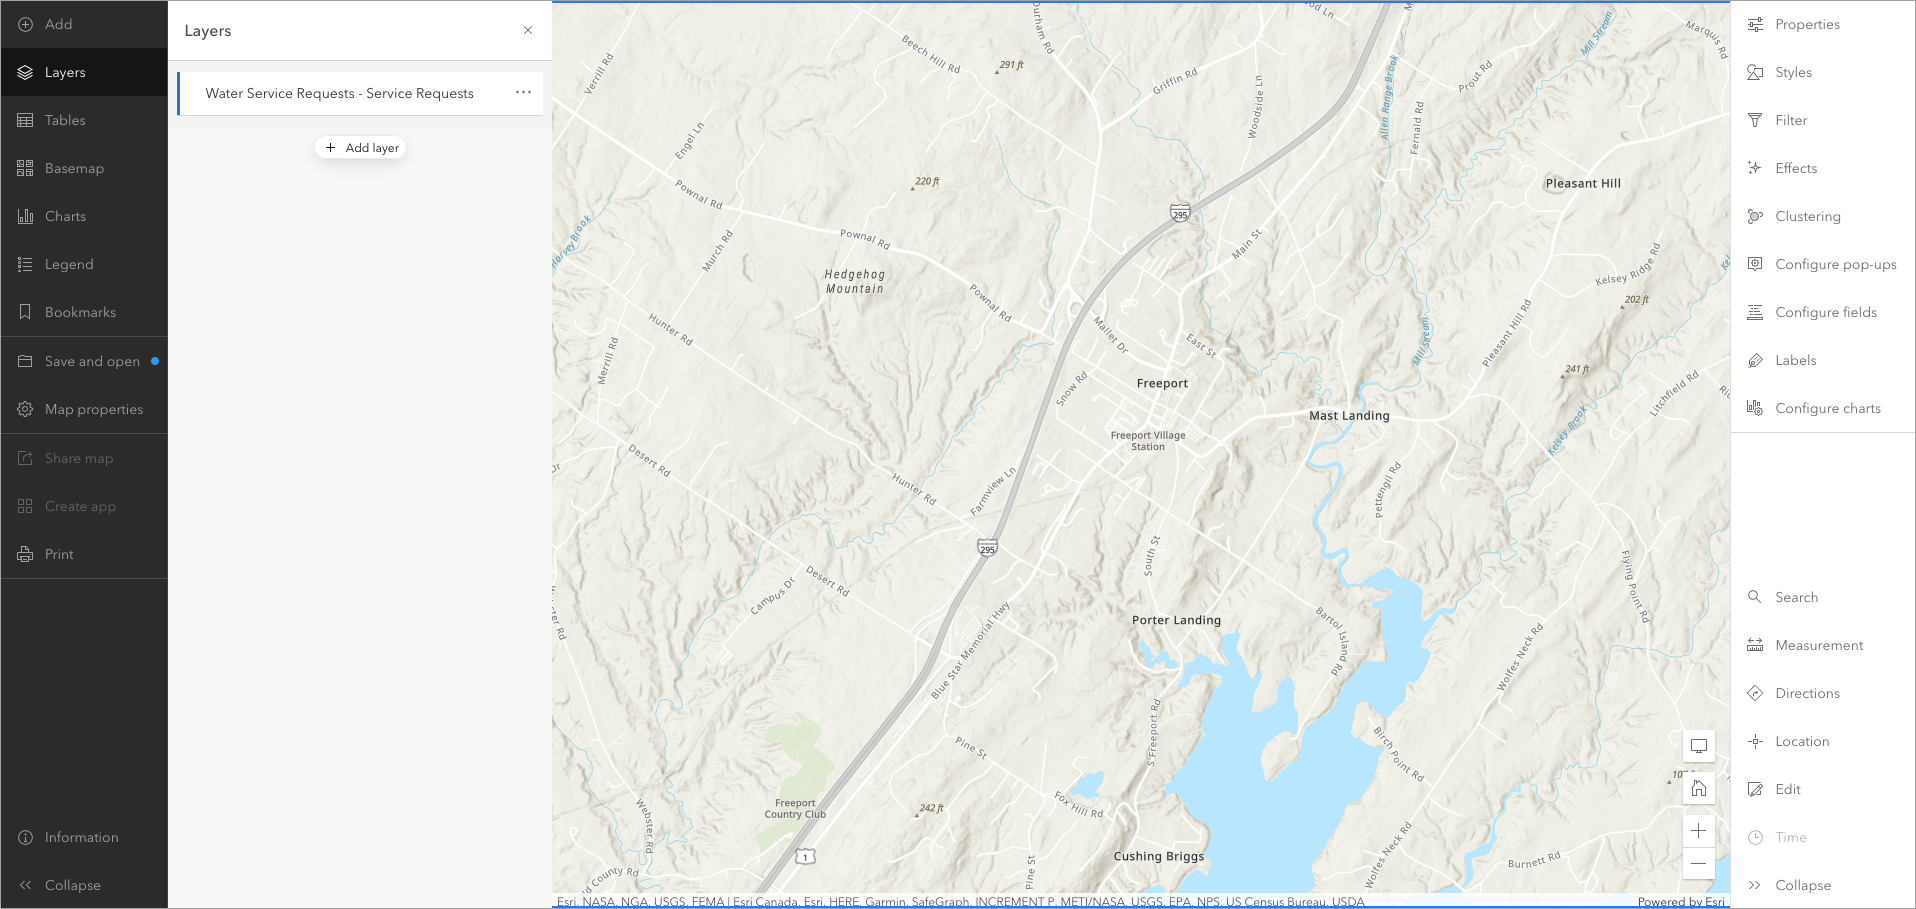
Click the Save and open action then choose Save. Enter a title of “Water Service Requests” and click Save map.
Create the Integromat Scenario
Browse to Integromat.com and create an account if you haven’t already. Once you sign in, click Create a new scenario to get started.
Click on the large icon to start building the scenario. Search for “Field Maps”. Click ArcGIS Field Maps to use the Field Maps app. Select the Watch Features module.
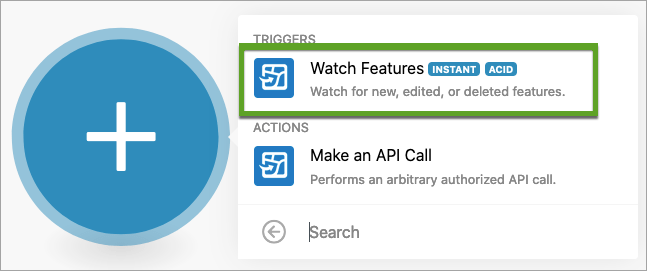
On the webhook configuration dialog, click Add to start configuring the webhook that will watch for new inspections.
Fill out the following information:
- Webhook name—Provide a name for the webhook that is unique to the project or map you’re configuring the webhook for.
- Connection—Click Add to connect to your ArcGIS Online account.
- Click Continue to sign into your account. You’ll only have to do this once.
- Feature Layer—Select the Water Service Requests feature layer you created earlier.
- Trigger events—Select what events trigger the module. For this example, check Features Created.
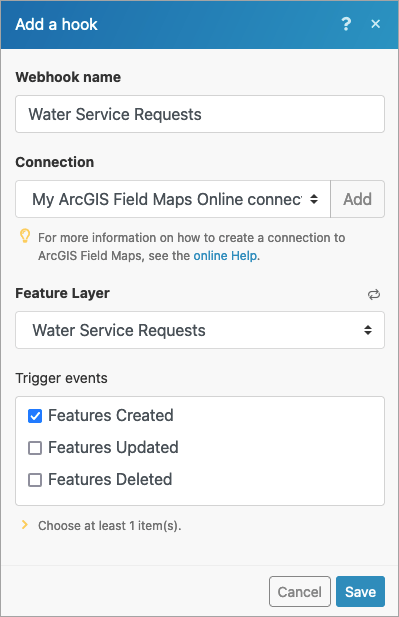
Click Save to register the webhook with ArcGIS Online. Then click OK to finish configuring the Watch Features module.
Next, we need to authenticate with Cityworks. Search for the HTTP app and select the Make a request action. Connect it to the ArcGIS Field Maps module.
Fill out the following information:
- URL—Provide the authentication URL for your Cityworks instance (e.g. https://<your-cityworks-site.com>/<tenant>/services/General/Authentication/Authenticate)
- Method—Select GET
- Query String—Add a parameter with:
- Name:
data - Value:
{"LoginName": "<username>", "Password": "<password>"}
- Name:
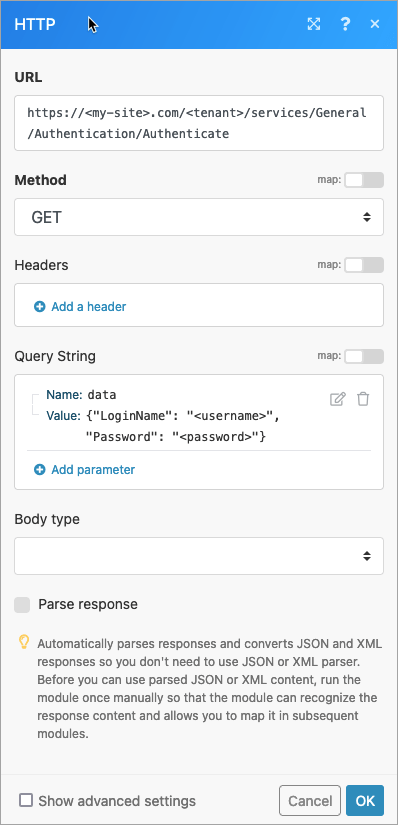
Click OK to save the configured module.
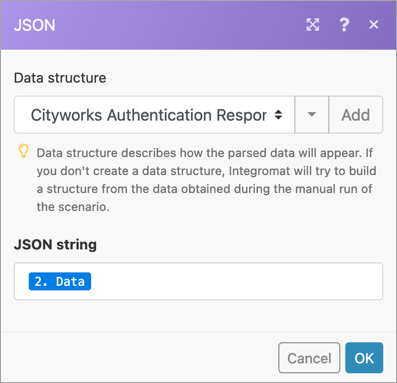
Next, search for the JSON app and select the Parse JSON action. We’ll use this module to extract the token that is returned from the previous request.
Click Add to add a new data structure.
Set the Data structure name to “Cityworks Authentication Response”.
Click Generator to generate the JSON specification from the following sample JSON:
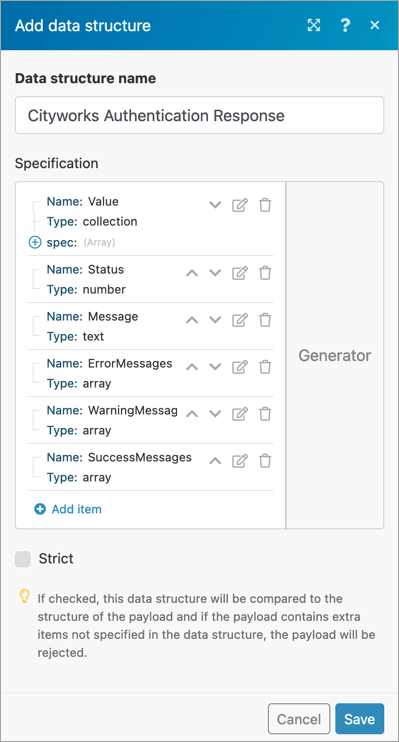
Click Save to save the data structure.
Set the JSON String to be the “Data” object from the previous module and click OK.
Next, you’ll add an Iterator module. This allows the webhook to iterate through an array of features if multiple features are returned at once. For example, if multiple mobile workers add new service requests around the same time, an iterator ensures each inspection is processed.
In the Tools section, click Flow Control.
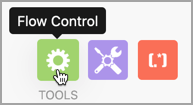
From the list of options, select Iterator. The Iterator module is automatically added to the webhook and connected to the Field Maps module.
Click in the Array text box and then, using the dropdowns, find Adds[] under the Service Requests (0) layer. This is the array of new features to iterate over.
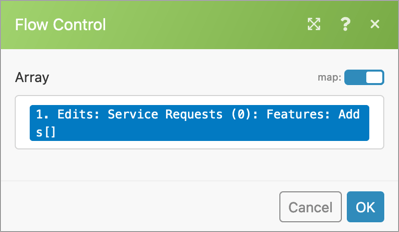
Click OK to save the configured module.
Next, click the JSON app again (this time it’s under your favorites section) and select the Create JSON module.
Click Add to add a new data structure. This time we’ll add a simplified version of a Cityworks Service Request object. Consult the Cityworks Service Request API to view all the possible parameters.
Set the Data structure name to “Simplified Cityworks Service Request”.
Click Generate and use the following sample JSON to generate the data structure:
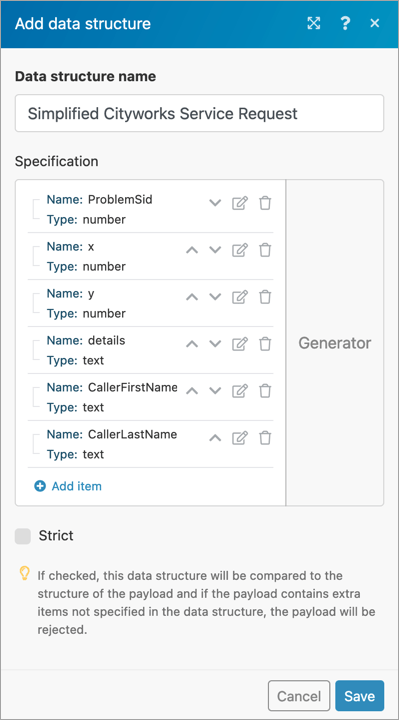
Click Save to save the data structure.
Fill out the following information:
- ProblemSid—This is the type of service request that will be created. In this case a Water Quality – Cloudy Water Service Request should be created. This value will vary from site to site. You can find the list of possible values by making a request to the Service Requests Templates endpoint (e.g. https://<your-cityworks-site.com>/<tenant>/services/Ams/ServiceRequestTemplate/Templates). In our case the ProblemSid for the “Water: Quality – Cloudy Water” service request template is 22176.
- x—This is the x coordinate of the location (in Web Mercator spatial reference). Map the current feature’s “X” value to this field
- y—This is the y coordinate of the location (in Web Mercator spatial reference). Map the current feature’s “Y” value to this field
- details—Those of the service request. Map the current features “Additional Details (COMMENTS)” value to this field.
- CallerFirstName—This is the first name of the user that submitted the feature. Map the current feature’s “First and Last Name (NAME)” value to this field. You’ll have to split the value to just get the first part using the get and split IML functions.
- CallerLastName—This is the last name of the user that submitted the feature. Map the current feature’s “First and Last Name (NAME)” value to this field. You’ll have to split the value to just get the last part using the get and split IML functions.
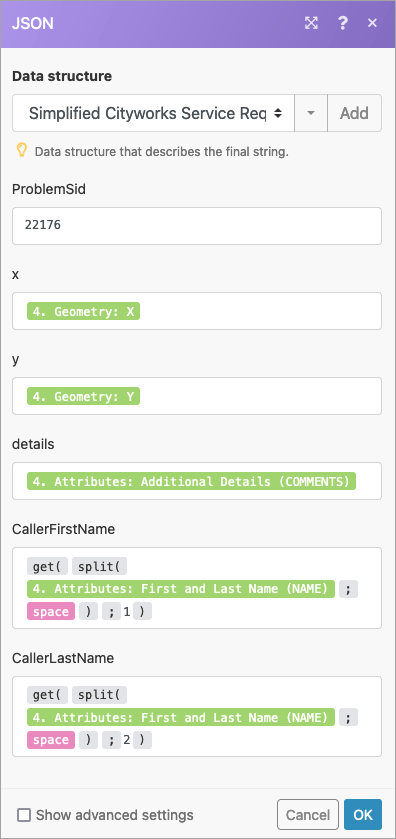
Click OK to save the configured module.
Next, add another HTTP app and select the Make a request action. This is the final step in the scenario and it will submit a request to Cityworks to create the Service Request.
Fill out the following information:
- URL—Provide the Service Request Creation endpoint for your Cityworks instance (e.g. https://<your-cityworks-site.com>/<tenant>/ services/Ams/ServiceRequest/Create)
- Method—Select GET
- Query String—Add two parameters with:
- Name: data
- Value: The previously created JSON string
- Name: token
- Value: The previously acquired token
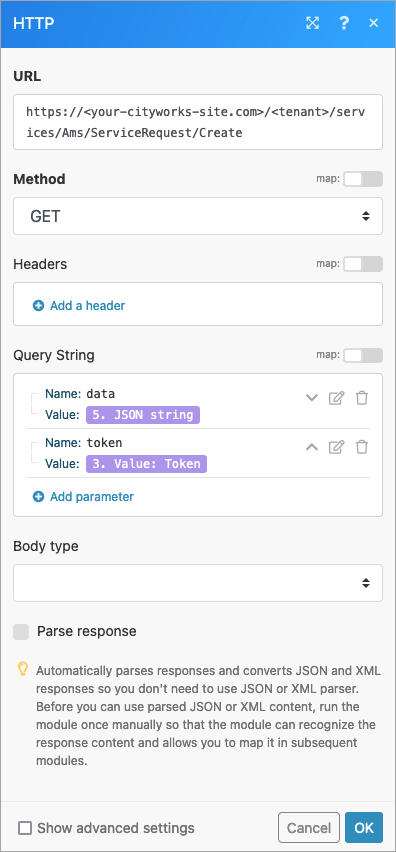
Click OK to save the configured module.
Finally, we want to add a filter so that only features that are of the “Water Quality – Cloudy Water” type are creating service requests. Click on the wrench icon between the Iterator and JSON modules.
Set the Label to “Is Cloudy Water”.
Set the Condition to check that the “Type of Issue (REQUESTTYPE)” is Equal to “Water Quality – Cloudy Water”.

Click OK.
At this point, the entire scenario is complete and ready for testing! It should look like this:

Click Run Once so that the scenario is active.
In the Field Maps mobile app, open the “Water Service Request” map you created and collect a new feature as shown below:
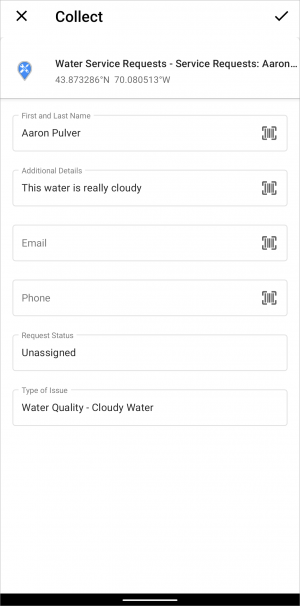
In Integromat, you should see the scenario execute within 30 seconds or so. After it completes, open the Cityworks Respond app. There should be a new request using the attributes submitted from the Field Maps mobile app.
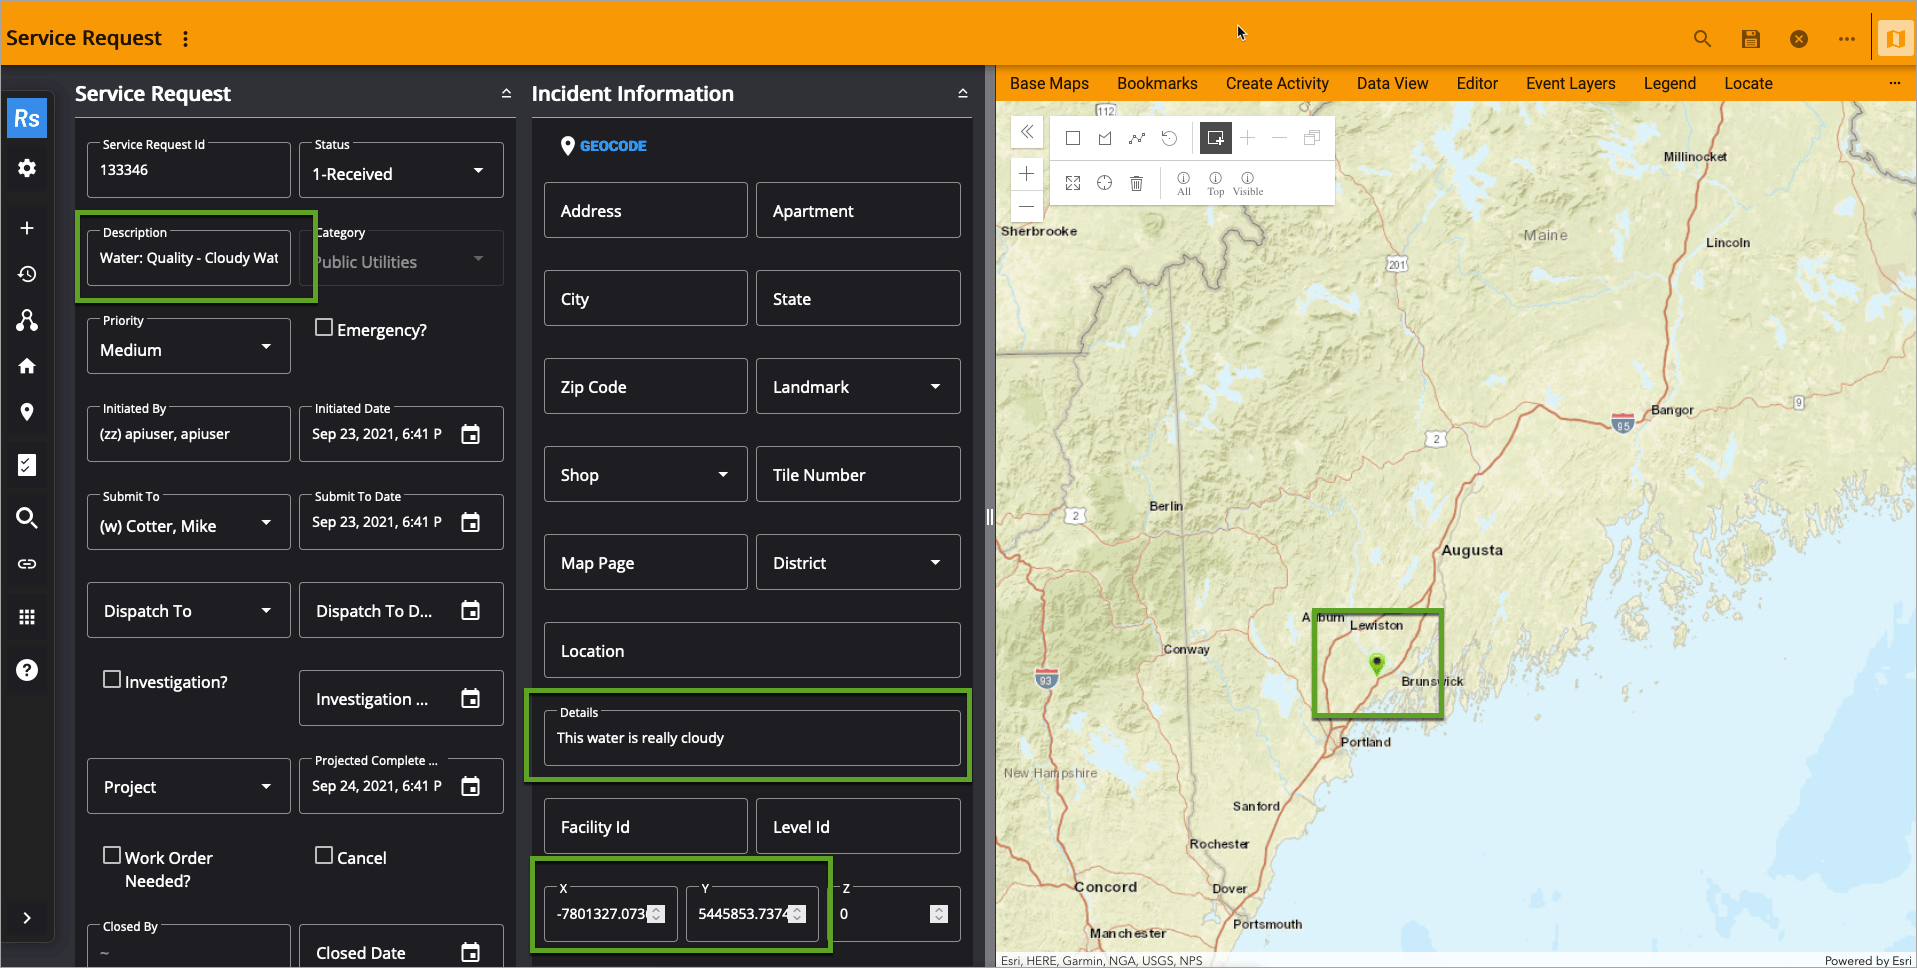
This is one way to use the Field Maps Integromat app to complete an integration workflow with Cityworks. You could extend this in so many ways! See the Automate Field Maps and Work Management topics for more information.


Article Discussion: