Now that you have geolocated your BIM model and better understand the concept of a building layer, you can continue working toward your BIM-GIS integration goal. For the first part of this blog, I am going showcase the workflow of creating a filter to show only the emergency/safety elements of the building. For part two, I will demonstrate the workflow of displaying the building layer by floor using the filter. These two workflows together help you to better organize and display your BIM data and meet the needs of your end users. Understanding these concepts can open up the ability to build more complex workflows later on.
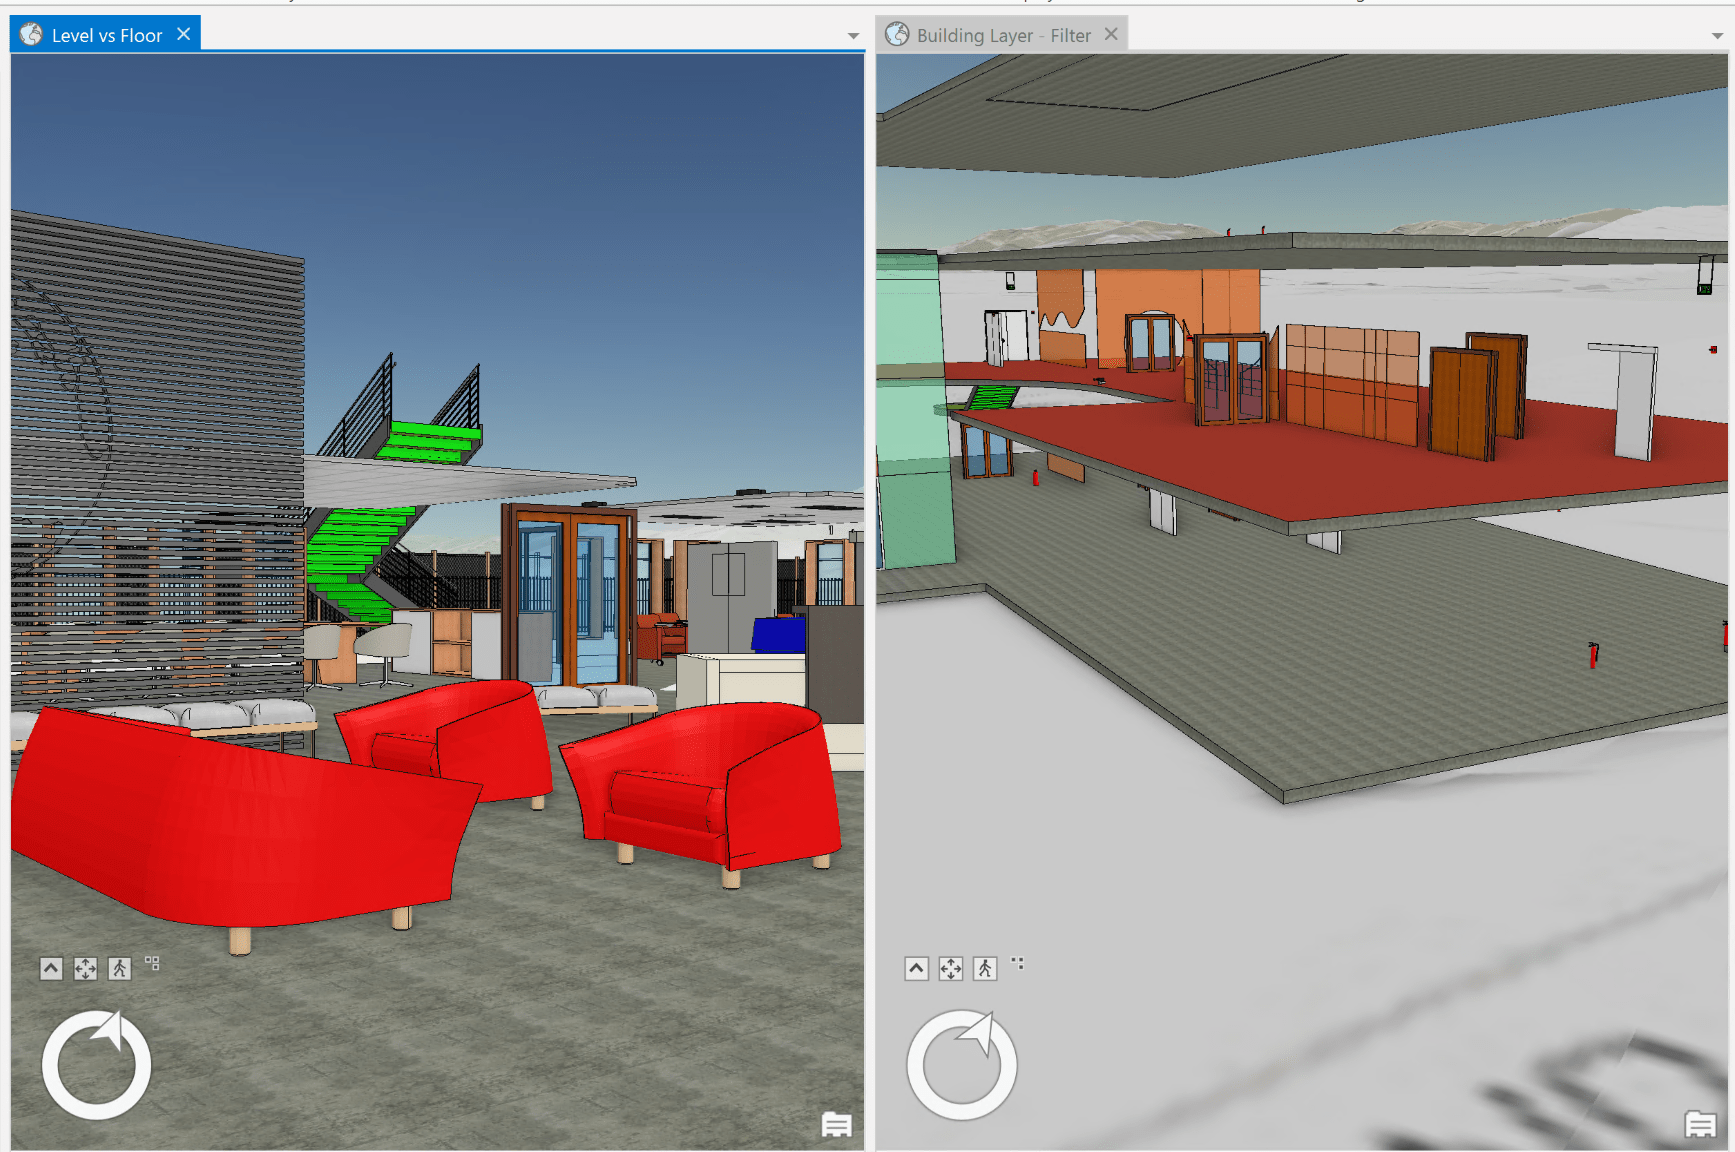
Part 1: BIM file workspace—Basic
Scenario: You received a request from the inspection team that they need to view the safety and security elements that are around the building, such as fire extinguishers, exit signs, and keypads, plus some reference elements (floors and doors).
- Drag the BIM file workspace to the scene.
- Select the building layer to activate the Building tab.
- Click Refresh Filter Values.

This will create the statistics that the building layer needs to leverage the filter capabilities. The more complex the model, the longer it will take to calculate the statistics.
- Now the Building Filter button is active.
After doing an inspection of the building model, find all the elements that you want to highlight (safety and security elements) and those that you need to hide or not display.
- Click the Building Filter button.
- Select New Filter.
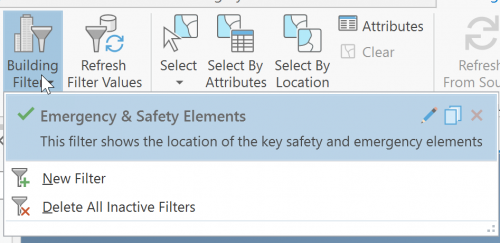
This opens the Building Filter pane.
- Fill in the Name field and the description for the filter.
Name: Safety and Emergency
Description: This filter shows the location of the key safety and emergency elements

- Click Settings.
- Check Family.
For your representation of the safety and emergency elements, choose the filter mode as solid.
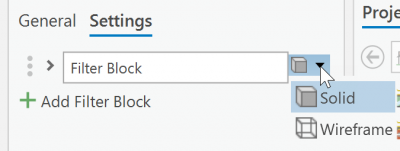
Now you’ll start creating the filter.
- Expand the filter block.
- Go to Family.
- Search for and check the following elements:
- Fire
- Camera
- Video
- Exit
- Door
- Curtain
- Emergency
- Stairs
- System Panel
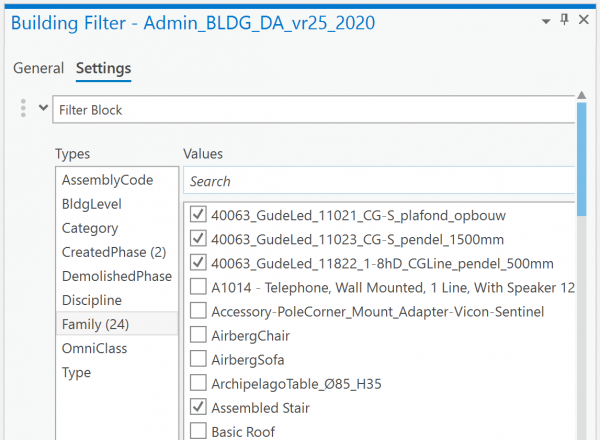
- Close the Building Layer pane.
You are finished with your filter setup. The next step is to share your building layer with the filter. This can be done in two ways:
- By creating a building scene layer package
- By sharing the web scene
In this case, you will share it as a web scene.
Part 2: BIM file workspace—Advanced
Scenario: You received a request from the facility management team regarding the need to view the building by floor, so they can perform an inventory of the assets (absence or presence).
- Run the BIM File to Geodatabase geoprocessing tool.
- Edit* the feature classes to match the floor behavior defined by facility management.
*A detailed workflow of the floor creation will be published as part of a separate blog.
- Run Make Building Layer geoprocessing tool.
- Select the building layer to activate the Building tab
- Click Refresh Filter Values.

This will create the statistics that the building layer needs to leverage the filter capabilities. The more complex the model, the longer it will take to calculate the statistics.
- Now the Building Filter button is active.
- Click the Building Filter button.
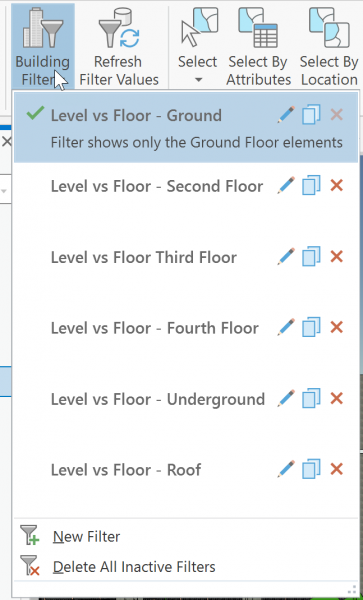
- Select New Filter.
This opens the Building Filter pane.
- Fill in the Name field and the description for the filter.
Name: Level vs Floor – Ground
Description: Filter shows only the Ground Floor elements
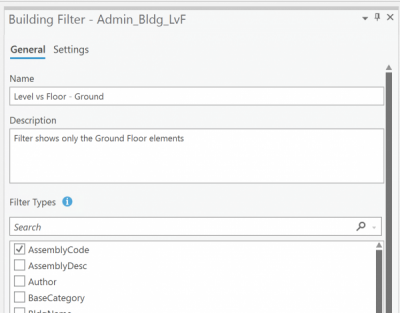
- Check FloorCode.
- Click Settings.
For your representation of the floor elements, choose the filter mode as solid.

Start creating the filter.
- Expand the filter block.
- Go to FloorCode.
- Select 2

You are finished with your filter setup for the ground floor. Repeat the steps for each of the floors. After all six filters have been created, you will share the web scene.
Thank you to The Ohio State University Facilities Information Technology Services Team for sharing their BIM Data.
Resources
Make sense of your BIM data by leveraging the Building layer

Article Discussion: