This blog post is part two in a series on ArcGIS Workflow Manager integration with ArcGIS Survey123. If you haven’t read part one and you are not familiar with this integration, you can access that blog post here.
Integrating ArcGIS Workflow Manager with ArcGIS Survey123 provides organizations with intuitive new ways to capture form-based responses from desktop and mobile users. Included with this integration is the ability to use Survey123 webhooks to create jobs in Workflow Manager. A webhook is a mechanism that allows an application to provide other applications with event-driven information. Webhooks offer a quick and easy way to connect separate systems together with no ongoing maintenance.
Why is this important? Well, consider a couple of scenarios that may be familiar to your organization.
Scenario 1: Your organization performs an annual fire hydrant inspection using Survey123. When a fire hydrant inspection results in repairs or replacement, your organization’s GIS data may need to be updated. To simplify this process, the submission of an annual fire hydrant inspection in Survey123 will automatically create a Workflow Manager job for the GIS team to review the inspection and make changes to their GIS data as necessary.
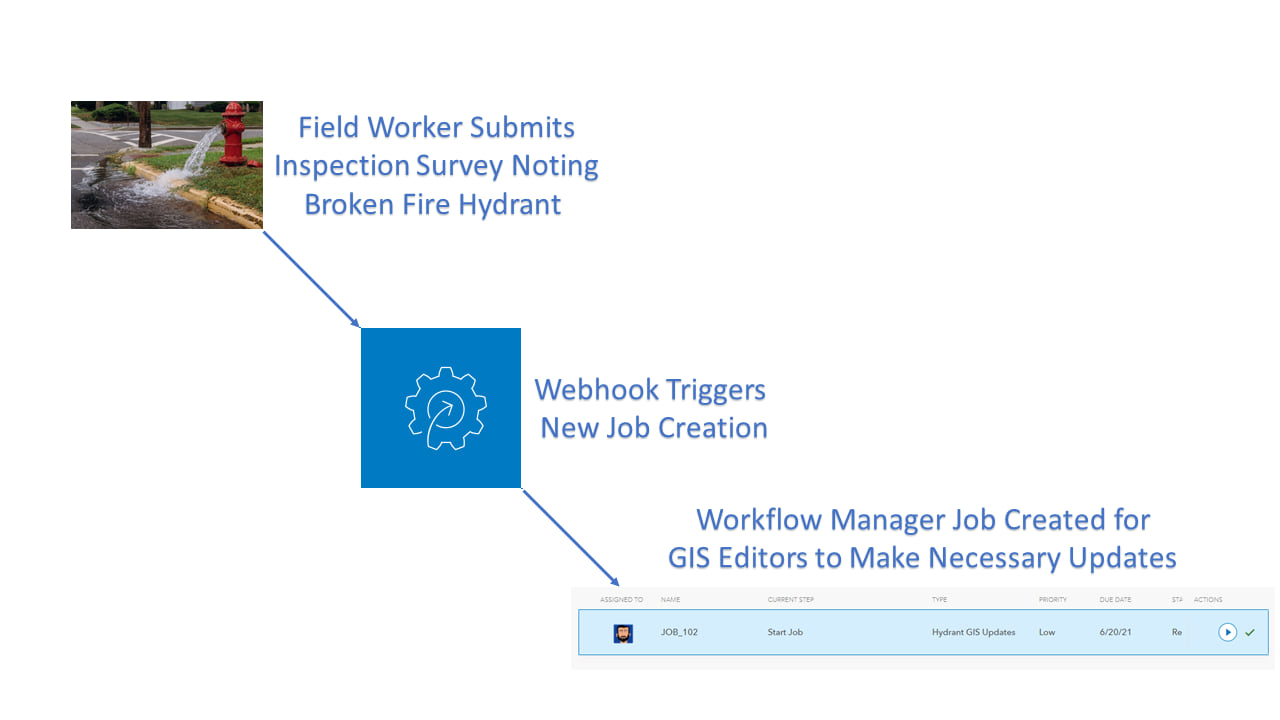
Scenario 2: Your organization regularly gathers information from other organizations to maintain a regional data hub. Submissions from these organizations need to go through a screening process before they are input into the data hub. Survey123 provides submitters with a familiar and simple way of sending their information. Once the survey is submitted, screeners in your organization are automatically assigned a job to begin the process with all the information they need attached.
Getting Started
Before we can start working with webhooks in Survey123, we’ll need to ensure we have a few items ready to go.
- A survey in Survey123 to which we’ll add a webhook. This survey will trigger the creation of a Workflow Manager job each time the survey is submitted.
- A workflow diagram and corresponding job template in Workflow Manager web app.
- A job template with an extended properties table created from the Survey123 form. This will ensure that survey responses are associated with newly created Workflow Manager jobs.
For this example, lets configure the annual fire hydrant inspection we discussed in scenario 1 above.
We’ve created a workflow diagram and job template for our hydrant GIS data updates workflow and added the Survey123 form as an extended properties table to our job template that associates survey responses with jobs.

Add a Webhook in Survey123
Now that we have the basics set up, we can add a webhook in Survey123 to automatically create a Workflow Manager job. In this example, the survey is created on the same ArcGIS Enterprise portal as Workflow Manager Server. You can also use a survey on a different Enterprise portal or ArcGIS Online.
1. Sign into your Enterprise portal using the following syntax:
https://survey123.arcgis.com/?portalUrl=https://exampleportal.esri.com/arcgis
2. On the My Surveys tab, click a survey to open it.
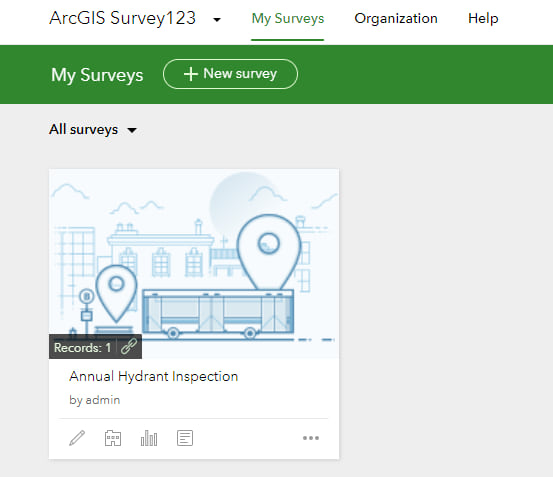
3. Click the Settings tab and click the Webhooks

4. Click Add webhook.
5. On the Add webhook page, we’ll need to provide the following information:
- Name—Give the webhook a unique name.
- Payload URL—The payload URL is what’s used to create a Workflow Manager job. It has the following syntax:
- https://gisserver.domain.com/webadaptorname/workflow/<workflow item id>/webhooks/createJobFromSurveyResponse/<job template id>
- We’ll need to provide the workflow item ID and job template ID values. One easy way to get this information is to access the Workflow Manager web app and go to the job template you wish to use. The values for workflow item ID and job template ID can be found in the URL in your web browser’s address bar.

- Trigger Events—Ensure that the New Record Submitted check box is checked. Jobs can’t be created in Workflow Manager when an existing record is edited.
- Event Data—Ensure that the Survey info, Portal info, and Submitted record check boxes are checked.
- Ensure that Status is set to On.
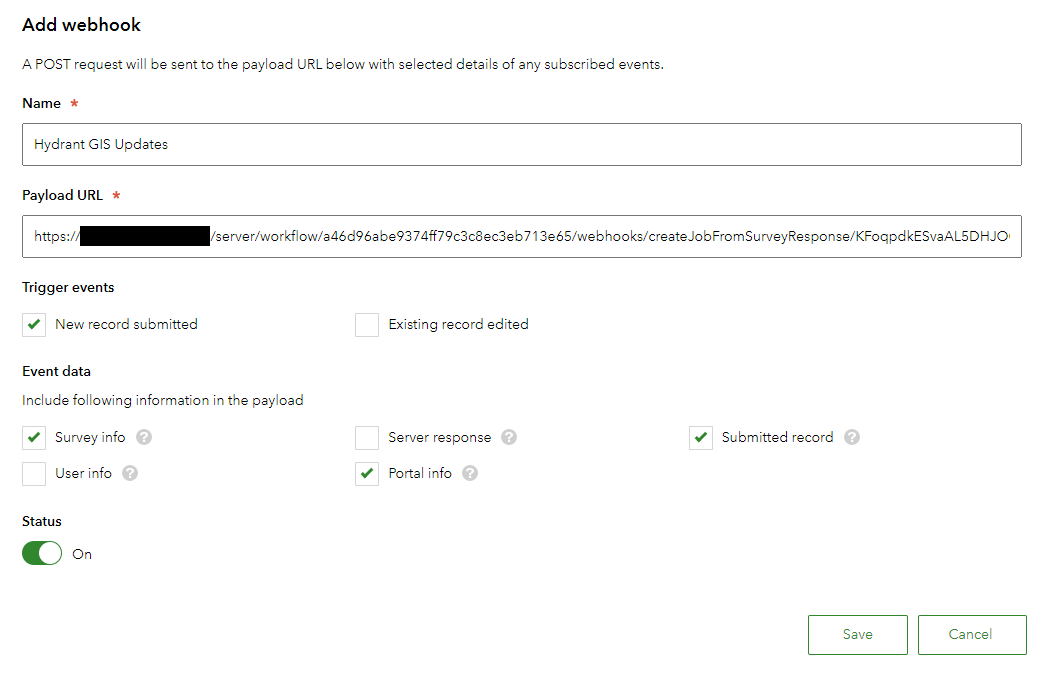
6. Click Save to add the webhook.
Submit a Survey Response
Once the webhook is added in Survey123, the next step is submitting a survey. Since we are already logged into Survey123, this part is easy!
1. Click the icon to the right of the Settings tab to view the survey link.
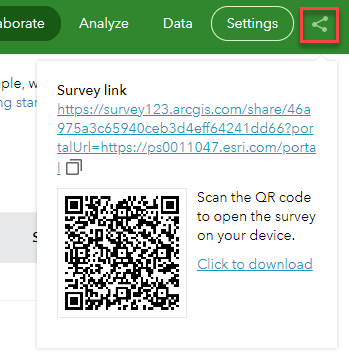
2. Click the survey link to open the survey.
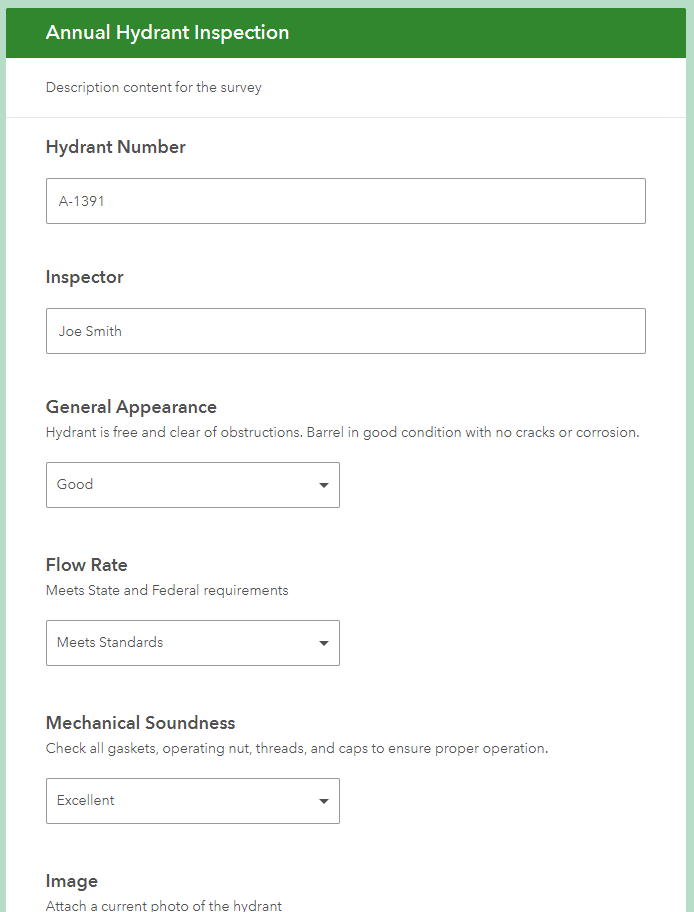
3. Fill out the survey and click Submit.
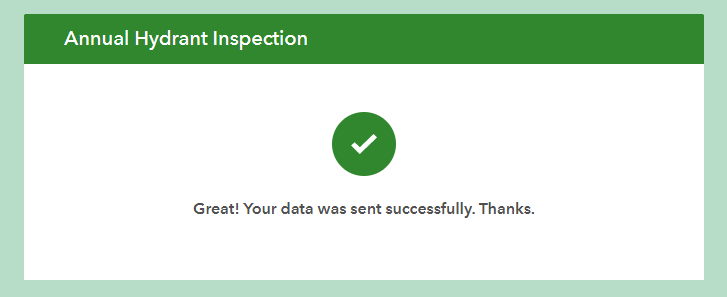
Inspect the Survey Response in the Newly Created Workflow Manager Job
After the survey response has been submitted, access the Workflow Manager web app to view the newly created job.

Since we added an extended properties table created from the Survey123 form to our job template, the survey record is automatically associated with the job. You can view the survey record by expanding the Details panel on the right side of the web app and expanding the extended properties table.
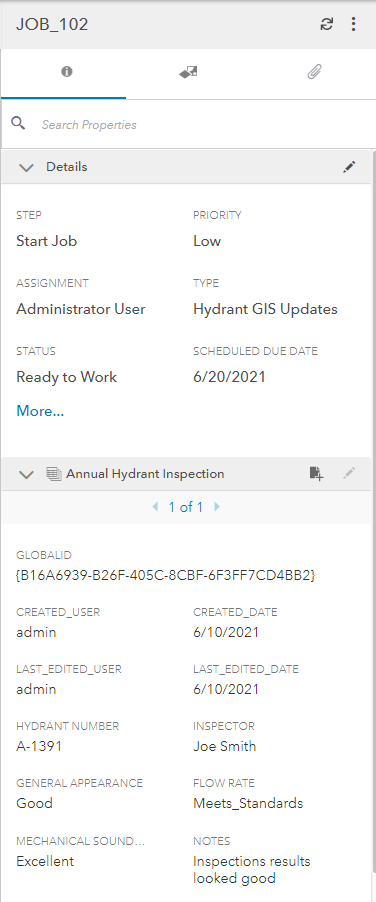
In this example, we also attached a photo of the hydrant that was inspected and would like to view that photo in the Workflow Manager web app. To do so, we simply run the Inspect Submitted Survey Record step we setup earlier which opens the survey record in the job tile and allows us to view the attached photo.

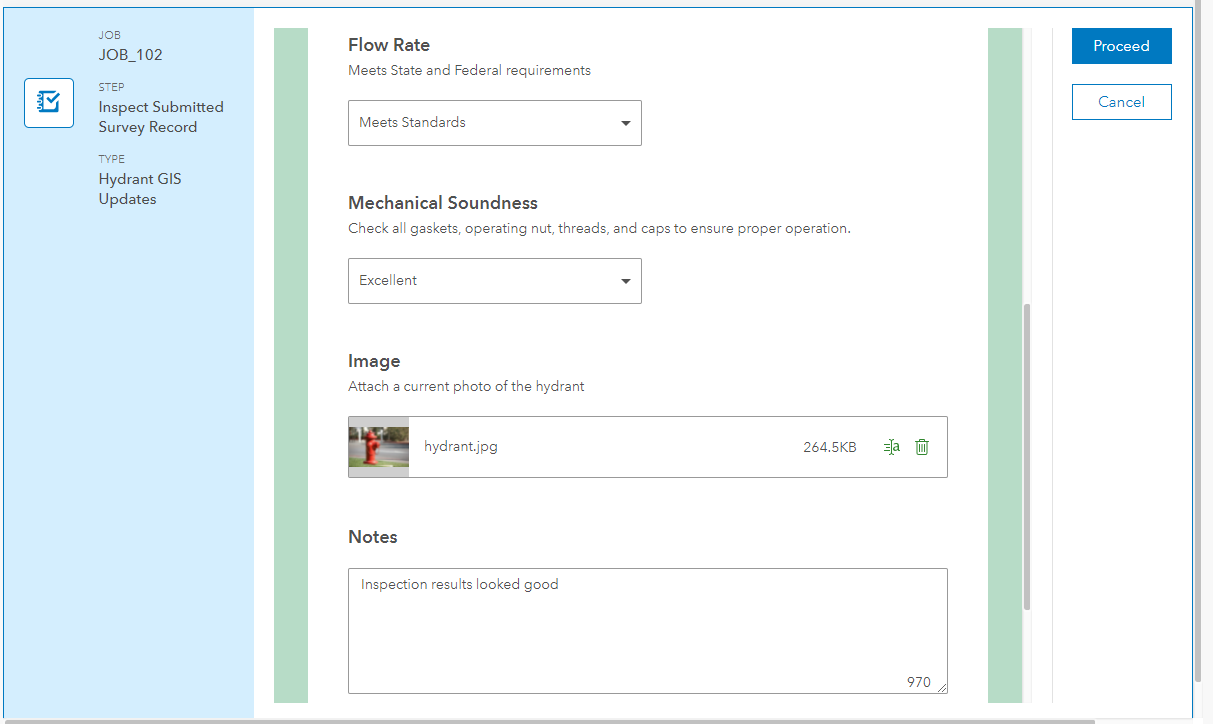
At this point, the GIS team can continue with the workflow to make any necessary edits to the GIS data based on this inspection.
With the ArcGIS Workflow Manager Server Advanced role and Survey123, you can automatically start the process of responding to a request immediately after it’s submitted. The Workflow Manager Server Advanced role is an optional server role that includes functionality to help automate workflows. With the 10.9 release, this includes the ability to create jobs using Survey123 webhooks and the ability to schedule and run a step automatically at a specified time. Additional automation capabilities will be added to the Workflow Manager Server Advanced role in the future.
Now you may be wondering if Workflow Manager supports cases where the survey is public and the people submitting responses are not Workflow Manager users. An example would be a pure crowdsourcing use case where members of the general public report incidents like a broken fire hydrant or graffiti using Survey123. Does Workflow Manager support this case as well? Could the Workflow Manager users just be internal to the organization to review and complete the request? The short answer is yes, we support this scenario as well. If the survey is made public then an organization can have anyone contribute new submissions so long as they’re comfortable with them not being able to follow-up on their request and they’re prepared to do a little extra work to get the submission from Survey123 into Workflow Manager. If you are interested in this use case, please reach out to us on our Esri Community page and we’ll tell you how it works.
To get started or to learn a bit more about Workflow Manager, check out the resources listed below.
Learn More
- Connect with the ArcGIS Workflow Manager Community
- Learn more on the ArcGIS Workflow Manager product page
- Access Workflow Manager documentation
- Check out the Workflow Manager Getting Started video on YouTube
- Sign up for the virtual 2021 Esri User Conference (Esri UC) to attend the ArcGIS Workflow Manager: Overview and Roadmap technical session.

Excellent! Exactly what I was looking for. Thank you! Although, it just became clear to me that it requires the ArcGIs Workflow Manager Server Advanced after checking the executeSurvey123Hook service at the API documentation. As an alternative, coud we call the createJob followed by the updateJob and/or the addAttachment services to pass information to the job?