Geologists collect rocks, minerals, fossils, and other specimens in the field to better understand the geological processes that shape our world. Traditionally, geologists collect data and compile field notes using paper-based notebooks and forms.
ArcGIS Field Maps is an app that allows for more streamlined field data collection. Using Field Maps, geologists gain a more organized data collection process by using digital maps and forms that can quickly be shared with others. Let’s explore how you can use Field Maps to collect geological data!
Imagine you’re a mineralogy teacher and your class will be collecting mineral specimens at the Chambless Rock Collecting Area as part of a field-based lab assignment. This area is a popular place for collecting hematite, magnetite, and green epidote minerals. Small garnets have also been identified at this location. While at Chambless, your class will use ArcGIS Field Maps to record and collect data on the mineral specimens they find. Before your class heads to the field, you must first make the map your students will use to collect data. Let’s learn how to make the map.
Create the feature layer and map
When your students are collecting mineral data in the Field Maps mobile app, they’re adding features to a layer contained in a map. With the Field Maps Designer web app, you’ll create the map and feature layer mobile workers will use in Field Maps to collect data.
1. Sign in to your ArcGIS Online account and, open Field Maps Designer from the app launcher.
2. The Maps page appears. Click + New Map.

The New map page appears with on-screen instructions to help guide you through the map creation process.
Next, you’ll define the layers used for data collection.
3. In the Layer name text box, type Mineral Collection.
4. In the Layer type drop-down menu, select Point layer.
You’ll use this layer to build the form mobile workers will use to collect data.

5. Click Next and, on the Layer settings tab, click Next again. You will not change any of the Layer settings.
6. On the Title and save tab, enter the following information for the Map title and Feature layer title text boxes:
- For Map title, type Mineral Collection Lab and your initials to ensure that the name is unique in your organization.
- For Feature layer title, type Mineral Collection and your initials to ensure that the name is unique in your organization.

7. In the Folder drop-down menu, select what folder to save the map in or create a new folder.
8. Click Create Map.
Your map is saved as an item in your organization and opens in Field Maps Designer on the Forms page.
Change the map basemap
Next, let’s change the basemap in Map Viewer so the map better shows the geologic features of the area.
1.In Field Maps Designer, click Open and select Map Viewer. The map will open in Map viewer in a popup window.
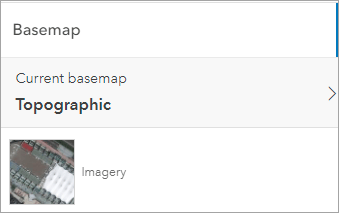
2. Click Basemap and select the Imagery

Click save and close the Map viewer window.
Next steps
This blog post is the first part of the Collect Geological Data with Field Maps tutorial series.
Now that you have made your map, check out the Configure a mineral collection map using Field Maps video to learn how to configure a map for use in the field.

Article Discussion: