Photo Viewer is a powerful image viewer in ArcGIS Business Analyst Mobile that handles the standard and panoramic images that all the latest phones can capture. In addition, it can display full 3D/360˚ images from the recent 360 cameras, widely available at a reasonable price.
Adding images to an ArcGIS Business Analyst site brings value and context to it. This also helps you document your location and record specific views for site analysis and presentations. The following is a short tutorial on how to add images to a site using the BA Mobile App.
Within BA Mobile, create a new site or open an already existing site on the map.
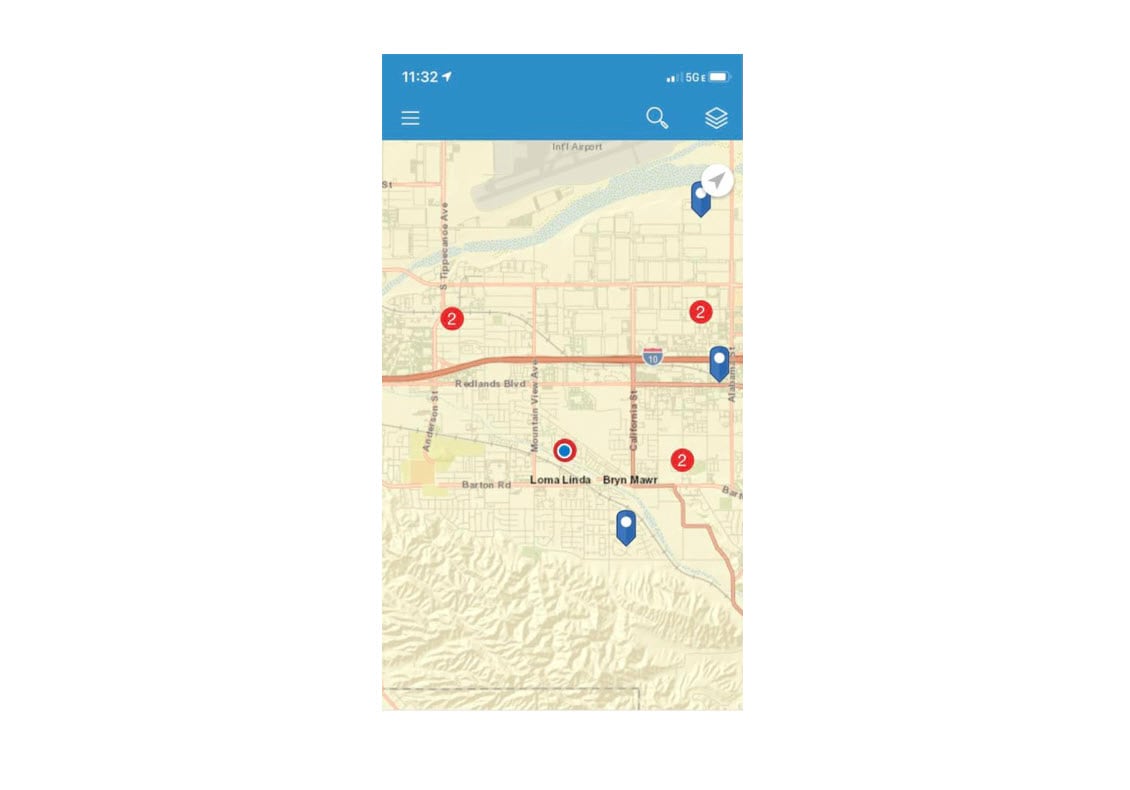
Once the site has loaded, click Details on the site card to open the Location Details page.
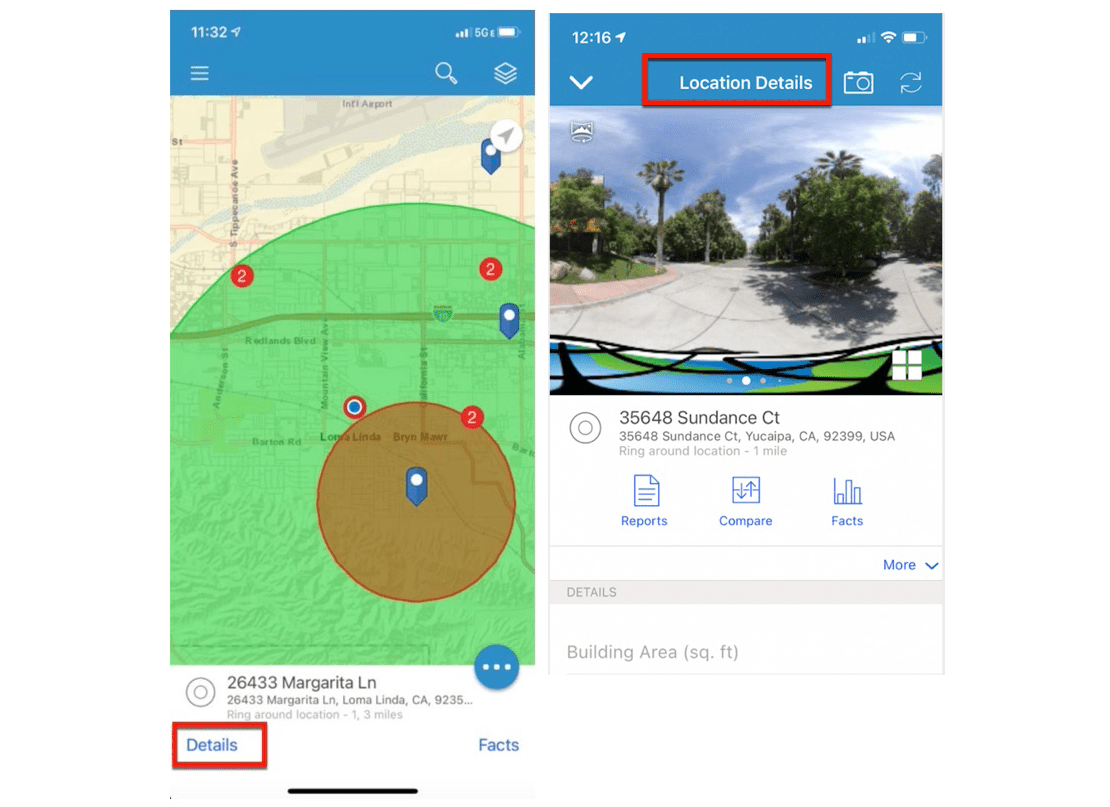
The top of this page contains the Image Preview section. If your site already has an image associated with it, the image appears in this section. If there is no image associated with your site, this section contains instructions for uploading an image.
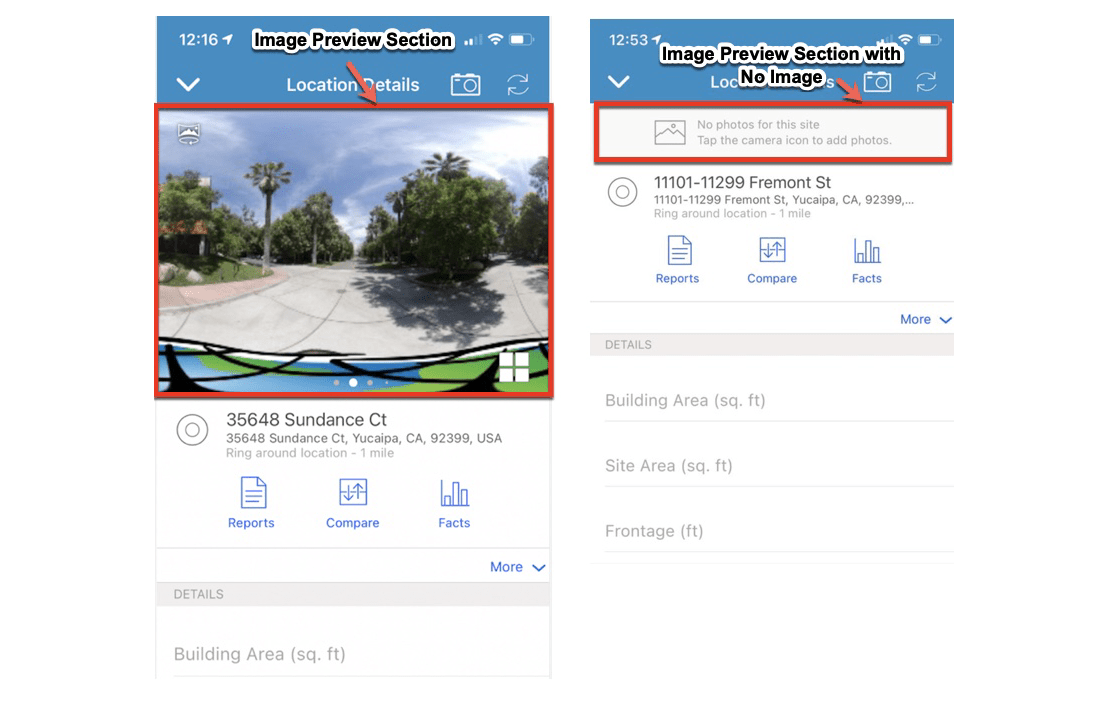
From this page, you can upload an image to the site you just created. Images can be any of the following types:
- Regular image
- Panoramic image
- Immersive 360 image
You can upload any of the above images by either using your phone’s camera to take a picture right at the site while you’re on the move, or uploading previously taken pictures of the site from the image gallery on your phone.
Note: Immersive 360 images of the site, both inside and outside, can be taken with 360 cameras and can be uploaded directly from your phone.
Upload an image
Let’s walk through the steps for uploading any image into the Image Preview section of your site’s Location Details page.
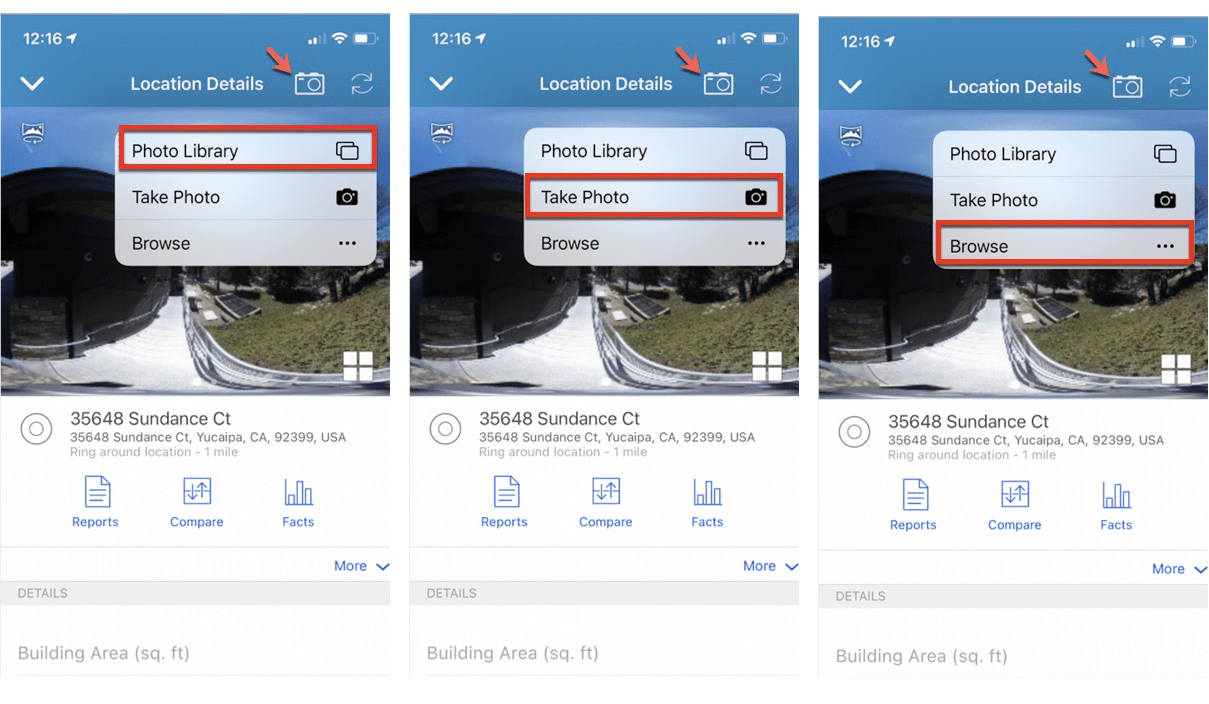
Tap on the camera icon next to the Location Details page header. Upload images in any of the following ways:
- Select an image or multiple images from your device’s photo library to upload them.
- Take a picture of the site using your device’s camera and upload it to the site.
- Browse through any folder on your device in which you store pictures of your site and upload a photo.
View images
Once you have uploaded the images for your site, there are couple of ways to view them.
- Swipe through the pictures in the Image Preview section of the Location Details page.
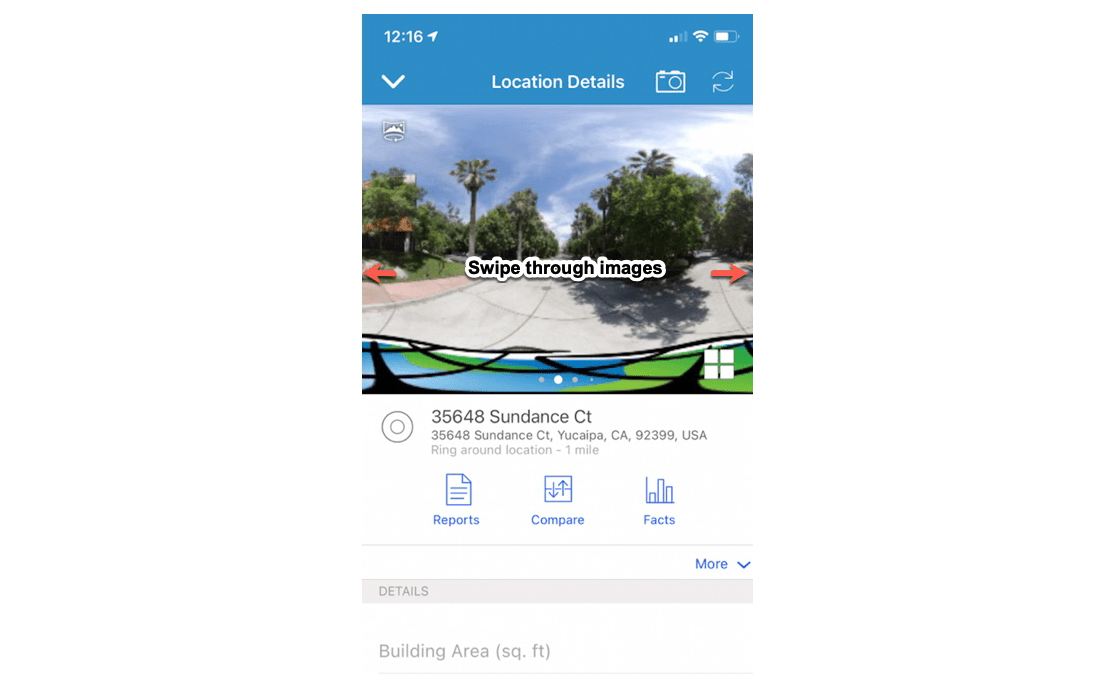
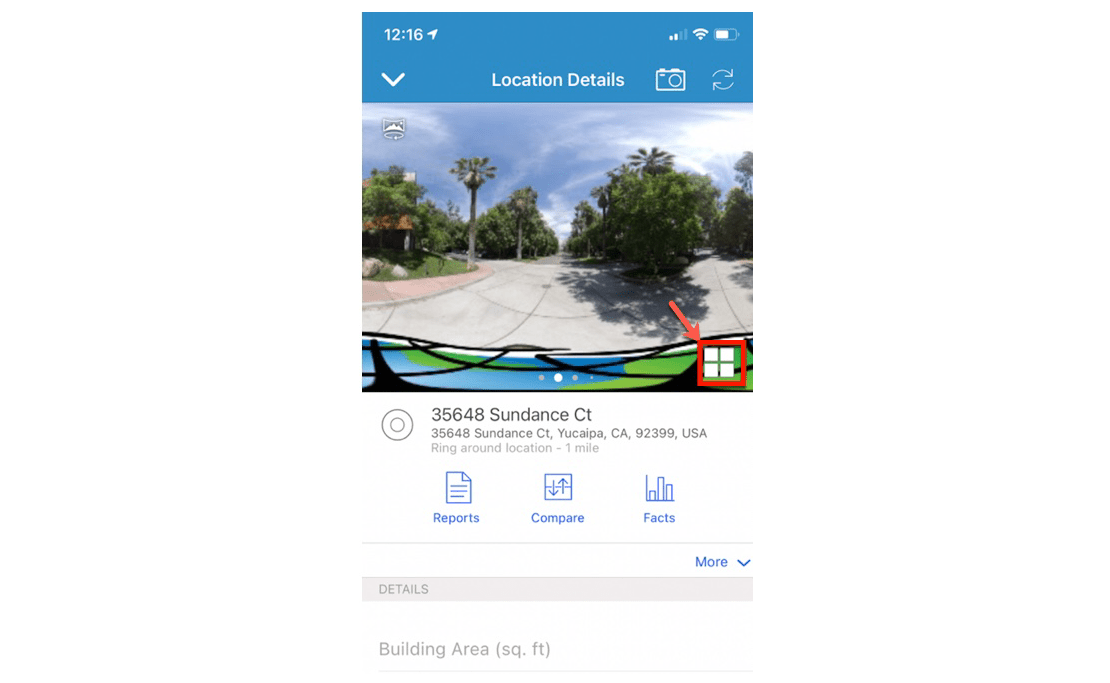
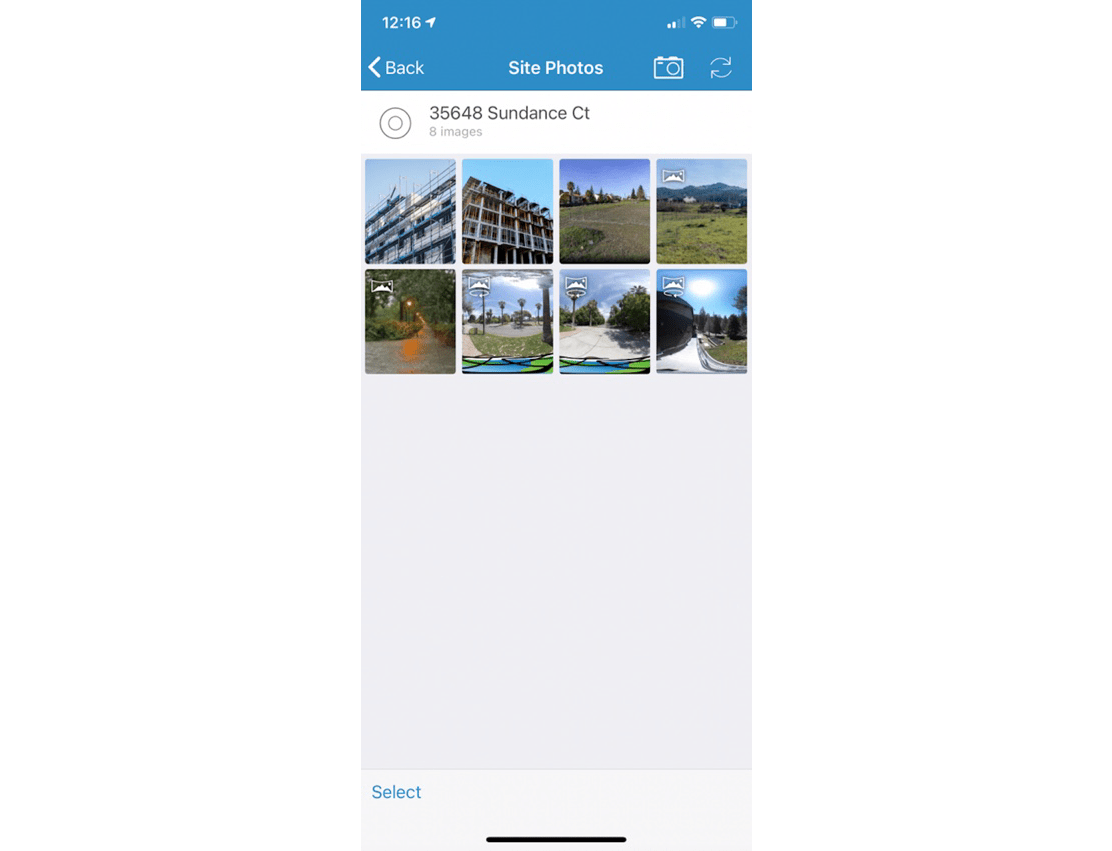
- Click on the Gallery button, depicted as four squares in the bottom right of the Image Preview section. This button opens the Site Photos gallery containing all the site’s images.
You can tap a single image to open it in Photo Viewer, or select multiple.
- Tap any image in the gallery to view the whole image in Photo Viewer.
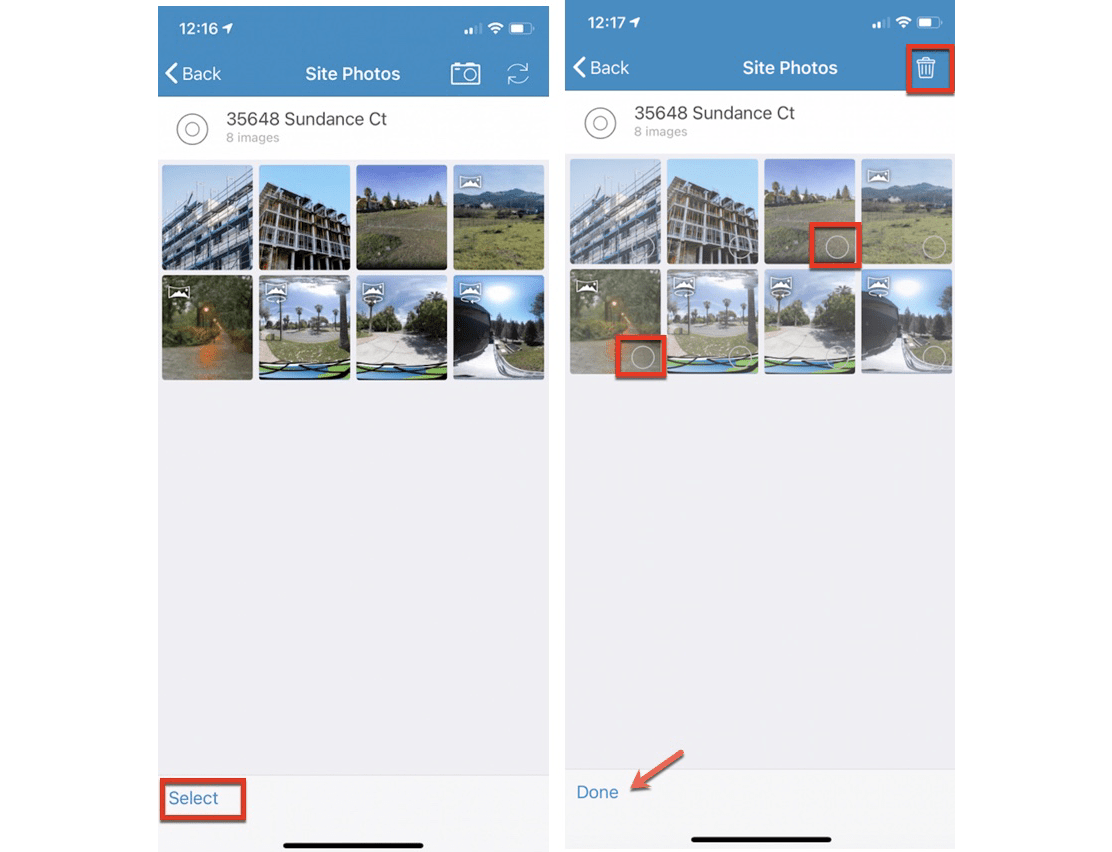
- Tap Select at the bottom of the gallery to select one or more of the images. Tap the trash icon to remove the selected images from the site’s gallery.
Features available in Photo Viewer
- Scroll through the thumbnails at the bottom to view all the images for this site one by one.
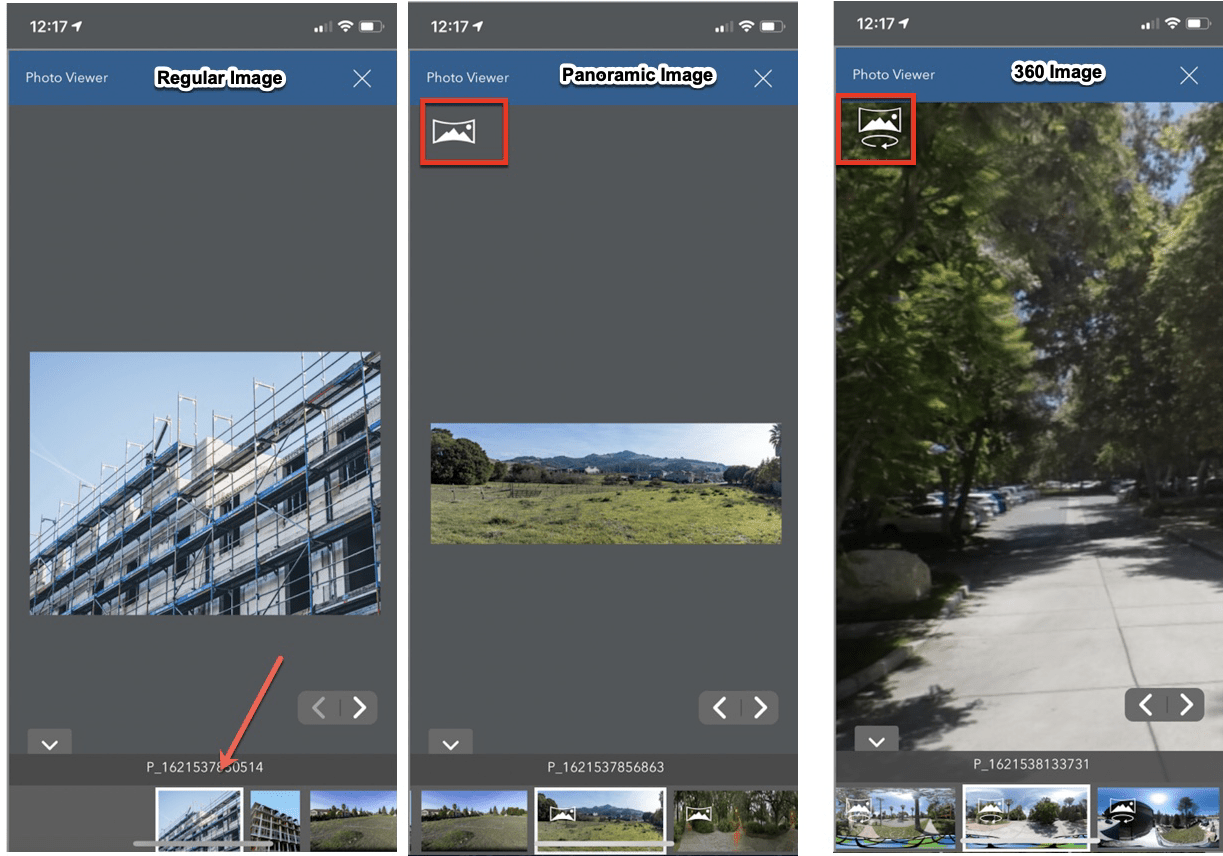
- Zoom in and out on any image to get a better view.
- Pan the image.
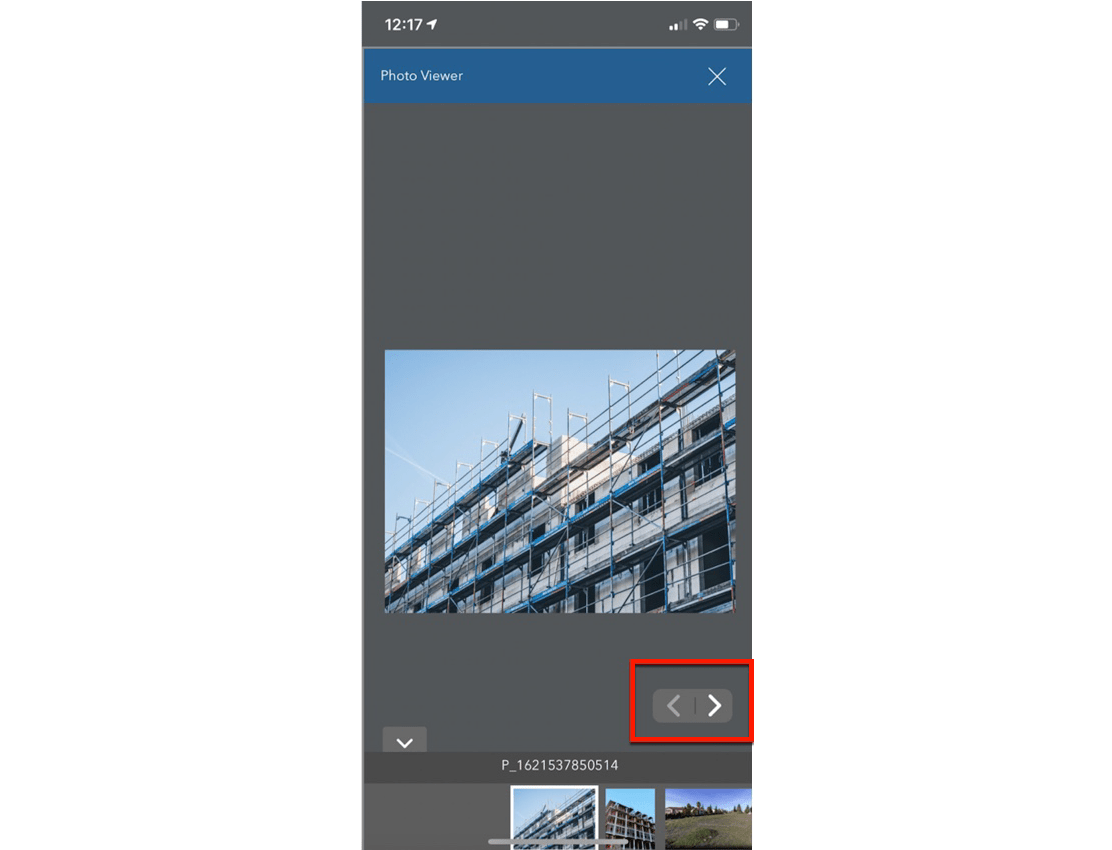
- Use the arrows to scroll through the images.
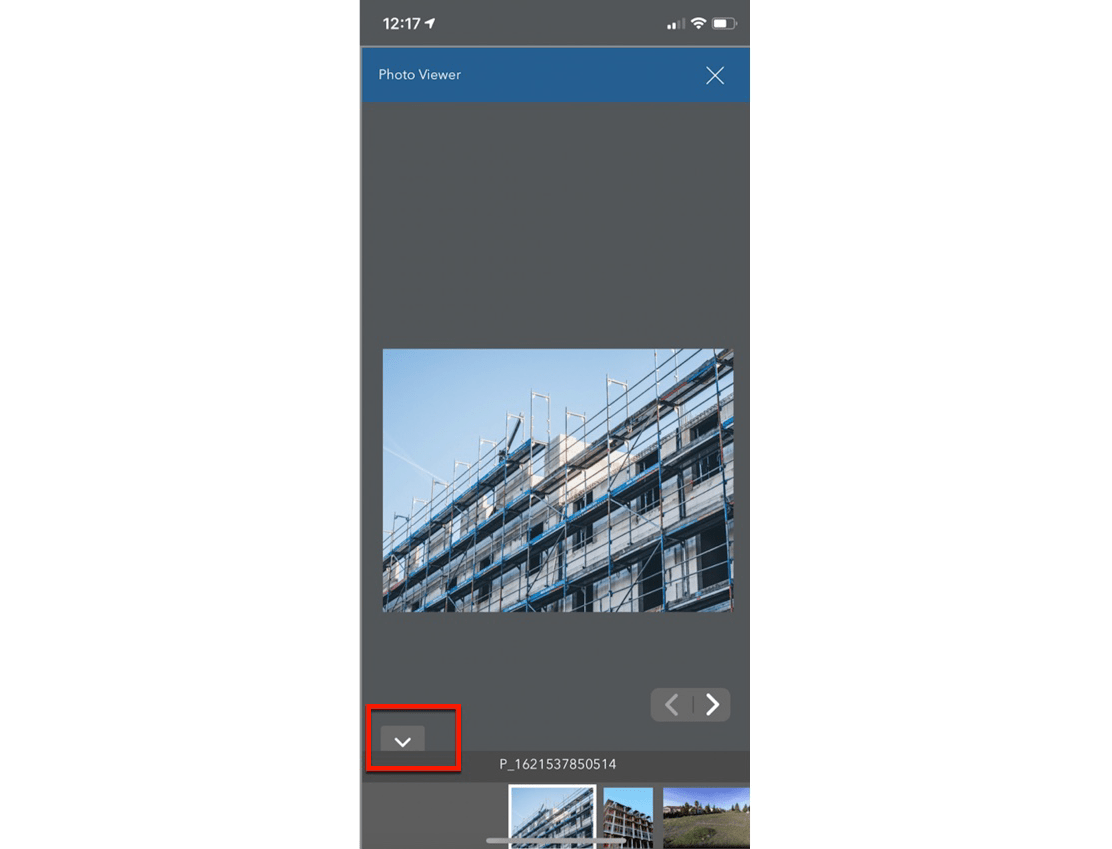
- Use the down arrow to hide the thumbnails section of Photo Viewer.
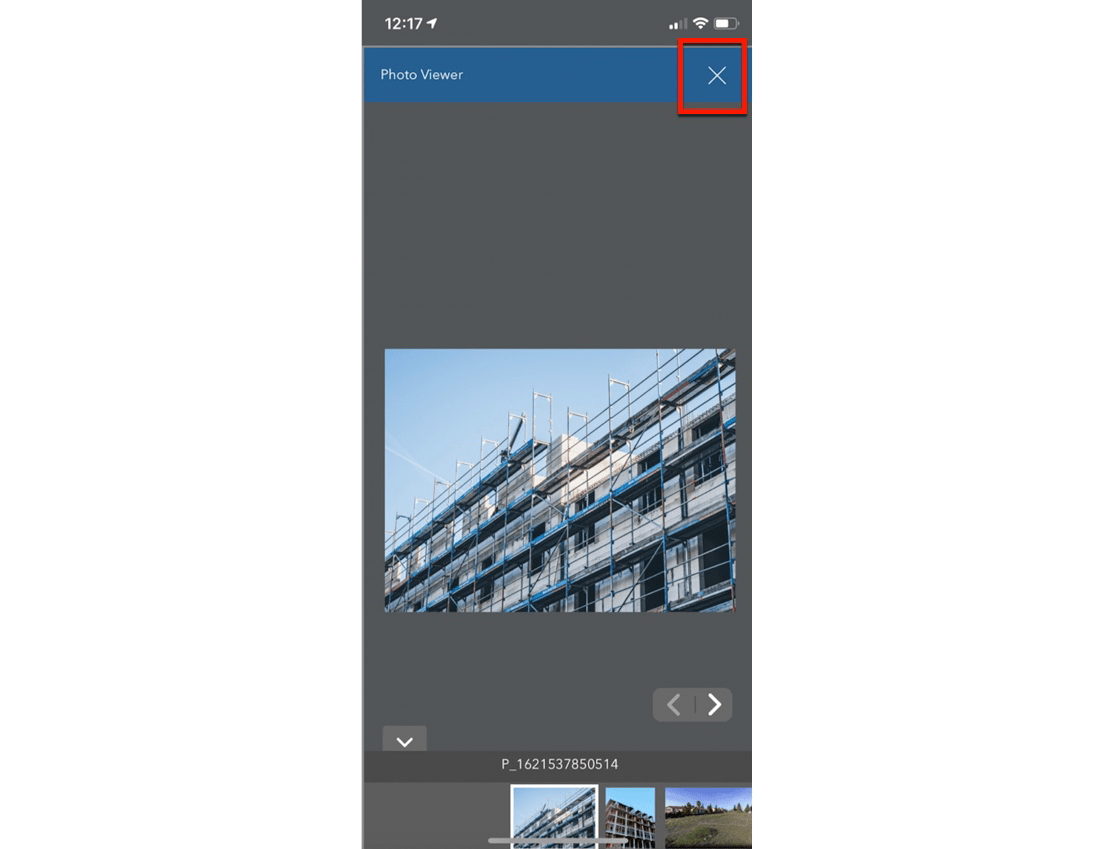
- Use the close button to exit Photo Viewer.
Note: BA Mobile Photo Viewer is compatible with iOS and Android mobile phones and tablets.


Article Discussion: