You may have seen demonstrations or tried out data collection in the ArcGIS Field Maps mobile app, or perhaps you’ve collected data using maps in ArcGIS Collector. How are these maps and their associated forms created? Let’s make a Parks map and find out. Along the way, you’ll learn how to prepare a layer and make a map so you can try data collection in Field Maps. This workflow is supported on ArcGIS Online and ArcGIS Enterprise 10.9 and later.
First, think about how the Field Maps mobile app will work after you’ve created your Parks map—you’ll open your map of parks in the app, and that map will contain the layers you created of things to capture in the parks, such as single places (a picnic table), lengths (a sidewalk), and areas (a playground). Each layer defines the information that can be captured in the form.
Prepare a layer
ArcGIS Online and ArcGIS Enterprise provide templates you can use to jumpstart your layer. There’s a template that lets you define all aspects of your layer, and that’s what we’ll use to create the Parks map.
In these steps, we’ll only configure the Places and Paths layers. For extra credit, you can create the Areas layer by following the same steps.
Note: If you are using a version of ArcGIS Enterprise earlier than 10.7, you can pick a different template and create a slightly different layer. A similar one would be the Field Notes template.
- Sign in to your ArcGIS account in a browser (ArcGIS Online or your ArcGIS Enterprise portal).
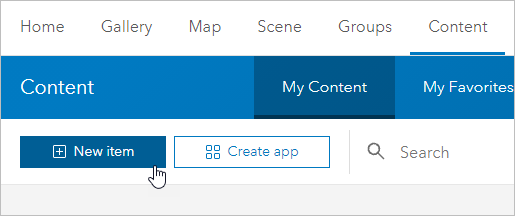
- Go to Content, and in My Content click New item and choose Feature Layer to open the Create a feature layer dialog.
- Select the Build a layer category, select Points, lines, and polygons, and click Create.
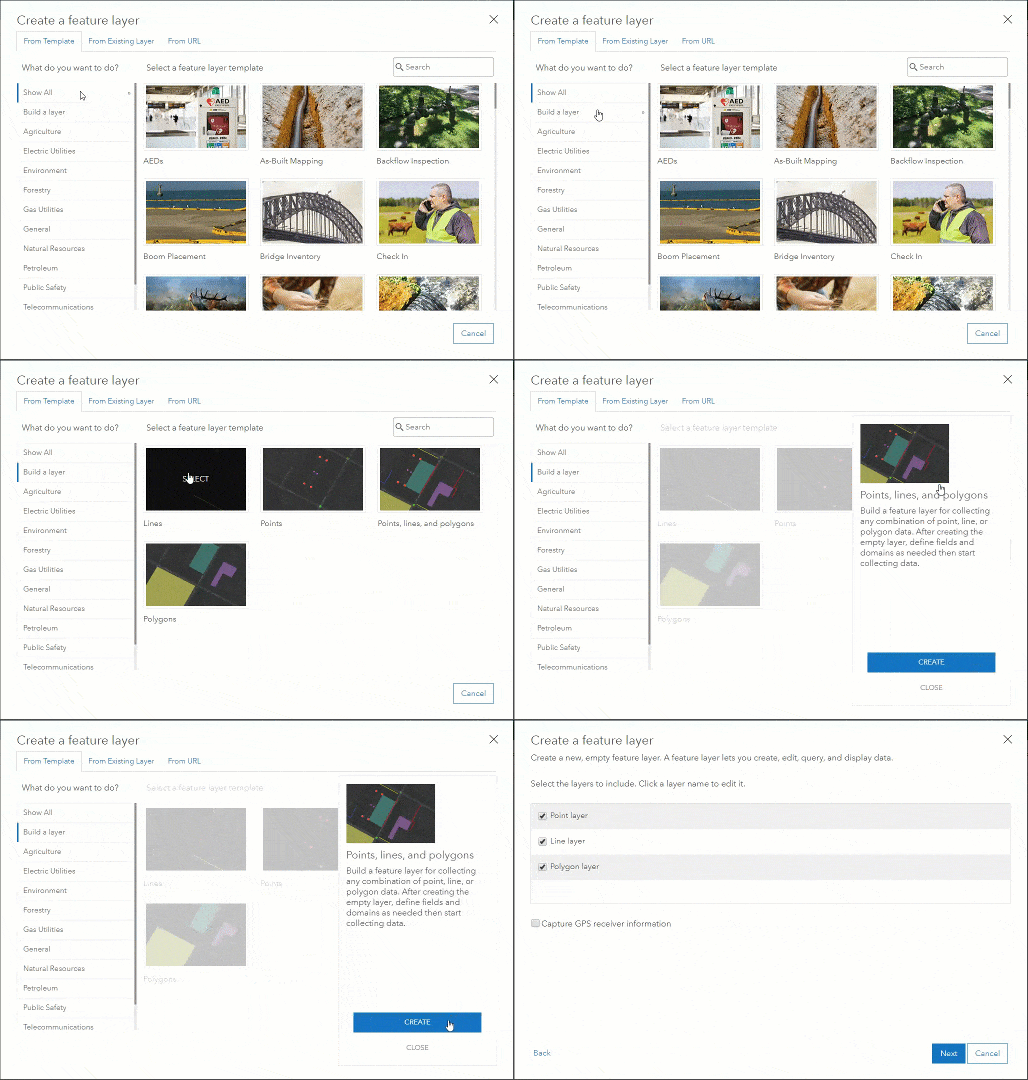
- Click on Point layer and rename it to Places, then click Line layer and rename it to Path.
If you want to create the Areas layer, rename the Polygon layer to Areas. Otherwise, you can uncheck them. Click Next.
- Set the extent for your layer and click Next.
- Provide a title, like Parks. Since this must be a unique name in your organization, you might need to include your initials if others have followed these same steps. Click Done.
Your Parks layer is created and its item page opens. In the following steps you’ll create the fields that define the form for the Places and Paths layers.
Configure the Places layer
- Click the Data tab on the item page and click Fields. If you created layers for points, lines, and polygons, verify that Places is chosen in the list of layers.

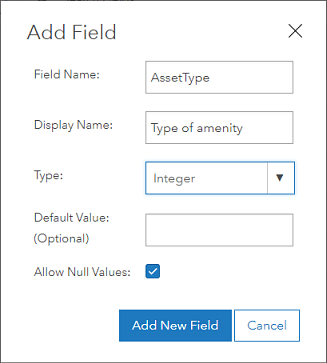
- Click Add. Name the field AssetType and give it an alias Type of amenity. Choose type Integer – you’ll create a list of choices next. Accept the other defaults and click Add New Field.
- Click Type of amenity in the Display Name list and click Create List to create a list of choices for the type of amenity.
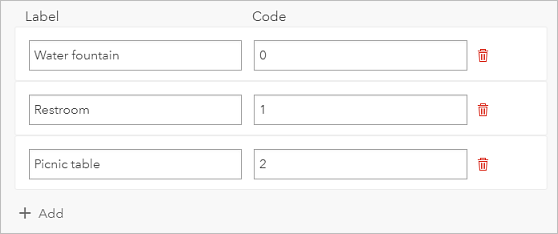
- Type a label of Water fountain with a code of 0.

- Add entries for Restroom (code 1) and Picnic table (code 2).
You can add as many amenities as you want—consider adding Bench, Bike rack, Light, Recycling bin, Trash bin, and Tree.
- Click Save.
- Close the Type of amenity pane and add another field named Notes that is a String.
- Since you want your mobile workers to be able to attach pictures showing the things in the parks, ensure that attachments are enabled: go to the Overview tab of the item page, scroll to the layers list, click Places, and under Attachments make sure the Enable Attachments toggle button is turned on.
Configure the Paths layer
The Paths layer is configured following the same steps you used to configure the Places layer above.
- Click the Data tab on the item page and click Fields. If you created layers for points, lines, and polygons, choose Paths in the list of layers.
- Click Add. Name the field AssetType and give it an alias Type of amenity. Choose type Integer – you’ll create a list of choices next. Accept the other defaults and click Add New Field.
- Click Type of amenity in the Display Name list and click Create List to create a list of choices for the type of amenity.
- Type a label of dirt with a code of 0.
- Add entries for gravel (code 1) and paved (code 2).
- Click Save.
- Close the Type of amenity pane and add another field named Notes that is a String.
- Go to the Overview tab of the item page, scroll to the layers list, click Paths, and under Attachments make sure the Enable Attachments toggle button is turned on.
Optionally, if you kept the Polygon layer and renamed it to Areas when you built your layer using the Points, lines, and polygons template, you can configure the Areas layer by following the steps listed above for configuring the Places and Paths layers. When you create your list of amenities, consider adding Baseball diamond, Dog park, Playground, Sports field, and Tennis court to the list.
Make a map
- On the item page of your Parks feature layer, click Open in Map Viewer Classic.
- Save your map, giving it a title Parks and a tag.
- In the Contents pane, hover over the places layer, click More Options
 , choose Rename, and rename the layer to Places.
 - Hover over the paths layer, click More Options
 , choose Rename, and rename the layer to Paths. If you chose to create an areas layer, rename it to Areas.
 - Hover over the Places layer and click Change Style
 .
. - Choose to show the Type of amenity attribute.
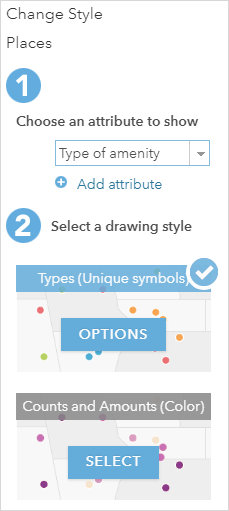
- Click Options for the Types (Unique symbols) drawing style.
- Click the symbol next to picnic table, click Shape, choose the Government category, and click the picnic table
 . Set it to a size of 30 and click OK.
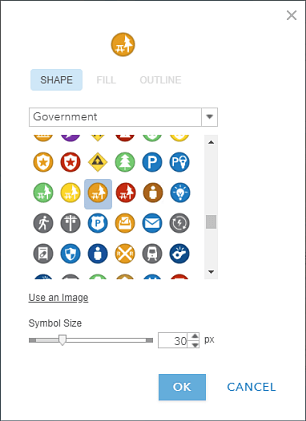
- Configure the symbols for the Restroom
 and Water fountain
  types, also in the Government category.
 - Click OK and click Done.
- Repeat steps 5-7 with the Paths layer and optionally, the Areas layer. Accept the default line colors for the Paths layer, click OK and click Done. If you chose to configure the Areas layer, accept the default area colors.
- Click Edit, click Manage, choose the Places layer, and click Save Changes. Then choose the Paths layer and click Save Changes. Choose the Areas layer and save your changes if you chose to configure it.
This creates feature templates that Field Maps will use as the types of assets you can add to the map. To create feature templates, you must own the layer or be an admin in your organization (you can’t create them for a layer someone has shared with you). - Save the map.
Next steps
Now you’ve prepared and used your own layer in Field Maps. Think about what assets and observations your organization would like to bring into its GIS, and how you’ll design layers for those data collection projects. For more details, see Design an editable layer, Prepare an editable layer, and Create a map enabled for editing.
Next, try using the map you created to collect data in Field Maps or keep customizing with the new Field Maps web app and try configuring your map before you collect any data in the Field Maps mobile app.



Commenting is not enabled for this article.