The September 2020 release of ArcGIS Online includes the migration of the Media Map configurable app to the new configuration experience. Media Map is typically used as an interactive map with basic tools and options for more focused map navigation. The settings that limit map navigation make the app great for being embedded in new articles or other web pages. Along with the new configuration experience, new tools and options have been added and updated in Media Map.
Configuring Media Map
The configuration experience offers two setup options:
- Express setup: This setup focuses on the essential settings for the app.
- Full setup: This setup provides access to all settings that are supported by the app.
Using Express
Using the new configuration experience in Media Map, an app can be created in just a few minutes. Creating a Media Map app in Express setup provides an app author with key tools. Some of the notable tools in the Express setup of Media Map include the following:
- Dark Theme: Choose to display tools in the app using a dark theme.
- Shared Theme: Apply the organization theme colors and logo to the app.
- Hover Pop-ups: Display pop-up content by hovering the mouse over features in the map, no click needed.
- Manage Widget Positions: Choose the locations for the widgets enabled in the app.
- Screenshot: Take screen shots of the app that can include the legend or pop-up for a single feature.
- Disable Scroll: Prevent the map from zooming when the app user scrolls.
Express app example
A local news site wants to create a quick app to embed on their home page to provide residents with information on nearby wildfires. With Express setup, the app will be ready to be embed in their site within minutes.
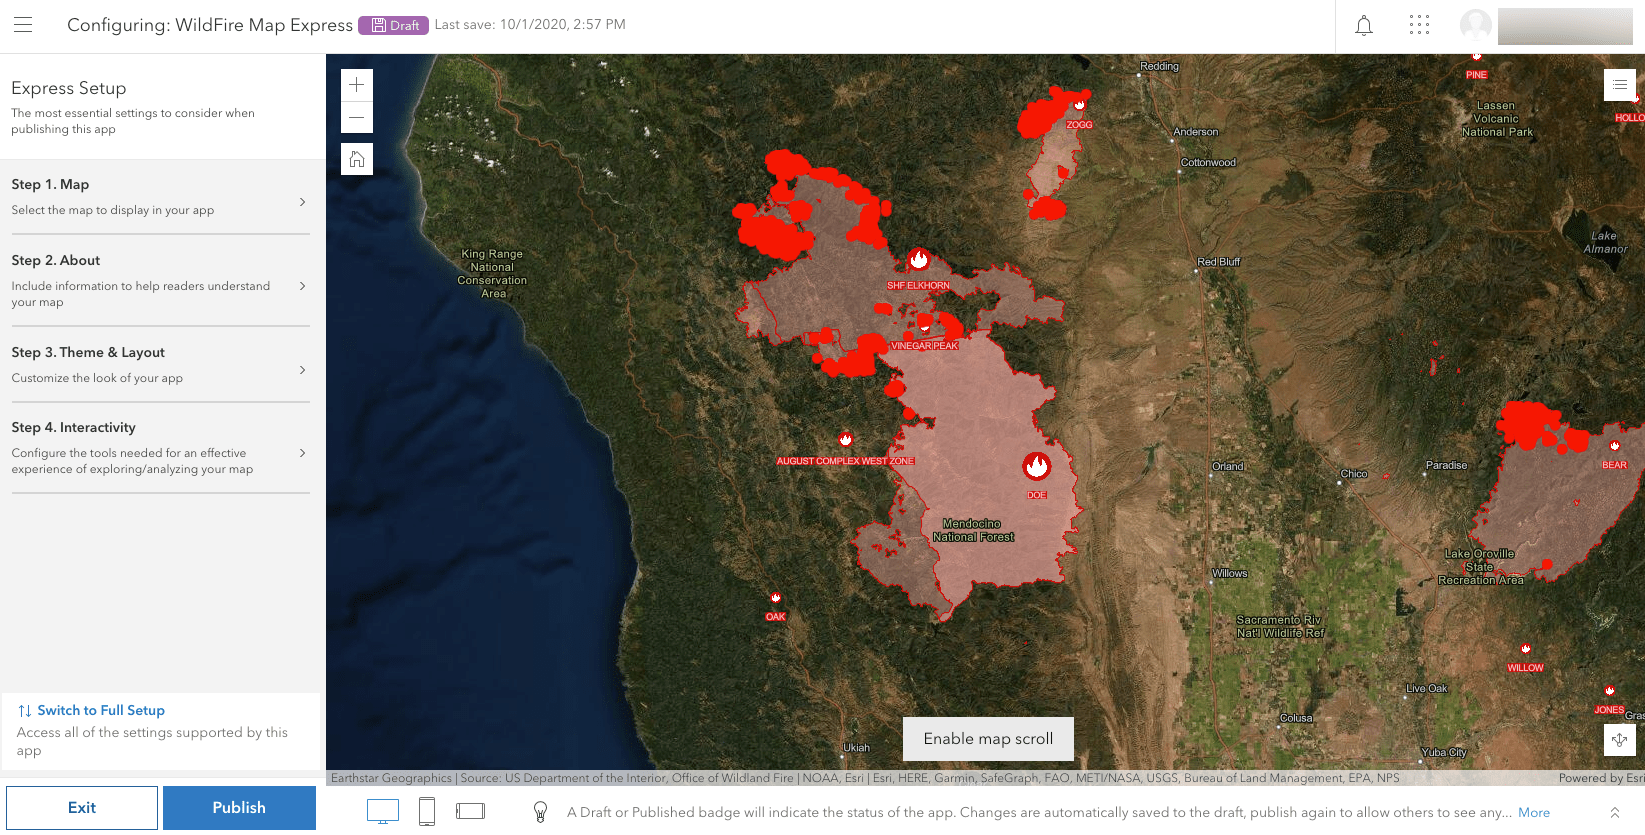
Wildfire Information
Other tools to consider in Media Map
Media Map has a plethora of tools that are offered in Full setup. These tools make it possible for app creators to customize their app with modification and navigation tools. Below are some of the updated tools from the most recent ArcGIS Online release:
Swipe
The Display Swipe configuration allows users to easily compare content in a map side by side. The swipe can be used to show things like voting district changes or zip code changes from one year to another. The swipe can also be used to compare imagery. One example of this would be to analyze the differences in shoreline before and after a tropical storm.
The Display Swipe tool is in the Modify subsection of the Interactivity section. Once the Display Swipe tool is enabled you have the following options:
- Select leading layer(s): Enables the option to choose which layers will display before the swipe.
- Select trailing layer(s): Enables the option to choose which layers will display after the swipe.
- Swipe direction: This option determines whether the swipe displays horizontally, so that the layers will display on the left and right side of the swipe; if the swipe is vertical, the layers will display above and below the swipe.
- Slider position: This option allows an app author to decide the location of the swipe tool when the app loads.
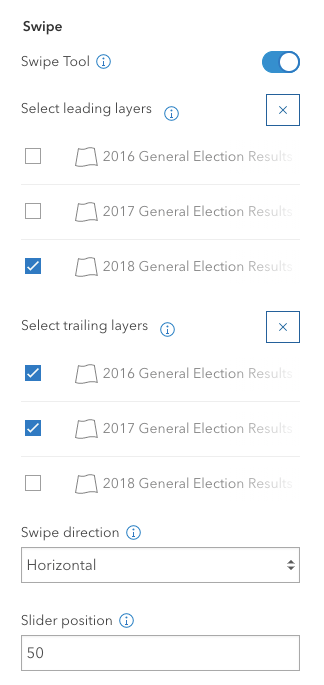
Once the Swipe tool is arranged with the desired options, the user can click the swipe in the application and begin comparing the layers on either side of the swipe tool.
This app is using the swipe tool to compare general election turnout over three years in voting districts.
Horizontal legend
This new feature provides the option to scroll through layer symbols from left to right, displaying symbols horizontally. This option is available in Full setup under the Legend settings, which can be found in the Location Details subsection of the About section. To enable the horizontal legend, the legend must be turned on and be using the Card style; from there, the side by side layout can be selected.
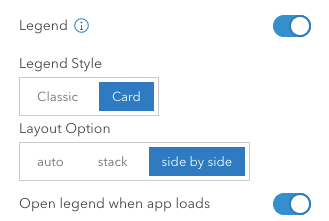
The legend in the application is open when the app first loads. By choosing to use the horizontal legend, you can see all the styles of the layers included in the map.
Screenshot tool
This tool provides app users with the ability to capture a screen shot of a user-defined area of the map. The user can choose to include the map legend and a pop-up focused on a single feature. Another new feature in ArcGIS Online provides the option to choose a horizontal or a vertical layout for the screen shot output. In Full setup, the Screenshot tool is in the Share subsection of the Interactivity section.
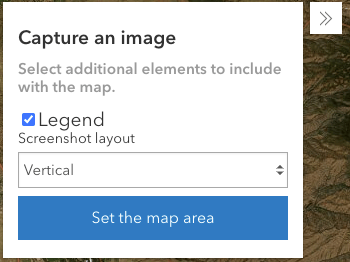
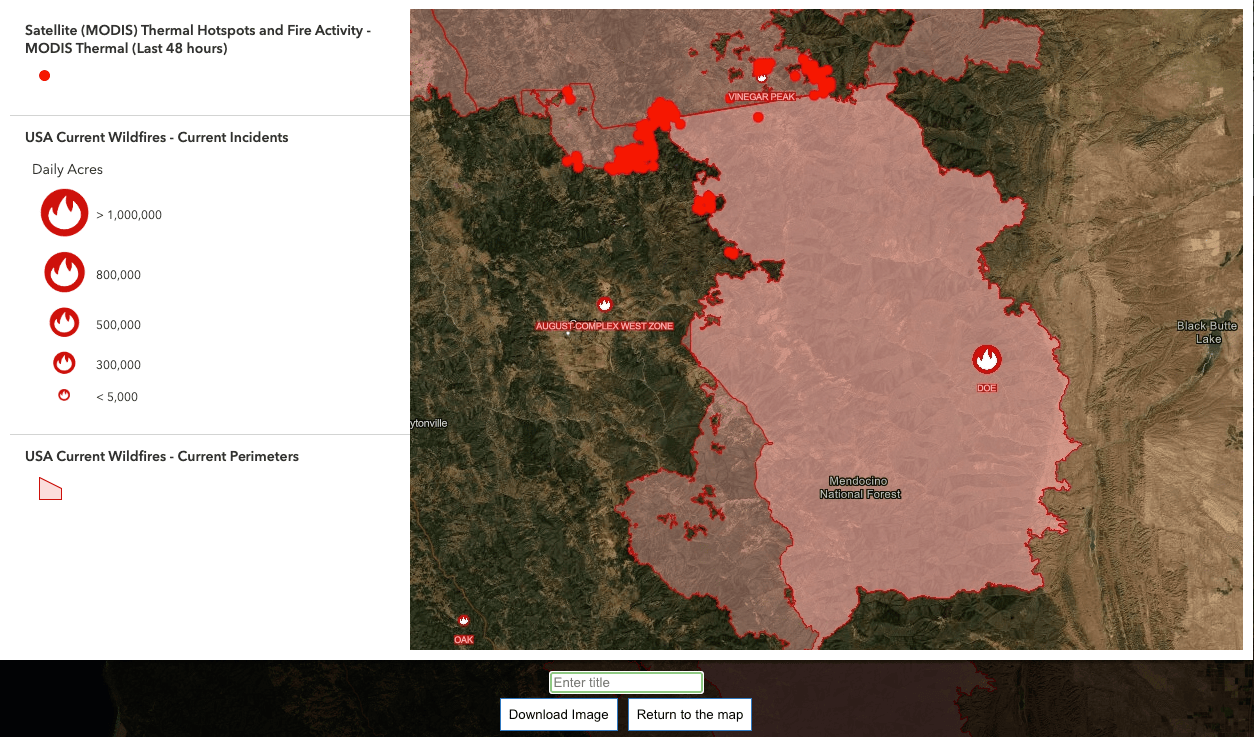
In the wildfire app, the Screenshot tool can be used to capture the severity of a wildfire. The ability to include a section of the map with the legend can help you provide information on specific areas in the app and provide context about the styles and symbols on the map.
Basemap toggle
The basemap toggle tool provides the ability to switch back and forth between two basemaps on the map. The basemap toggle tool is available in the previous version of Media Map but has been updated with the new app configuration experience. Once the basemap toggle tool has been enabled, Select Basemap from the basemap gallery will appear. In the gallery the basemaps for the organization’s basemap gallery will be displayed. Below the gallery, there is a Browse for Basemap button. This button will open an item browser where app authors can search for a map to include in the basemap toggle tool. The basemap toggle tool is available in Full setup in the Modify subsection under the Interactivity section.
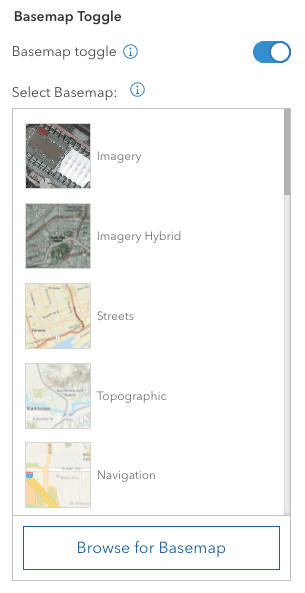
The basemap toggle tool provides the audience with the option to switch between the community basemap and the imagery map.
Define visible map extent
App authors can now focus app viewers’ attention on the app’s subject matter by defining a set extent and visibility range. This tool can be useful when embedding the Media Map app, so app viewers stay focused on the area of attention in the app. The Define Visible Map Extent tool is in Full setup in the Explore/Navigate subsection of the Interactivity section. This tool offers two options to concentrate viewers’ attention:
- Visibility range: Specify levels for zooming in and out.
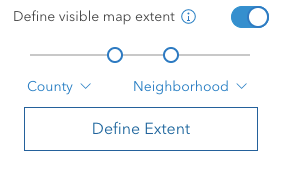
- Extent: Create a bounding box to center the map on. The map will not be able to pan outside of this boundary.
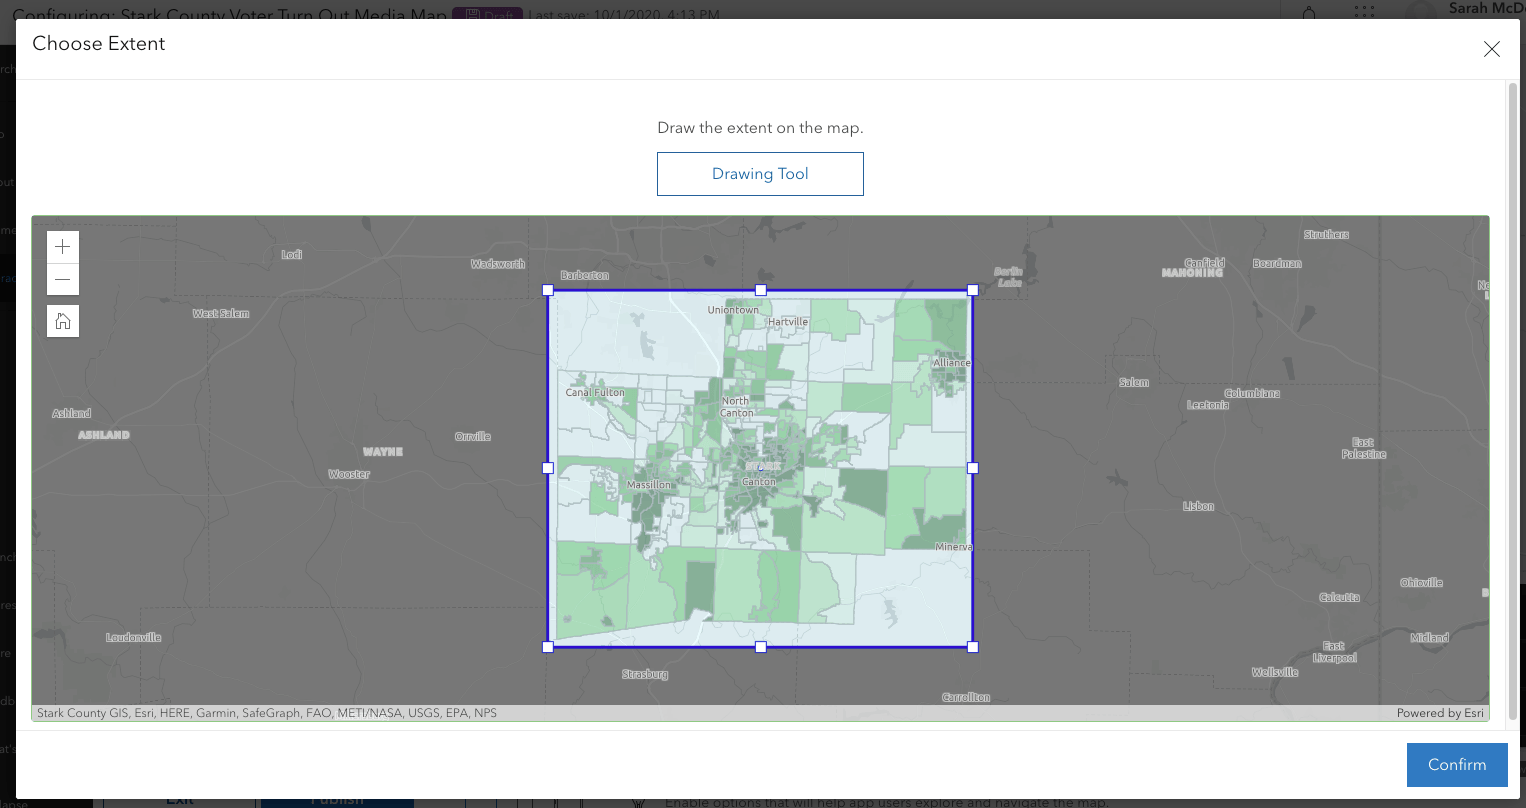
This app is set to focus on the county which contains the relevant data. Panning and zooming within the map will be limited to this extent.
Hover pop-ups
Pop-ups are a great way for an app author to provide crucial attribute information about features in a concise and organized manner. With hover pop-ups, reading and viewing attribute information can become even more accessible. Hover pop-ups remove the need to click features in the app; attributes will appear when a pointer hovers over a feature in the map. App authors can also select a fixed position in which hover pop-ups will appear (bottom right, top left, and so on).
It is best to configure a clear and simple pop-up to use with the hover option. That way, when a viewer hovers over features, the most pertinent feature information is clearly presented right away.

Hover pop-ups are used in this app to provide clear and concise information about wildfires. Using this setting will provide the audience for this application with easy access to the information without requiring much experience with web apps.

Article Discussion: