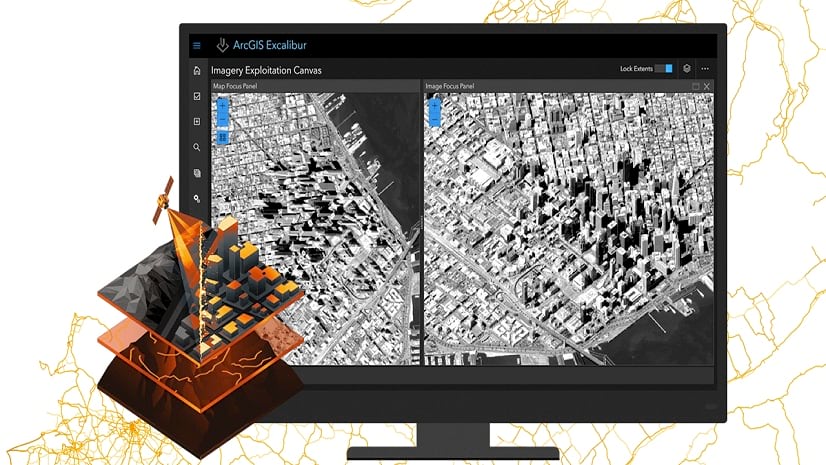
Hosted Imagery in ArcGIS Excalibur September 2020 Release
Do your imagery workflows include the need to quickly disseminate a few local images for exploitation? Does your organization need a way to easily share recent image collections for use across image-based applications? Does your organization have limited administrators, but a high-demand to use new imagery files for analysis to create image-derived products? These are a few of the common difficulties some organizations face. However, these difficulties can be overcome by using the new capability to publish hosted imagery layers in the ArcGIS Excalibur September 2020 release.
Hosted imagery layers are dynamic image services that make it easier to manage, publish, and share imagery with your organization and for your analysis. Sounds good right? Well simply put, if you identify local imagery files on your machine for upload, ArcGIS Excalibur will take care of the rest.
Requirements to Use Hosted Imagery in Excalibur
So what would you need to support this capability in your organization? Great question. To upload hosted imagery layers in the ArcGIS Excalibur September 2020 release, your environment must be properly configured for image hosting and raster analysis, and you need privileges to create content and publish imagery layers.
Once these requirements are in place, you can publish imagery through the Excalibur home page or through the side navigation menu under Publish Imagery.

Publish a Hosted Imagery Layer Guided Workflow
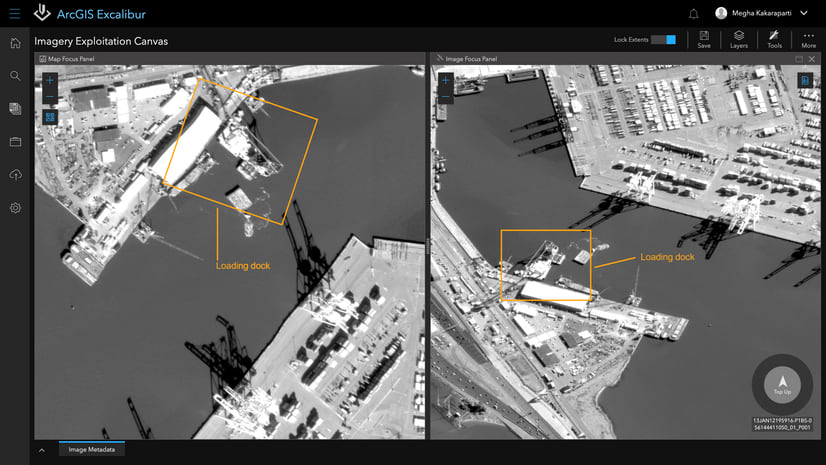
The Publish a Hosted Imagery Layer capability takes you through a short, guided workflow for a successful publishing experience. Let’s walk you through these four easy steps using a local image file. This image file was created from the Full Motion Video capability in ArcGIS Pro using the Frame Snapshot tool in the video player.
Step 1 – Provide Layer Information
Step 1 allows you to provide basic information about your new imagery layer such as the title of the layer and the option to share the layer to your organization. The information provided in this step is also used to populate the imagery layer (hosted) portal item when it is created. This allows for users within your organization to gain an understanding of the imagery layer.
Since this image is a snapshot around an Area of Interest (AOI) training site where activity was observed, I will add these details to my layer.

Step 2 – Choose Layer Type
Step 2 allows you to choose the configuration of the new imagery layer when it is created. This is determined based on your source data and intended use of the imagery. This step offers three choices as described below:
- Single Image Layer – Create one imagery layer from a single image resource. This is a quick way to web-enable a single image file for immediate use.
- Image Mosaic Layer—Create one imagery layer by mosaicking many images. This is useful to blend overlapping images into a single, seamless image layer.
- Image Collection Layer—Create one imagery layer that manages a collection of many images. This is useful to query the resulting imagery layer for the properties of individual images.
Since I received a single image snap from my FMV analyst, I will choose the Single Image Layer option.

Step 3 – Select Source Imagery Files
Step 3 provides an easy way to browse and upload files to create your new imagery layer. The primary raster files supported in this workflow are .tif, .ntf, and .jp2 along with their corresponding metadata files. For this example, I will navigate and select the image snap and corresponding files created by my FMV analyst.
After selecting your imagery files, they appear in a list view sorted by size, along with an overall estimated file upload size. This directly relates to the time it may take to upload and create the imagery layer based on your network connection.

Step 4 – Publish Imagery Layer
Step 4 is to simply click Publish New Imagery Layer. If any changes need to be made, you can skip back to the appropriate step and make those edits. Since your input data is from a local folder, the portal always copies the data to the portal’s raster store when it creates the hosted imagery layer. Behind the scenes, the imagery layer is published based on a default input raster type of Raster Dataset to help streamline the workflow.

Once the publishing is kicked off, you can choose to stay on the same page where updated messaging informs you of the current step, or you can navigate away to use other parts of Excalibur. The notification center will inform you when your imagery layer is published and ready for use. Once the layer is created successfully, you can immediately utilize the imagery for any exploitation and analysis needs such as conducting mark ups and mensurations or creating dynamic image-derived reports.

As for my imagery, I immediately collected observations for any activities that I identified within the AOI. These observations are fed directly into an ArcGIS Dashboard for my supervisor to view the most up-to-date observations over our area of interest.


Read more about new features and updates in ArcGIS Excalibur September 2020 release on the ArcGIS Blog. To learn more about Excalibur and add it to your organization’s ArcGIS Enterprise deployment, get in touch with an Esri representative at go.esri.com/excalibur or visit the YouTube Playlist.

Article Discussion: