If you’re an administrator of your ArcGIS Online organizational account, member management is likely an important part of your work. To ensure that you have enough time for everything on your to-do list, efficiency is key.
The Members tab on the Organization page provides a central location for managing members. Whether you need to assign add-on app licenses, add members to groups, or perform any other member management task, ArcGIS Online includes time-saving capabilities such as filters and bulk actions to help you get the job done.
You can see these capabilities at work when doing the following common member management tasks:
- Managing app licenses and groups for members assigned a specific user type
- Allocating more credits to members who need them
- Removing licenses from inactive members to free them up for others
- Changing the ownership of items owned by multiple members
For a demo of these capabilities, watch the video Time-Saving Tips for Managing Members in ArcGIS Online.
Manage App Licenses and Groups
If you want to assign ArcGIS Navigator licenses to the mobile workers in your organizational account, follow the steps below.
Step 1: Sign in to ArcGIS Online as an administrator and click Organization at the top of the site. Then click the Members tab to see a list of your organizational account’s members.

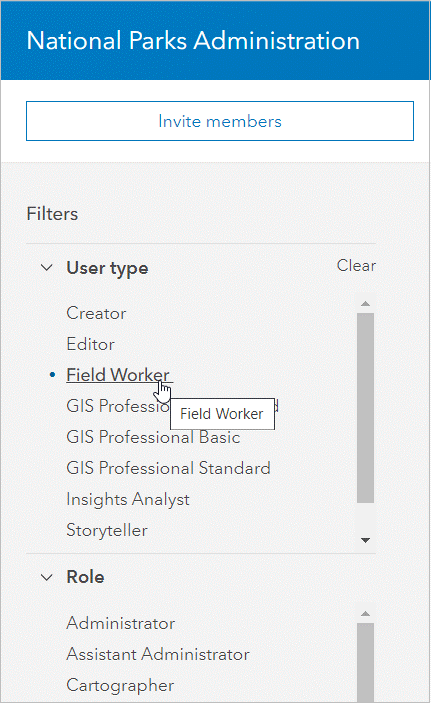
Step 2: Find the mobile workers by using Filters, on the left. Under User type, select Field Worker to filter the list of members.
Assign Licenses
With only the mobile workers listed, you can quickly assign ArcGIS Navigator to these members.
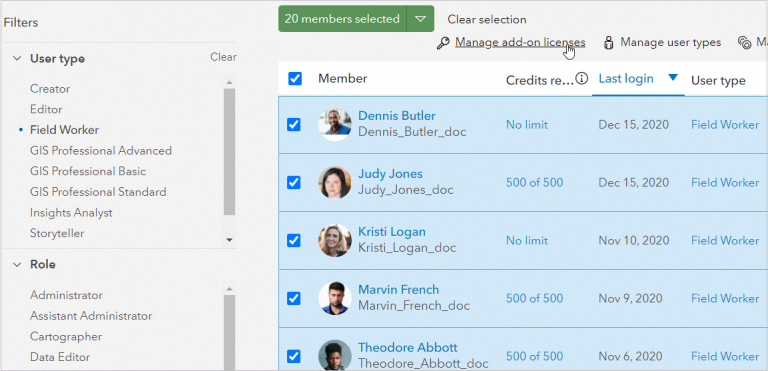
Step 1: Check the Member box at the top to select all the members, then click Manage add-on licenses.
Step 2: Find and select ArcGIS Navigator, then click Save.
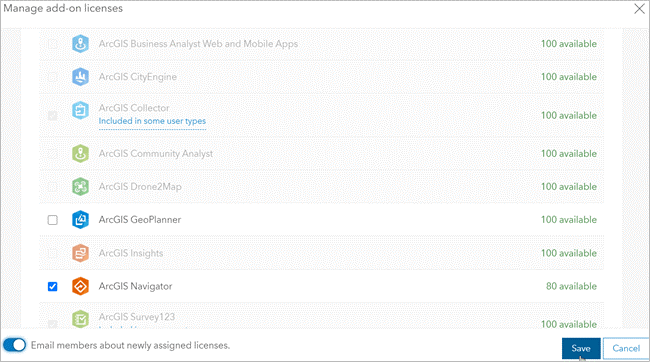
All mobile workers in the organization now have a Navigator license.
Assign Groups
Next, you may want to add these members to a group you created for managing mobile staff and data collected in the field.
Step 1: With the mobile workers still selected, go to the More menu and click Assign groups.
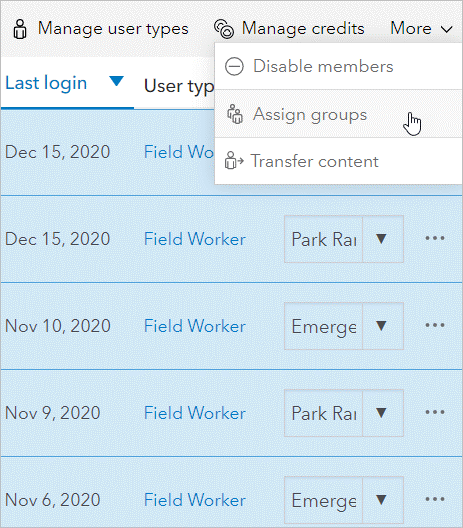
Step 2: Search for the group, select it, and click Save.
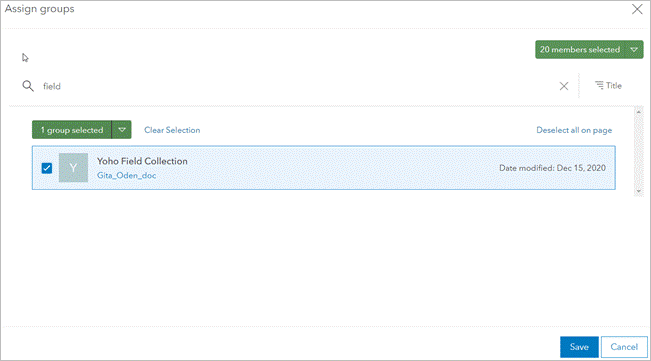
The mobile workers are now members of the group.
In just a few clicks, you assigned Navigator licenses to mobile staff in your organization and you assigned the members to a field collection group. For more information, visit manage groups and manage licenses.
Now you can move on to managing credits.
Allocate More Credits to Members
Credit management is a common task for many organization administrators, but it doesn’t have to be a time-consuming one.
As members of your organization complete their daily work in ArcGIS Online, the number of credits allocated to them may become low. Before you start receiving a slew of email requests for more credits, you can proactively update the credit allocation for members who are running low.
Again, the filters on the Members tab are your best friends.
Step 1: If necessary, start by clearing the existing filters and selection to return to the full list of members.
Step 2: Expand the Credits remaining filter. You want to find members who have fewer than 300 credits remaining so you can increase them to 500 credits. Under Less than, type 300 and press Enter to filter the members list.
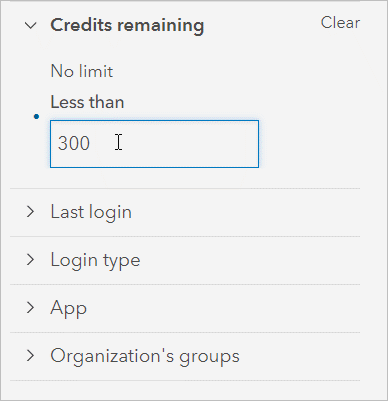
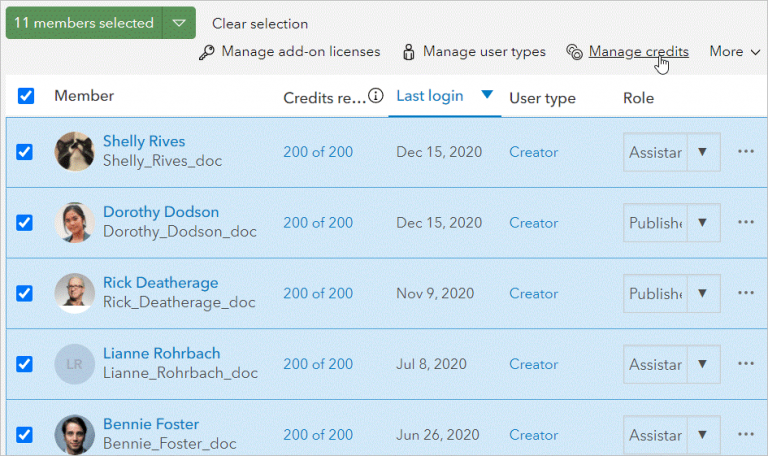
Step 3: Select all the members in the filtered list using the check box at the top and click Manage credits.
Step 4: In the Set credit allocation box, increase the credit allocation and click Save.
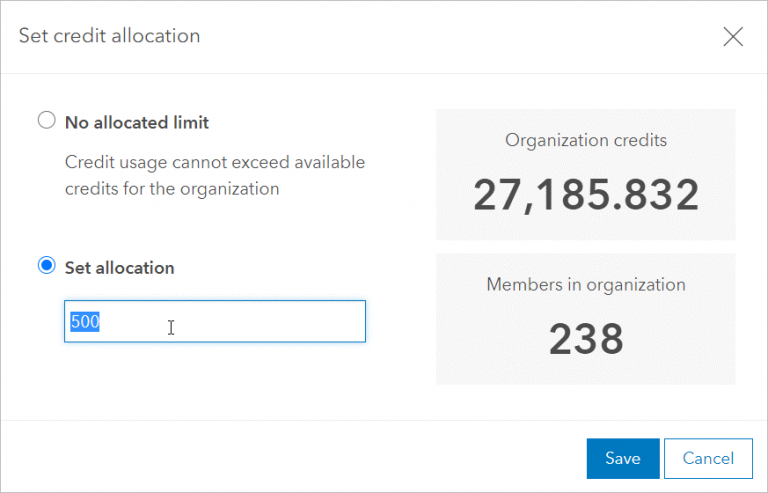
And that’s it. Members can continue their work without interruption because they have enough credits. And you don’t need to spend time responding to emails. Everyone wins!
Remove Licenses for Inactive Members
As members come and go—or change roles, departments, or teams—some cleanup is required to free up or reassign resources like app licenses. For example, your organization may have inactive members who you’ve discovered don’t work with ArcGIS Online, and you need to make their app licenses available for other members to use.
You can do this quickly using the Last login and App filters.
Step 1: Expand Last login and click Never to filter the list to show members who have never signed in. Then, expand the App filter and select the add-on app you want to reassign, such as ArcGIS Insights.
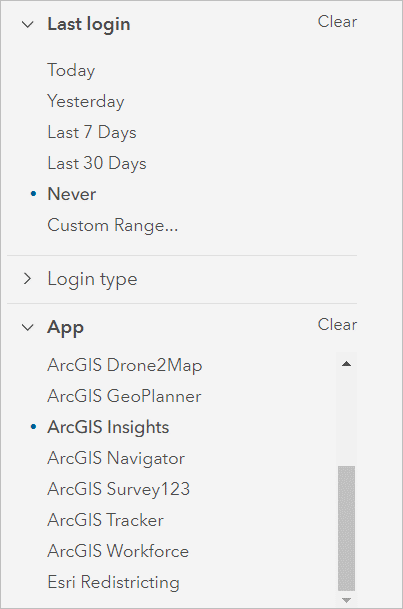
Step 2: Select the members in the newly filtered list and click Manage Add-on licenses.

Step 3: In the Manage add-on licenses window, uncheck the box for the app license you want to unassign.
Step 4: Click Save. The licenses are then removed from the inactive members and are now available to assign to members who need the app.

Change the Ownership of Items Owned by Multiple Members
For organization administrators, a common task is managing members’ content. For example, suppose several employees have left your company in the last month, but your company wants to maintain the valuable content assets they owned. Reassigning their content to another owner allows the organization to continue maintaining the items moving forward. Fortunately, ArcGIS Online offers an easy way to transfer these items in bulk.
Step 1: Find and select each of the members whose content you want to reassign.
Step 2: Click the More menu and click Transfer content.
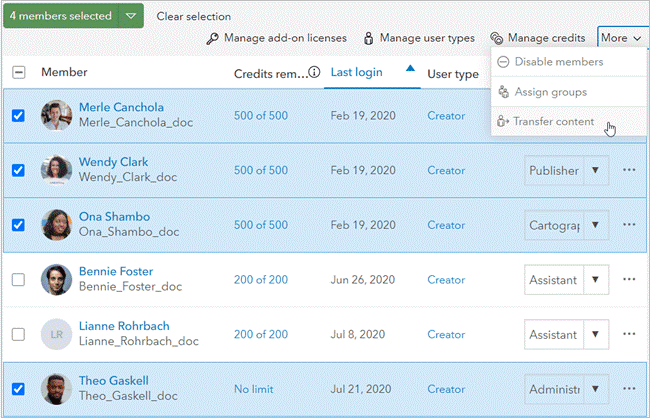
Step 3: In the Transfer content window, select a new owner and a target folder for the items and click Transfer. That’s all there is to it.

To learn more about managing members and other organization administration tasks, see the following resources:
- ArcGIS Online resources—Check out the latest resources for ArcGIS Online, including discovery paths, blog articles, and help documentation.
- Administer ArcGIS Online discovery path—Videos, lessons, and blog articles show you how to configure ArcGIS Online to meet your requirements for mapping, security, authentication, and privacy.
- ArcGIS Online Implementation Guide—View essential tasks and best practices for setting up ArcGIS Online.
- GeoNet—Exchange ideas, solve problems, and build relationships with the ArcGIS Online community.

