This tutorial, which was last tested on February 5, 2025, requires a User, Publisher, or Administrator role in an ArcGIS organization (see options for software access).
A feature layer contains a reference to a data source, as well as layer properties that determine how that data is displayed and behaves on a map.
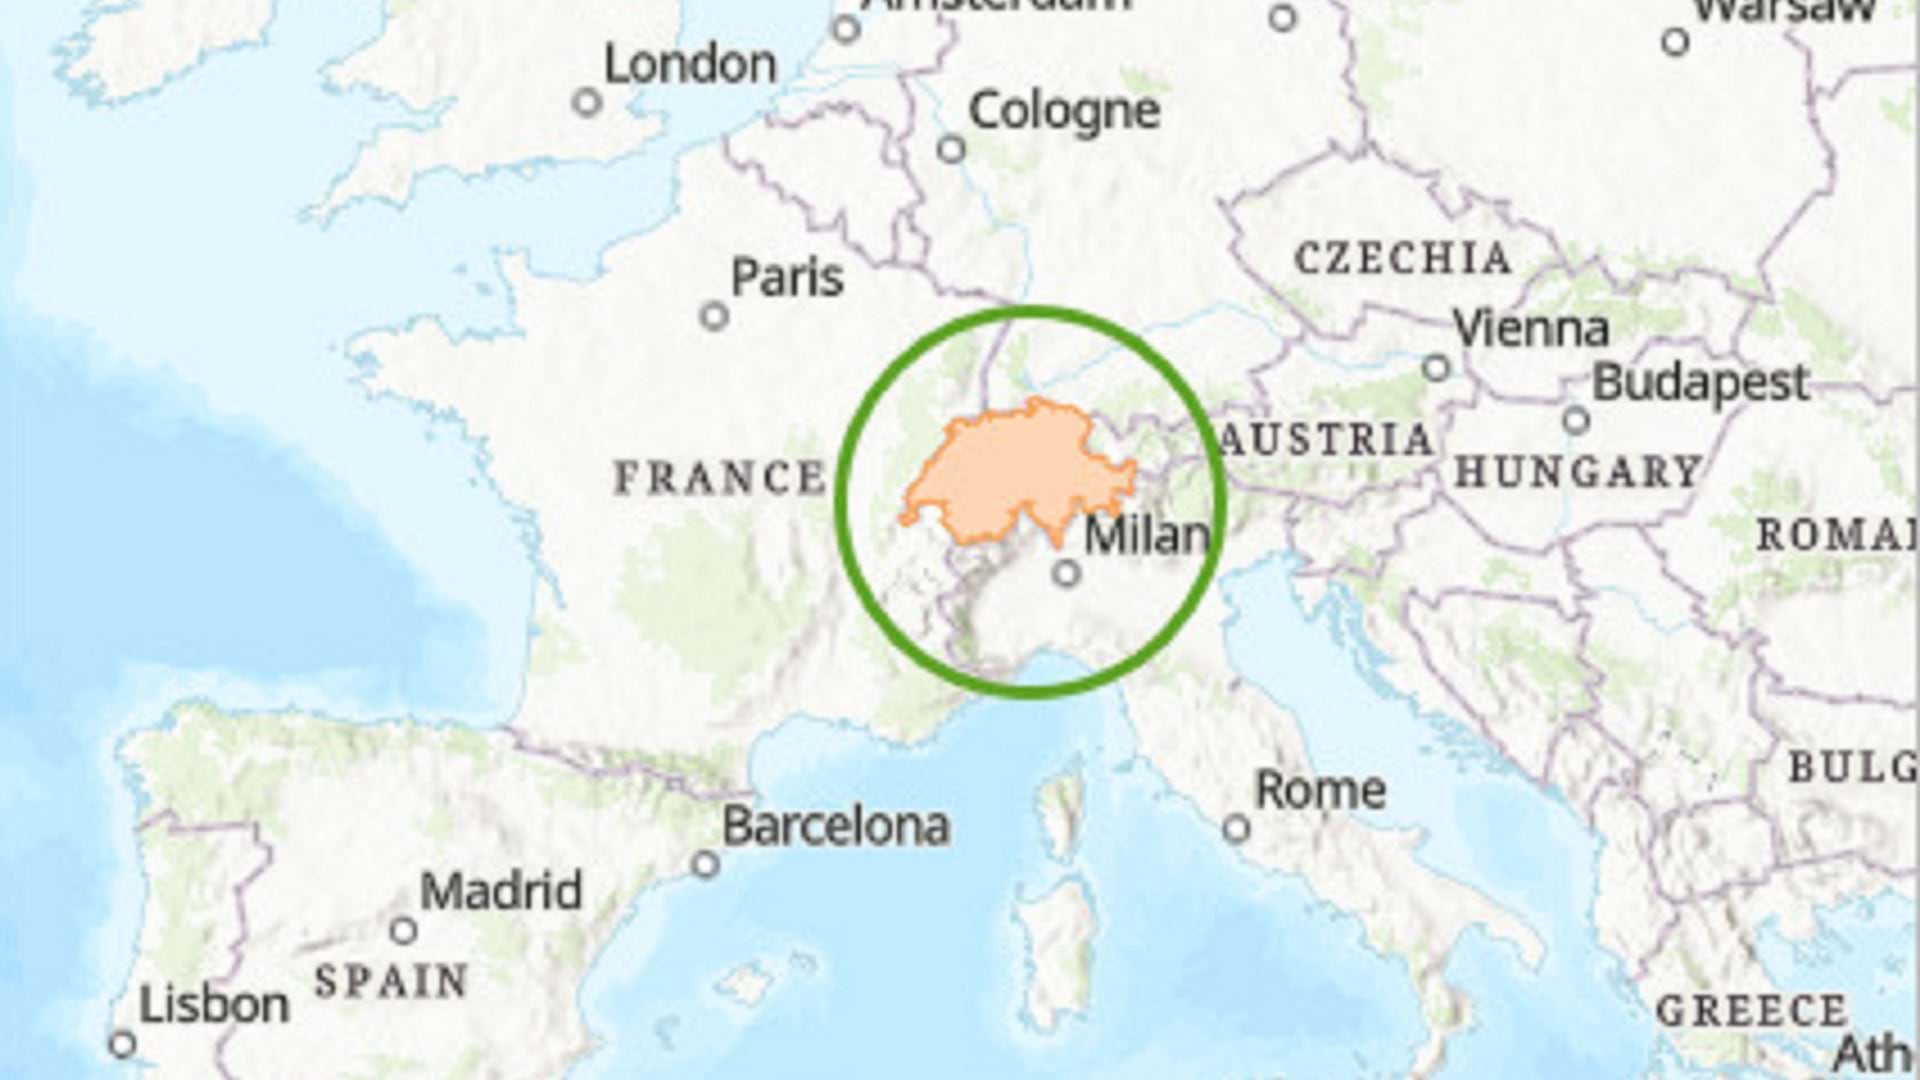
If you ever need to use a feature layer created by someone else, you may want to change its features to suit your needs. In this tutorial, you’ll view a feature layer owned by Esri and change some of its layer properties. This example involves building a set of maps of Switzerland for a tourism business’s website. There will be a different map for each season, since different attractions are popular at different times of the year.
To begin, you’ll need a feature layer of the boundary of Switzerland. You’ll use the World Countries layer available in ArcGIS Living Atlas of the World and filter it to only show Switzerland. Then, you’ll save the filtered layer as a new item in your ArcGIS Online account so that you can reuse it consistently in all your maps for the website.
Step 1. Filter the layer
1. Click the following item page link: World Countries. (The terms of use for this feature layer, which is owned by Esri, allow it to be used in your maps because you have an ArcGIS subscription.)
2. At the top of the item page, click Open in Map Viewer.

3. If necessary, on the ribbon, click Sign In to sign in with your ArcGIS organizational account. If you don’t have an ArcGIS organizational account, see options for software access.
A map of the world appears. Now you’ll filter the layer to show only Switzerland.
4. On the Settings (light) toolbar, click the Filter (If the Settings toolbar is unavailable, in the Layers pane, click World Countries. The Settings toolbar is only available when a layer is selected.)
5. In the Filter pane, click Add new.
6. Under Condition, ensure that the first menu is set to Country Name and the second menu is set to is. In the third menu, type or paste “Switzerland”.
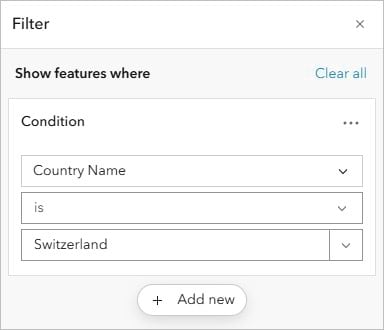
7. Click Save.
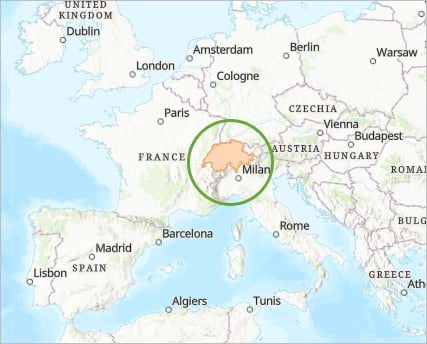
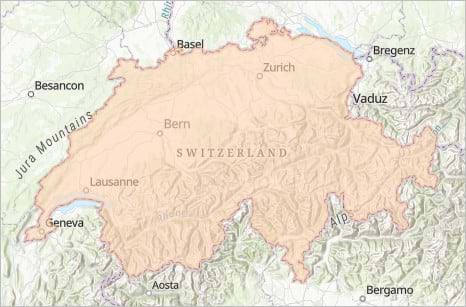
On the map, zoom to Switzerland. Note that you haven’t changed the feature layer owned by Esri; you’ve only changed how it appears in this map.
Next, you will save a copy of the layer. Your website will include several maps of Switzerland, each featuring different thematic data. Instead of applying the filter every time, you’ll save a copy of the layer that is prefiltered.
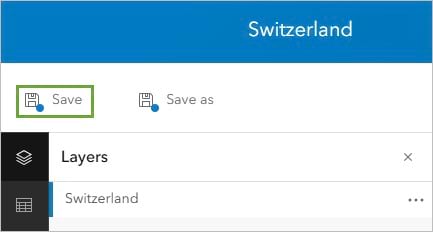
8. In the Layers pane, on the World Countries layer, click the Options button (the three horizontal dots). Click Save as.

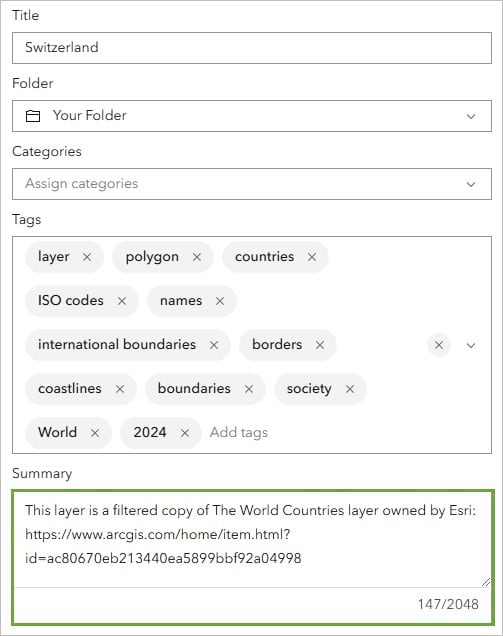
9. In the Save as window, for Title, type “Switzerland”, followed by your initials (for example, Switzerland XX).
Note that you cannot create two layers in an ArcGIS organization with the same name. Adding your initials to a layer name ensures that other people in your organization can also complete this tutorial. Once a layer has been created, you can rename it in the map to remove your initials, which will not affect the name of the underlying data layer.
The Tags are already filled in with information from the source layer. You’ll adapt the Summary to include a direct link to the source layer.
10. For Summary, delete the existing text. Copy and paste the following:
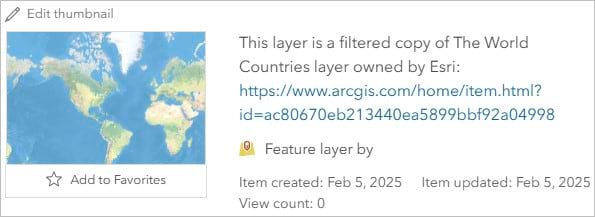
This layer is a filtered copy of The World Countries layer owned by Esri: https://www.arcgis.com/home/item.html?id=ac80670eb213440ea5899bbf92a04998.
11. Click Save.
A new feature layer item is created in your My Content list, but nothing on the map appears to change.
12. On the Settings toolbar, click the Properties button.
13. In the Properties pane, expand the Information section. The Source layer is listed as Switzerland [XX] / World Countries. This is the new feature layer item that you created in your ArcGIS Online account. (Previously, the Source layer was the World Countries / World Countries feature layer owned by Esri.)
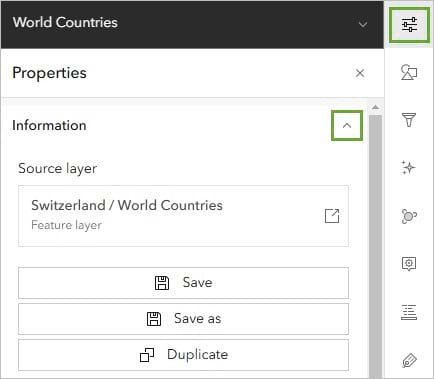
Switzerland is the sublayer inside the World Countries feature layer.
14. Under Source layer, click Switzerland [XX] / World Countries.
The item page for the feature layer’s sublayer appears.
15. On the ribbon, click Switzerland [XX].
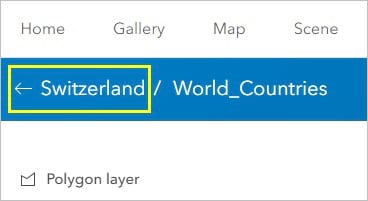
The item page for the feature layer appears. This feature layer is owned by you.
A feature layer does not contain data. Instead, it contains a reference to a data source, plus layer properties. The Switzerland layer references the same data source as the World Countries layer it was created from. If the data source is edited (for example, if a country’s name is changed), that edit will appear on the Switzerland layer.
The URL that you added to the summary earlier can help you navigate back to the original feature layer owned by Esri, to retrieve its metadata and data sources.
16. Scroll to the bottom of the page. Next to Credits (Attribution), click Edit.
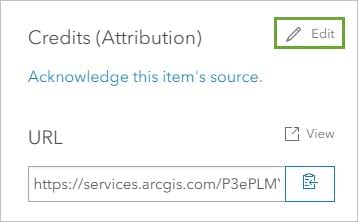
17. In the text box that appears, you’ll add the same attribution that is used for the World Countries feature layer. Enter the following text:
Esri; Garmin International, Inc.; U.S. Central Intelligence Agency
18. Click Save.
Step 2. Configure layer properties
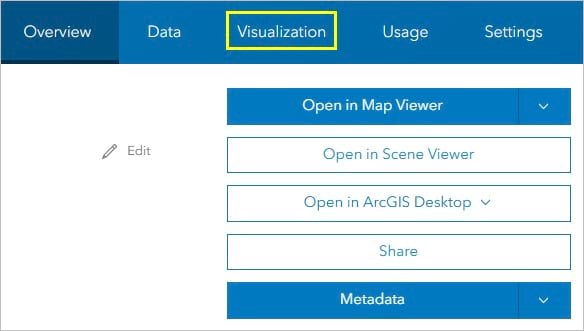
Next, you’ll change some of the layer’s appearance properties. You could click Open in Map Viewer and make the changes there. However, those changes would be saved in a web map, so they would only control how the layer appears in that map. For your project, you want to ensure that layer properties are set consistently across multiple maps. So, instead, you’ll make your changes on the item page’s Visualization tab. These changes will be saved in the feature layer. They will affect how the layer appears in every map.
- Scroll back up to the top. On the ribbon, click the Visualization tab.
A map view of the Switzerland [XX] feature layer appears. This is only a map view, not a map item, so you can’t add any other layers to this map. You can control layer properties in this map view. Any properties you change here will be stored in the feature layer, rather than in a web map.
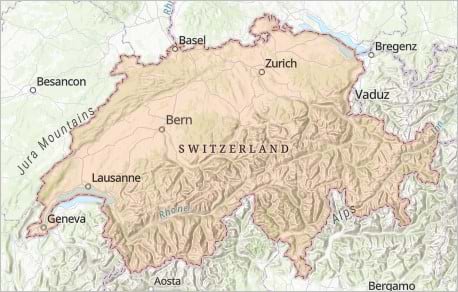
2. On the map, zoom to Switzerland.
You’ll change the layer’s appearance so that the basemap can be seen underneath the layer.
3. If necessary, on the Contents (dark) toolbar, click the Layers button to open the Layers pane.
4. On the Settings toolbar, click the Properties button.
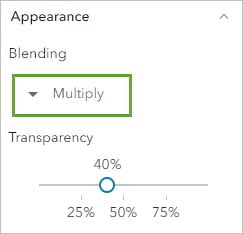
5. In the Properties pane, in the Appearance section, change the Transparency setting to 40 percent.
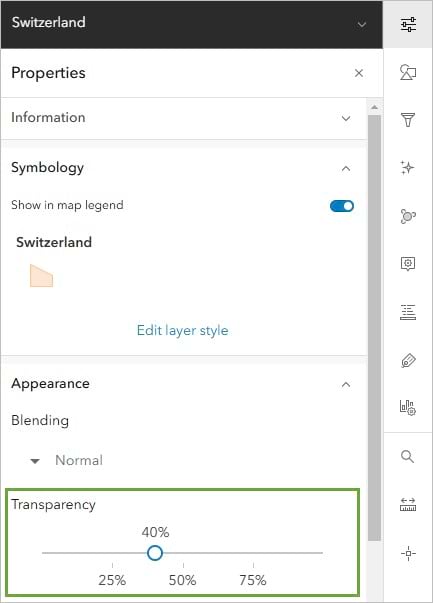
The hillshade of the Alps is now visible, but it is still partially obscured by the layer.
You’ll use a blend mode so that the mountains may appear crisper.
6. For Blending, choose Multiply.
Blend modes control how a layer’s pixels interact with the pixels underneath it.
The color theme of each of the seasonal maps will be different, so you’ll change the layer’s color in each map, rather than here on the Visualization tab.
7. Above the map view, on the left, click Save.
When you add this layer to new maps, it will have all of the properties set here, including the filter, transparency, and blending settings.
Step 3. Use the layer in a map
The Switzerland feature layer is now ready to add to the seasonal maps. You’ll add it to the winter-themed map first and change its color to blue. You’ll also confirm that all other properties are controlled by the source layer, rather than the map.
1. Click the following link to open the Switzerland Winter map: Switzerland Winter.
2. If necessary, on the ribbon, click Sign In and sign in with your ArcGIS organizational account.
3. If necessary, on the Contents (dark) toolbar, click the Layers button to open the Layers pane.
4. In the Layers pane, click Add.

5. Ensure that the filter at the top of the Add layer pane is set to My Content.
6. From the top of the item list, on the Switzerland [XX] feature layer card, click the Add button.
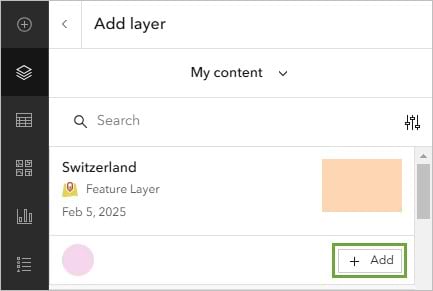
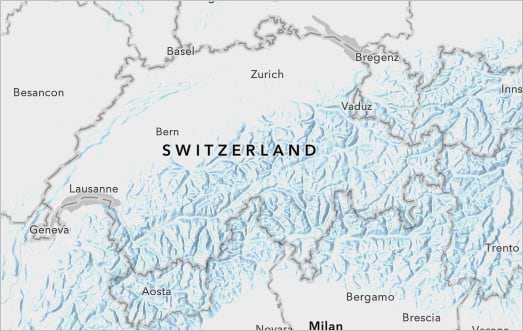
The Switzerland layer appears on the map. The orange color doesn’t suit the winter-themed map very well, so now you’ll change the color to blue.
7. On the Settings toolbar, click the Effects button. Note that you can also change the layer’s color in the Styles pane.

8. In the Effects pane, turn on Hue rotate.
9. In the Hue rotate window, type “163”.
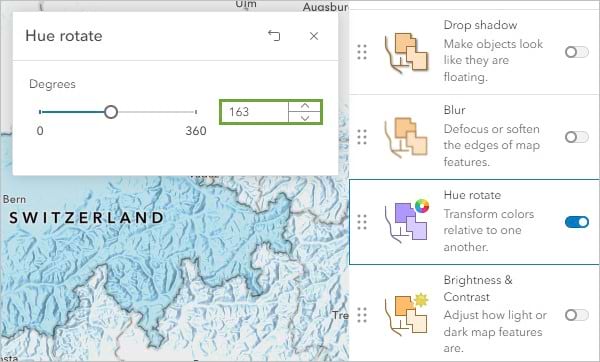
The Switzerland layer changes to blue, which better matches the basemap.
10. Close the Hue rotate window.
11. In the Settings pane, click the Properties button.
12. In the Properties pane, expand the Information section.
13. Click Some properties are stored in this web map.
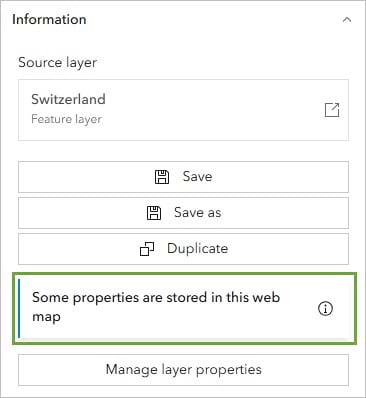
The Layer properties status window appears.
Layer properties are divided into two categories: Data properties and Appearance properties. The Appearance properties section shows that only one property—Effects—is stored in the web map. All other properties are stored in the source layer.
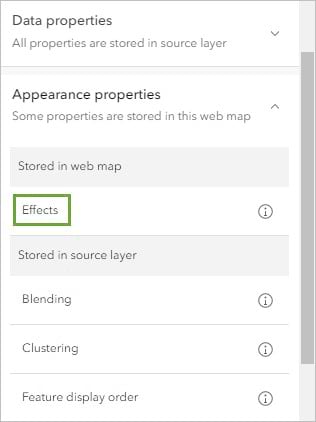
This means that if you return to the source layer (on the Visualization tab of the Switzerland feature layer item page) and make a change in the Effects pane, it will result in no change to this map.
All other properties are stored in the source layer. This means that if you change the Blending, Filter, Pop-ups, or any other property of the source layer, those changes will appear on this map.
It helps to know where properties are stored so that you can predict how they will behave. In this case, you own the source layer, so layer property changes won’t happen unexpectedly. Note that since you don’t own the data, data changes could still happen unexpectedly.
You can use the feature layer to control the properties you want to be consistent across all maps, and you can set the properties you want to be different separately in each map.
14. Close the Layer properties status window. You’ve finished the tutorial.
