A new ArcGIS Online configurable app was released in July 2015 that provides an updated experience for sharing time-enabled maps. The Time Aware app looks and works great on its own, but it also provides a way to add time-enabled maps to your story maps. Read on to find out how to create a Time Aware app and embed it in a Story Map Journal or Story Map Series.
Step 1: Create a web map with a time-enabled layer, using ArcGIS Online.
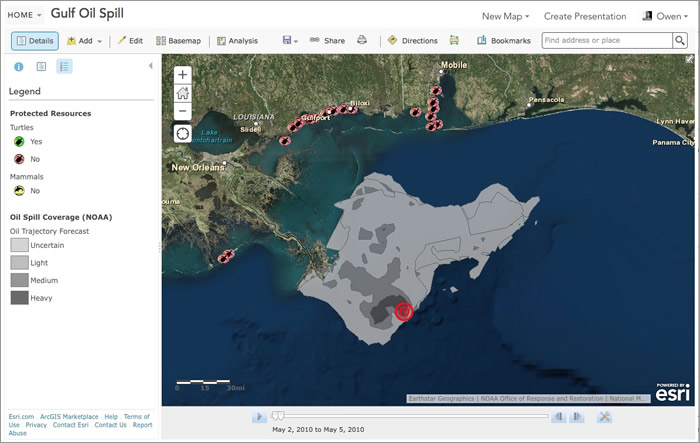
Start by making or finding a map that has at least one layer with temporal data, like this web map of the 2010 Deepwater Horizon oil spill in the Gulf of Mexico. If you are new to time-enabled layers, you can learn more about publishing and configuring time on layers.
Once you add a layer with time data, you’ll see a time slider at the bottom of the map that controls how the time data is displayed.
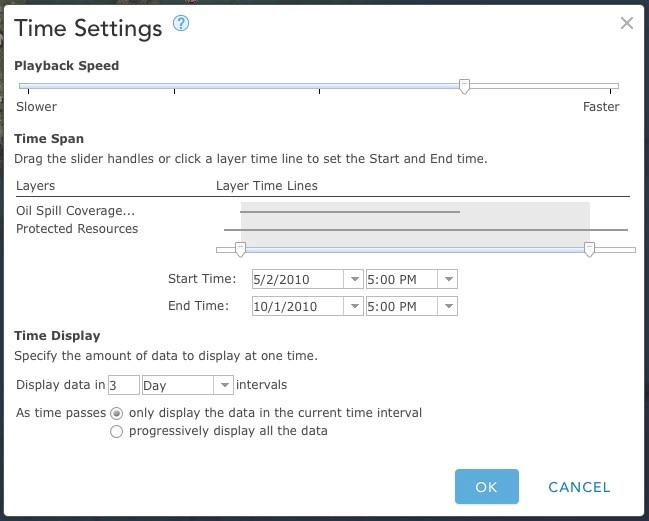
Click the Configure  button beside the time slider, click Show advanced options, and configure the time span and time display for the map. These settings control the overall extent of time shown by the slider and the time window shown on the map. (Learn more about configuring time settings in a map.)
Once the map layers and time settings are configured, Click SAVE.
Step 2: Share the map using the new Time Aware app
Click Share, choose who can see your map, click Create A Web App, and click Create under the new Time Aware configurable app from the app gallery.

If you don’t see this app, or you see a Time Aware app labeled “retired,” your administrator may have a custom app gallery configured for your organization. Ask the administrator to add the current default Esri apps to your organization’s app gallery. This can be done by going to My Organization > Edit Settings > Map > Web App Templates and checking the box to Share the Esri default web application templates to this group when you click SAVE.
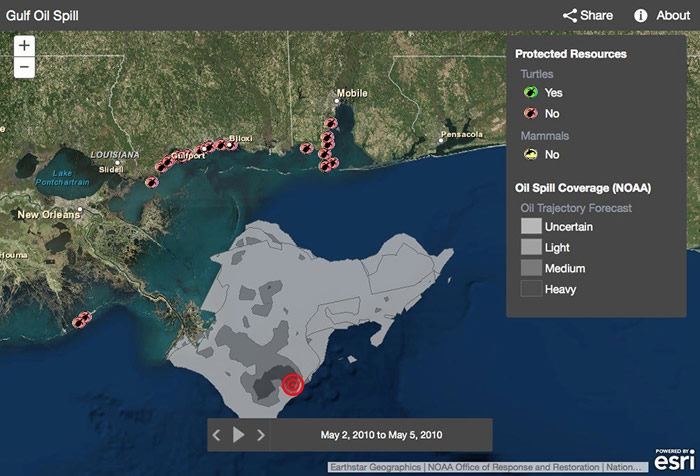
If the app is available, you’ll see something like this once you finish creating the app.
Step 3: Configure the Time Aware app.
Now you’ll use the configuration panel to adjust how your Time Aware app looks and behaves. The configuration panel should be visible when you create the app, but you can always access it by going to the app’s item page and clicking Configure App.
When embedding the Time Aware app in a story map, it’s best to turn off Show Title, Display about dialog, and Display share dialog in the General settings. If you uncheck these three settings, the header bar will be removed, which will work best for embedding this app in a story map.
The default dark gray theme pairs well with most story maps, but you can choose different theme colors for the legend and time slider if you like. There are also configuration panel sections to tweak the Time Display, Map Tools, and Search options for the app.
Once you’re done making configuration changes, don’t forget to click SAVE.
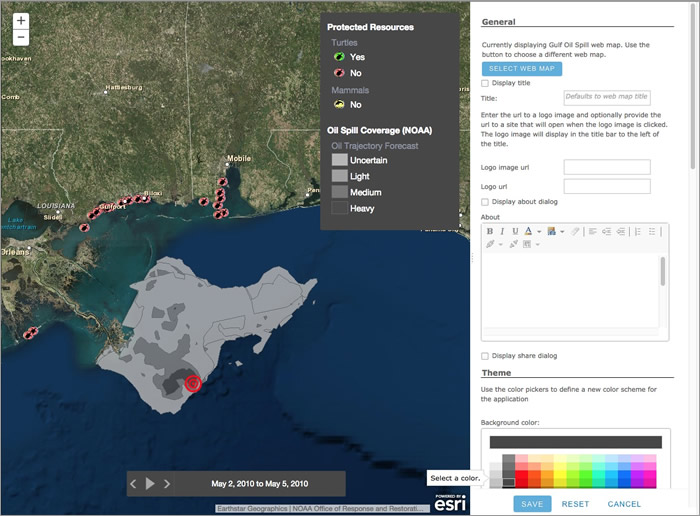
There are many other configuration options for you to explore including some useful Time Settings that control how the time slider appears and works in your app.
Step 4: Embed the Time Aware app into your Story Map Journal or Story Map Series app.
Copy the URL of your Time Aware app and add it to your story map as a web page, as described in this blog post. Make sure to copy the URL of the app when the configuration panel is not open, or copy it from the Properties section of the app’s item page.
Click on this simple example of a Time Aware app in a Story Map Journal.
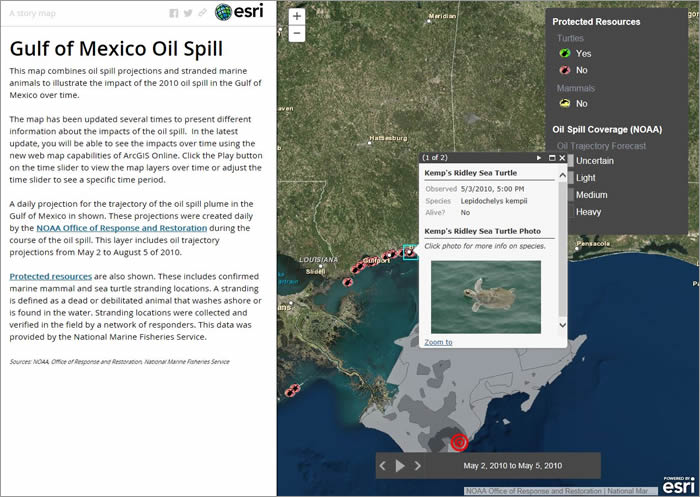
A final suggestion: If your Time Aware app’s legend is visible, do not configure the description panel to be on the right side of a tabbed or bulleted Story Map Series app. The two could overlap.
