Have you ever spotted a color you liked that you wanted to use on your own map, perhaps in symbols or charts? For example, you may find a map service on ArcGIS Online that has colors you really like. After adding the map service as a layer in ArcMap in ArcGIS for Desktop, you can use the Eye Dropper tool to easily find any color on the page.
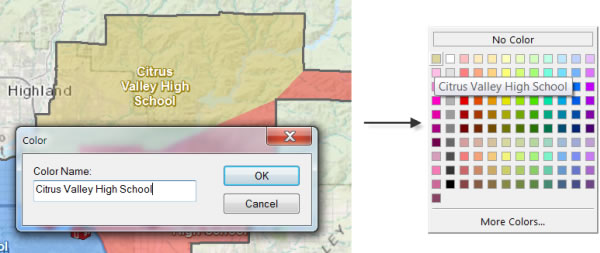
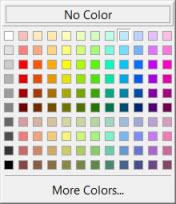
The Eye Dropper tool shows the red, green, and blue (RGB) definition of any color you click on the map. The colors you identify also will be added to your personal style, which is the default location where new symbols and style elements are saved. Colors in your personal style will appear in the ArcMap Color Picker, the palette that appears when you select colors. This makes it easy to choose from the colors you picked when you apply symbology to features in layers, any graphics you draw, and elements on the page such as titles and charts.
Step 1: Add the Eye Dropper tool to a toolbar.
Add the Eye Dropper tool to ArcMap using the Customize dialog box.
- On the main menu, click Customize > Customize Mode.

- Click the Commands tab, and in the left pane click the Page Layout category.
- Scroll down to find the Eye Dropper tool.
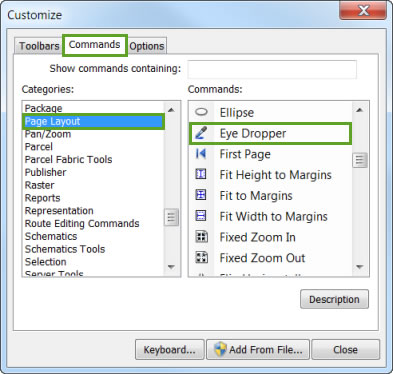
Tip: You can also search for the tool by typing Eye Dropper at the top of the Commands tab.
- Drag the tool onto any toolbar.Tip: If you want to remove the tool from a toolbar, simply drag it off the toolbar.
Step 2: Identify the values for a color.
- Click the Eye Dropper tool and then click an area with the desired color on the map.
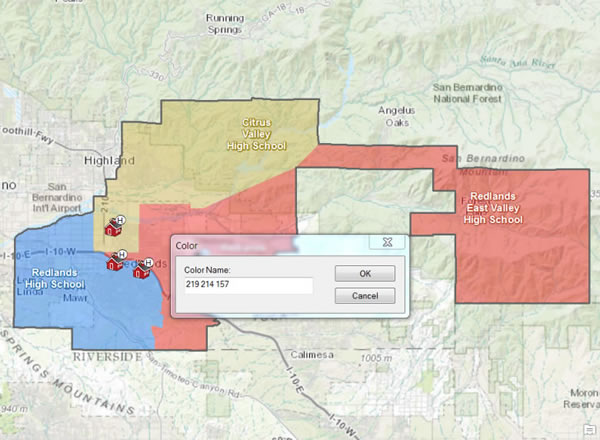
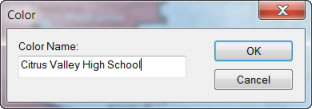
The RGB color values are displayed in the Color dialog box.
- Click the color values to rename the color if you want. This is useful if you want to easily identify the color for use later.
Step 3: Use the color to symbolize features or graphics.
The color you identified will be saved in your personal style in the Style Manager (Customize > Style Manager).
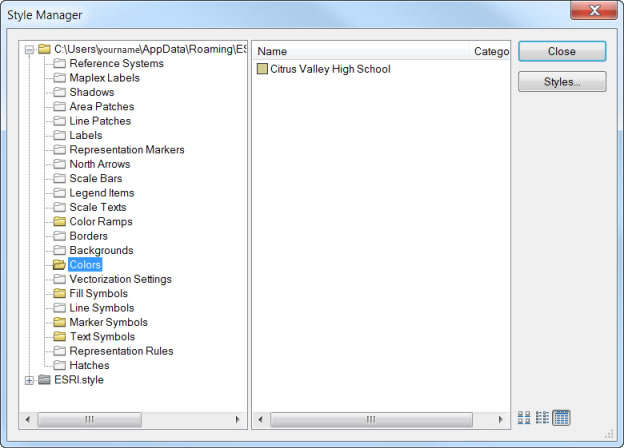
Note: If you did not change the name of the color, the name in Style Manager will be the RGB values such as 219 214 157 in the example above. You can easily change the name in Style Manager by clicking the symbol.
Because the color is now in your style, it will also be added to the upper left of the Color Picker. Hover over it to see its name.
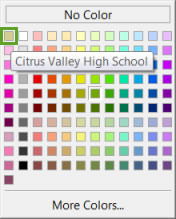
You can now choose the color from Color Picker when you symbolize features in layers, graphics you draw, and other elements on the page such as titles and charts.

