Clear and timely communication is important. There are easy ways for your organization to broadcast news and notices to members and visitors to your site.
Your ArcGIS Online and ArcGIS Enterprise organization includes settings for access notices and information banners. Both provide a mechanism for delivering timely information directly to your audience, but each serves a different communication need and purpose.
This tutorial details the steps needed to configure information banners and access notices. Note that you must be a default administrator or have the privileges to configure these settings assigned to you.

What Information Banners Do
You can use information banners to alert all users who visit your organization home page about your site’s status, news, or changes in content. For example, you can inform visitors about maintenance updates, newly added content, or other changes to your organization site.
Information banner messages appear at the top and bottom of your site pages. The banner appears on the Home, Gallery, Map Viewer, Scene Viewer, Notebook, Groups, Content, and Organization pages. See my blog post “Configure your home page navigation bar and galleries” for more information.

Configure Information Banner
- Sign in to your account. You will need to be the default administrator or have the correct privileges assigned to you.
Click the Organization tab, then click Settings. - Click the Security tab, then scroll down to find the information banner section.
- Click Set information banner.
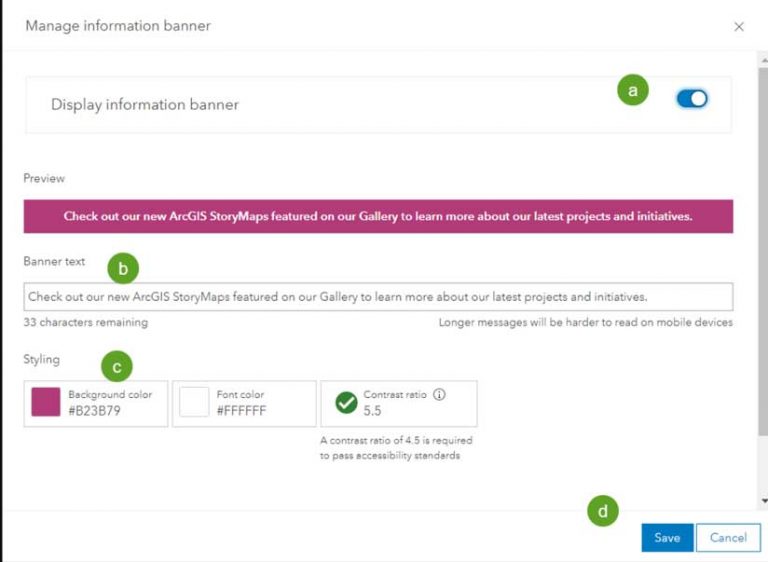
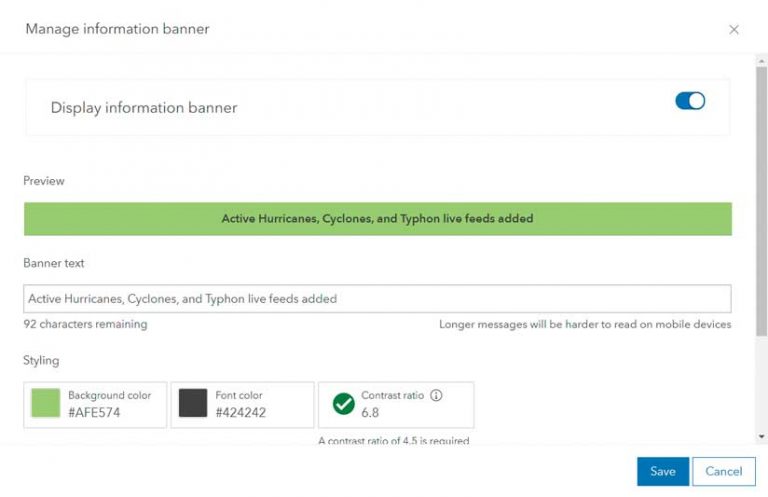
- Complete the Information banner configuration by toggling the access notice on, adding the banner text, adjusting the styling by setting the font and background colors, and checking the contrast ratio for best accessibility. Click Save when finished.
- To remove or edit the banner, return to Settings and click Edit information banner.
What Access Notices Do
Access notices provide a notice of terms that are displayed to organization members or to all users that must be accepted before they can proceed to your site.
An access notice can be configured to display whenever someone visits your home page. It can be used to display an access notice for any visitor, organization members only, or both. The notices can be tailored for each audience.
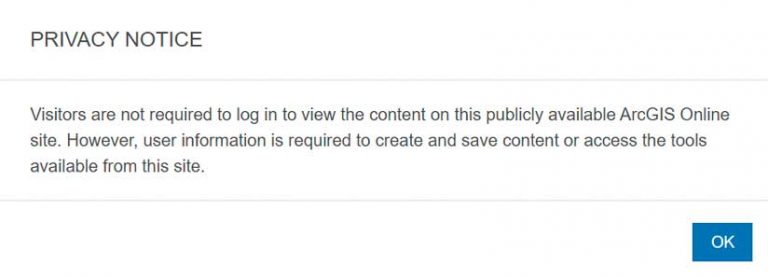
If configured for all users, the notice will be displayed when anyone visits your site. If configured for members only, the notice will display after members sign in. Notices can be configured to provide Accept and Decline buttons or an OK button.
Access notices for members will be displayed each time they sign in. Access notices for all visitors to your organization will not be displayed again for the remainder of their browser session. If you configure both types of notices, members will see two notices.

Configure an Access Notice
You can configure a notice for visitors, members, or both, and choose to display an accept/decline button or an ok button. Follow these steps to configure an access notice:
- Sign in to your account. You will need to be the default administrator or have the correct privileges assigned to you.
- Click the Organization tab and then click Settings.
- Click the Security tab, then scroll down to find the Access notice section.
- Determine if you want to configure a notice for organization members, for all visitors to your site, or both. Click Set access notice for the intended audience.
- Complete the access notice by toggling the access notice on, adding a notice title, entering the notice text, choosing whether to display an accept and decline button, or an OK button, and click Save when finished. If Accept and Decline buttons are used, the Accept button must be clicked to continue on to the site. Otherwise, a message appears that provides the visitor with an opportunity to refresh, review the notice, and accept it to continue on to your site.
- To remove or edit the notice, return to Settings, and click Edit access notice.


