You can customize the ArcGIS Pro interface as much or as little as you want to help you work more efficiently. You can make lots of modifications without coding—and without much time or effort.
Although you can make extensive changes to the functionality of ArcGIS Pro using the ArcGIS Pro SDK for the Microsoft .NET Framework, this article gives you a couple of noncoding options for quickly and easily tailoring ArcGIS Pro to streamline what you do and how you do it. You have lots of choices. These range from simply rearranging the location and placement of windows, panes, and tools to making a custom toolbar that keeps the tools you use most often where you can quickly find them with a minimum number of clicks.

You can minimize the screen real estate consumed by the two panes you probably use all the time, the Contents and Catalog panes. Drag one pane over the other so that the tabs for each appear at the bottom of both panes. Switch from one pane to the other using these tabs. Save even more space by clicking the drop-down on both panes and choosing Dock and then Auto-Hide. Both these frequently used panes will now be nicely tucked away until you need them.

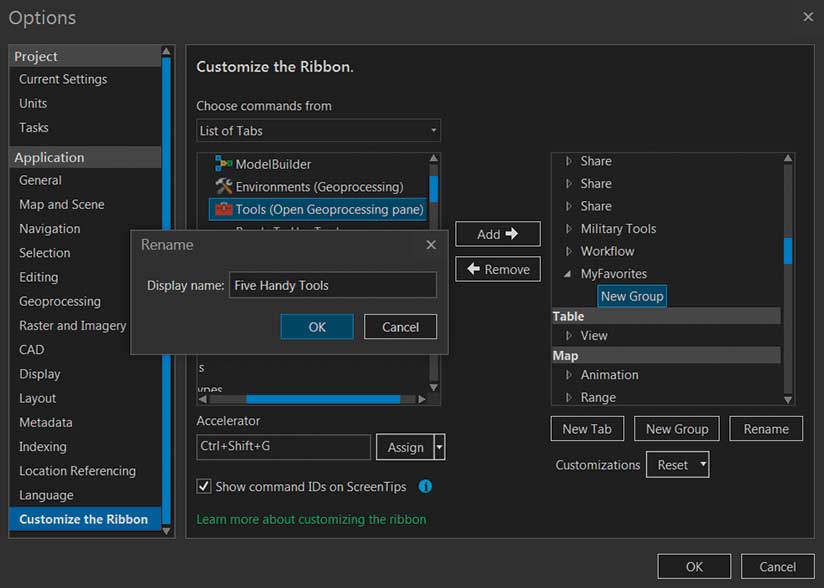
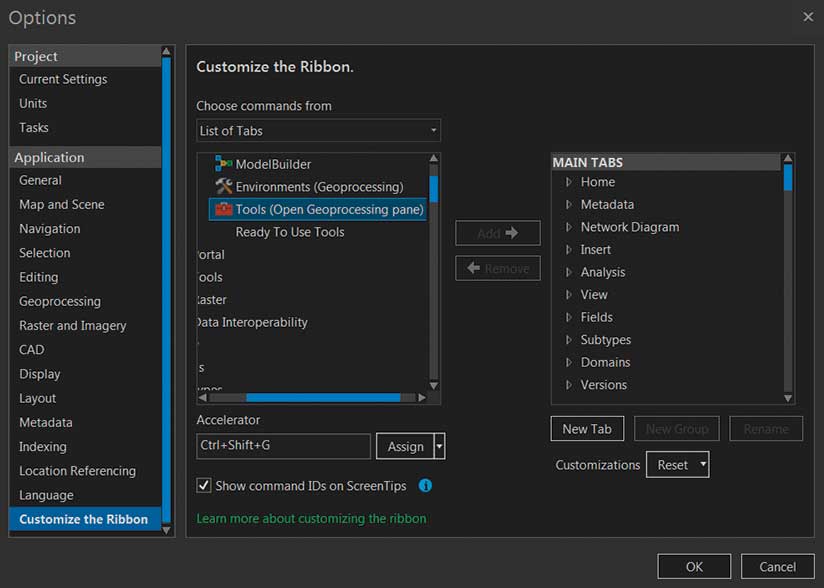
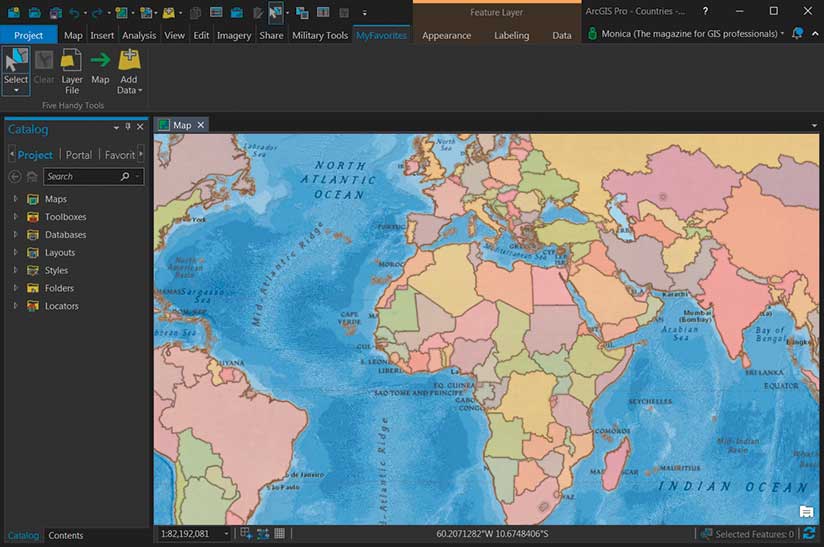
How about moving (or removing) tools from the Ribbon tab? Just click Project > Options and then click Customize the Ribbon. Use the two panes in this window to shuffle commands, adding and removing tabs at will. You can also use this same window to create new tabs and groups, add tools to those tabs and groups, and rename them if you like.
But don’t close the Options window yet. If you are a person who loves keyboard shortcuts, this window is also where you can set your own keyboard shortcuts to instantly access tools you need frequently. Locate the desired command from the left-hand pane, select it, and give the focus to the Accelerator text box below the left-hand pane. Press the key combination you want to use as a shortcut for that command to assign it.
You can get even fancier by customizing the two tool galleries on the Analysis and Edit tabs. Click the drop-down arrow on the lower right side of either tool gallery to invoke the customization panel. Use the arrows to reorder tools, add or delete tools in a group, add a new group, or rename a group.
Decide you don’t like the changes you made after all? Buttons on customization panes let you revert to the default settings with just one click, so nothing should stop you from experimenting with the display or placement of tabs, groups, and tools anywhere in the ArcGIS Pro interface.

If you really want to simplify things, you can use the ArcGIS Pro Quick Access Toolbar (QAT) to put all your frequently used tools in one place. By default, QAT is always shown on top of the ArcGIS Pro ribbon and already contains the New Project, Open Project, Save Project, Undo, and Redo tools. To add more tools to QAT, right-click any tool on the ribbon and click Add to Quick Access Toolbar. You can move QAT below the ribbon or delete any tool from QAT using the same context menu. Reorder the tools on your QAT using the Customize window. One small caveat: your QAT will not persist when you upgrade ArcGIS Pro.
That’s it. What could be simpler?
One last modification you might like if your eyes get fatigued. You can change the interface theme from the default light setting to the dark theme. Choose Project > Options, click General, and scroll down to the Personalize section. In the Theme drop-down, choose Dark. You will need to restart ArcGIS Pro for the theme change to take effect.
For more productivity tips and the latest news about ArcGIS Pro and the rest of the ArcGIS platform from Esri software teams, make sure to read the ArcGIS Blog.


