You can create and deploy custom mapping apps for the web that can run on any device without doing any programming. How? By using Web AppBuilder for ArcGIS, which provides an intuitive, what you see is what you get (WYSIWYG) app-building user experience.
Web AppBuilder for ArcGIS was developed using ArcGIS API for JavaScript and HTML5 technology. It is an app included with your ArcGIS Online organization and Portal for ArcGIS.
You can create and deploy custom mapping apps using Web AppBuilder for ArcGIS Developer Edition. You can download it to your local machine, and it provides the same user experience as Web AppBuilder for ArcGIS in ArcGIS Online and Portal for ArcGIS. Some users choose to work with the developer edition because they want to extend the capabilities of Web AppBuilder for ArcGIS with custom widgets and themes, or they prefer to host their apps on their own web servers. There is a large and very active Web AppBuilder for ArcGIS user community on GeoNet that shares numerous custom widgets.
This tip walks you through each step of how to download, install, and configure Web AppBuilder for ArcGIS Developer Edition to work with your ArcGIS Online organization. Then you can start building new custom mapping apps for the web, with the ability to leverage custom widgets and themes.
This tip requires that you have an ArcGIS Online organization already set up.
Step 1: Download and install Web AppBuilder for ArcGIS Developer Edition.
In a web browser, navigate to the ArcGIS for Developers site.
Below the banner graphic, click the Configurable Apps & App Builders drop-down menu and select Web AppBuilder.
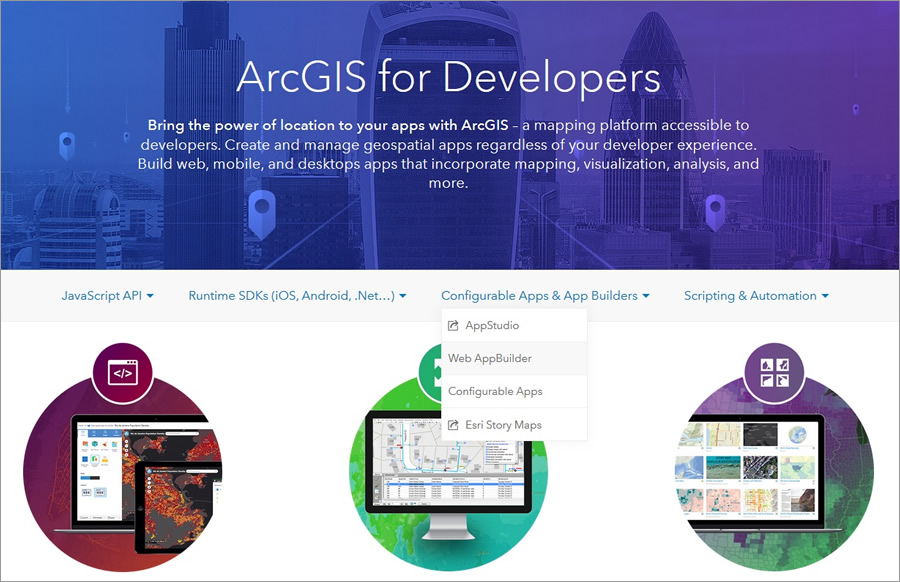 This takes you to the Web AppBuilder for ArcGIS Developer Edition landing page.
Click the Download SDK button on the banner graphic.
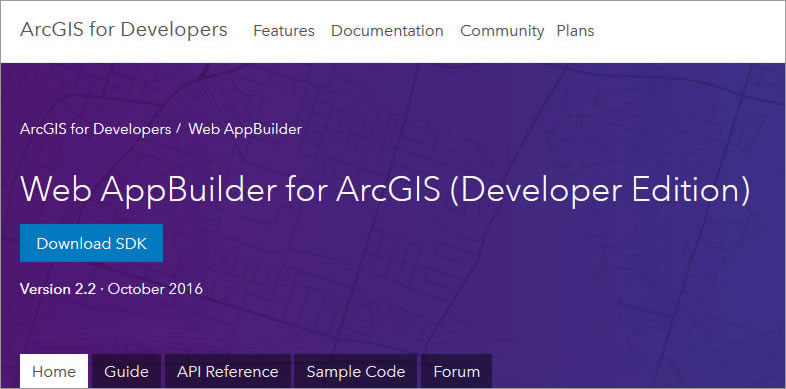
When you click the Download SDK button, the web browser will prompt you to log in to your ArcGIS Online organizational account. Sign in if needed. If you have already logged in, then the download message window will appear.
Download the Web AppBuilder for ArcGIS Developer Edition ZIP file. Unzip the file and extract the contents of the file onto your local machine.
This will create a directory called arcgis-web-appbuilder-2.2. This folder contains all the files you need to use Web AppBuilder for ArcGIS Developer Edition.
In Windows File Explorer, navigate to the arcgis-web-appbuilder-2.2 > WebAppBuilderForArcGIS directory on your local machine and double-click to view its contents.
Double-click startup.bat to start Web AppBuilder for ArcGIS Developer Edition.
This opens a Command Prompt window called Web AppBuilder for ArcGIS.
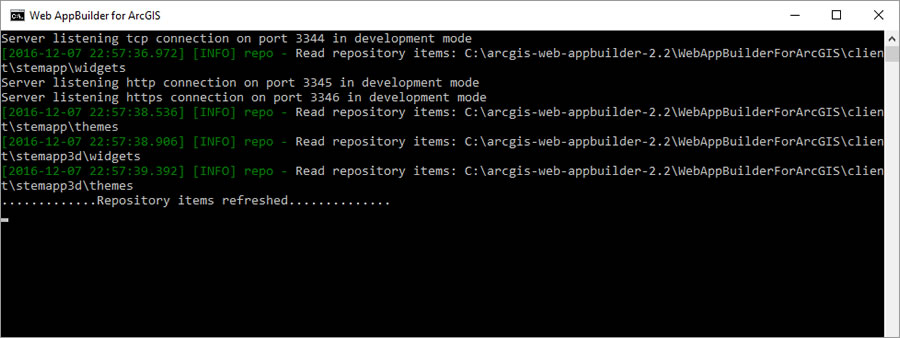
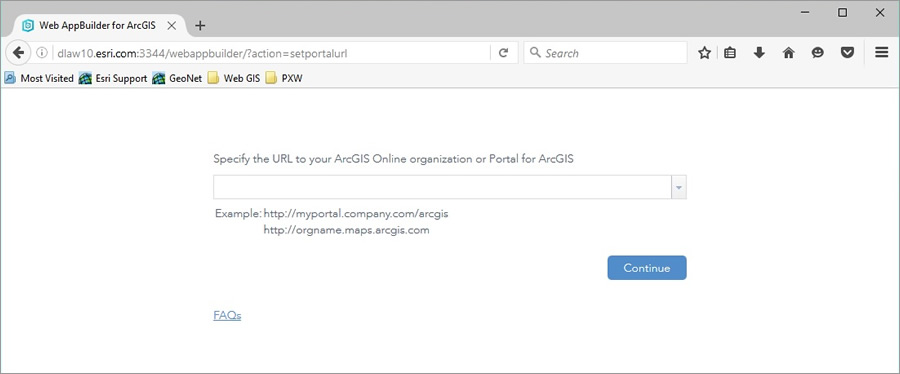
It also opens your web browser, where Web AppBuilder for ArcGIS Developer Edition appears.
Minimize the Command Prompt window.
The web browser now displays the setup panel for Web AppBuilder for ArcGIS. When you first start Web AppBuilder for ArcGIS Developer Edition, you need to configure it to work with your ArcGIS Online organization.
In the web browser, on the Web AppBuilder for ArcGIS Developer Edition setup panel, click the FAQs link.
In the help document that appears, click Get started under How do I start Web AppBuilder for ArcGIS (Developer Edition)?
Scroll down to the sections titled Specify your portal URL and Provide an app ID for Web AppBuilder, and review their contents.
To enable Web AppBuilder for ArcGIS Developer Edition to work with your ArcGIS Online organization, you need to provide the URL of the ArcGIS Online organization. This is the input parameter that appears in the Web AppBuilder for ArcGIS Developer Edition setup panel.
You also need to add Web AppBuilder for ArcGIS Developer Edition as a new item in your ArcGIS Online organization. This will generate an app ID—a property used by Web AppBuilder for ArcGIS Developer Edition to support OAuth 2.0 authentication—which enables Web AppBuilder for ArcGIS Developer Edition to securely connect to your ArcGIS Online organization. You will perform these actions in the next steps.
Minimize the web browser window.
Step 2: Add Web AppBuilder for ArcGIS Developer Edition as a new item in your ArcGIS Online organization.
Open a new web browser instance and navigate to ArcGIS Online. Sign in to your ArcGIS Online organization.
Go to the My Content page > Add Item > An application.
The Application dialog box appears.
Enter the following parameters:
- For Type, select Web Mapping.
- For Purpose, select Ready To Use.
- For API, select JavaScript.
- For URL, enter “http://[YourMachineName]:3344/webappbuilder”.
- For Title, enter “Web AppBuilder for ArcGIS Dev Ed”.
- For Tags, enter type “Web AppBuilder for ArcGIS” (or other tags that make sense to you).
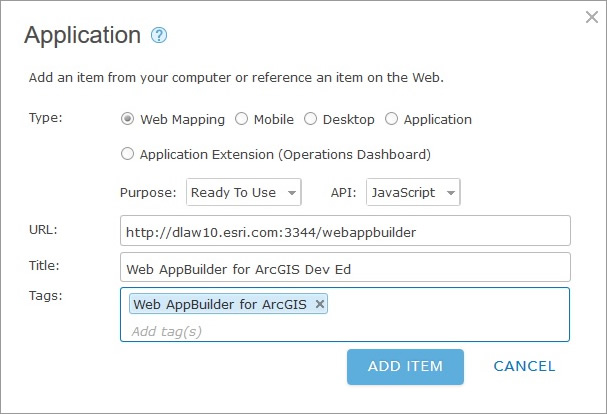
Click ADD ITEM.
A new item for Web AppBuilder for ArcGIS Developer Edition appears in your ArcGIS Online organization.
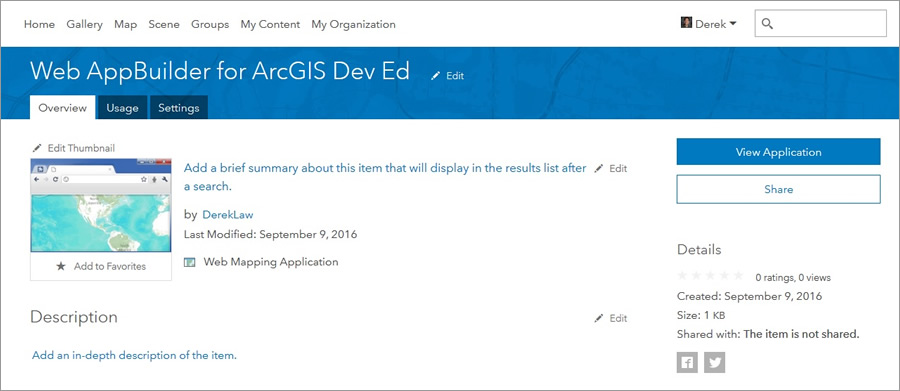
On the Web AppBuilder for ArcGIS Dev Ed Item Details page, click the Settings tab, scroll down, and click Register.
This opens the Register dialog box.
Enter the following parameters:
- For App Type, select Browser.
- For Redirect URL, enter these two values: “http://[YourMachineName]” and “https://[YourMachineName]”. You can input these one at a time and click Add.
Note: YourMachineName refers to the machine where you downloaded and installed Web AppBuilder for ArcGIS Developer Edition.
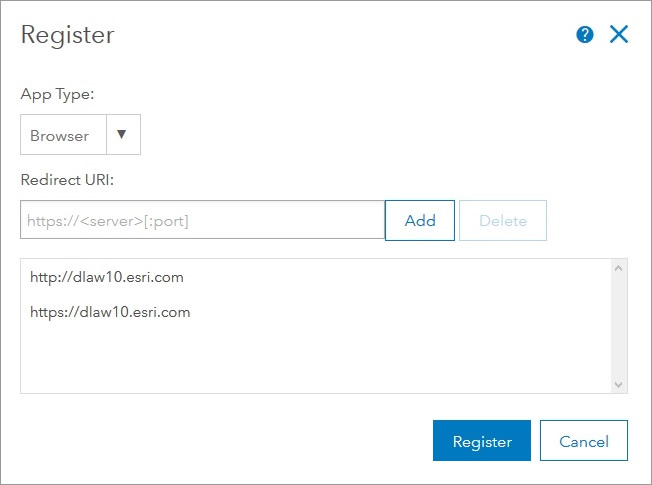
Click Register.
An app ID value on the Web AppBuilder for ArcGIS Dev Ed Item Details page appears under the App Registration section. Use this app ID value to register your installation of Web AppBuilder for ArcGIS Developer Edition with your ArcGIS Online organization.
Copy the app ID value.
Step 3: Configure the URL and app ID to register Web AppBuilder for ArcGIS Developer Edition with the ArcGIS Online organization.
Return to the web browser window with Web AppBuilder for ArcGIS Developer Edition and the setup panel.
For the URL, enter the URL of your ArcGIS Online organization.
The URL is validated by Web AppBuilder for ArcGIS Developer Edition, and a green check mark appears. Then the app ID input parameter appears.
For the app ID, paste the app ID value you copied from the Item Details page.
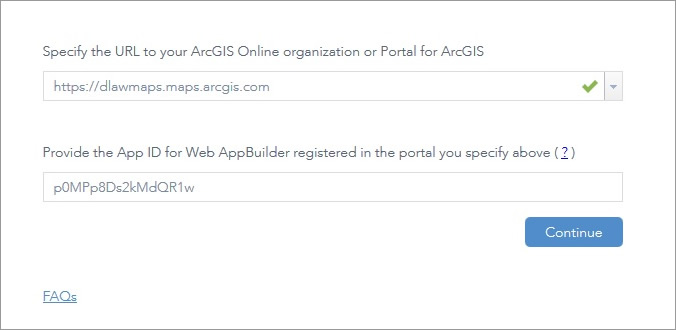
Click Continue.
The Request for Permission dialog box appears; this is to verify that you approve that Web AppBuilder for ArcGIS Developer Edition can access the ArcGIS Online organization.
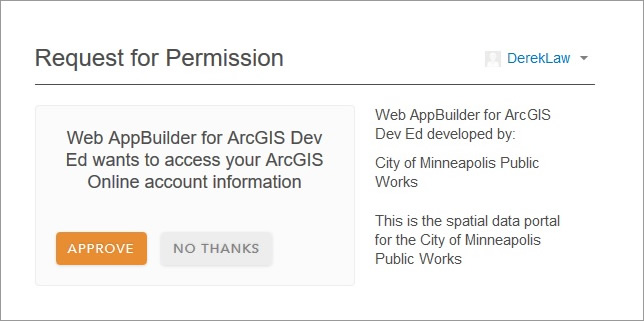
Click APPROVE.
The Web AppBuilder for ArcGIS Developer Edition user interface loads, and you can now start to create new mapping apps for the web!
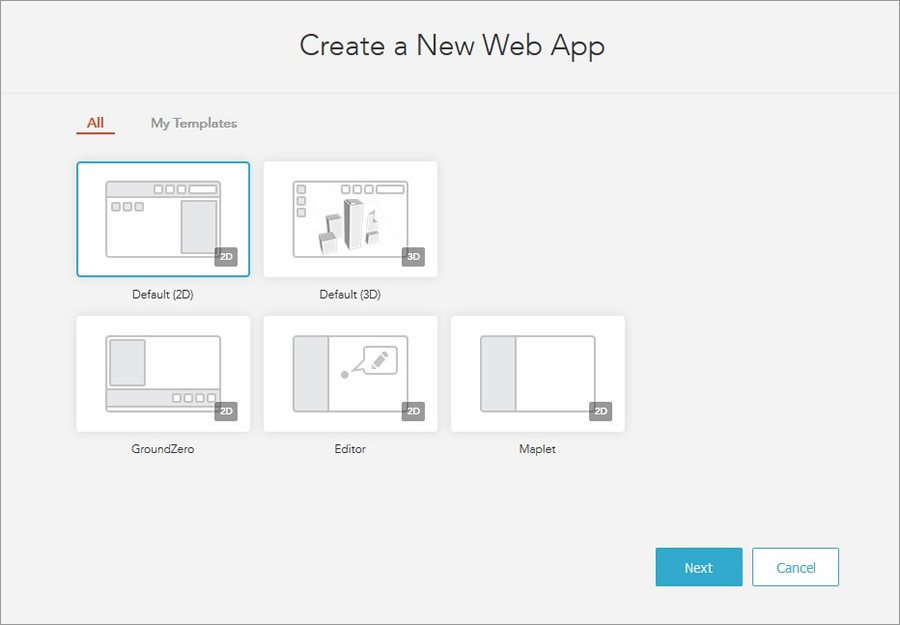
Note: You only have to define the app ID for Web AppBuilder for ArcGIS Developer Edition the first time you use it. Once enabled, you will not have to configure its settings to start the application the next time you use it.
You can also enable Web AppBuilder for ArcGIS Developer Edition to work with Portal for ArcGIS. Just follow the same steps but use the Portal URL instead of the ArcGIS Online organization URL and create the new item in Portal rather than in ArcGIS Online.
Now that you have Web AppBuilder for ArcGIS Developer Edition installed, you can start to create and deploy custom widgets and themes in Web AppBuilder for ArcGIS.
For more information, consult the Web AppBuilder for ArcGIS Developer Edition Guide.
