Using ArcGIS Arcade, you can extend the capabilities of ArcGIS Field Maps and make your workflows more efficient. When setting up your forms in Field Maps Designer, there are four areas where you can add Arcade. Under the Logic section, you can use Arcade in the Visible, Required, and Editable options, or below that, you can add a calculated expression.

In Field Maps Designer, once you have either added your fields to the form manually or convert your pop-up into a form, select one of your fields and the Properties pane will open on the right side of the screen. The upper portion of the pane focuses on formatting the field with elements like display name, input type, and placeholder. The lower portion of the pane is where you will find the logic section, where you can add your Arcade expressions. For more information on how to set up your fields in Field Maps Designer, check out the Get started with Field Maps Designer tutorial. Open Field Maps Designer using the app launcher in the upper right corner of ArcGIS Online or ArcGIS Enterprise.

Conditional visibility has been around the longest and can be used for both individual fields and for groups. Using conditional visibility, you can set a field to be visible or hidden. This allows you to help your mobile workforce know which fields need to be filled out and when, streamlining the workflow by hiding fields or groups of fields that aren’t necessary in certain situations.
The example below shows two fields from a trail inspection form. The first is Safety Concerns, which is a switch. The second is Safety Concerns Notes. Using Arcade, the following only shows the Safety Concerns Notes field when the Safety Concerns field is equal to yes.

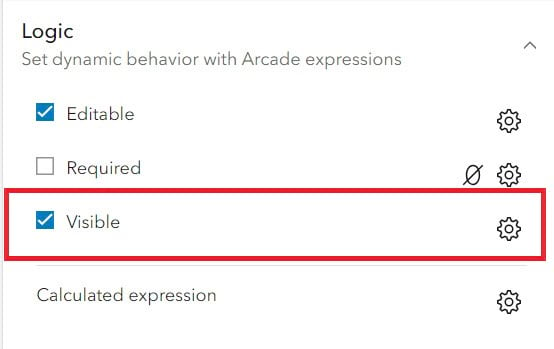
Since this is a fairly simple expression, you can use the Arcade Expression builder window or the Arcade editor; it’s a matter of preference. This example shows both cases. First, select the Safety Concerns Notes field. When it’s selected, it will show a blue rectangle around the field. Next, click the settings button next to the Visible logic option in the Logic section and click New expression.
In this first case, use the Expression builder window. Start by titling the expression. It’s important to title your expressions so you can identify them later if you want to reuse them or if you want to edit them. In the Expression section, select Safety Concerns in the top drop-down menu. This is the field to check in this expression. Next, select Is in the middle drop-down menu. This is the qualifier. In this case, Is is equivalent to equal. And select Yes in the bottom drop-down menu. This list shows the values available in the field you selected in the first line. The finished expression will look like this:
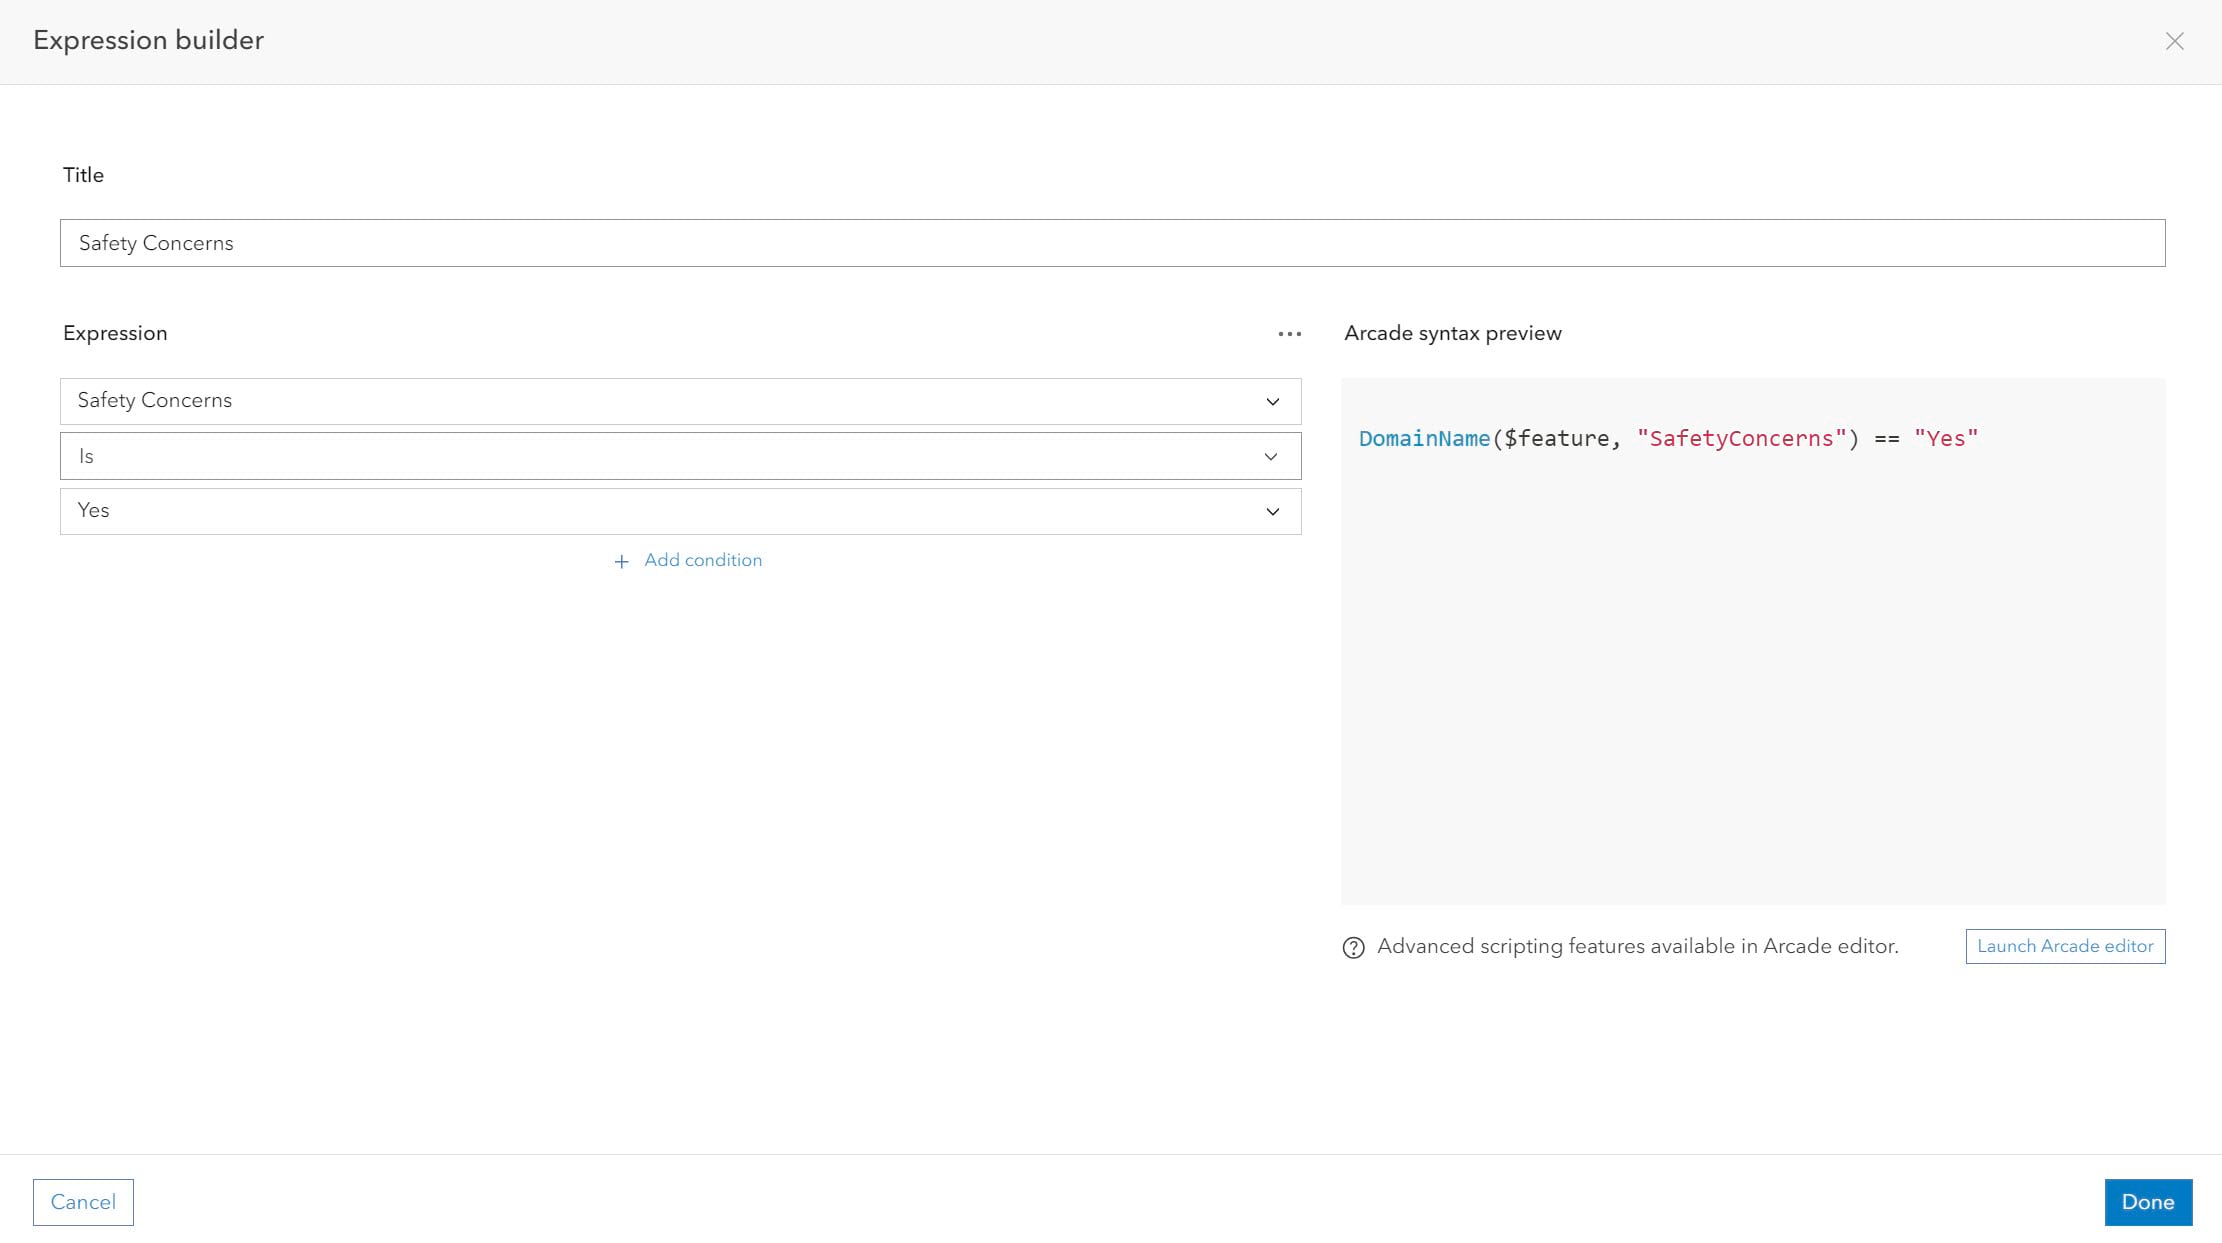
You’ll notice that in addition to the Expression builder window showing the conditions in drop-down menus, it also gives you a preview of the Arcade syntax. You can add conditions in the Expression builder window using either the AND or OR option. You don’t need any additional conditions in this case. If you do use additional conditions for an expression, there is one limitation you should know: You can only select one or the other for all the additional conditions. If you select AND, all of the conditions will need to be true for the expression to run. If you select OR, if any of the conditions are true the expression will run.
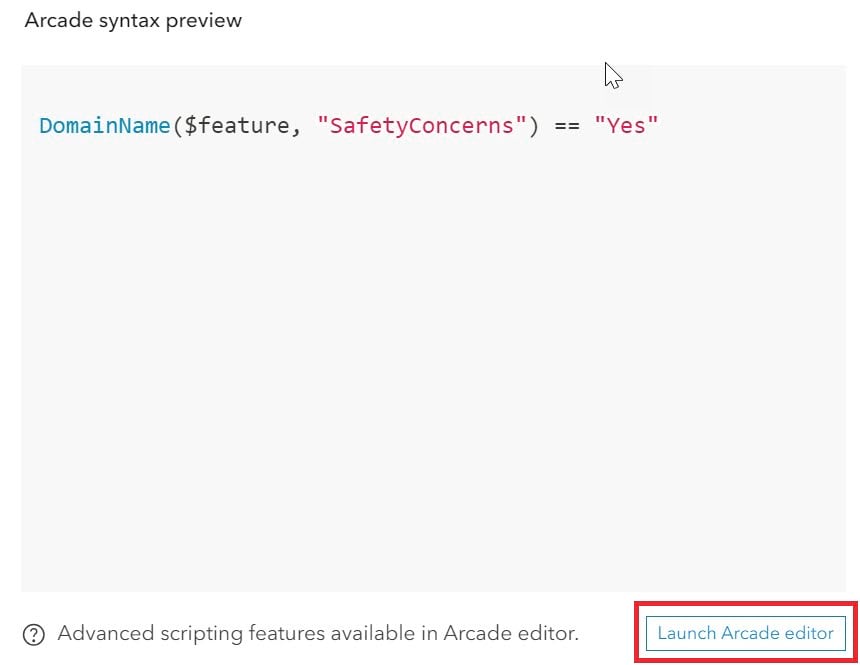
For more complex expressions or if you want to practice your Arcade skills, you can launch the Arcade editor. Below the Arcade syntax preview pane is the Launch Arcade editor button.
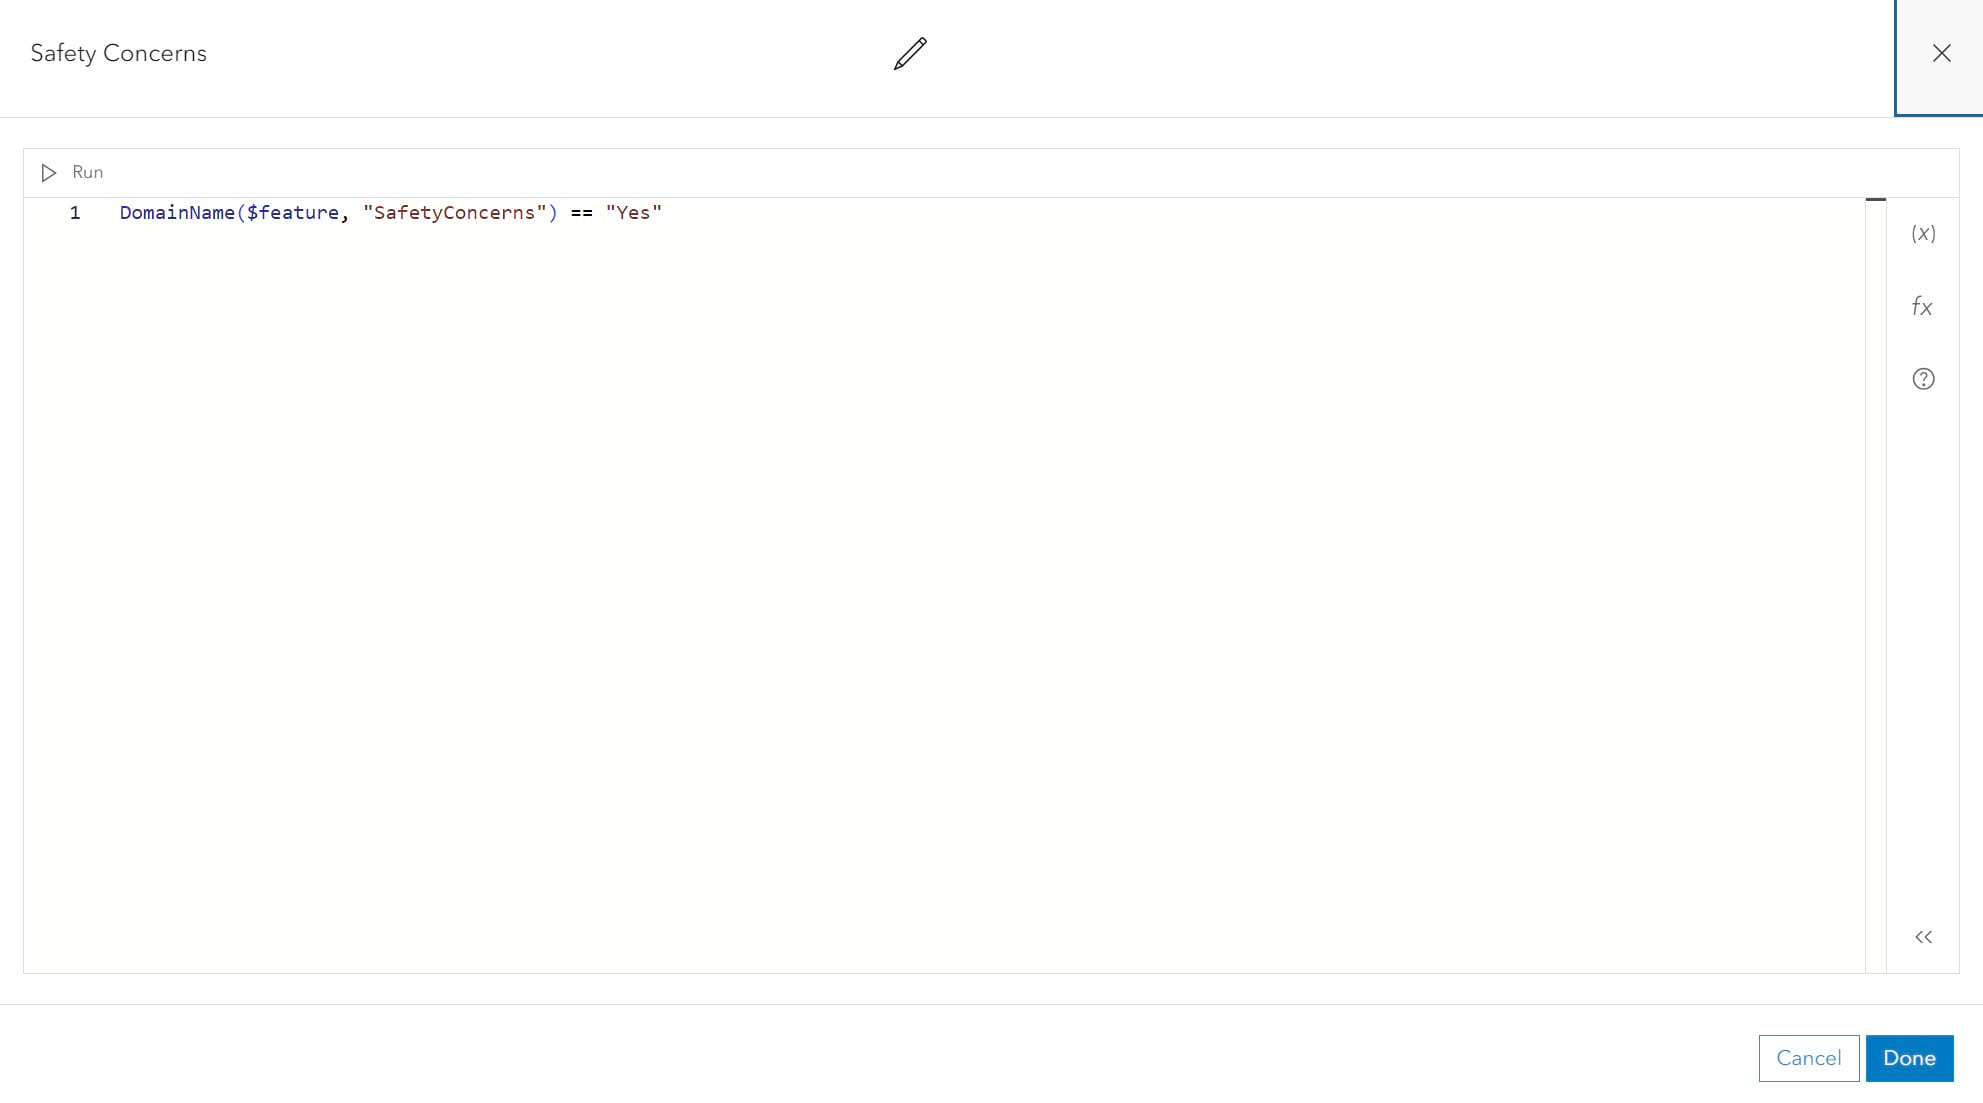
If you have already created an expression in the Expression builder window, it will show in the Arcade editor. Otherwise, it will be blank.
Now that the Arcade expression is complete, click the Done button in the lower left corner. Back in the form builder, the Safety Concerns Notes field now has a new label showing that it has visibility logic. And the field will remain hidden in the form unless the Safety Concerns field is equal to Yes. The last step in the process is to click the Save button in the upper right corner of the form to save your changes.

Using editable logic, you can set a field to be editable or read only based on the conditions set in your expression. You may have fields in your forms that you don’t want users to edit, such as a parcel ID or other type of ID that you want available to users for reference.
Using Arcade on the Inspection Date field in the form, the field will be editable when adding a new inspection record and will show as read only with the existing date if the record is edited in the future. First, select the Inspection Date field. Next, click the settings button next to the Editable logic option in the Logic section and click New expression. This time, you will launch the Arcade editor to create an expression.

This Arcade expression is more complex, so you can add a comment at the top. Adding comments to your expressions can help if you need to reuse or edit them later. You can add a comment by typing // in front of a line of text. For example, comments can describe what the expression does as a whole, or for a larger expression, comments for each section can give context on what that part of the expression will do.
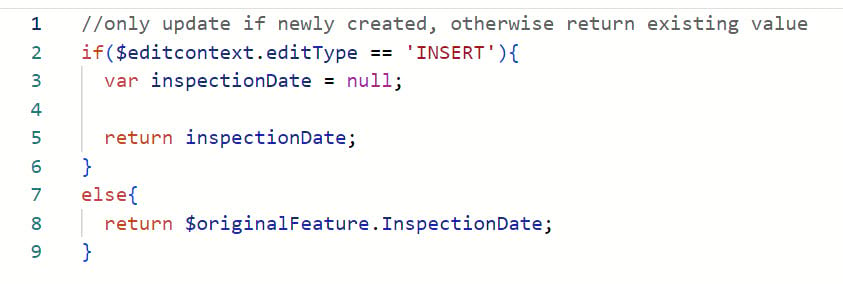
You added the expression to the Arcade editor, gave it a title, and clicked Done. Now the Inspection Date field has an Editable label, which tells you that there is editable logic on that field. Click the Save button again to save the changes to the form.

Required logic allows you to set a field to be conditionally required. If a field is required, it must be filled in before the form can be submitted. But what if that field isn’t always necessary? You could set the field to Required and users would need to fill in something in order to submit the form. Or if you don’t set the field to Required, someone may forget to fill out that field and then you end up with a hole in your data. That’s where Arcade comes in, to help make sure you don’t have any holes in your data.
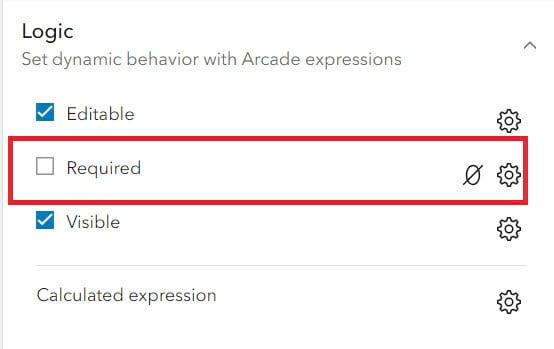
In the form, use required logic on the invasive species fields. If Invasive Species Plant Present is set to Yes, the Invasive Species Plant Remediation field will be required.

Since this is a short expression, use the Expression builder window to create an expression. Then title it and create the expression that Invasive Species Plant Present is Yes and click Done.
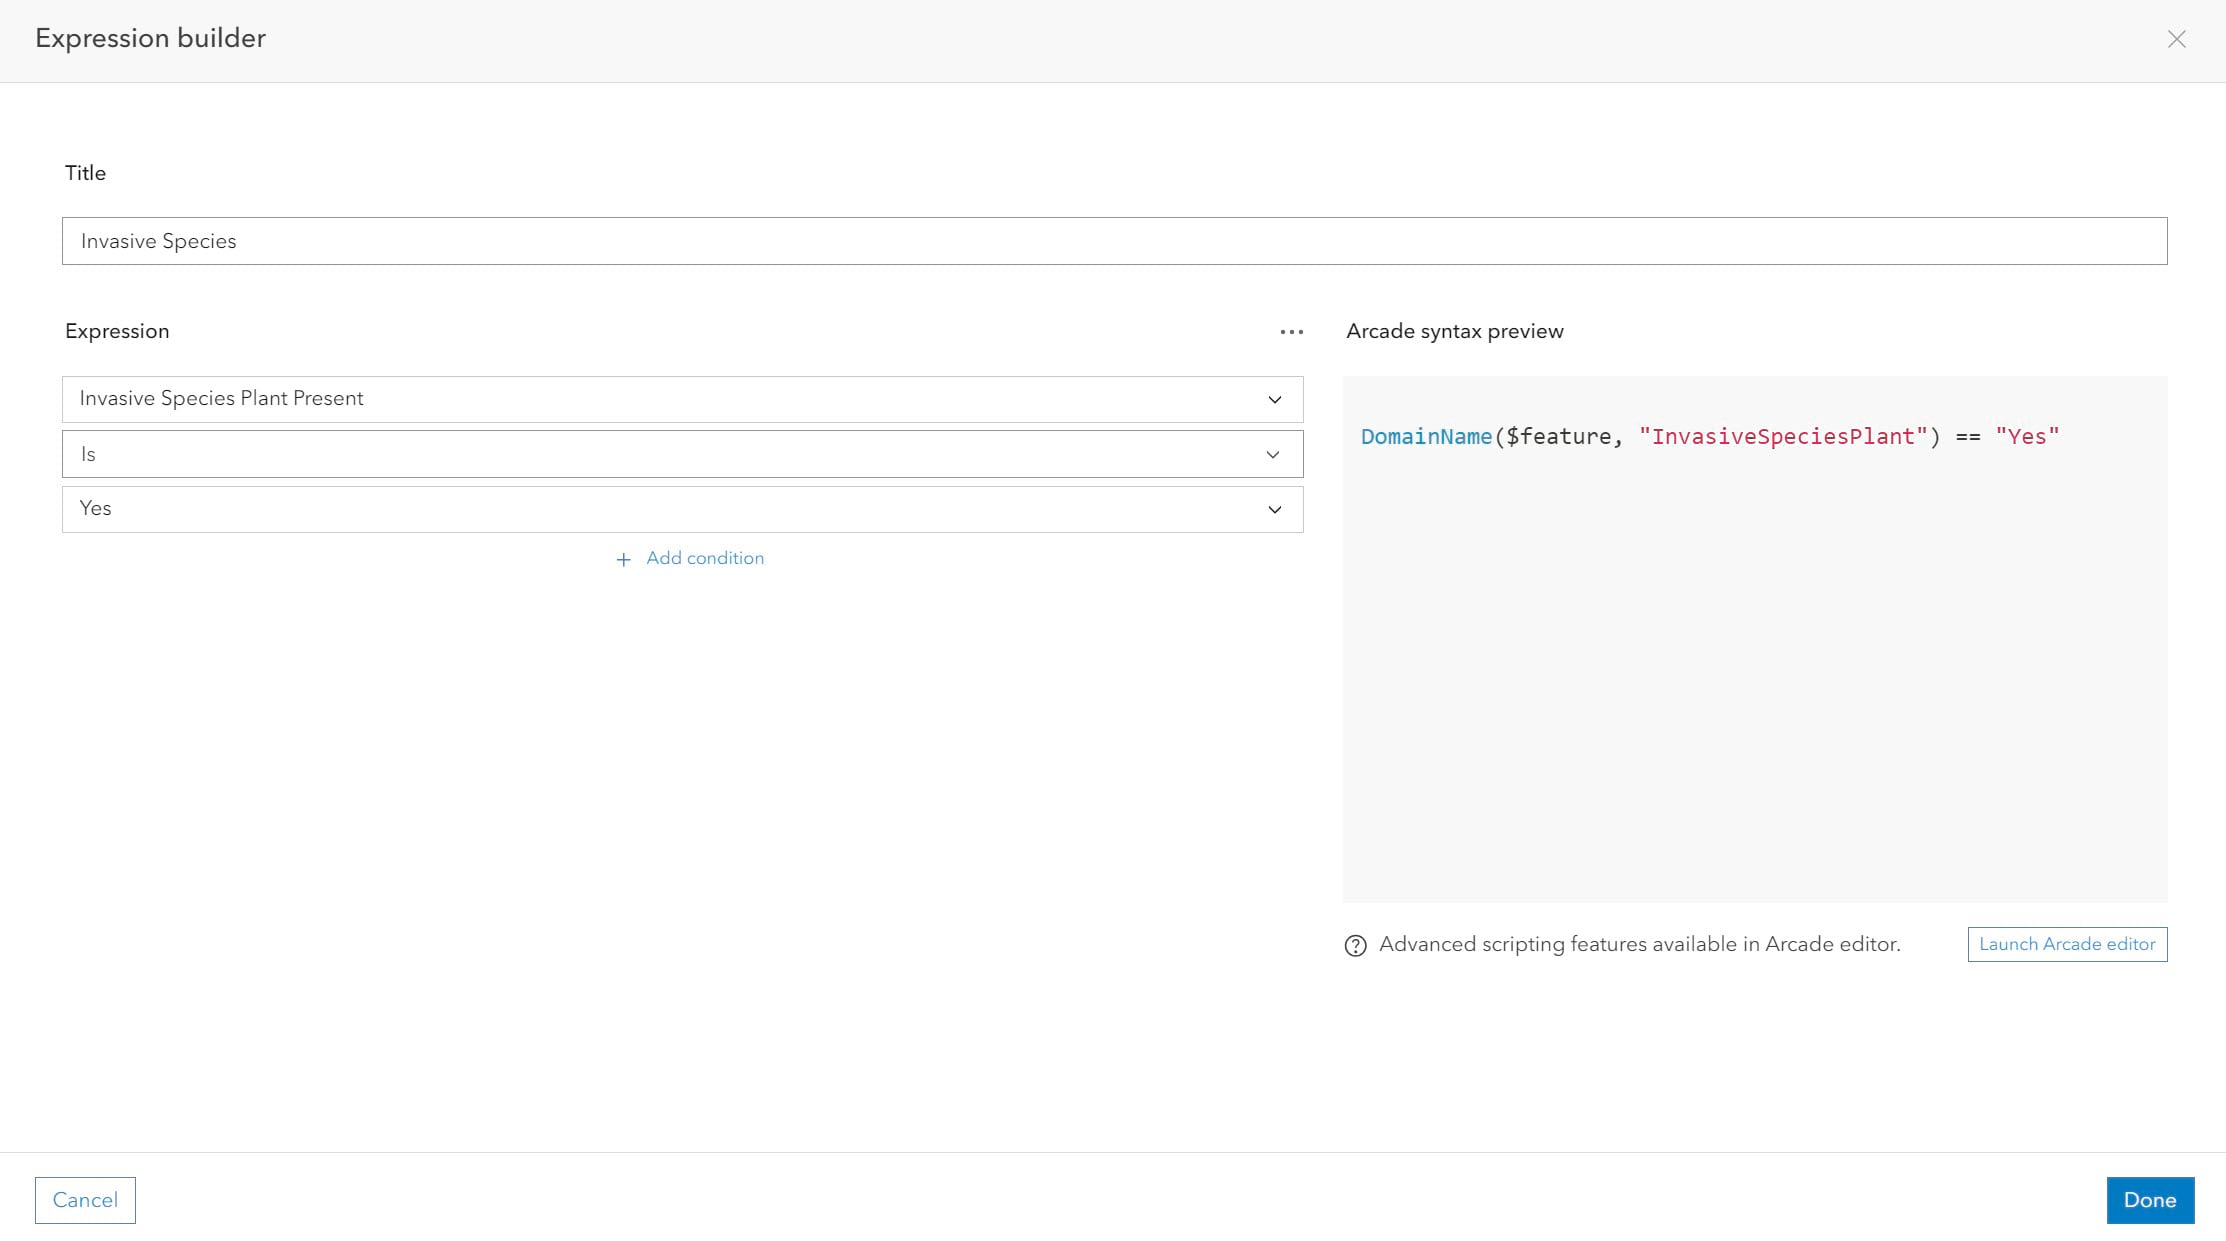
The field now has a required logic label on it. Save the form again, so you don’t lose the changes.

In the case of the Invasive Species Plant Remediation field, you could also use the Visible logic option on that field. The field will only show when there are invasive species present and it will be required. You can use more than one type of logic on a field at the same time. This time instead of creating a new expression, use an existing expression. Click the settings button next to Visible and click the Invasive Species expression you just wrote. A check mark will appear to the left of the expression name, and you will see the number 2 now in the gray circle. That means that you are using that expression twice in the form.
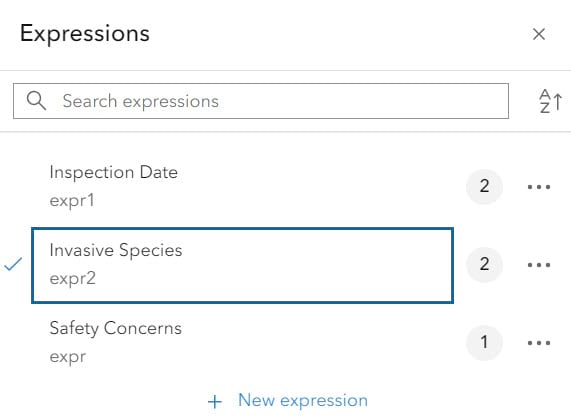
Now looking at the field again, it has a label for visible and required. Save your work.

Lastly, you will use calculated expressions. Calculated expressions will calculate the value of the field, and in the process, the field will be made read-only. In this example, use the GetUser function to populate the Inspector field with the inspector’s full name. Start by clicking the settings button next to Calculated expression and create an expression.
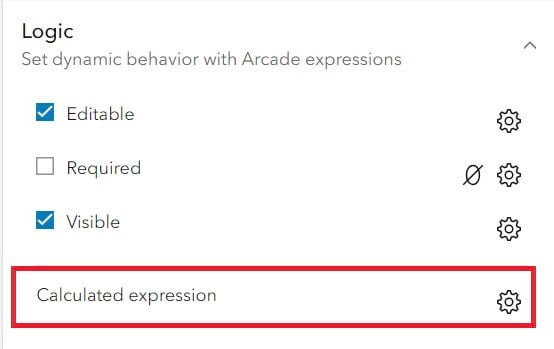
Unlike the previous examples, there is no expression builder for the calculated expressions. It will open the Arcade editor automatically. Give the expression a name and then add the expression to the Expression window and click Done. Once the form opens again, save the changes.
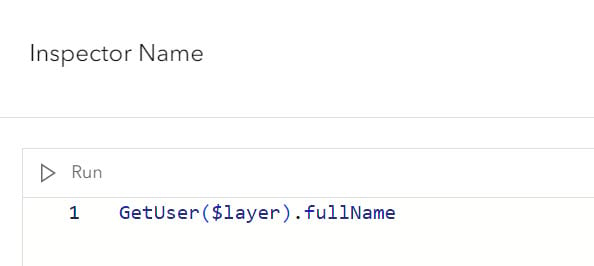
In this expression, the GetUser function is using properties from your portal or server and pulls the full name of the user. When a new record is added, the inspector’s name will be filled out automatically. Using the GetUser function, you can also populate other information such as user ID, username, email, and more.
After adding the calculated expression, you now have two labels for the Inspector field: Read-only and Calculated.

Arcade can make your workflows more efficient and help reduce data input errors. These were just a few examples of how you can use Arcade within your Field Maps forms. Continue to explore all the ways Arcade can help you with your workflows.
Here are additional resources you can check out to start learning more about Arcade:
- Common calculated expressions for ArcGIS Field Maps—Learn how to use some of the most common expressions in your Field Maps workflows.
- ArcGIS Field Maps: Get Started with ArcGIS Arcade—Learn the basics of Arcade and how it can be used in your maps and forms in ArcGIS Field Maps.
- Arcade documentation—Your best source for all things Arcade, including an introduction, language features, release notes, FAQ, and more.
- Tutorials—Get hands-on experience through guided tutorials.
- Your Arcade Questions Answered—A blog article by Lisa Berry with insights into the most asked Arcade questions.
- Arcade Resources—Links to examples, blog articles, training materials, and videos.
- Tips from the Team—Short video tips from the Field Apps team, including tips on using Arcade in Field Maps.

Article Discussion: