Legends in ArcGIS Pro are powerful, but they can also be a little tricky. There are so many different options it can be hard to know where to start. To help, here’s a list of 10 tips and tricks for working with legends in ArcGIS Pro.
1. Add Selected Items
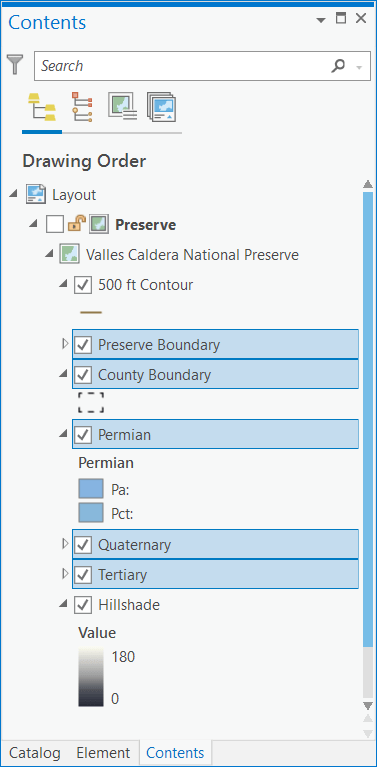
When you create a legend, you don’t have to include all the layers in the map. If you select specific layers in the Contents pane before creating the legend, only the selected layers are added to the legend. If you forgot to select a layer, no worries, you can drag it in after the legend has been created.
2. Legend vs. Legend Item
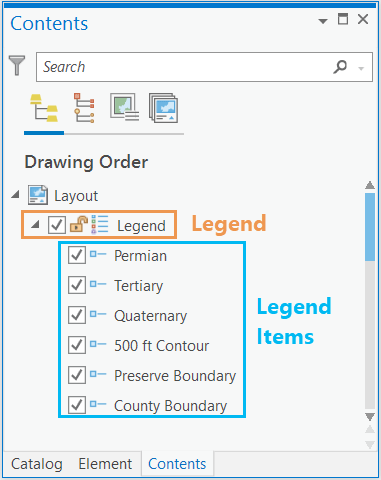
A legend is made up of legend items. You can set properties at either the legend or legend item level. The legend contains properties that apply to the entire legend element, like the fitting strategy, title, word wrapping, and background. Legend items have properties that can be different for each layer including the patch size, the label text size, and if all the classes in the layer are included or only the ones visible in the map extent. You can set properties for each item individually, or multiple items at once.
To set properties at the legend level, select the legend in the Contents pane, right click and choose Properties to open the Element pane. Once the pane has been opened, if you select a legend item or items the pane updates to show the properties of the item or items. You can also open the element pane by right-clicking a legend item (or legend items!) and choosing properties.
3. Reorder legend items
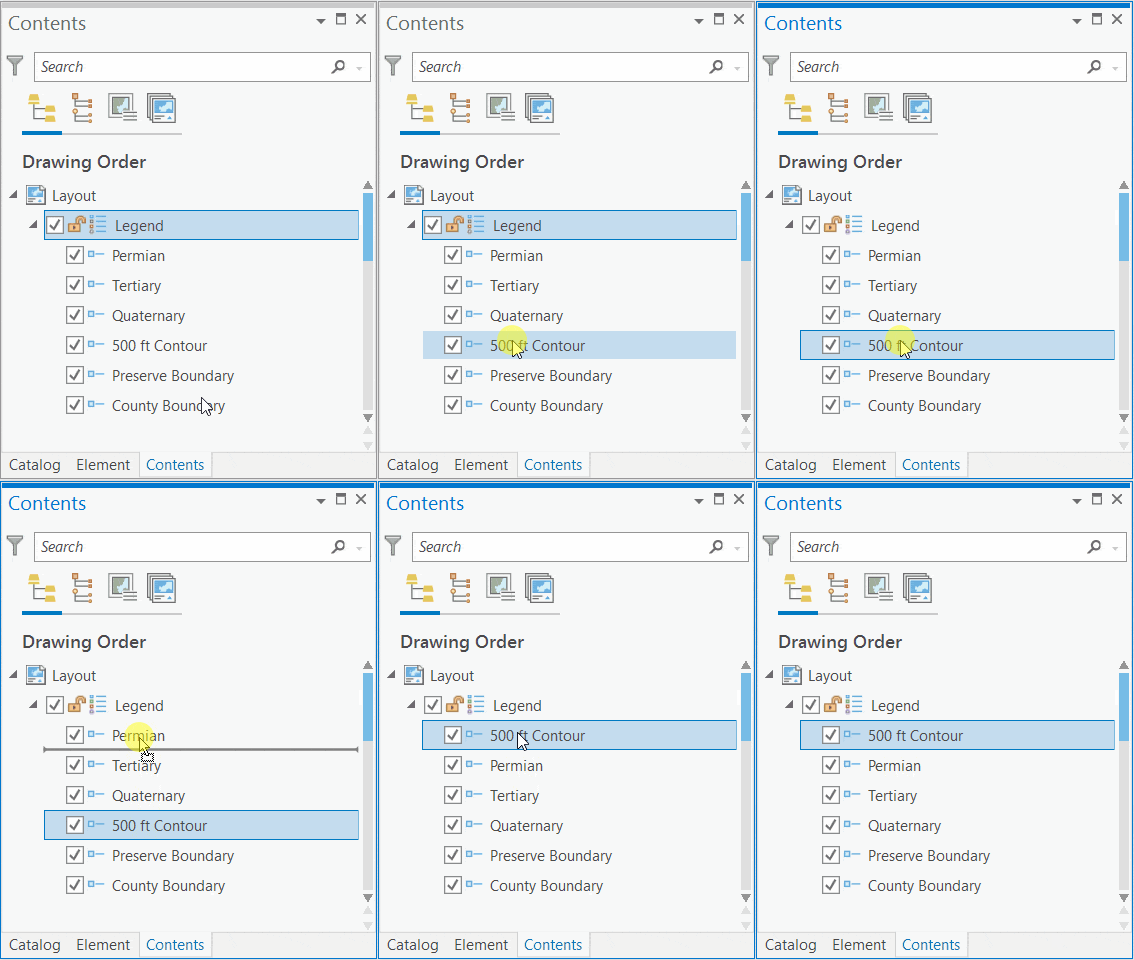
Once you’ve created a legend you can change the order the legend items draw anytime. Expand the legend in the Contents pane, select a legend item and then drag it up or down on the list to get the order you want.
4. Change the fitting strategy
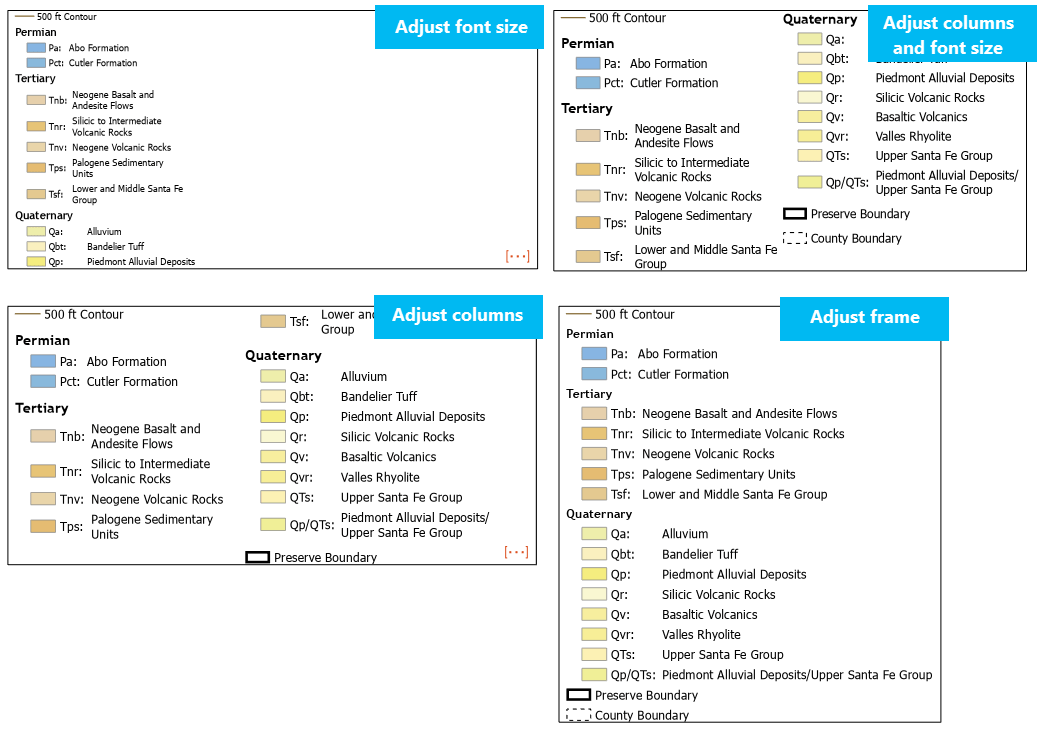
As layers are added, removed, or the legend is resized your legend grows and shrinks. How the legend items get arranged when the legend changes size is determined by the fitting strategy. There are four fitting strategies available:
- Adjust font size: Shrink the font until all the legend items fit. You can set a minimum font size to make sure your font doesn’t get too small to read! If the legend items can’t fit in that font size, they are dropped. While the font size shrinks if needed, it never grows past the font size set for the legend.
- Adjust columns: Add more columns until all the legend items fit. The text size for the legend doesn’t change, but more columns are added. If there isn’t enough room in the legend for more columns, items are dropped.
- Adjust columns and font sizes: Shrink the font AND add more columns until the legend items fit. Similar to adjust font size, the text can get smaller than the set font size if needed, but it never grows larger. This is my favorite to use!
- Adjust frame: The legend becomes the size needed to fit all the legend items. You can’t resize the legend. If you ever come across a legend in a project you can’t resize, the fitting strategy is probably set to adjust frame.
5. Style groups of text
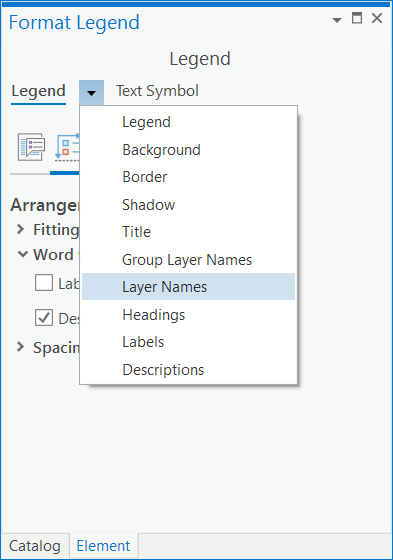
You don’t have to update the text properties for every legend item heading individually. Headings, Layer Names, Group Layer Names, Labels, and Descriptions for the entire legend can be updated when the legend is selected by using the legend part list in the Format Legend pane. With the legend selected in the Contents pane, choose the text group you want to update from the list, and the changes are applied to all legend items. Or select a single legend item and use the list to set the text properties for only that legend item.
6. Use indents
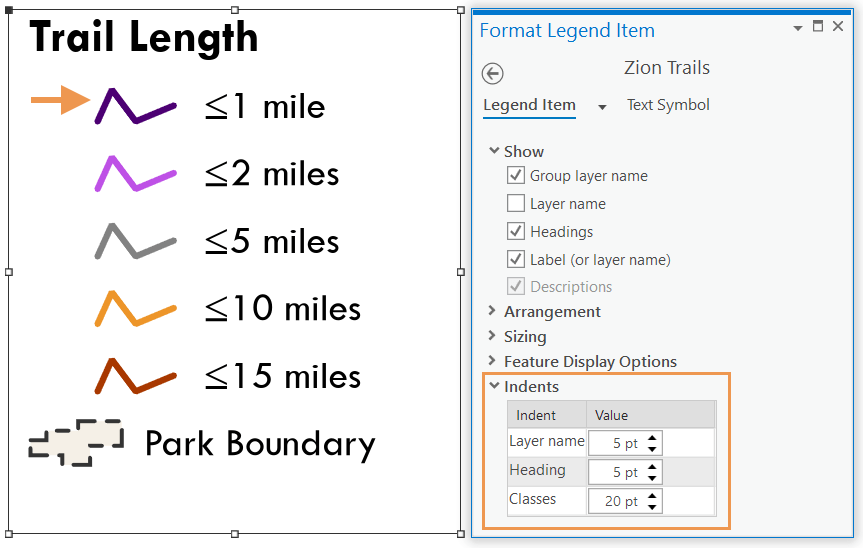
Indent pieces of your legend item using the indent options for a legend item. You can indent the layer name, the heading, and the classes. For example, if you have a layer symbolized by unique values you can indent the classes within that item.
7. Update layer settings
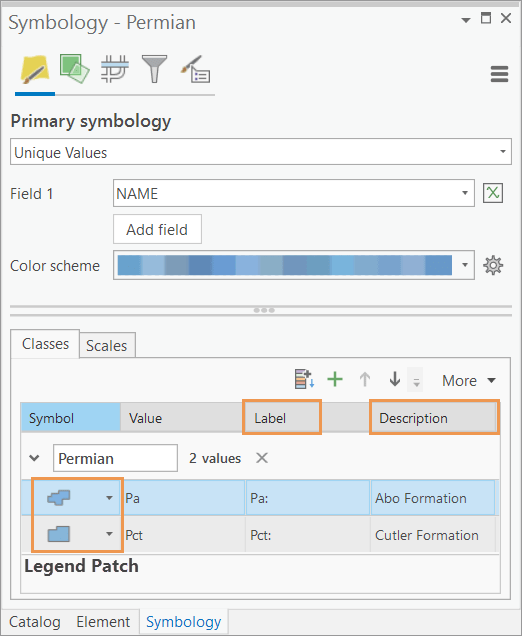
Not everything is set at the legend or legend item level. Legends also use information from the layer properties. For example, the label text, description text, and legend patch shape are all properties of the layer and not the legend. This means if you want to update them, you’ll need to go to the layer’s symbology not the legend properties.
8. Sync with the map
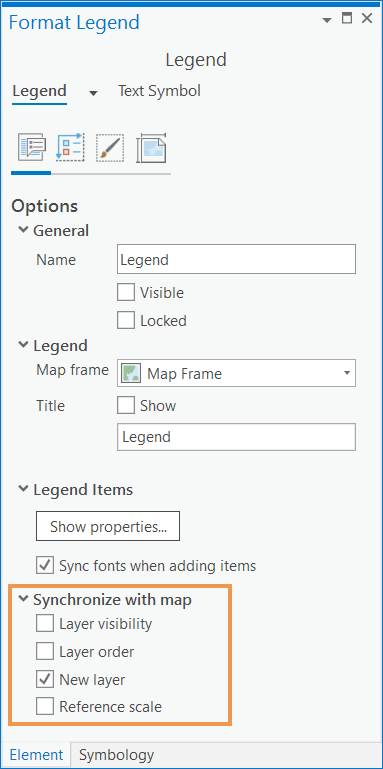
Use the Synchronize with map options at the legend level to keep the map layers and legend items in sync. There are four sync options. They are particularly useful if your map isn’t quite finished when you start building the legend.
- Layer visibility: Any time you turn a layer off in the map, the corresponding legend item will also be turned off.
- Layer order: Sets the legend item order to match the layer order in the map.
- New layer: Adds a new legend item any time a layer gets added to the map.
- Reference scale: Scales the symbology based on the map’s set reference scale.
Note: The symbology of the layer is always connected to the legend. Updating the symbology in the map automatically updates the legend item. Also, deleting a layer in the map always deletes the corresponding legend item.
9. Borders and backgrounds (with spaces!)
Borders and backgrounds can help provide a clean look to your legend. They can be added on the Element pane, at the legend level. By default, when you add a border or background it draws right at the edge of your legend text or patches. This sometimes make the legend feel crowded. If you want to add some space, use the X gap and Y gap options for the border or background. Remember to set the same gaps for the border and the background if you are including both in your legend.
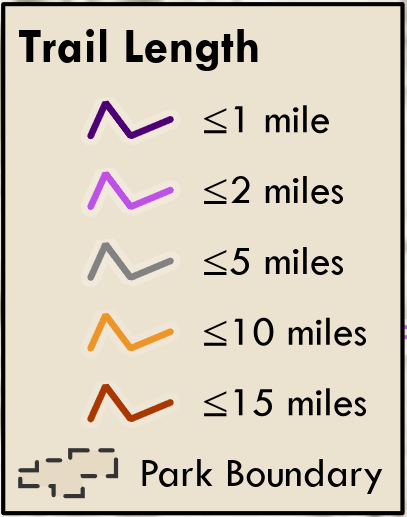
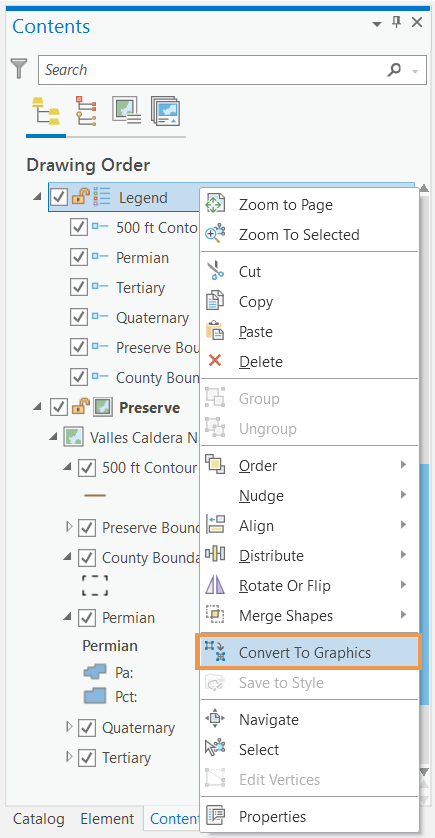
10. Convert to graphics
For exact control over your legend items you can convert the legend to graphics. This changes your legend items into grouped text and graphic elements. You can then move, resize, delete, or format individual elements. Convert to graphics is a powerful tool for creating custom legends, but there is a catch. Once you’ve converted your legend to graphics it loses all the connection with the map. If you add layers, delete layers, or change layer symbology the legend graphics won’t update. You must make those changes to the legend manually.
Losing the connection to the map may seem like a reason to avoid converting to graphics at all costs. However, if you have a completed map where the symbology and layers likely won’t change then convert to graphics may be the best option for fully customizing your legend.
Those are just a few tricks for working with legends. To learn more check out these help topics:


Article Discussion: